My photo
Ontario, Canada
I am a wife, mother and grandma who enjoys the many aspects of homemaking. A variety of interests and hobbies combined with travel keep me active. They reflect the importance of family, friends, home and good food.
Cook ingredients that you are used to cooking by other techniques, such as fish, chicken, or hamburgers. In other words be comfortable with the ingredients you are using.
--Bobby Flay

For Your Information

Please watch this area for important information like updates, food recalls, polls, contests, coupons, and freebies.
  • [March 19, 2020] - Effective Mar 17, this blog will no longer accept advertising. The reason is very simple. If I like a product, I will promote it without compensation. If I don't like a product, I will have no problem saying so.
  • [March 17, 2020] - A return to blogging! Stay tuned for new tips, resources and all things food related.
  • [February 1, 2016] - An interesting report on why you should always choose organic tea verses non-organic: Toxic Tea (pdf format)
  • Sticky Post - Warning: 4ever Recap reusable canning lids. The reports are growing daily of these lids losing their seal during storage. Some have lost their entire season's worth of canning to these seal failures! [Update: 4ever Recap appears to be out of business.]

Popular Posts

Showing posts with label pasta. Show all posts

Monday, March 16, 2015

Oh So Simple Mac 'n Cheese

Despite being Canada's favourite, I have never been a fan of Kraft Dinner aka KD.  Years ago our youngest who was about seven at the time, came home from a friends and proceeded to tell me about the wonderful macaroni and cheese his friend's mother had made.  It was in a 'really neat' blue box!  After I pulled my eyes out from the back of my head and picked myself up off the floor, I carried on making dinner while listening to him go on and on about this fantastic 'meal in a box'.  Occasionally, cave in and I would buy a couple of boxes of KD for the kids but our staple macaroni and cheese has always been from scratch, oven baked.  KD did find its way into our pantry during the y2K scare as part of our emergency preparedness

making easy mac and cheese
We were on the topic of food as we often are and the discussion turned to macaroni and cheese.  One of our kids swears by one pot, stove-top, creamy mac and cheese as her tried and true, kid approved family favourite.  Essentially this is an easy, versatile one pot method for cooking macaroni and cheese on the stovetop.  I've also heard of this method called the one-to-one because the portions are simply a 1:1 ratio.  I decided to try this method to see how it compared to the boxed and oven baked versions.

I did not follow the Todd and Diane's recipe exactly nor did I do an actual one-to-one.  I started with 1½ cup of half & half because I was out of milk then stirred in 1½ c of uncooked elbow macaroni and 1 tbsp butter.  I heated this mixture slowly while stirring adding in just enough extra half & half to keep the mixture runny while cooking.  When the macaroni was al denté, I stirred in 1 cup of shredded cheddar cheese.  Once the cheese was melted, the creamy macaroni and cheese was ready to be enjoyed!

easy mac and cheese
KD and other boxed macaroni and cheese dinners are not exactly health food.  Even if the organic brand is still a heavily processed food item.  There are preservatives but more importantly tartrazine, a synthetic lemon yellow azo dye derived from coal tar.  This synthetic dye has numerous side-effects ranging from allergic reactions to heart palpitations, OCD, and in severe cases, anaphylatic-like reactions.  The Oh So Simple Mac 'n Cheese, has just four ingredients: milk, pasta of choice, cheese of choice and butter (optional).  That's it!  There are no artificial ingredients.  The result is rich, creamy macaroni and cheese that is even easier to make than the boxed version with no extra packaging either.  It isn't a lot but that packet containing the powdered cheese mixture in boxed macaroni and cheese can't be recycled so ends up in the landfill.  The Oh So Simple Mac 'n Cheese tastes better than boxed and it definitely has a creamier texture.  It is just as quick to prepare.  Oh, and this macaroni and cheese actually works out less per serving than the boxed version!

Any milk can be used although milks with a heavier cream content will give a bit creamier flavour.  The butter really is optional.  I know it is supposed to be added to boxed macaroni and cheese, and I added it as well but the butter is really just for added flavour.  Any shredded cheese or combination of shredded cheese can be used.  I have it on good authority, aspiring chefs Little Miss C and Little Master A that aged white cheddar is the cheese to use!


Tuesday, February 03, 2015

Baked Chicken with Tomatoes and Mushrooms

One of my goals with using up the pantry and freezer surplus is creating minimal left-overs.  This differs from my normal cooking where I intentionally cook extra for planned left-overs for the freezer.  Despite this, there has been a few left overs just enough to use up the following day for lunch or as a side dish for dinner.  On the whole, I have been rather pleased as small pockets of space appear in both the pantry and freezers but there is a long ways to go!

baked chicken with tomatoes and mushrooms
I thawed two chicken legs with backs attached. I browned the chicken legs in a little olive oil then placed them in a baking dish and topped with a jar of home canned tomato pieces that I added about a teaspoon of Italian seasoning.  I baked the chicken covered at 350°F until the chicken was cooked (about 40 minutes).  I sautéed sliced white mushrooms to top the chicken. I served the chicken with left-over seafood pasta noodles and left-over  Greek salad (not pictured). 

It was an easy, tasty meal using what was on hand and while it doesn't seem like much, two more items were used up from the pantry and freezers.  Just as in any type of decluttering, baby steps can make a huge difference when done consistently.  And so the pantry and freezer decluttering continues...


Monday, February 02, 2015

Seafood Pasta

We spent Saturday preparing for our Superbowl party on Sunday.   Sam's Club was the perfect place to pick up a large container of sour cream, shredded cheese, pork loin, rolls, buns, veggie tray and cream cheese.   This weather is really playing havoc with my arthritis so my husband suggested a couple of short cuts like the veggie tray.  It was a much appreciated lovely gesture!  After shopping, it was time to make the pulled pork and chili while my husband set-up the games room.  I used one of my pressure cookers for the pulled pork so all that would be needed the following day was warming in the slow cooker.  We finally sat down for a breather.  My husband checked the weather forecast which quickly became cause for concern!  By 6 AM game day, the snow had started and it continued causing our number of guests to drop from twenty to nine.  Luckily we had tracking the weather so put out less food to begin with then adjust from there but we are still left with extra food.  Despite the weather, a good time was had by all!

seafood pasta
It has been very much cooking on the fly here with the main focus on using up some of the pantry and freezer surplus.  This has triggered a bit of fun in the kitchen!  Last week, I wasn't feeling overly creative so pasta it was.  Pasta is one of those staples that goes with just about anything.  I toyed around using up a jar of home canned meat sauce but felt like something a bit lighter.  Seafood is one of my favourites for eating light. 

I settled on making a brown butter sauce.  Then I added jumbo shrimp and scallops.  Both are tasty, low calorie sources for protein.  The dish was almost ready when my husband suggested adding in a little Kraft Herb & Garlic shredded cheese.  This cheese has a nice flavour with a creamy texture when melted.  The end result was an tasty seafood pasta.  There was enough of noodles left over for the following night's side dish that warmed nicely and still had a lovely seafood flavour. 


Saturday, February 01, 2014

Italian Venison Fusilli

My husband spent a week in November at hunt camp in the Muskoka Region of Ontario.  A fun time was had by all!  They got two doe that were cleaned, cut and wrapped before they left.  Everyone brought home a bit of venison, a much welcomed addition in our freezer.  Venison is a rich, flavourful red meat that can be used in place of beef for most dishes.  It is a healthier option, well for those counting calories.  Venison is lower in calories (102 cal/3 oz), lower in sodium (42 mg/3 oz), lower in fat (2.8 g/3 oz) and lower in cholesterol (72 mg/3 oz) than beef (3 oz: 162 cal, 56 mg sodium, 5.8 g fat, 76 mg cholesterol).  It is, however, lower in protein at 19.2 g per 3 oz verses 25.8 g per 2 oz of beef.  Venison should be served hot because what fat there is has a slightly unpleasant mouth feel when cold.  For that reason, venison is often cooked with pork fat.
  

Italian venison sauce cooking
I used home canned Italian Garden Sauce with Mushrooms to make a delicious venison sauce for pasta.  This is a must have staple sauce in our pantry, one I created a couple of years ago then tweaked in small batches until it met my specifications. 

I lightly seared the venison pieces then poured in a 750 ml jar of Italian garden sauce with mushrooms.  I brought the mixture to a boil then reduced to a simmer.  I let the mixture simmer until the venison pieces were cooked through and tender.  While the venison sauce was simmering I cooked tri-colour fusilli to al dente then drained.

Italian Venison Fusilli
I topped the tri-colour fusilli with a generous scoop of the venison sauce along with fresh grape tomatoes, green peppers and chopped onions for Italian Venison Fusilli.  This entrée was low calorie and low fat, yet tasty and filling. 

A serving size of tri-colour fusilli is 2 oz dry which gives a yield of 255 g/9 oz cooked [210 cal. 7 g protein, 41 g carbohydrates, 25 mg sodium, 2 g fiber, 1 g fat, 0 mg cholesterol].  Plain wheat fusilli does not have any fiber so the tri-colour is a healthier choice as is whole wheat fusilli.  If counting calories, it is best to weight out the cooked pasta for the proper serving size.  I often add fresh vegetables over pasta sauces.  They add a nice texture, complimenting the flavour of a wide variety of sauces while adding extra nutrition. 


Sunday, July 28, 2013

Creamy Orzo Salad

I love to peruse the grocery store aisles looking for new products mainly for flavour combination ideas but from time to time I will buy a product that sounds interesting in the hopes of being able to clone it in the event we like it.  Two new flavours of Kraft dressing recently became available in our little corner of beautiful Ontario, Canada.  I seldom buy salad dressings as we prefer homemade but these flavours sounded interesting so I bought one of each.  The flavours were sweet onion and roasted red pepper with parmesan, both with no artificial flavours, cholesterol free, zero trans fat and low in saturated fat.

creamy orzo salad
One of the salads served at our relative's annual pig roast was an orzo and watermelon salad.  It was a unique and unexpected combination.  Orzo is a delightful pasta to use as a salad base because it is naturally creamy.  I used orzo to make an easy, creamy orzo salad using the new Kraft sweet onion salad dressing.  The result was a light, creamy salad that was a sure winner!

Creamy Orzo Salad
recipe by:  Garden Gnome

2 cup cooked orzo
1 tomato, chopped
½ c broccoli, finely chopped
2 green onions, finely sliced
¾ c Kraft Sweet Onion dressing

Cook orzo to al dente.  Drain.  Measure out two cups of the cooked orzo and allow to cool.  Wash vegetables.  Chop the tomato.  Fine chop the broccoli.  Fine slice the green onions.  Mix vegetable into the cooled orzo.  Pour the salad dressing over the pasta mixture and mix well.  Serve.

Note:  Will keep well for 2 - 3 days in the refrigerator.

I really liked the flavour of the Kraft sweet onion salad dressing.  This should be a fairly easy salad dressing to clone which will give all the flavour without any preservatives.  Like many commercially made salad dressings, this salad dressing gets its texture from xanthan gum, something I will also use in the clone recipe.  Another ingredient of note is citric acid, often added to commercially made salad dressings to give a bit of tang.  Citric acid is something I always have on hand for home canning acidification of certain products.  The benefit of using citric acid over lemon juice in a salad dressing is not increasing the liquid volume as citric acid is a crystallized powder rather than a liquid.  I'll post the clone recipe I came up with shortly.


Tuesday, May 28, 2013

Pasta Bar

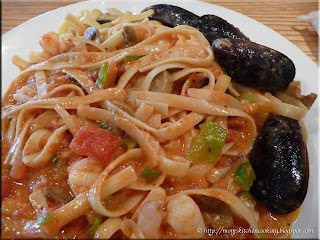
The clubhouse at our vacation home resort holds a weekly pasta night.  The meal is set up in an L-shape pasta bar with a serve yourself simple garden salad and garlic bread followed by the pasta station where the chef prepares your choice for you.  The pasta station consists of pre-cooked penne and liguini, red sauce, white (béchemel) sauce, sausage, shrimp, mussels, chicken, green peppers, tomatoes, mushrooms, an onions.  The pasta dish is cooked on a portable propane burner.  The chef drizzles olive oil in a small skillet then adds your vegetables and meat of choice.  When that is warmed through, he drizzles a little white wine over the mixture, adds your sauce of choice and flips the pan to mix.  Finally he adds the pasta of choice again flipping the pan to mix. 
 

linguine with white sauce and shrimp
My husband had linguine with béchemel sauce and shrimp.  The shrimp were nice sized.  The sauce  was rich and creamy.  This was a delightfully tasty dish that can easily be duplicated at home.  

When cooking pasta, I like to cook extra for planned leftovers.  I simply cool the cooked pasta then refrigerate it until needed.  It is very easy to whip up a quick meal using pre-cooked pasta.  Pre-cooked pasta warms nicely in a variety of sauces.  It can quickly be turned into tasty homemade pasta cheese dish or other casserole, or used in pasta salads. 

linguine with blush sauce
I had linguine with a blush sauce, a mix of red and béchemel sauces.  I also added shrimp, mussels, tomatoes, green peppers, onions and mushrooms.  I really enjoyed this rich, delicious meal!  With the exception of fresh mussels which are difficult to find at home, this is also a very easy dish to recreate at home. 

A blush sauce is very easy to make but it involves making at least the béchemel sauce to mix with a fresh or prepared ahead tomato sauce.  A rosa sauce is similar to a blush sauce without having to make a béchemel sauce.  A rosa sauce is made by stirring heavy cream into a tomato sauce as it is warming.  Shredded parmesan cheese can be stirred into the rosa sauce if desired. 

A pasta bar is a rather simple idea that can easily be duplicated at home with a few modifications.  Kids love meals that allow them to make the choice of what they want to add.  That is one reason why homemade pizza, tacos and taco salad where always big hits with our kids.  As with other top your own dishes, keep it simple yet interesting.  You don't need a lot of each topping either so a pasta bar is a great way to use up a few leftovers as well.  Presentation can be as easy as setting up various bowls of the prepared ingredients on the table then let each family member top their pasta as desired.


Tuesday, May 21, 2013

Leonardo's Italian Grille in Romulus, Michigan

One of our great pleasures when traveling is discovering new restaurants that offer homestyle cooking in a cozy atmosphere.  While we find some of these gems through word of mouth, quite often we discover a good eatery by shear luck.  Sometimes it is the name of the restaurant, other times the  look of the exterior and others still a combination of both.  So it was during a recent road trip when we discovered a small, cozy Italian restaurant.

Leondardo's Italian Grille
Leonardo's Italian Grille is located at 7575 Merriman Rd in Romulus, Michigan about a mile away from Detroit MetroAirport.  The restaurant is owned by brothers Vito and Joe Liparoto who emigrated from Sicily to America in 1969 with their family.  Years later the brothers opened their first pizzeria, now operating as Leonardo's Italian Grille.  They have captured the essence of authentic Sicilian cuisine with the inspiration of Chef David Neal. They offer a variety of Italian specialties as well as dishes from the grill.

The exterior of Leonardo's is modern architecture  with Italian overtones of red and green.  There is a large outdoor dining patio to the left of the entrance.  The interior is cozy and welcoming with shades of taupes and greens, lots of wood, and an Italian themed mural.  There is an impressive bar with comfortable sitting in the lounge area as well as tables and booths.  The atmosphere is cozy, casual with friendly waitstaff.

fresh soft bread sticks
The waitress brought us a basket of fresh bake twisted Italian bread stick with butter to accompany our meal.  These soft chewy bread sticks were delightfully delicious!   The texture was quite similar to a crusty roll yet a slightly different.  A little twist opened the warm bread stick forming a small pocket perfect for the butter.  This is one recipe I will be looking for to make at home!

Entrées were served with soup or salad.  We both ordered salads with our entreé.  The side salad was a simple salad greens with shredded red cabbage, shredded carrots, red onion slices, cherry tomatoes, croutons and Italian dressing. 

veal marsala
Leonardo's serves Provimi veal, a superior milk-fed pale coloured, fork-tender veal, the finest available.  My husband ordered the veal parmesan ($19.95).  The generous portion of tender veal was coated with Italian breadcrumbs, sautéed in olive oil then topped with marinara sauce and baked with mozzarella cheese.  It was served with spaghetti in marinara sauce.  The dish was garnished with finely chopped red onion and carrot, something a bit different from the over . used sprinkling of dried parsley. 

My husband really enjoyed the veal parmesan.  It was tender with a nice richly flavoured mainara sauce and gooey melted mozzarella cheese.  This entreé was a sure winner!

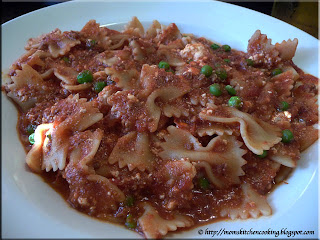
Sicilian pasta
I ordered the Sicilian pasta ($15.45) with a side salad.  This entrée consisted of sautéed tender peas tossed with homemade meat sauce and fresh ricotta served over bowtie pasta.  The fine textured meat sauce had a bit of a zip bordering on heat to it so I think the meat was hot Italian sausage rather than ground beef.  The Sicilian pasta was a delicious entreé!

Leonardo's is ranked #2 of 33 restaurants in Romulus on Trip Advisor and for good reason.   The waitstaff are friendly and provide fast service.  The unpretentious food is simply good, homestyle basic Italian nicely presented in a cozy, inviting family-style atmosphere.  The portion size for the entreés is substantial. It is child-friendly for those traveling with little ones but can also accommodate larger groups.  If you are in the vicinity of the Detroit Metro Airport, this is a great restaurant for lunch or dinner.


Sunday, April 28, 2013

Asparagus Fusilli with Pork Balls in Mushroom Sauce

It really is amazing how versatile some foods are.  Take corn for example.  I read where 99% of everything produced (edible, non-edible) is in some way connected to corn.  A quick walk through the grocery store will show that corn is in many products as an ingredient, in packaging, and so much more.  Other vegetables appear in products that you would least expect.  Our kids gifted us with a very lovely basket filled with food products with asparagus as an ingredient over the Easter holiday.   Asparagus is one such vegetable that I would not have expected to find in a lot of food products yet surprisingly, Barrie's Asparagus in Cambridge, Ontario makes several products using asparagus. 

Last night, I decided to cook the asparagus fusilli that came in the gift basket.  This is an enriched pasta made from 100% durum semolina and fresh Ontario asparagus.  Fresh asparagus pasta would be quite easy to make if you have a pasta maker attachment for your Kitchen Aid stand mixer.  I wanted a rich, creamy sauce for the asparagus fusilli.  I started with fresh ground pork loin then built the dish from there.

browning the pork balls
When I make meatballs, the method used is determined by the meat.  If beef, I don't season the meat and the binder is milk.  That's it.  Ground pork is rather mild flavoured which is fine if cooking in a rich tomato based sauce long enough to absorb the flavour.  These meatballs were destined for a mushroom sauce, cooked over a shorter period of time so I lightly seasoned the ground pork with garlic pepper, mixed well with 2 eggs, then added dry bread crumbs.  I formed the meatballs with a meatball shaper then browned in heated olive oil in a ceramic coated skillet.  Once the meatballs were browned, I stirred in two cans of Campbell's condensed mushroom soup, a half can of milk and a half can of half & half.

pork balls in mushroom sauce
This is one of the very, very few mass produced condensed soups that I do buy.  The reason being, it is ideal as a quick sauce.  Homemade cream of mushroom soup is easy enough to make but cannot be home canned and it is next to impossible to keep enough on hand in the freezer. 

I brought the meatball and sauce mixture to a low boil then reduced the heat to a low simmer.  The low simmer allows the meatballs to finish cooking while absorbing flavour from the sauce.  It also reduces the sauce to a thicker, richer consistency.  The lactose in the milk and half & half caramelizes to give a richer flavour while the lactic acid in both keep the meatballs tender and juicy. 

asparagus fusilli with pork balls in mushroom sauce topped with sauteed mushrooms and asparagus and chopped fresh green onions and tomatoes
Local fresh asparagus will be in season here shortly.  I can't wait!  Asparagus is best lightly cooked (steamed, sautéed, grilled) until just tender (al dente) while retaining the beautiful bright green.  If overcooked asparagus takes on a drab olive colour with a mushy texture.  Dried asparagus is closer to a brown than a green so it did not surprise me that the asparagus fusilli while more of a drab olive colour dry, turned closer to tan when cooked.  Aside of the colour, there really isn't much asparagus flavour in the asparagus fusilli. 
Fusili is a nice thick pasta with lots of nooks to hold thick sauces, like the mushroom sauce used for this dish.  I topped the asparagus fusilli with the pork balls in mushroom sauce, sautéed fresh asparagus and sliced mushrooms, and chopped fresh green onions and tomatoes with just a light sprinkling of sesame seeds.  One of my favourite ways to serve any pasta is to include some type of chopped fresh vegetables on top.  Raw vegetables added this way add both an element of flavour and texture that pairs nicely with many pasta dishes.   It's a great way to add a bit of extra nutrition as well as eye appeal.  The asparagus fusilli with pork balls in mushroom sauce was a delightfully delicious and sinfully rich meal with the flavours blending nicely yet fairly low in fat. 


Friday, March 29, 2013

Thoughts on New Lagostina Cookware and Whole Wheat Linguine with Roasted Italian Sauce with Mushrooms

Wednesday morning we picked up our new Lagostina Collezion Pro 12 Elite Series cookware that had finally arrived via rain cheque.  We bought the set at a fantastic 60% off.  The cookware was bought to upgrade our cookware at home while allowing us to take our existing pot set down to our vacation home.  It was also bought with the goal of reducing the number of pots and pans needed to prepare certain dishes.  Instead of searing in a fry pan then transferring to a casserole dish, these pieces will allow us to do everything in one pan, stovetop to oven.  I have to be honest with you, aside of oogling the new cookware and reorganizing the cabinet to accomodate it, I did not use any of the cookware until this morning when I started a pot of navy beans for baked beans as part of our Easter dinner tomorrow.

Lagostina Renaissance
We bought a set of Italian made Lagostina Renaissance pots about 10 years ago.  They still look great and perform quite nicely.  As far as pots go, these are a delight to use with their heavy tri-clad bases that eliminate hot spots.  The handles have faded a bit from going through the dishwasher but they still have the high polish protective coating that keeps them shiny.  The only downside to this particular set, is they cannot be used in the oven due to the handles.  Other than that, they are great performers.  I really would not have thought of replacing them had it not been for our cooking style changing a bit and wanting a better set of pots for our vacation home.

Lagostina Collezione Pro in the box
We got a rain cheque for the Lagostina Collezione Pro cookware the day after the sale flyer came out.  It took almost two weeks for them to arrive.  We chose this set because it is a multi-material set.   Cookware is currently available in aluminum, stainless steel, copper, and cast iron.  A non-stick coating is a popular edition.  If buying non-stick, I highly recommend ceramic over tefalon for safety and durability.  At one time, Pyrex had a line of glass cookware available but there were shattering issues so it was removed from the market.  You can still find it at resale shops and yard sales from time to time.  Each of the cookware materials have pros and cons.  The best cookware is actually a combination of more than one material to give even heat conduction and distribution.  As you cook more, you come to realize to realize certain cookware material gives better results than others.  For example, a good sear is best done in a hot stainless steel pan because a non-stick pan cannot be brought to a high enough temperature for a good sear.  If you are getting creative with cooking, then a matching set like the Lagostina Renaissance is not a good choice unless you don't mind buying specialty pieces.

Lagostina Collezione Pro cookware set
The Collezione Pro cookware consists of two tri-ly clad sauce pans for true even heat distribution (eg. sauces, vegetables, soups), one bi-clad sauté pan with anodized exterior for even heat (eg. braising, searing, flambéeing), one tri-ply copper exterior saucepan (delicate sauces, reducing liquids), one tri-ply copper exterior casserole for precise cooking control and an enamel coated cast iron dutch oven for superior heat retention (eg. soups, stews, casseroles).  All of the cookware have matching lids. All of the cookware can be used on the stovetop and in the oven.  The set comes with a lifetime replacement warranty and if a piece is replaced under that warranty, the replacement piece is also covered by the original warranty.  Of not, the guarantee does not apply to any damage resulting from abuse, misuse, negligence, accidents, improper repair, commercial use or dishwasher.  Needless to say, this cookware will not be going into the dishwasher!

My concern was missing the Dutch oven from my old set.  It will take a bit of getting used to the new cast iron dutch oven.  It is more of a conceptual thing with me because the new Dutch oven doesn't look like it can be used on the stovetop.  I've seen the celebrity chefs using this style on the stovetop and so far this morning, the beans are cooking nicely.  I'll report back on those results shortly.
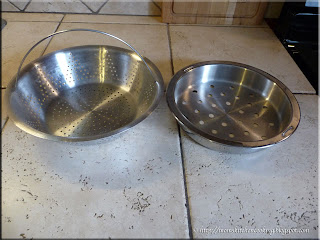
 
steamer baskets
Pots and pans do not always come with everything you want or need.  We do a lot of steaming, often have more than one steamed dish cooking at the same time so really needed steamer baskets.  Our pastaiola came with two steamer baskets, a rather deep one perfect for larger quantities of vegetables or cooking pasta then lifting out for quick draining, and a shallower one (with handle) that fit the Dutch oven of the Renaissance set perfectly.  I kept the steamer basket out of our first rice maker when it quit.  This basket fit the largest saucepan of the Renaissance set perfectly.  Neither of these steamer baskets fit the new Collezion set perfect but they are useable.  The larger one fits down into the new Dutch oven still leaving space between the water level and basket.  The smaller one fits the larger tri-ply clad stainless steel saucepan, sticking up by about a half inch but it will still work.  In the meantime, I will keep checking the resale shops for steamer baskets that might fit a bit better.

whole wheat linguine with roasted Italian sauce and mushrooms
My husband and I really enjoy our pastas!  There are so many varieties of pastas that we just never really tire of it.  We enjoy both dry pasta and fresh made pastas using the Kitchen Aid pasta attachment.  I have been working towards making some of our favourite pasta meals a bit healthier.  All of my tomato based pasta sauces are home canned or homemade from scratch.  While they are rich, full bodied and flavourful, I seldom add salt so they are low sodium.  All have a little olive oil in them which makes the anti-oxidant lycopene more accessible to the body, making them a healthy sauce.  I often top pasta dishes with chopped fresh herbs and vegetables along with a little shredded cheese.  There are now a lot of healthy choices for dried pastas.  Some are made with whole grains while others have vegetables added and some are a combination of both.

Catelli has a line of dry pastas called Healthy Harvest.  I bought a 375g box of their whole wheat linguine that gives 75% of the daily recommended whole grain servings and is a high source of fibre.  It only takes 9 minutes to cook to perfection.  I topped the pasta with home canned roasted Italian sauce with mushrooms, shredded Asiago cheese, chopped green onions and chopped tomato for a lovely, healthy and meatless dinner that was low sodium and low fat.  The entire meal took under 15 minutes to prepare! 

If you have not tried whole wheat pastas, they are well worth the slightly higher price.  I like the whole grain pastas.  They have just a bit  firmer texture than white wheat pastas.  There is a bit more texture, just a slightly noticeable grainy texture.  Whole grain pastas cook up more of a light tan than a pale creamy yellow.  Other than that, whole wheat pastas can substitute in any pasta dish.  This pasta is available in various shapes.  A multi-grain line of pastas is also available from Catelli so you are sure to find one to please.


Wednesday, March 06, 2013

Faux Lasagna

It has been eons since I bought a boxed ground beef helper.  Why?  These types of convenience foods are expensive for what you get and the are laden with food additives.  I checked a box for the ingredients at the grocery store the other day.  Most contain maltodextrin (a corn sugar that is highly addictive creating cravings for it), monosodium glutamate (triggers headaches and allergic reactions), modified milk ingredients, natural flavour (could be anything!) and if the product has cheese, the cheese is dried.  A pasta based helper perhaps has a cup of dried pasta, the seasoning packet and you provide the meat and liquid at a cost of more than four times the cost of dried pasta bought on sale and adding your own fresh ingredients and cheese.  I have several versions of homemade ground meat helper, all fresh and easily prepared in about the same time it takes to prepare a boxed version AND they eliminate the cost of the boxed mix along with all the additives.

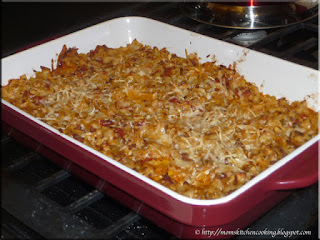
faux lasagna casserole
Even if you use a boxed ground beef helper you have to brown the ground beef.  I have found I can make the actual convenient dry mix for about a quarter of the price of store bought but I can also make the entire casserole from scratch in pretty much the same time at a quarter of the price as well.

The other day, I made a faux lasagna casserole using 2 lb of lean ground beef.  It had a lovely flavour, very much like lasagna without the work.  Quite frankly, I don't find lasagna a lot of work even making the sauce from scratch but I wanted a quick meal that night.

Faux Lasagna
source: Garden Gnome

2 lb lean ground beef
2 c broad egg noodles
2 c shredded mozarella cheese
½ c shredded cheddar cheese
¼ c cottage cheese
1 c shredded Parmesan cheese (divided)
1 L (4 c) roasted Italian garden sauce with mushrooms

Brown the ground beef and drain.  Cook and drain the pasta.  Pour ground beef into a large mixing bowl.  Pour the sauce over the meat. Mix well.  Stir in the pasta then all the cheese reserving ½ c of the Parmesan cheese.  Mix well.  Pour into oven proof baking dish.  Sprinkle the remaining Parmesan cheese on top.  Bake at 350°F for 15 minutes or until warmed through and bubbly.

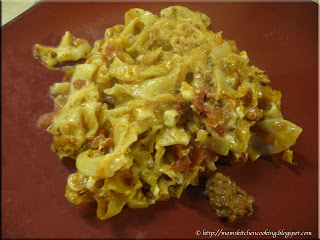
faux lasagna
This homemade faux lasagna casserole took 5 minutes longer prep time and 3 minutes longer cooking time than the boxed version.   I didn't factor in the time it takes to bring the boxed version to a boil though so in terms of timing the homemade version was really quite close to the boxed version.  However, I ended up with a less expensive and tastier dish than the boxed version.  The homemade version not only eliminated all the food additives, it was lower in sodium as well.  Unlike the boxed version, I didn't have to take time to stir occasionally either freeing up that time to do other things.

The proof is in the taste and hands down this faux lasagna is a winner.   It is rich, creamy and cheesy sure to satisfy any lasagna craving in short order.  I usually use 7 to 9 cheeses in my homemade lasagna but this recipe only had 4 cheeses.  The mozzarella cheese could easily be reduced to 1 c then add in another cup of any desired cheese.  Over all though, this was a very nice casserole!


Saturday, February 16, 2013

Slow Cooker Chicken Cacciatore

Meals do not have to be fancy or complicated to be both frugal and delicious.  Simpler meals save on the cost of additional ingredients, they take less prep work and often less clean-up.  They are the perfect go to meals that often become family favourites!

family pack boneless, skinless chicken breasts
Our local grocery store had boneless, skinless chicken breasts on sale so I bought a family pack.  The chicken breasts were quite large so were a good deal for $7.01.  I mentally calculated a yield of four servings from the package.

I really don't like buying any meat in this type of packaging as none of it can be recycled.  The  foam trays cannot be cleaned well enough to prevent an risk of contamination from the raw meat they held.  I wash the trays well, dry then spray with rubbing alcohol to kill off contaminants.  I reuse these types for applications that will not come into anything edible.

browning the chicken breasts
Most meats cooked in the slow cooker need to be browned first.  This seals in some of the juices while adding flavour.  I used organic coconut oil to lightly brown the chicken.  Normally, I would use olive oil as the sauce was tomato based but I'm experimenting with coconut oil.  Coconut oil is very heat stable making it suitable for searing or browning meats.  It adds a light nutty sweetness.

Coconut oil is one of the healthiest oils you can use for both culinary and home made beauty products.  It contains lauric acids that aid in digestion while protecting the body from bacterial and fungal infections.  It is a solid at room temperature.  It can be used as a moisturizer on hair and skin as well.  I highly recommend using it on your hair to keep it healthy and shiny.

preparing the slow cooker
Home canned tomato sauces are our number one homemade convenience food.  I make several different, gourmet tomato based sauces each tomato harvest.  They range from plain and smooth to rich and meaty with everything in between.  One of my specialty tomato sauces started off as a roasted tomato sauce that quickly evolved to several versions of fire roasted sauces.  Fire roasting gives a rich depth to the sauces that can't be achieved by simply roasting.

I placed the browned chicken breasts in the slow cooker then poured a 1 L (quart) jar of fire roasted Italian tomato sauce with mushrooms over the chicken.  I set the slow cooker on low for 2 hrs than increased to high for an hour.  This is a newer slow cooker that does operate at higher temperatures than the old one it replaced.

slow cooker chicken cacciatore
I served the chicken breast on a bed of extra broad egg noodles then ladled with sauce, topped with fresh grated Parmesan cheese and garnished with fresh parsley from my indoor garden.  It was a simple, low cost meal that was easy to prepare.

My home canned tomato sauces cost me nothing more than the canning lid, cooking fuel (fire roasting, processing) and extra ingredients if necessary.  A 1 L jar of sauce without meat or mushrooms averages about 30¢ but I can reduce that cost using a reusable canning lid (glass insert, Tattler, 4ever recap) by 13¢.  Store bought broad egg noodles are quite inexpensive and homemade even less expensive so the only real cost for me with this type of simple slow cooker meal is the meat.  In this case using store bought chicken at the sale price brought the cost per serving to just under $1.80 which is rather frugal.


Sunday, June 10, 2012

Revisiting Giorgio's Bakery & Bistro in Hollywood, Florida

During our first vacation house hunting trip to Florida, we stayed in Hallandale.  One of my husband's aunts highly recommended Giorgio's Bakery & Bistro.  This little bakery and bistro offers waterside dining as well as a wonderful bakery with take-out available.  We so enjoyed our visit there we simply had to take our friends there for this visit.  It was a beautiful, lazy night just the perfect location to spend a bit of time before heading to the motel for the night with visions of Aruba the following day.

Giorgio's Bakery & Bistro angel hair pasta
We settled into the bench booths at Giorgio's to watch the boats through the waning sun.  I admit it.  My number one favourite dish when eating out is pasta!  I have had some duds, I have had some stellar dishes and I have tweaked my own sauces to get just the right results.  So, I ordered the angel hair pasta ($8.95) with fresh tomatoes, black olives and basil in a light tomato sauce.  It came with fresh baked bread.

The pasta serving was generous, well over the recommended serving size.  It was light and tasty!  This would be a very easy dish to duplicate at home.   Angel hair pasta is perfect for quick meals as it takes very little cooking time.  The sauce was quite thin, on the watery side with little seasoning allowing the tomato flavour to shine,

Giorgio's philly cheese steak
My husband ordered the Philly cheese steak ($7.95).  The thin sliced beef steak with onion, peppers and provolone cheese was served on a fresh baked baguette.  A side of potato chips rounded out the meal.  What really made this sandwich was the baguette.  You just can't beat fresh baked bread!

Philly cheese steak sandwiches are very easy to make at home.   I keep packets of thin sliced roast beef from left over roast beef in the freezer for use as lunch meat.  These work nicely for Philly cheese steak sandwiches.   If you don't want to make your own baguettes, buy them in the fresh baked section of the grocery store or in a bakery.

The food at Giorgio's is not fancy, it is very much home style cooking.  Sitting outside listening to the sights and sounds of the water inches away from your feet is well worth it.  The view is wonderful!   Picking up a few extras from the bakery after dining is highly recommended!  It's hard to resist with the tantalizing aroma :)


Friday, April 20, 2012

Homemade Fettucine with Creamed Turkey Sauce

Pasta lends itself nicely for a wide variety of sauces.  While tomato and alfredo style sauces are likely the most popular, there really is no end to the types of sauces that can top pastas.  I often pair left overs with fresh vegetables as a pasta topping.  It's quick, easy and oh so delicious plus it is an easy, tasty way to use up left overs.

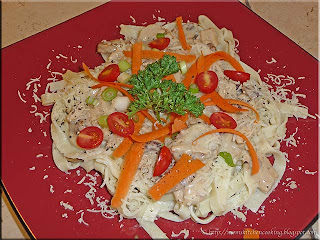
homemade fettucine with creamed turkey sauce
We have been working on emptying our largest freeze in preparation for our beef on the hoof purchase.  I pulled the last of the frozen left over turkey from the freezer.  It had been frozen with the gravy so I thawed it then used some of the turkey only to make a quick pasta sauce for homemade fettucine noodles.  As an aside, we are loving fresh made pasta.  It is so tasty, beyond dried or store bought fresh!  The fresh pasta stores nicely in the refrigerator too so I can make one batch that will give us two pasta meals for the week.
I cut the turkey into bite sized pieces then stirred into seared mushroom slices and poured a can of condensed mushroom soup over it with almost a full can of milk.  I let the sauce simmer until thickened then topped the cooked fettucine with it.  I garnished with fresh grated Parmesan cheese, sliced green onions, halved cherry tomatoes, shredded carrots and fresh parsley.   It ended up being a rather tasty meal that took almost no time to put together.

Fresh parsley is one of the leading garnishes and for good reason.  Dried parsley lacks the flavour and health benefits that raw parsley has.  Fresh parsley as a garnish is not just for it good looks.  It provides a nice source of Vitamin C, freshens the breath and settles the tummy after a large meal.  Oh and parsley is mildly diuretic reducing water weight gain.  So don't leave it on your plate, indulge in all the health benefits fresh parsley offers.


Saturday, April 14, 2012

Homemade Fettuccine with a Blush Fire Roasted Tomato Basil Seafood Sauce

Yesterday I wrote about my first adventure using my new KitchenAid® pasta sheet roller and fettuccine cutter attachments.  Both attachments were beyond incredibly easy to use.  I was at the ease of use and the results!  The next thing on my mind was the taste.  Trust me, there is no need to go through a bit of extra work only to end up with a product that doesn't taste better than store bought.

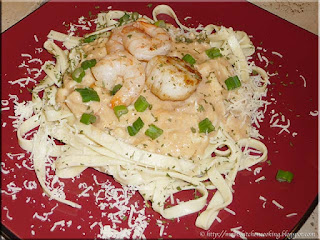
homemade fettuccine with seafood sauce
Earlier this year we enjoyed a delicious meal at a local restaurant that featured a blush seafood sauce topping linguine.  I set out to clone that recipe then I tweaked the seafood sauce slightly to use my gourmet home canned fire roasted tomato basil sauce, crab meat, cod and scallops then up scaled the garnish to use pan seared shrimp and scallop.  The end result is a mouth watering sauce perfect for topping homemade fettuccine.  It is light yet filling,  packed full of rich flavour while being lower in calories than a traditional spaghetti meat sauce.

The fettuccine took about 7 minutes to cook to al dente.  While it looked like cooked dried or store bought fresh in terms of colour and texture, the proof was in the tasting.  The taste of this  fettuccine was incredible!  It had a freshness that dried pasta can't achieve and none of the chemical flavour of store bought fresh pasta.  An added bonus as with many homemade foods, there was no pesky packaging to have to deal with.  In fact, this meal resulted in very little going into the garbage.  There was no packaging and only the shrimp and crab shells had to be discarded although the shrimp shells might have been ok in the compost as there were only six of them.  This is the time of year I keep and grind all egg shells possible for the garden.  They add calcium while controlling slugs and snails.

It is important to realize that home cooking has a positive effect on the environment.  A vast portion of waste from home cooking can go into the compost, resulting in very little going into the landfill.  It really is a win win by home cooking.  You get good, healthy, less expensive food while lessening your carbon footprint.  Nothing wrong with that in my book and quite frankly it is one more reason to cook from scratch at home!


Friday, April 13, 2012

Homemade Fettuccine

Just before Easter I wrote about my new KitchenAid® pasta sheet roller and fettuccine cutter attachments.  Easter Monday, I decided to take a bit of time to play with the attachments.  I've made pasta manually so had an idea of what to expect.  Fresh homemade pasta just has such a lovely flavour!  It is more expensive than dried pasta (not bought on sale) and while I initially calculated it to be more expensive than store bought fresh pasta, it actually comes in less expensive.  If you raise your own chickens, the cost of homemade fresh pasta is considerably less expensive than store bought dried.  Homemade pasta can be easily tweaked to make vegetable or herb pastas as well and you can be sure you are using free range eggs if that is important to you, as it is to us.

first pass of pasta dough through the pasta sheet roller
Pasta dough should be firm and leathery to the touch but also pliable.  It should not be sticky or crumbly.  External factors like humidity or brand of flour can affect the dough consistency so small amounts of additional flour or water may be necessary to get the dough to the right  consistency.

I used the basic egg pasta recipe in the KitchenAid® manualI will be honest in that I had serious doubts about the dough.  It did not come together in a smooth ball and did not look like it would hold together well at all.  It was a very stiff dough!  I was almost ready to give up and try another recipe after the first pass through the pasta sheet roller on setting 1.  However, the dough actually came together quite nicely upon further passes through the roller.
 

Basic Egg Pasta
source:  KitchenAid®, KitchenAid® Pasta Sheet Roller and Pasta Cutter Attachments Manual, Pp. 9.

4 large eggs
1 tbsp water
3½ unbleached flour
½ tsp sea salt

Mix ingredients together using the flat beater.  Change to dough hook and knead 2 minutes on setting 2.  Remove dough from blow and hand knead 1 to 2 minutes.  Let rest 20 minutes.  Divide dough into quarters then flatten for processing with the pasta roller.

folding pasta sheet for next pass through the pasta sheet roller
The pasta sheet roller has 8 settings.  The first time through is on setting 1 which is the folding and kneading.   Each time you roll the pasta sheet, fold the ends in as pictured or fold the entire sheet in half then roll again.  If you use the half fold method, alternate how you feed the dough into the roller so you end up with two relatively straight ends.  Repeat the folding and rolling until you reach setting 2.  After that the dough does not need to be folded, simply passed through the roller until you reach the desired consistency.  Fettuccine can be rolled to setting 4/5 or if you want a thinner fettuccine it can be rolled to setting 6 or 7.   Within a couple of passes through the roller the dough took on a very smooth, uniform appearance.  

pasta sheet as it is being made
I was absolutely amazed at how quickly the dough was formed into smooth sheets of pasta.  It was beyond impressive!  Just look how gorgeous that sheet of pasta looks.  I can easily use these sheets as is to make lasagna noodles and ravioli as well as using the fettuccine cutter.

I had no problems passing the sheets of pasta through the various settings on the roller.   I folded the pasta sheets then stacked ready for cutting (bottom left).  By the time I got to the last couple of sheets, they had started drying a bit more than I would have liked so next time will cover them with a damp towel until ready to cut. 

cutting the pasta sheet
I cut each pasta sheet in half to pass them through the fettuccine cutter simply to make the resulting strands easier to handle.  Cutting the pasta was every bit as easy as rolling the pasta.  Each pasta sheet fed through the cutter, easily cutting the sheet into fettuccine. 

For just learning how to use the roller and cutter, the problems were minimal as was the time it took to get the fresh made pasta onto a drying rack.   I dried the pasta (see below) because I wasn't sure how much we would use for dinner and I wanted to try the drying process.  In all honesty, without the drying, rolling and cutting the dough took me about the same time as spooning batter into muffin tins.  With the drying time, it took less time than getting bread ready for baking.  So, in terms of time, homemade pasta takes very little time.

drying the pasta
I used my brand new (when we moved here) clothes drying rack to dry the pasta.  The thing is too flimsy to dry clothes on anyway.  I found the best way to load the rungs was to catch the pasta half-way through the cutter using my hand turned sideways, thumb up so the pasta draped over my hand.  I then transferred it to the rungs and separated any strands that stuck together.  I let the pasta dry about 45 minutes before transferring it ready for cooking and storage.  KitchenAid® warns that foods containing perishable ingredients like eggs should not be un-refrigerated for more than one hour as this is a food poisoning rick that could cause sickness.  While homemade pastas are not suitable for drying as a shelf stable product, they will keep in the refrigerator and can be frozen for longer term storage.  The only thing I would do differently using this rack would be to place a clean towel under it to catch any pasta pieces that break off.

freshly made pasta ready for cooking and storage
Once the pasta had dried, I set out enough for that night's dinner and the rest was vacuum sealed for the refrigerator.  This is where I had to adjust my calculations.  The recipe basically made the equivalent of four packages of store bought fresh pasta.  That would have cost me about $14 but the homemade only cost me $1.44 which really works out to less than the cost of store bought dried pasta.  I won't eliminate dried pastas from my pantry storage but I will stock less.  Dried pastas will become more of what dried milk and cheese are, part of our emergency preparedness.  What the pasta attachments will do is eliminate buying store bought fresh pastas. 

I am very excited!  Tomorrow I will post about the dinner I made with the homemade fettuccine noodles because after all, taste is everything.  I will be experimenting with whole wheat and a variety of vegetable pastas as well as a few herbed pastas.  So watch for that coming in the near future.  I definitely will be buying the attachments to make spaghetti and thick noodles and I am looking into a pasta extruder to make shapes like elbow noodles. 


Friday, April 06, 2012

KitchenAid® Pasta Roller and Fettuccine Cutter

As a newlywed, I made breads and pasta by hand but as I became busier with raising a young family while earning higher education, I moved onto a few mechanical methods.  I went to a breadmachine, but never pleased with the baking results it ended up being a glorified dough mixer.  I opted for buying dry and fresh pastas at the grocery store.  A few years ago I splurged on a KitchenAid® stand mixer, made bagels and immediately saw the potential so started buying attachments.  Several years ago I started having problems with my wrists and fingers, so these attachments would allow me to save money without stressing my joints.

KitchenAid pasta roller and fettuccine cutter set
I honestly don't think I have ever paid full price for any kitchen equipment including my stand mixer or attachments.  I have no problem waiting for a good sale to pick up a piece of kitchen equipment I want but I won't pay full price!  Canadian Tire really makes it's money off of automotive supplies and repairs which means they tend to offer great deals on the other items they stock.  About a month ago, they had the KitchenAid® stand mixers on sale and a promotional offer for the pasta roller and fettuccine cutter set (KETPRA) for $89.99.  The paster roller is valued at $90 itself on the KitchenAid® site so it was like getting the fettuccine cutter free!  It wasn't in stock so they gave me a rain check.  It came in yesterday so I am beyond excited!

Sometimes being frugal in the kitchen is not about money, it about getting a superior product in terms of freshness and flavour.  So it is with homemade pasta like homemade egg noodles.  If you compare current prices fresh, ready to cook deli pasta is about 10¢ per serving, dried pasta is 18¢ per 85 g serving and homemade is 39¢ per serving.  The price per serving of homemade pasta looks quite high on the surface but it all depends on how much your eggs cost.  I am currently paying 30¢ per egg but I can get them as low as 15¢ per egg when available which reduces my cost for homemade pasta to 23¢ per serving.  Now the thing is, I do pride myself in my homemade, gourmet style tomato sauces so paying a bit extra for that ultimate pasta taste to match the sauces is worth it to me.  Unlike the ready to cook, fresh deli pastas there are no preservatives with homemade pastas either.  I know I'm using free range eggs as well.  Homemade pasta comes in less expensive than the specialty pastas (eg. vegetable, whole wheat).  The neat thing is homemade uncooked pasta can be stored in the refrigerator for use that week or frozen for later use.


Friday, March 09, 2012

Rotini with Roasted Tomato Basil Seafood Sauce

Michael Smith is my favourite Canadian chefs.  I am particularly fond of his wholesome philosophy of cooking without a recipe using whole foods (aka cooking from scratch).  Being laid up, I have enjoyed watching a bit of Food Network Canada so was quite intrigued by his seafood chowder with dill.  My dill has just been started so I have no fresh to use meaning I have to wait to try that yummy sounding recipe.  What stood out was his comment that anything that swims in water is fair came for a seafood chowder.  I decided to take this ideal a step further to create a roasted tomato basil seafood sauce for pasta.

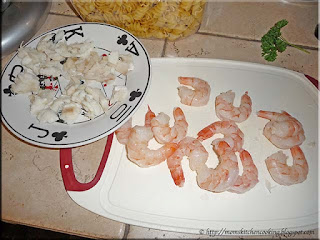
cooked cod and shrimp for the seafood sauce
I really started this recipe with a vague idea of what I wanted the end result to be.  We has recently dined at a local restaurant where I enjoyed spaghetti topped with a seafood blush sauce so that was my inspiration for this dish.  I used cooked seafood in my recipe, focusing on cod, shrimp and crab meat.  The premise was each would add texture and flavour without being overcooked and rubbery.  I used a piece of cod fillet that was about 5 - inches long, simply brought to a boil in salted water and cooked to opaque.  The shrimp was pre-cooked and frozen so all I had to do was thaw, peel and cut into pieces.  It was left over from our holiday celebrations so I wanted to use up some of it.

cooked crab knuckle
The crab knuckle is the joint where the crab legs attach.  It is a nice meaty section ideal for making seafood based soups, salads, dips and chowders.  The meat is not quite as sweet as the legs themselves but there is a lot of it.  One crab knuckle will give a yield of about ¾ cup of prepared crab meat.  The taste difference between using the crab knuckle even cooked from frozen when compared to store bought canned crab meat is far superior!

Method for cooking:  Pour about 3 cups of water into a small sauce pan.  Season with about a teaspoon of salt.  Bring the water to a boil then put the frozen crab knuckle into the water.  Allow to cook until the meat is opaque.  Remove the knuckle from the water with a slotted spoon and allow to drain before preparing.

peeled crab knuckle
The crab knuckle yields a nice sized piece of crab meat that has a lovely flavour.  Now doesn't this piece of crab meat from the knuckle look divine?  I was so tempted just to eat is as is but I resisted!

The easiest way to get the meat out of the knuckle is to use a pair of kitchen shears.  Cut horizontally from across the knuckle from narrow end to narrow end.  The meat shell can easily be peeled off leaving the tender, juicy crab meat.  Any remaining crab meat on the knuckle can be removed using the tines of a fork.  Cut the crab meat into bite sized pieces if using for soups, stews or chowder.  If using for dip, shred with the tines of a fork.

rotini with roasted tomato basil seafood sauce
Home canned fire roasted tomato basil sauce formed the base for this seafood blush sauce.  I love basil and quite frankly grow several varieties because there is no such thing as too much basil!  You know that commercial where the lady says "I put the F on everything"?  Well I could say the same thing about basil.  The end result was a yummy, zesty seafood sauce just perfect for topping rotini.  If you notice, I generally do garnish homemade pasta dishes with fresh chopped vegetables that help to add nutrition along with texture.  I also garnished with a little Parmigiano Reggiano (aged over 24 months) and fresh ground pepper for flavour without adding a lot of calories or fat as well as fresh parsley for colour, flavour and digestive properties.

This sauce was a winner hands down!  I think the only thing I would change the next time is to reduce the amount of the roasted tomato basil sauce.  That would allow the seafood flavour to shine through a bit more.  Other than that, it really was an excellent sauce perfect for topping most pastas!

Roasted Tomato Basil Seafood Sauce
recipe by: Garden Gnome

12 jumbo cooked shrimp
1 small cod fillet (or other white fish)
1 crab knuckle

2 c 2% milk
¼ c evaporated 2% milk
1½ c roasted tomato basil sauce
8 oz pk sliced mushrooms
2 tbsp extra virgin olive oil
1 tbsp butter
2 tbsp flour
2 tbsp water or milk
1 tsp

½ small onion
½ small tomato
1 sprig fresh parsley per serving
1 tbsp fresh grated Parmigiano Reggiano
fresh cracked pepper


Cook the cod fillet and crab knuckle in separate small sauce pans and cook until opaque.  Cool, then cut into bite sized pieces.  Sautée the mushrooms in the olive oil and butter mixture.  Drain.  Bring the milks to a simmer then stir in a slurry of flour and water or milk.  Allow to cook until thickened.  Stir in the roasted tomato basil sauce and mushrooms.  Bring to a simmer.  Stir in the shrimp, cod and crab meat.  Remove from heat.  Ladle the sauce over your pasta of choice.  Sprinkle on fresh grated cheese and fresh cracked pepper.  Garnish with fresh chopped onions, tomatoes and sprig of parsley.


Tuesday, February 21, 2012

Preparing for the Week and Pasta with Veggies

Everyone has those weeks that are without doubt going to be a challenge.  The problem is quite often when one of those weeks hit, it is just too tempting to pick up fast food or take-out.  Now that we are settled in from the move, I am back into my cooking and preparing ahead routine.  It is being hindered slightly by my goal to paint every room in the house before May along with distractions like various workers coming in and out.  We are having a fair amount of custom woodworking done in the house and we've had the utilities, pest control, maintenance personnel, painting, volunteering and life in general our days have become very busy.  That means I need to do a bit more preparing ahead for the week.

filled vacuum seal canisters
I have a FoodSaver so use my vacuum seal canisters for short term storage.  They are great for any crispy snack like potato chips (back middle).  What they are really nice for is storing washed, ready to use produce like watermelon (back right), lettuce (back left), celery leaves (middle right), cucumber slices, carrots, broccoli pieces (middle left) and grated cheese.  Most of the vacuum sealed foods pictured will be used for snacking throughout the week although some will be used in salads.  The celery leaves will likely be used for soup as will the broccoli while the watermelon will be used for snacking and maybe breakfast smoothies.

My total prep time was 15 minutes on the weekend.  Vacuum sealing will keep the produce fresh, ready to use for over a week but all of this will be used up before the weekend.  If you notice three of the containers have different lids.  That's because the are actually Rival Seal-a-Meal canisters not FoodSaver.  I rigged up an adapter to use both.  I vacuum seal smaller amounts of prepared foods in mason jars as well.  This really is homemade convenience.

pasta with veggies
Canada's Food Guide recommends 4 to 6 servings of fruits and vegetables depending on their age, 7 to 8 servings for teens depending on gender, 7 to 10 servings for those 19 to 50 depending on gender and 7 for those over the age of 51.  The thing is a serving size is not as big as you think.  A serving of fresh vegetables is only 125 ml (½ cup)  so it doesn't take a lot of vegetables to meet which is something to keep in mind from a frugal perspective.

I made a pasta with veggies for dinner.  It was a healthy, meat free entrée that when served with a small garden salad would meet half or a little more of my daily fruits and vegetable requirements for the day.  We are big fruit and vegetable lovers here so fresh vegetables find their way into almost every meal.  Pasta with veggies is just so easy and quick to make.  While the pasta is cooking I warm the roasted tomato sauce and prepare any vegetables needed.  Then I drain the pasta, top with sauce, sprinkle with fresh grated Parmesan cheese (protein) and chopped vegetables then add a sprig of basil from my indoor (winter) or outdoor (growing season) garden. 

custom made drink tables
I wanted to share our custom made drink tables for the games room since I mentioned them when talking about Superbowl entertaining.  One of our friends is a very talented woodworker.  He is doing a lot of custom woodworking in the house for us.

We needed something a bit more functional than the standard wood TV trays.  Drinks and snacks can easily get knocked over and more so when you have a crowd of 20 to 3o or more.  Our friend made us these custom made drink tables.  They are on wheels.  Each triangular shape can be used individually or I can put them together in an hexagon or put them in line fashion.  They were expensive at $125 each but they are solid wood and custom made to our specifications.  Since we do a lot of entertaining and I prefer not dealing with cleaning up spills, these tables were a frugal option for us.  They help a lot in me being able to focus on the food coming out from the kitchen without worry about my floors (laminate/ceramic tile) in the games room being damaged, slip and fall accidents from spilled drinks and everyone loves them.  I have to tell you, they are one of the ultimates for entertaining!


Friday, January 20, 2012

Spaghetti with Broccoli-Garlic Sauce

I have been looking for heart healthy, lower cholesterol meals so was quite pleased to find a copy of Weight Watcher's Smart Choices Recipe Collection( 1992) at the local thrift store for 25¢.  This binder style cookbook is chock full of delicious recipes all meeting the Weight Watcher's guidelines for losing weight.  Each recipe has a beautiful colour photograph along with the nutritional information per serving.  At the back of the binder, the previous owner added in several pages from McCall's Cooking School which is a nice bonus!

Neither of us are watching our weight or on any type of diet restriction but we do try to eat mainly healthy, home cooked meals.  There is room to improve our diets though.  Our biggest culinary vices are larger portions of red meat, cheese and butter.  We have been reducing the portion size of red meat as well as having a meatless dinner once a week and fish at least once a week.  Butter adds a lot of flavour and it is only used in cooking for that purpose.  We very, very seldom use butter as a spread.   The cheeses remain a vice but we are cutting back on them as well.   Offsetting our vices is our tendency to eat a lot of vegetables including some type of salad with dinner and often just a salad for lunch.  We very seldom indulge in desserts and for the most part our snacks tend to be healthy (eg. popcorn, nuts, fruits).  That being said, a recipe book full of delicious, healthy and low cholesterol recipes is certainly a welcomed addition to my recipe book collection.

spaghetti with broccoli garlic sauce
One of the first things I do with any new or new to me cookbook is browse through it from cover to cover tagging recipes I want to try with post-it-note.  I doubt I have a recipe book without tags!  I was always very particular about never writing or highlighting in my post-secondary textbooks most of which I still have but take the opposite approach with my cookbooks.  I do record any changes I made, whether we liked the recipe and anything thing I would do different the next time.  Browsing through the Smart Choices Recipe Collection I came across a recipe called linguine with broccoli-garlic sauce (Pp. 28) that had wonderful eye appeal.  I took that healthy meal idea then personalized it into a very tasty, easy to prepare spaghetti with broccoli-garlic sauce.  My version uses butter for the added flavour but I reduced the amount of Parmesan cheese and used home canned defatted turkey stock so the total dietary cholesterol in my version was just slightly lower than the 32 mg even though I used a little butter.

Spaghetti with Broccoli-Garlic Sauce
recipe by:  Garden Gnome

2 c chopped broccoli florets
½ small red onion
¼ small red bell pepper
3 cloves garlic
½ c defatted turkey stock
1tbsp cornstarch
2 tbsp butter
1 tbsp extra virgin olive oil
pinch fresh ground pepper
2 tbsp fresh ground Parmesan cheese
½ tsp dried parsley flakes
6 oz dry spaghetti (about 1/3 of a 450 g package)*

Bring a large saucepan with salted water to a boil.  Add pasta and cook until al dente.   While the pasta is cooking, mince garlic cloves and chop vegetables.  Heat oil and butter in non-stick, ceramic coated fry pan.  Add garlic and heat through.  Stir in vegetables, cooking until the broccoli is a bright green.  Stir in the turkey stock.  Make a slurry with water or stock and the cornstarch.  Stir the slurry into the vegetable mixture cooking just to thicken.  Remove from heat.  Drain the spaghetti.  Place the spaghetti on plates for serving.  Top with the broccoli-garlic sauce.  Sprinkle pepper and parsley flakes on top of the sauce.  Garnish with the Parmesan cheese.

*Note:  I used about half of a 450 g (about 16 oz) package and cooked extra specifically for planned pasta leftovers.