My photo
Ontario, Canada
I am a wife, mother and grandma who enjoys the many aspects of homemaking. A variety of interests and hobbies combined with travel keep me active. They reflect the importance of family, friends, home and good food.
Cook ingredients that you are used to cooking by other techniques, such as fish, chicken, or hamburgers. In other words be comfortable with the ingredients you are using.
--Bobby Flay

For Your Information

Please watch this area for important information like updates, food recalls, polls, contests, coupons, and freebies.
  • [March 19, 2020] - Effective Mar 17, this blog will no longer accept advertising. The reason is very simple. If I like a product, I will promote it without compensation. If I don't like a product, I will have no problem saying so.
  • [March 17, 2020] - A return to blogging! Stay tuned for new tips, resources and all things food related.
  • [February 1, 2016] - An interesting report on why you should always choose organic tea verses non-organic: Toxic Tea (pdf format)
  • Sticky Post - Warning: 4ever Recap reusable canning lids. The reports are growing daily of these lids losing their seal during storage. Some have lost their entire season's worth of canning to these seal failures! [Update: 4ever Recap appears to be out of business.]

Popular Posts

Showing posts with label low fat. Show all posts

Saturday, February 01, 2014

Italian Venison Fusilli

My husband spent a week in November at hunt camp in the Muskoka Region of Ontario.  A fun time was had by all!  They got two doe that were cleaned, cut and wrapped before they left.  Everyone brought home a bit of venison, a much welcomed addition in our freezer.  Venison is a rich, flavourful red meat that can be used in place of beef for most dishes.  It is a healthier option, well for those counting calories.  Venison is lower in calories (102 cal/3 oz), lower in sodium (42 mg/3 oz), lower in fat (2.8 g/3 oz) and lower in cholesterol (72 mg/3 oz) than beef (3 oz: 162 cal, 56 mg sodium, 5.8 g fat, 76 mg cholesterol).  It is, however, lower in protein at 19.2 g per 3 oz verses 25.8 g per 2 oz of beef.  Venison should be served hot because what fat there is has a slightly unpleasant mouth feel when cold.  For that reason, venison is often cooked with pork fat.
  

Italian venison sauce cooking
I used home canned Italian Garden Sauce with Mushrooms to make a delicious venison sauce for pasta.  This is a must have staple sauce in our pantry, one I created a couple of years ago then tweaked in small batches until it met my specifications. 

I lightly seared the venison pieces then poured in a 750 ml jar of Italian garden sauce with mushrooms.  I brought the mixture to a boil then reduced to a simmer.  I let the mixture simmer until the venison pieces were cooked through and tender.  While the venison sauce was simmering I cooked tri-colour fusilli to al dente then drained.

Italian Venison Fusilli
I topped the tri-colour fusilli with a generous scoop of the venison sauce along with fresh grape tomatoes, green peppers and chopped onions for Italian Venison Fusilli.  This entrée was low calorie and low fat, yet tasty and filling. 

A serving size of tri-colour fusilli is 2 oz dry which gives a yield of 255 g/9 oz cooked [210 cal. 7 g protein, 41 g carbohydrates, 25 mg sodium, 2 g fiber, 1 g fat, 0 mg cholesterol].  Plain wheat fusilli does not have any fiber so the tri-colour is a healthier choice as is whole wheat fusilli.  If counting calories, it is best to weight out the cooked pasta for the proper serving size.  I often add fresh vegetables over pasta sauces.  They add a nice texture, complimenting the flavour of a wide variety of sauces while adding extra nutrition. 


Sunday, June 16, 2013

Grilled Peameal Bacon

Boneless pork loin is a good budget stretching meat as not only is it lower price per pound, it is a very versatile meat that can be used fresh or cured.  Last week I shared how I prepare a boneless pork loin at our vacation home.  Half is cured for peameal bacon, our must have taste of home while the other half is sliced into thick chop for grilling.  If need be, the chops can be cut into slices or pieces for other dishes.

grilled peameal bacon
One of the most common questions I get with respect to peameal bacon is "What do you do with it?"  The simple answer is, peameal bacon can be used much the same way you would use a ham.  The texture and flavour differs from ham.  The most common way to use peameal bacon is thin sliced then fried as bacon but it can be cooked other ways.  Thick sliced peameal bacon is quite lovely when grilled. 

I cut the peameal bacon into about three quarters of an inch thick slices.  Thick slices ensure the meat does not become dry while cooking.  I place the peameal bacon slices on a pre-heated medium hot grill.  Once the grill marks form nicely on one side, I turn and grill until the marks form on the other side.  The peameal bacon slices are then ready for serving.  They pair nicely with zucchini and baby carrots, both of which cook quickly on the grill.  Simply cut the zucchini in half lengthwise and brush with olive oil then sprinkle with a little sea salt.  Grill cut side down until grill marks are nicely formed and the squash is tender.  Baby carrots cook quickly in a foil pouch on the grill.  This entire meal can be cooked on the grill in about 20 minutes.  Complete the meal with a tossed salad sprinkled with fresh squeezed lemon juice and sliced watermelon for the perfect low fat and low calorie meal that is sure to please! 


Friday, March 29, 2013

Thoughts on New Lagostina Cookware and Whole Wheat Linguine with Roasted Italian Sauce with Mushrooms

Wednesday morning we picked up our new Lagostina Collezion Pro 12 Elite Series cookware that had finally arrived via rain cheque.  We bought the set at a fantastic 60% off.  The cookware was bought to upgrade our cookware at home while allowing us to take our existing pot set down to our vacation home.  It was also bought with the goal of reducing the number of pots and pans needed to prepare certain dishes.  Instead of searing in a fry pan then transferring to a casserole dish, these pieces will allow us to do everything in one pan, stovetop to oven.  I have to be honest with you, aside of oogling the new cookware and reorganizing the cabinet to accomodate it, I did not use any of the cookware until this morning when I started a pot of navy beans for baked beans as part of our Easter dinner tomorrow.

Lagostina Renaissance
We bought a set of Italian made Lagostina Renaissance pots about 10 years ago.  They still look great and perform quite nicely.  As far as pots go, these are a delight to use with their heavy tri-clad bases that eliminate hot spots.  The handles have faded a bit from going through the dishwasher but they still have the high polish protective coating that keeps them shiny.  The only downside to this particular set, is they cannot be used in the oven due to the handles.  Other than that, they are great performers.  I really would not have thought of replacing them had it not been for our cooking style changing a bit and wanting a better set of pots for our vacation home.

Lagostina Collezione Pro in the box
We got a rain cheque for the Lagostina Collezione Pro cookware the day after the sale flyer came out.  It took almost two weeks for them to arrive.  We chose this set because it is a multi-material set.   Cookware is currently available in aluminum, stainless steel, copper, and cast iron.  A non-stick coating is a popular edition.  If buying non-stick, I highly recommend ceramic over tefalon for safety and durability.  At one time, Pyrex had a line of glass cookware available but there were shattering issues so it was removed from the market.  You can still find it at resale shops and yard sales from time to time.  Each of the cookware materials have pros and cons.  The best cookware is actually a combination of more than one material to give even heat conduction and distribution.  As you cook more, you come to realize to realize certain cookware material gives better results than others.  For example, a good sear is best done in a hot stainless steel pan because a non-stick pan cannot be brought to a high enough temperature for a good sear.  If you are getting creative with cooking, then a matching set like the Lagostina Renaissance is not a good choice unless you don't mind buying specialty pieces.

Lagostina Collezione Pro cookware set
The Collezione Pro cookware consists of two tri-ly clad sauce pans for true even heat distribution (eg. sauces, vegetables, soups), one bi-clad sauté pan with anodized exterior for even heat (eg. braising, searing, flambéeing), one tri-ply copper exterior saucepan (delicate sauces, reducing liquids), one tri-ply copper exterior casserole for precise cooking control and an enamel coated cast iron dutch oven for superior heat retention (eg. soups, stews, casseroles).  All of the cookware have matching lids. All of the cookware can be used on the stovetop and in the oven.  The set comes with a lifetime replacement warranty and if a piece is replaced under that warranty, the replacement piece is also covered by the original warranty.  Of not, the guarantee does not apply to any damage resulting from abuse, misuse, negligence, accidents, improper repair, commercial use or dishwasher.  Needless to say, this cookware will not be going into the dishwasher!

My concern was missing the Dutch oven from my old set.  It will take a bit of getting used to the new cast iron dutch oven.  It is more of a conceptual thing with me because the new Dutch oven doesn't look like it can be used on the stovetop.  I've seen the celebrity chefs using this style on the stovetop and so far this morning, the beans are cooking nicely.  I'll report back on those results shortly.
 
steamer baskets
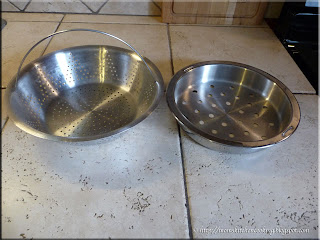
Pots and pans do not always come with everything you want or need.  We do a lot of steaming, often have more than one steamed dish cooking at the same time so really needed steamer baskets.  Our pastaiola came with two steamer baskets, a rather deep one perfect for larger quantities of vegetables or cooking pasta then lifting out for quick draining, and a shallower one (with handle) that fit the Dutch oven of the Renaissance set perfectly.  I kept the steamer basket out of our first rice maker when it quit.  This basket fit the largest saucepan of the Renaissance set perfectly.  Neither of these steamer baskets fit the new Collezion set perfect but they are useable.  The larger one fits down into the new Dutch oven still leaving space between the water level and basket.  The smaller one fits the larger tri-ply clad stainless steel saucepan, sticking up by about a half inch but it will still work.  In the meantime, I will keep checking the resale shops for steamer baskets that might fit a bit better.

whole wheat linguine with roasted Italian sauce and mushrooms
My husband and I really enjoy our pastas!  There are so many varieties of pastas that we just never really tire of it.  We enjoy both dry pasta and fresh made pastas using the Kitchen Aid pasta attachment.  I have been working towards making some of our favourite pasta meals a bit healthier.  All of my tomato based pasta sauces are home canned or homemade from scratch.  While they are rich, full bodied and flavourful, I seldom add salt so they are low sodium.  All have a little olive oil in them which makes the anti-oxidant lycopene more accessible to the body, making them a healthy sauce.  I often top pasta dishes with chopped fresh herbs and vegetables along with a little shredded cheese.  There are now a lot of healthy choices for dried pastas.  Some are made with whole grains while others have vegetables added and some are a combination of both.

Catelli has a line of dry pastas called Healthy Harvest.  I bought a 375g box of their whole wheat linguine that gives 75% of the daily recommended whole grain servings and is a high source of fibre.  It only takes 9 minutes to cook to perfection.  I topped the pasta with home canned roasted Italian sauce with mushrooms, shredded Asiago cheese, chopped green onions and chopped tomato for a lovely, healthy and meatless dinner that was low sodium and low fat.  The entire meal took under 15 minutes to prepare! 

If you have not tried whole wheat pastas, they are well worth the slightly higher price.  I like the whole grain pastas.  They have just a bit  firmer texture than white wheat pastas.  There is a bit more texture, just a slightly noticeable grainy texture.  Whole grain pastas cook up more of a light tan than a pale creamy yellow.  Other than that, whole wheat pastas can substitute in any pasta dish.  This pasta is available in various shapes.  A multi-grain line of pastas is also available from Catelli so you are sure to find one to please.


Wednesday, December 05, 2012

Roasted Beets

I recently posted about a few great deals I got on Ontario produce only a day after returning home from our fall vacation.  No Frills had 10 lb bags of beets, onions, potatoes and carrots on sale for $1.88 each.  When I come across a deal like this, there is no way I am not going to take advantage of it.  I do a lot of home food preservation so it would take me very little time to home can or freeze 40 lb of produce but I have a bit of a system.  I tend to preserve 25% to 50% of this type of deal and use the rest fresh for very inexpensive, frugal meals.  This is a very frugal method for keeping your pantry and freezers well stocked while using fresh produce.

roasted beets
This meal seriously was about as cheap as you can get with the most expensive item being chicken breast baked in homemade shake and bake coating mix.  I baked a couple of potatoes, roasted a couple of beets and steamed carrots all from my frugal Ontario produce purchases.  That isn't sour cream on the potato either, it is homemade yogurt which is lower in fat and calories than sour cream.  It is butter on the steamed carrots.

Roasted beets have a deep rich flavour.  It rather surprising that you don't often see beets served at restaurants given their delicious flavour element combined with very low price.  In fact, even on the food channel, I seldom see them cooking beets.  Anyway, roasting beets is simple.  Scrub the beets well and trim only the top leaving about 2 - inches.  This prevents the beet from bleeding.  Place the whole beets in a baking dish and bake uncovered at 350°F until the beets are tender, about 45 minutes.  Remove from baking dish and let sit 5 minutes.  Trim both ends and slip the skins.  The roasted beets can be halved or sliced for serving.

This was a very simple, frugal meal yet rich in antioxidants, beta carotene and fairly high in tryptophan.  It was low fat as well even though I did add butter to my steamed carrots.  It was very low sodium.  The most important thing though, it was a delicious meal that took almost no effort.  It was low prep, toss in the oven except the carrots that went into the steamer basket.  Not bad if I don't say so myself !


Saturday, August 21, 2010

She Said - Peach Spice Muffins

Earlier this month I announced the Second Annual He Said/She Said Contest.  The focus of this year's contest will be Company's Coming Heart-Friendly Cooking by Jean Paré, one of my favourite cookbook authors.  From now until the end of the month 8 recipes will be posted from this cookbook, four of my husband's choosing and four of mine.  Ontario peaches are in season so I've been busy canning them.  I chose the Peach Spice Muffin recipe as my first She Said contest recipe.

I'm always looking for muffin recipes.  Muffins are so easy to make.  They are great for breakfast or snacks and they travel well so I make  them quite often.  Peaches added to muffins sounded like a wonderful match.  The Peach Spice Muffins have a delightful taste.  They are low fat (1.6 g) and low in sodium (153 g) with 173 calories per muffing.

I made three substitutions in this recipe.  I used unbleached flour instead of all-purpose, home canned peaches instead of store bought and vegetable oil in place of canola oil.

Peach Spice Muffins
source: Jean Paré, Company's Coming Heart-Friendly Cooking, 2003, Pp. 38

1 c all-purpose flour
¾ c whole wheat flour
1 tbsp baking powder
½ tsp ground cinnamon
½ tsp ground ginger
¼ tsp ground allspice
¾ c dark brown sugar, packed

14 oz can peach halves
1 large egg
¾ c buttermilk
⅓ c apple juice
2 tbsp canola oil

Combine the dry ingredients in a large mixing bowl.  Make a well in the centre.  Combine the last 5 ingredients in a separate mixing bowl.  Pour into the well.  Stir until just moistened without overmixing.  Fill greased muffin cup ¾ full.  Bake at 190ºC (375ºF) for 20 to 25 minutes until wooden pick inserted in centre of muffin comes out clean.  Remove from oven.  Let stand in pan 5 minutes before turning out onto wire rack to cool completely.

Yield: 12 muffins


Sunday, June 27, 2010

Chicken with Mango Chutney

Yesterday I wrote about an easy chicken and gravy with rice dinner using boneless, skinless chicken breasts and Thai sweet rice.  This sticky rice is often paired with mango slices then surrounded by coconut milk as a desert.  I decided to take a savory spin on the sweet rice and mango combination by using mango chutney to create an entrée.

chicken with mango chutney
Mango chutney has a deep, warm, spicy flavour with slightly sweet high notes.  It has a chunky texture similar to thick salsa.  It really is delightful!  Mango chutney pairs wonderfully with chicken adding a lot of flavour. 

Pictured is the easy to make chicken with mango chutney.  I cooked the Thai sweet rice in chicken stock while the chicken was cooking.  I seared the chicken on both sides then covered the pan and allowed the chicken to continue cooking on reduced heat until the juices were no longer pink.  This kept the chicken nice and moist.  To serve I placed the chicken on a bed of sweet rice and topped with mango chutney.  It was an easy, low fat yet wonderfully flavoured meal.


Sunday, April 18, 2010

Cheese Lace Salad Bowl

Cheese is one of my favourite foods.  In fact it's more like a food group :) 

making cheese lace
I discovered cheese lace quite some time ago.  It is extremely easy to make and most hard cheeses can be used so there are endless possibilities for flavour.  I used an aged cheddar for the cheese lace bowls.  For a lacier effect you can stir a about 1 tsp flour into the shredded cheese before placing on baking sheet or spread the plain shredded cheese apart more.   Cheese lace can be left as rounds, formed into bowls, formed into smaller cracker sized rounds or broken to be used as a salad topping.  Since most of the oil has been removed, cheese lace is low fat yet packs a lot of flavour.

Method:  Spread shredded cheese in a circle on a Silpat (1).  Bake at 350ºF until melted, edges are golden and centre firming (2).  Carefully transfer the cheese lace to cover the inverted bottom of a glass (3).  If you want a slightly more compact bowl light press the cheese lace closer to the glass as it cools.  Once cooled remove from the glass.  Set on a paper towl and place a wadded up piece of paper towel in the lace bowl to absorb any additional oil (4).  Fill as desired just before serving. 

cheese lace salad bowl
I like using cheese lace bowls as edible salad bowls.  They make such a lovely presentation!  Cheese lace bowls would also be suitable for serving cheese cubes or shorter breadsticks.  If using for salad, do not add any salad dressing until served.

I filled each cheese lace bowl with leaf lettuce, cucumber slices, green onion, green pepper and mushroom slices sprinkled with sunflower seeds.  The salads were topped with  simple vinaigrette then served with grilled Oktoberfest sausages. 


Wednesday, March 10, 2010

Cod with Organic Vegetables (Low Fat)

I use organic growing methods for my gardens so when I buy produce out of season I like to buy certified organic if at all possible. Last weekend one of our kids picked up a basket of organic produce for us from Pfenning's Organic Farm in Baden, Ontario. The basket contained Jona Gold apples, blood oranges, rainbow carrots, blueberries, English cucumber, yellow onions, red leaf lettuce, red potatoes and button mushrooms. The cost for all this great organic produce was $17. In comparison to fruits and vegetables that are not grown using organic methods, this produce is more expensive. However, more grocery stores are now carrying organic produce so as the demand grows, the price will decrease somewhat. Why is buying organic produce important?

organic produceOrganic Produce

Organic growers use no chemical fertilizers, herbicides or fumigants so there are none of these residues remaining in the food. The food is free of toxic chemical and growing organically keeps toxic chemicals out of the air, soil and water. In addition to this, growing organically provides a safer working environment for field workers. Growing and/or buying organic produce is:

  • eco-friendly
  • socially responsible
  • healthiers, free of toxic chemicals
  • supporting sustainable farming practices
In some but not all cases, buying organic produce will cost a bit more. The reason for this is two fold. There is less demand for organic produce. Organic methods are more labour intensive. For example weeds are manually removed when growing organically rather than using a chemical herbicide. Organic farms tend to be smaller with lower yields. In addition to this, organic produce is not always blemish free and perfect looking contrary to what consumers have come to expect. As a result the uninformed consumer doesn't buy organic produce on the basis of looks and cost even though it is a healthier choice.

cod, organic potatoes and carrotsIngredients

Pictured are the organic vegeatables (top) and cod (bottom) used to make an easy, low fat meal. Rainbow carrots are carrots that have been selectively bred to red, purple, yellow and white. Each have their own unique characteristics and flavours. When used as a blend they have a nice eye appeal as well as interesting flavours, quite gourmet. Rainbow carrots can easily be grown in the home garden so this will be one of my new varieties to try growing this year. Red potatoes are always a delight! We love them steamed.

Our butchershop has Highliner brand cod fillets on sale for $5.99 per pound, a $4 per lb savings. We bought 10 fillets which is enough for 2 meals for 2 adults. Cod is a lean white fish with a mild flavour and firm texture that can be baked, steamed, poached, pan fried or coated English style in batter then deep fried. It can also be used in chowders. Cod has 105 calories per 3.5 ounce (about 1 pictured fillet) serving making it a health conscious choice. It is also an economical choice in terms of price. As with all fish, it is important not to over cook cod.

cod with organic vegetablesThe Meal

We coated the cod fillets with Krusto Fish Batter mix then pan fried until just golden. This is a fish coating that can be used dry as we did here or can be made into a batter for deep frying. We steamed the red potatoes and rainbow carrots together. Notice the contrasting colours of the carrots. The bag we got only had yellow and 2 shades of orange carrots so I will be looking for one with both red and white carrots. Adding in a few regular carrots would give a bit more contrast as well. Rounding out the meal was a small spinach side salad making for a healthy, low fat meal.


Tuesday, December 29, 2009

Vegetable Beef and Barley Soup

During the winter months homemade soup is my version of fast food. I can make a lovely, nutritious soup from start to finish completely from the soup bones up in about 50 minutes using one of my pressure cookers and in under 20 minutes if I start with homemade and home canned stock or soup base. Served with homemade bread or biscuits any homemade soup turns into a warm comfort meal on a cold winter's night!

vegetable beef and barley soupVegetable Beef & Barley Soup

As I've previously mentioned many of the meals I make are inspired by an ingredient that caught my eye on one of the many trips I make into the pantry each day. A couple of days I beef soup bones just beckoned to be made into a hearty soup. When I make soup I tend to go with ingredients that inspire me at that time and barley was it for this soup. The vast majority of the non-cream based soups I make are both low fat and low sodium.

I will warn you now that I didn't measure anything for this soup. I started with 2 lg beef soup bones, a stalk of celery, a carrot, small onion and enough water to fill the 4 qt pressure canner ⅔ full. I brought the pressure canner to pressure then reduced the temp just low enough to maintain pressure and let cook 20 minutes. While the stock was cooking, I brought barley and a jar of stewed tomatoes from the pantry then prepared the fresh vegetables (red onion, carrots, mushrooms, tomato) about a handful each. When the stock was finished, I lowered the pressure then removed the bones and cooked vegetables. Beef soup bones have very little fat, usually a nice amount of meat and connective tissue. After pressure cooking the meat will basically fall the bone so I just cut it into bite sized pieces and added it back into the stock. I then added the fresh vegetables, about a cup of barley, a bit of tomato liquid from the stewed tomatoes, a couple of generous spoons of stewed tomatoes, dash of Montréal Steak Seasoning and a couple of splashes of Worcestershire sauce. Then I put the lid back on the pot, brought the pressure cooker to pressure and let cook for 15 minutes. Once the time was up I depressurized the pressure cooker then ladled the soup into bowls and garnished with green onion.


Sunday, December 27, 2009

Cranberry Roast Pork Loin

I very rarely buy foodie magazines although sometimes I am tempted by the food pictures on the front cover. The reason I avoid buying most foodie magazines is there ends up being one or two recipes worth trying but usually difficult to find in the midst of the copious advertisements. Instead, I get 2 free food related magazines that are put out quarterly - What's Cooking (Kraft Canada) and Food & Drink (LCBO, Ontario, Canada). Food & Drink leans towards a bit on the gourmet side but is a very valuable resource for enterainment cooking and cooking with beer, wine or spirits. I recently splurged one year subscriptions to Cook's Country and Cook's Illustrated. What I like about both of these magazines is the absence of advertisements. In addition to several recipes per issue there are great cooking tips and how-tos along with product reviews. These magazines will be a valuable resource in my kitchen!

roasted pork loin with cranberry sauceCranberry Roast Pork Loin

It is easy to get into a cooking rut when you preserve as much food as I do but the same can be said for anyone who keeps a very well stocked pantry. For example, fresh cranberries and commercially canned cranberries go on sale just before Thanksgiving so that is when I stock up. I freeze cranberries to cook fresh later or can as cranberry sauce. The majority of the time cranberries are paired with turkey but there is no reason they couldn't be used in another way, it's just I don't think to do so. So when it comes to cranberries I'm in a bit of a rut.

This month's issue of Cook's Country had a recipe for a roasted pork loin glazed with a cranberry sauce. Pairing cranberry with pork is not something I would have thought of immediately. I modified the recipe to half for a smaller cut of pork loin and I used home canned whole cranberry sauce. I also modified the roasting method. Of interest is the flavour of the cranberries was layered by using 3 forms as spoken about on Food Network Canada. Pictured is the roasted pork loin with the cranberry glaze just out of the oven.

Cranberry Pork Loin
source: modified from Cook's Country, December/January 2010, Pp. 10.

1½ lb pork loin roast
salt and pepper

1½ tsp butter
1 garlic clove, minced
⅓ tsp dried thyme
1 c whole cranberry sauce
¾ c cranberry juice
½ c dried cranberries
1½ tbsp ketchup
1½ tsp Dijon mustard
1 tbsp brown sugar
½ tsp white vinegar

1 tbsp cornstarch

Pre-heat oven to 220ºC/425ºF. Pat roast dry then season with salt and pepper. Score fat on top of roast in ½- inch intervals. Place pork, fat side up in baking pan. Roast 20 minutes. Combine the remaining ingredients except for cornstarch and about 2 tbsp of the cranberry juice. Bring to a low boil over medium-high heat. Reduce heat to medium low and simmer 5 minutes. Mix the remaining cranberry juice with the cornstarch to form a slurry. Slowly pour into the sauce while stirring. Continue to cook and stir until thickened. Spoon the mixture over the pork and continue to roast 20 to 25 minutes or the roast reaches an internal temperature of 63ºC/145ºF. Remove from oven. Let rest 10 minutes before slicing. Spoon sauce over slices for serving. Spoon the rest of the sauce into a serving bowl for passing at the table.

cranberry roast pork servedCranberry Roast Pork Dinner

Pork is considerably leaner than it was years ago due to the way pigs are raised in response to the demand for low fat meat alternatives. As a result the problem becomes keeping pork moist and tender after cooking. An easy way to do this is to use some type of sauce when cooking pork. I tend to use milk based sauces to help tenderize pork or fruit based sweet or savory glazes that add flavour when cooking pork.

The roasted pork smelled wonderful! I served the pork roast with baked Yukon gold and sweet potatoes and home canned green beans from the foodie road trip I made last summer. The meal itself ended up being low fat although that wasn't the original intention when I started putting things together. The cranberry sauce looked gorgeous and had good flavour but unfortunately lacked sparkle. I think it needed a touch of citrus specifically orange to brighten the flavour. The next time I make this I will substitute orange juice for the cranberry juice then garnish with orange zest. The white vinegar really didn't add any flavour so I would be tempted to use Basmatic or red wine vinegar instead. With a bit of tweaking to get that sparkle this will be a lovely cranberry sauce one that I may even can as a ready to use convenience product for the pantry.


Tuesday, December 22, 2009

Souped Up Tomato Soup

A well stocked pantry is always an inspiration for my cooking. I have a large walk-in pantry that I'm in and out of several times most days. Quite often I get a glimpse of something in the pantry that forms the basis for a meal. This is one reason why menu planning with the exception of special events simply does not work for me. At heart I love the creativity of pantry cooking!

souped up tomato soupSouped Up Tomato Soup

I have posted many times about the various foods I can but sometimes how I use them is not always apparent. Since home canned foods play such a huge role in my pantry it only stands to reason that many meals are inspired from home canned foods. A couple of days ago I wanted a quick to prepare meal. Home canned tomato soup caught my eye for dinner but as Canadian Chef Michael Smith would say not any tomato soup, a special tomato soup. Michael Smith shows how to cook without a recipe on on Food Network Canada's Chef at Home. He gets his inspiration from one ingredient then builds from there. This is such a wonderful way to cook!

I started with home canned tomato soup made from scratch using garden fresh ingredients. The taste of this condensed soup beats store bought condensed tomato soup hands down! I decided to build on this soup base to create a souped up tomato soup. I added in home canned mushrooms, corn niblets, broccoli and red onion along with a bit of milk and Rooster Brand Instant Noodles to create a tasty, meatless soup that took less that 15 minutes to prepare. If you recall these are a healthier version of instant noodles than Ramen noodles Rooster Instant Noodles contain 0% fat making this a healthy soup as well.

Method: I heated 2 - 500 ml jars tomato soup then stirred in home canned mushrooms, frozen corn niblets, broccoli pieces and chopped red onion. Once the broccoli was lightly cooked I stirred in 500 ml of whole milk and brought to just a simmer then stirred in ¼ package of Rooster Instant Noodles. Cook 1 minute then ladle into bowls for serving.


Sunday, December 06, 2009

Tuna Croquettes

Food Network Canada is on most days here. I use the shows to get various ideas and learn more about different foods. Alton Brown of Good Eats is one of my favourites because his shows are all about learning all those interesting facts that make being a foodie fun. A few days ago I watched one of his shows that had a segment on tuna. It was very interesting!

Did you know if tuna is labeled as light or chunky is is skip tuna? If it is labeled as white or solid it is Albacore tuna which is a much larger fish than skip tuna. Solid tuna is exactly that, a solid piece of tuna cut from the fish. It is also interesting that james Beard said tuna 'is the one food that tastes better canned". The reason for this is apparent to anyone who home cans and that is because of the high processing time for fish so canned tuna is already well cooked when you open the can.

tuna croquetteTuna Croquettes

During this segment Alton made tuna croquette. I immediately thought that this could be made into a very easy low fat, low sodium and budget stretching meal. I modified his recipe and method a little then served the tuna croquettes with steamed spinach and carrots topped with a little butter and garnished with sesame seeds and a lemon twist.

The meal was good. We were both surprised at the change of flavour in tuna when it is hot. Thinking back this is the first time we have had hot tuna. So if you haven't had hot tuna before be warned it does have a different flavour, not unpleasant just different. There is a fair amount of room for tweaking this recipe.

Tuna Croquettes
modified from recipe courtesy Alton Brown, 2008

12 oz light tuna, drained well
1 green onions, chopped fine
2 teaspoons Dijon mustard
2 large eggs, beaten
1 tsp freshly squeezed lemon juice
¼ tsp sea salt
pinch freshly ground black pepper
¾ cup panko bread crumbs, divided
olive oil

Place ingredients except for last 2 in mixing bowl. Stir in 1/4 cup of the bread crumb. Stir to combine. Divide the mixture into 8 rounds. Set aside on a parchment lined pan. Allow to rest for 15 minutes. Spoon half of the remaining panko over the rounds and pat in. Flip the rounds and repeat to coat all sides. Heat enough olive oil to cover the bottom of a 12-inch sauté pan over medium heat until shimmering. Add the croquettes. Cook 3 minutes on each side or until golden brown. Drain on paper towels. Plate.

Note: Serve with tartar sauce and lemon wedge for an appetizer or vegetable sides as an entré.


Sunday, October 25, 2009

Slow Cooker Pork Loin Chops

The weather has turned extremely ugly here so that means I'm going into hibernation mode. Well not hibernation as in sleeping the entire winter but finding any excuse as to avoid going outside. That translates into filling, homemade comfort meals using meats from the freezer and ingredients from the pantry. Quite often the evening meal is decided on the spur of the moment starting with an idea I got from something I saw in the pantry or freezers. Now this is actually a good thing in many respects because stored foods are getting used up.

pork loin chops thawingPork Loin Chops

When we took the turkey our of the freezer we moved a few packages of meat to the top of the freezer to get used up. This is really important to help rotate the food in the freezer and prevent foods from staying in the freezer too long. One of the packages of meat was pork loin chops. Aren't they gorgeous? I removed the package the night before to start thawing in the refrigerator which is one of the safest ways of thawing meats. Unlike some I very seldom use the microwave oven for defrosting meats. The following morning I moved the pork loin chops to the counter to finish thawing before browning. By then I had decided to take the easy cooking method of using the slow cooker. Now the slow cooker is not one of my favourite appliances but it's so grey outside that my mood change that normally happens in November has already started.

browning the pork loin chopBrowning

One of the things I really dislike about the slow cooker is it does not brown meats and there is no way to brown meats using a slow cooker. Browning meat aka searing involves using a hot pan just to seal in the juices. My preferred fry pan for this is a stainless steel with copper core bottom but for this dish I reached for a non-stick fry pan. The reason being is I did not want to add any fat to this dish as it would be heavy enough.

Browning serves a couple of purposes. First it seals in the juices keeping the meat tender. Second browning adds to both the flavour and colour of the final dish. Browning give a richness and depth to the final dish that can't be achieved by any other method. I browned the pork loin chops before putting them in the slow cooker.

slow cooker pork loin chopsThe Meal

Despite being rich and creamy looking and tasting this meal is actually low fat. I used 4 tins of low sodium condensed mushroom soup mixed with 2 c of skim milk. The pork loin chops where well trimmed too. Then I added about 8 small potatoes cubes, some niblet corn (home froze) and home canned mushrooms. Using a slow cooker for this dish means the sauce doesn't thicken and darken like it does on the stovetop. I thickened the sauce using instant potatoes, stirring in 1 tbsp at a time until I got the right consistency for the sauce. The end result was a very rich yet low fat, low sodium comfort meal perfect for a cold, damp fall evening meal.


Saturday, June 20, 2009

A Fifteen Minute Prep Garlic Shrimp Dinner

The biggest misconceptions when cooking from scratch are that it must be both labour and time intensive. This is this vision of a harried, frustrated homemaker with crying kids straining to cut and chop to get a nice, healthy, cooked from scratch meal on the table. It doesn't need to be that way! It is surprising at how many interesting and tasty meals can be made in 30 minutes or less. In fact there are many meals you can make that only take 15 minutes from start to finish!

garlic shrimpGarlic Shrimp Dinner

One trick for getting quick meals on the table that I've often talked about on this blog is to keep pre-cooked meats in your freezer. When it comes to pre-cooked seafood one of nicest to keep on hand is jumbo shrimp. It is a versatile seafood that can be used as an appetizer, in salads or as the main course meat. This is a case where a little goes a long way too so pre-cooked jumbo shrimp ends up being quite cost effective. If you want to save further on pre-cooked shrimp buy according to the sales cycles. Shrimp tends to go on sale just before the Christmas holiday season and again just before the main grilling season so stock your freezers then.

Pre-cooked shrimp was used for my garlic shrimp meal. This time I prepared spaghetti. As the spaghetti was cooking I removed the tails from the thawed shrimp and set aside. I warmed 3 cloves of minced garlic in ½ c of melted butter allowing the butter to just lightly brown. Then I tossed in the shrimp to warm through and removed from the burner. I diced tomato, red onion and green pepper mixed with balsamic vinaigrette for the side salad and cut straight 8 cucumbers into quarters for the second vegetable side. Then I drained the pasta, mixed with the browned butter shrimp sauce and plated. Fresh parsley from the garden was the garnish. It was a very deliciously simple yet filling meal that took me under 15 minutes to put together.


Saturday, May 09, 2009

Chicken Lettuce Tomato Pita Wraps

One nice thing I like about eating out is the opportunity to discover new dishes. That's what makes being a foodie so much fun! Some of these dishes will be dishes I enjoy enough to try making them at home. Some of them are this is good but I think I could tweak to make it better. Occasionally I come across a dish that I try duplicating and becomes an instant hit with my family.

Years ago I discovered a BLT spinoff at a university pub called a CLT. It was and likely still is one of their most requested dishes yet it is a very simple, home style sandwich. Instead of using a tortilla as a wrap, the sandwich was based on a Greek style pita. The filling consisted simple of boneless, skinless chicken breast strips, iceberg lettuce, tomato and French dressing. The sandwich was pinned together with a toothpick then wrapped partially in thin tin foil. These wraps were an instant winner!

chicken lettuce tomato wrapChicken Lettuce Tomato Pita Wrap

When I first started making the CLTs at home, I basically made them the same way as the pub did but it didn't take long before I started experimenting. Pictured is a CLT the way I make them now. They are extremely good and they are very filling!

CLTs are low fat the way I make them as well making this sandwich a nice, healthy choice. Use low or no fat salad dressing and mayo to reduce the fat further. They are a frugal, budget stretching sandwich as well since the focus is on the vegetables not the meat. One chicken breast will be enough meat for two wraps. Use Parmesan cheese for a lot of flavour without using a lot of cheese meaning less fat and cost. Finally if you make your own pitas substitute the fat with applesauce to further reduce the fat.

Method: The filling consists of: strips of lightly seasoned grilled or pan fried boneless, skinless chicken breast; chopped tomato, chopped red onion, leaf lettuce and shredded cheddar or Parmesan cheese. I use steamed homemade Greek style pocketless pitas but you can use store bought. I will be posting how to make pitas sometime this week so watch for that. Steaming the pitas serves two purposes. It warms the pita while making the pita more pliable for folding over the filling without breaking. Once the pita is warmed I spread with a little mayo, add the filling then drizzle just a little homemade vinaigrette over the filling. Then I fold the pita over the filling and secure with a toothpick. Serve with a small side salad.


Wednesday, April 29, 2009

Peameal Bacon Sub

I have often mentioned peameal bacon on this blog. Shortly after posting how to make peameal bacon aka the real Canadian bacon people started asking how to serve this cured meat. This really is a simple meat that can be sliced then pan fried or  baked whole then sliced. The slices can then be served much the same you would serve any other sliced meat. Left over slices can be warmed and used for making peameal bacon on a bun or used in casseroles and quiche.

There really are only two rules when cooking peameal bacon. First do not overcook! This is very important as overcooking will cause the peameal bacon to have a dry texture. It is even more expensive if the peameal bacon has been thin sliced. Pan fried slices should be cooked until just nicely pink with a bit of browning. Second do not season while cooking! Peameal bacon has its own unique flavour that really doesn't need any further seasoning.

peameal bacon subPeameal Bacon Sub

Submarine sandwiches remain a popular choice for lunch. Sub shops allow you to choose your toppings and bun from a standard selection. This is an ideal way to get a sandwich made the way you want it without making it yourself! However the over all cost of the sub shop sandwich is more expensive than homemade. If you like subs, make them at home to take to work or school. Quite often a microwave oven is available at either to warm your sub if you desire.

Peameal bacon can be used to make very tasty, low fat submarine sandwiches. Pictured is one of the peameal subs we enjoyed for lunch a few days ago. Fillings included romaine lettuce, peameal bacon, Swiss cheese, tomatoes, red onions and olives. I put a little mayo on the inside of the buns and used Kraft Signature aged balsamic vinaigrette as the sub dressing.

Submarine buns range in size from 6 inches to 2 feet or longer. There are specialty party sized subs available through some bakeries. The size of homemade sub buns are limited by the width of your oven. At one time sub buns were either white or whole wheat but now there is quite a large variety available. If you make your own the variety is almost endless so do experiment a bit. My basic white bread recipe lends itself nicely to making sub buns. This is a lovely recipe to tweak just a bit for different results especially when it comes to crust enhancers like sesame seeds. Most of the yeast bread recipes in the archives can also be made into sub buns as well.


Tuesday, April 28, 2009

Festive Spring Salad

Despite serving salads almost daily as part of our lunch and dinner few seem to be featured on this blog. Sometimes the entire meal is a salad. This really is an oversight on my part mainly because most of our salads are of the tossed greens variety that really are so simple to make no further explanation is needed. That being said even tossed salads can be interesting and refreshing. I decided to use a spring theme for dinner when the kids and second grandbaby were home for Easter.

festive spring saladFestive Spring Salad

If you look at most salad bars the offerings tend to be iceberg lettuce, tomatoes, cucumbers, onions, imitation bacon bits, croutons and a limited choice of dressings. Larger salad bars also offer a limited choice of prepared salads, cottage cheese, green peppers and sunflower seeds. Some even offer fruits like melon cubes, grapes and strawberries. If you order a garden salad chances are good it comes with tomato, cucumber and onion on a bed of lettuce with a choice of dressing. Salad greens do form the basis of many salads but think outside of the box!

I love playing with colour when it comes to food presentation. The colours in this beautiful spring salad makes your mouth water in expectation. I used an iceberg and leaf lettuce blend for this salad. The toppings included English cucumber slices, red onion slices, shredded carrots, shredded red cabbage, fresh raspberries and walnut pieces. I made a raspberry vinaigrette for the dressing. It was a wonderful taste of spring!

Raspberry Vinaigrette

1 tbsp green onion, chopped
¾ c fresh raspberries
¼ c frozen apple juice concentrate
¼ c raspberry vinegar
1 tbsp Dijon mustard
pinch sea salt
honey to taste

Place all ingredients except honey in blender and puree until smooth. Refrigerate 1 hour before serving. Shake well.

ham dinnerHam Dinner

Putting a quick yet tasty meal together is always easy with quick starts in the freezer and fresh vegetables. I used a package of spiral ham leftovers from the freezer paired with baked potatoes, steamed asparagus, homemade bread & butter pickles and festive garden salad. The steamed asparagus was lightly buttered then garnished with sesame seeds. I like topping potatoes with sour cream or homemade yogurt but other than that the meal was rather low fat.

Ham is one of those meats that a lot of people don't think to freeze yet it is one I like keeping packets in the freezer for quick meals. Ham freezes nicely in a large piece or as slices and cubes. Since the ham is already cooked it can be used simply by thawing for sandwiches and salads or heated as the meat component for a meal. Ham pieces can also be added into soups, casseroles and egg dishes so do keep a few packages in the freezer.


Wednesday, August 27, 2008

Grilled Half Chicken

I've written before about doing your own meat prep not only for freshness but also to save money. When it comes to chicken buy it whole on sale then cut as desired. The method for preparing boneless skinless chicken breasts can be found here. While I can get chicken pieces on sale for as low as 69¢ per pound, whole chicken sales are few and far between with the regular price averaging around $8 for a small chicken. So when a local store held an in store special at the same sized chickens for around the $3.50 range, I had to pick up a few.

We had planned to go boating Sunday but after a very long and productive weekend working on three rooms including the kitchen, we simply were too tired. I had thawed a whole chicken with the plans of using the rotisserie on the grill but then couldn't find the clamps to hold the chicken on the spit. They are in my notorious safe place so may take awhile to find! It was onto plan B of cutting the chicken in half and grilling. It ended up being a good plan as it started raining shortly after we turned off the grill.

First Cuts

The first thing to remember when cutting a whole chicken in half is not to use a knife. What you want to use for best results is kitchen shears. [Oh and never use or let anyone else use your kitchen shears for cutting anything else but food!] Lay the chicken breast up on a cutting board. Make the first cut from the tip of the breastbone clear through to the neck (upper scissors). It will be slightly unequal as far as size of halves but that's fine. Once you have cut through to the neck it is time for what I call the clean-up cuts.

Carefully go around the chicken removing any excess fat (lower scissors) and extra skin. This lowers the fat content but also reduces flare-ups on the grill. The fat and skin can be froze for adding extra flavour when making chicken stock.

Back Cut

Spread the chicken open after the clean-up cuts. Turn the chicken so the bottom end faces you. Using the kitchen shears cut strain up along the vertebrae. Check for any extra trimming that might be needed.

I should note that the recommendation is to have a separate cutting board for poultry. In fact you should have separate cutting boards for vegetables, pork, beef and cheese. Although mine are not colour coded, you can now buy packages of colour coded cutting boards. You will also notice that my cutting board is sitting on a tea towel. This is not my normal practice. It's on the tea towel because the grout has not been sealed yet so believe me I was being extra careful not to get anything on the tile. After the chicken is cut either wash the cutting board and kitchen shears with soapy, bleach water or put in the dishwasher. Wipe down the countertop with an antibacterial solution (5% ethanol, 5% liquid Lysol, 50% vinegar). A bleach solution can be used but it is a respiratory irritant and can damage surfaces as well as materials so should be avoided.

Chicken Halves

Once the chicken is prepped you will have two half chickens. This makes for a lovely presentation regardless of the way it is cooked. At this point a rub or marinade can be used.

I decided to not use a rub or marinade for the chicken halves. Instead I decided on a slower grilling method then finishing with Diana sauce. The best way for grilling half chickens is to use tongs. Place the chicken wing side up on the grill and let cook until there are well defined grill marks. Turn using tongs. Once the chicken is grilled on the other side, pour the desired sauce if using and allow the sauce to caramelize.

Grilled Half Chicken

This meal really falls under the categories of budget stretching and frugal meals cooked on the grill. The chicken cost $3.58 for two with half left over. The zucchini was free with onions and corn being well under 50¢ per serving. So total cost per serving was about $1.40 which accounts for the energy used to cook the meal. It is important to consider the cost of the energy used to prepare meals because that is part of your food costs.

Yep, and there is my onion and zucchini mix sans mushrooms. Sorry but I love zucchini and would eat it daily if I could. Considering I'm working through those lovely zucchini we were gifted with I'm a pretty happy camper. I used Diana Sauce® Gourmet Honey Garlic for the sauce. Niblet corn and a side salad rounded out the meal.


Wednesday, August 13, 2008

Mediterranean Pasta (Vegetarian)

Sunday was cold and nasty with rain on and off most of the day. It stopped raining long enough for me to cook angel hair pasta on the side burner of the grill. By the time we were eating dinner it was raining again! Doing without the normal kitchen amenities stimulates the creative juices.

Mediterranean Pasta

I decided to make a vegetable based pasta dish that was a bit different. Instead of a heavier sauce I tossed the hot angel hair pasta with a Mediterranean salad dressing containing kalamata olives, feta cheese, sundried tomatoes and herbs. Then I topped the pasta with steamed broccoli, fresh red onions, cherry tomatoes and jumbo stuffed olive slices. The olives are the kind bought in the deli section not in jars. The cherry tomatoes are from one of my tomato plants grown in a container. This plant is producing tomatoes faster than we can use them which highlights what I've been saying all along. A lot of produce can be grown in a small space and even in containers.

Mediterranean Pasta

1 454 g (1 lb) package angel hair pasta
1 tbsp olive oil
salt

½ c small broccoli flowerettes, cooked
½ c cherry tomatoes, halved
¼ c red onions, chopped
8 stuffed jumbo olives, sliced
½ c Mediterranean salad dressing with sundried tomatoes

Fill a large sauce pot half full with water. Add olive oil and a good sprinkling of salt. Bring to a boil. Stir in the angel hair pasta. Boil about 5 minutes or until al dente. Drain. Toss the hot pasta with the salad dressing. Plate. Top with vegetables.


Tuesday, April 15, 2008

Popcorn

Popcorn is the all round, ideal snack made popular by movie theaters but a staple of North American life well before that. The only kind of corn that pops is Zea mays everta, a special kind of flint corn. As with all good things methods were developed to automate the popping of corn with the first steam-powered popper developed by Charlie Cretors in 1885. In 1959 ConAgra Foods began marketing JiffyPop® a prepackaged ready to pop corn using an aluminum pan covered with a folded aluminum foil lid that expanded as the corn popped. Enterprising manufactures came out with hot air poppers and finally microwaveable bags however, they have never really replaced the best way to cook popcorn. Pre-packaged ready to pop microwave popcorn has been implicated as a potential health risk, something to consider when there are easier ways to make your favourite snack.

Popcorn is a family favourite here with hot buttered popcorn being the most popular. While I have used many other methods for popping corn, the one I like the best is the Whirley popper pictured here. A Whirley popper is an aluminum pot with a clip on two hinged lid. The centre mechanism is geared so that when you turn the handle the stirring rod extending from the lid to the bottom of the pan turns to prevent burning. Popcorn made in a Whirley popper is tender and crispy. You can make at least twice the amount can be made than in a standard microwave popcorn bag in only three minutes! Who can resist the smell of freshly made, hot popcorn?

Popped

Method: Pour about 2 tbsp of vegetable oil into the pot and add one popping corn kernel. Cover the pot and place over heat on medium. When the kernel pops pour in about 1 cup of popping corn. Cover then turn the crank handle of the Whirley popper until the corn finishes popping. It will be a little stiffer to pop as the pot fills. If you do not have a Whirley popper, gently shake the covered pot until corn finishes popping. Do not allow the corn to scortch or burn as that will ruin the entire batch. Remove from heat. Pour popped corn into large serving bowl. Top with your favourite popcorn topping if desired.

For hot buttered popcorn: Melt about 1/3 c of butter. Slowly pour the butter over the popcorn while gently tossing the popcorn in the bowl. Sprinkle a little salt over top. Gently toss to mix the butter and salt into the popcorn.

Hot & Buttery

Did you know that popcorn is good for you? Plain, air popped corn has only 31 calories and 1.2 g fiber per cup. Oil popped corn has 55 calories and 1.2 g fiber per cup. So if you eat it plain, it is a low calorie, low fat filling snack. But you don't have to eat it plain! As mentioned we like it simple with melted butter and salt. Parmesan cheese sprinkled over hot popcorn is another good topping that packs a lot of flavour without adding a lot of calories. The other day I was doing a little stocking-up shopping and noticed in the spice aisle there were several different varieties of popcorn toppings in shaker bottles!

Be sure to check back as I will be post my tried, true and ever so good recipe for caramel corn next week. This is a must have recipe!

Some fun facts:

  • a kernel that doesn't pop is called an Old Maid
  • during the Depression popcorn sold for 5 to 10 cents per bag making it a luxury item
  • popcorn consumption was three times higher during World War II because sugar was being sent overseas
  • Nebraska and Indiana are the top producers for popping corn
  • six locality claim to be Popcorn Capitol of the World (Valparaiso, Indiana; Van Buren, Indiana; Marion, Ohio; Ridgway, Illinois; Schaller, Iowa; and North Loup, Nebraska)
  • popcorn is the official state snack of Illinois
  • peak sales for home consumption of popcorn is in the fall
  • the number one use for microwave ovens is popping corn; many newer microwave ovens have a popcorn button
  • a kernel of corn can pop 3 feet into the air