My photo
Ontario, Canada
I am a wife, mother and grandma who enjoys the many aspects of homemaking. A variety of interests and hobbies combined with travel keep me active. They reflect the importance of family, friends, home and good food.
Cook ingredients that you are used to cooking by other techniques, such as fish, chicken, or hamburgers. In other words be comfortable with the ingredients you are using.
--Bobby Flay

For Your Information

Please watch this area for important information like updates, food recalls, polls, contests, coupons, and freebies.
  • [March 19, 2020] - Effective Mar 17, this blog will no longer accept advertising. The reason is very simple. If I like a product, I will promote it without compensation. If I don't like a product, I will have no problem saying so.
  • [March 17, 2020] - A return to blogging! Stay tuned for new tips, resources and all things food related.
  • [February 1, 2016] - An interesting report on why you should always choose organic tea verses non-organic: Toxic Tea (pdf format)
  • Sticky Post - Warning: 4ever Recap reusable canning lids. The reports are growing daily of these lids losing their seal during storage. Some have lost their entire season's worth of canning to these seal failures! [Update: 4ever Recap appears to be out of business.]

Popular Posts

Sunday, June 30, 2013

Chipotle Ranch Sliders

It was a great honour to be chosen this year as one of Canada's top online influencers to participate in the Hidden Valley RanchTM Ranchify Recipe Challenge.  This was the perfect excuse to get into the kitchen to do a bit of experimenting with the goal of creating a recipe to enter in the contest.  This year's contest will be judged by Chef Ned Bell, of the Four Seasons YEW Restaurant in Vancouver, British Columbia.

bacon ranch sliders
I honestly had a lot of fun experimenting with the Hidden Valley RanchTM dressings included in my contest kit.  It was really difficult to choose a favourite between the Original, Spicy and Cheese-flavored ranch dressings.  Quite frankly they are all delicious!

Pictured are the Bacon Ranch Sliders submitted for my contest recipe.  These little gems are delicious, packed full of flavour with just the right amount of heat.  They are kicked up a notch from my contest creation stage recipe for bacon ranch sliders.  These mini burgers were a lot of fun to create.  They were declared a winner by my husband.  The Bacon Ranch Sliders are easy to make so I hope your family enjoys them as much as I enjoyed creating them!

Chipotle Ranch Sliders
recipe by:  Garden Gnome, June 2013

For this recipe you will need the following: mini burger buns with sesame seed tops, grilled mini patties, chipotle ranch sauce, fresh salsa, and leaf lettuce.

burger patties
1 lb lean ground beef
3 tbsp cooked crumbled bacon pieces
¼ c Hidden Valley RanchTM spicy dressing
 ½ tsp garlic pepper
8 small squares Asiago cheese

Cook the bacon pieces and drain.  Mix all of the ingredients together.  Divide into 8 equal sized portions.  Form into large meatballs then flatten to form patties.  Place the patties into mini burger grilling rack.  Grill on medium high cooked through, turning once.  Remove top of mini burger grilling rack.  Place a slice of cheese on each burger patty.  Continue grill just until cheese melts.

chipotle ranch sauce
½ c Hidden Valley RanchTM spicy dressing
½ chipolte pepper in adobo sauce
1 tsp chopped red onions
½ tsp chopped garlic
¼ tsp cumin
½ tsp fresh lime juice
½ tsp dried oregano leaves

Place all ingredients except oregano leavesinto blender.  Blend until well mixed.  Transfer the sauce to a small container with lid.  Stir in oregano leaves.

fresh tomato salsa
3 tbsp tomato, seeded and chopped
2 tbsp finely chopped red onions
2 tbsp chopped yellow pepper
1 tsp fresh parsley, chopped
2 tsp fresh lime juice

Mix together.

Assembly of Chipotle Ranch Sliders
Toast the buns until golden brown.  Place a circle of leaf lettuce on the bottom half of the bun.  Place a cheese topped mini burger patty on top.  Spoon about a teaspoon of Chipotle ranch dressing over the patty then top with fresh tomato salsa.  Place the top half of the bun on the burger. 


Saturday, June 29, 2013

Have a Wing Night

Chicken wings have been a long time favourite pub grub fare.  Traditionally, cheap wing night was held on Tuesday nights but that varied from pub to pub.  The going price was 10¢ per wing several years ago but now that has more than tripled to 35¢ per wing.  Still, even at the higher price it is still a cheap at only $3.50 for 10 wings.  Wings tend to come naked (no coating) or breaded, sauced or sauce on the side and a choice of usually mild, hot or suicide sauce although new and exciting sauces like chili lime and honey garlic are quickly becoming popular.  We love chicken wings so get together with the guys quite often on Tuesday nights to enjoy wings at one of our favourite bars.  Wing nights are fun because the focus is on the wings, with wings making up most or all of the meal.  It's quite common to order a big plate of wings and a drink.  That's it!  The price of drinks greatly increases the cost of the meal as does ordering a side salad as I like to do.  The biggest complaint I have with this particular bar and their wings is the lack of consistency.  One week the wings will be large and nicely cooked, the next week the wings will be small and over cooked.  The sauces are never the same!  Seriously, how difficult can it be to make the same honey garlic sauce the same way so it tastes the same from week to week?  At any rate, the place remains popular with the guys because it is the only place in town with a wing night.

coating the chicken wings
I decided to experiment with chicken wings as a potential candidate recipe for my Hidden Valley RanchTM Ranchify Recipe Challenge. I've tried naked and coated wings.  Coating in the pubs tends to be more on the thicker breaded side.  Quite frankly, I am not a huge fan of anything breaded but when it comes to wings, some type of coating helps make the sauce stick better.

I started with 16 large chicken wings then removed the tips and cut at the joint for 32 pieces.  I used a light breading mixture consisting of 1 c organic unbleached flour, ½ c homemade breadcrumbs and seasonings.  I placed this in a large container, mixed well then added the wings to coat.  The easiest way to coat the wings I found is to lightly shake the container then let sit for five minutes and shake again.

chicken wings in the deep fryer
I left the coated wings in the container until ready for frying.  I heated the deep fryer to 356°F then fried the chicken wings in small batches until golden brow, about 7 minutes.  It took three batches to fry the 32 wings.  Once the wings were fried, I drained them then set aside for the various sauces I was testing.

I used  ½ c of each sauce in separate bowls then divided the cooked wings into four equal amounts (8 pieces per sauce).  I added each portion of the cooked wings to the respective sauces then used a slight flipping motion to coat the wings well with the sauce.  I used tongs to remove the wings to be plated for serving.

chicken wings with sauces
I made four varieties of chicken wings.  Three were ranch based creation stage recipes for the contest, the last was Sweet Baby Ray's.  Of the four versions, bottom left with garnish and the Sweet Baby Ray's were definite keepers.  Watch for the creation stage recipe to be posted.

The beauty of using the light breading method for homemade chicken wings is virtually any sauce desired can be used.  They are good left without sauce then sauce on the side for dipping as well.  You can experiment with the seasonings added to the flour and breadcrumb mixture as well so the possibilities are endless! 

The homemade chicken wings came in at 37¢ each but the wings were quite large.  Chicken wings seldom go on sale here so that price likely won't change much.  However, drinks and salad were a lot cheaper at home.  This is really a quick and easy meal as the sides can be kept quite simple.  It is a sure to please meal as well since each family member can choose their own sauce or just mix and match.  Having a wing night is a fun activity the whole family will enjoy!


Friday, June 28, 2013

Jello Shooters

Today marks the start of the Canada Day (July 1) celebrations.  This weekend will be filled with outdoor gatherings, pool parties, camping, fireworks and just plain old summertime fun.  In preparation for a late evening house party we were invited to this weekend I made jello shooters at the request of the host.  The grill will be fired up and as long as the rain holds off the party will meander into the wee hours of the morning.  

jello shooter ingredients
Jello shooters are rather popular with younger adults but they tend to go over well at summer house parties, pool parties, stag & doe parties, and sitting around the campfire.  Quite often jello shooters are sold at a stag & doe to raise money for the engaged couple.  Traditionally, jello shooters are made with some type of liquor, usually vodka as it doesn't conflict with the flavour of the jello.   However, just about any liquor can be used.  Non-alcoholic versions can be made as well.

The ingredients for jello shooters are simply jello, liquor, water and/or alternative liquid.  The jello shooter cups (clear plastic or waxed condiment cups) can be found at party stores as well as at some dollar and box stores.  They are usually sold in a package of 24.  I personally prefer the clear plastic cups for appearance but the paper cups are popular as the jello shooter can easily be squished into the mouth.

jello shooters prepared for refrigerator
I made two kinds of jello shooters, both alcoholic so not for minors.   Here is how I made them.  I've included a non-alcoholic jello shooter recipes below the two alcoholic ones for the younger ones at the party or for those who choose not to imbibe.  Jello shooters need to be supported while setting.  I fill each cup individually then place onto a baking sheet and place in the refrigerator to set.  Once set the jello shooters can be placed on a serving tray.

Vodka Jello Shooters
1 box orange jello (or flavour of choice)
1 c boiling water
1 c vodka

Bring the water to to a boil.  Pour into large measuring cup.  Stir in jello until the gelatin has dissolved.  Allow to cool until luke warm.  Stir in the vodka.  Carefully pour into jello shooter cups.  Chill until set.

Rum & Coke Jello Shooters
2 boxes cherry jello
1 c boiling cola
1 c cold cola
1 c rum

Bring 1 c of cola just to a boil.  Pour into large measuring cup.  Stir in both packages of jello.  Stir until the gelatin has dissolved.  Stir in the rum.  Lightly stir in the cold cola.  Carefully pour into jello shooter cups.  Chill until set.

Non-Alcoholic Jello Shooters
1 box jello flavour of choice
1 c boiling water
1 c club soda or ginger ale

Bring water to boil.  Pour into large measuring cup.  Stir in jello until gelatin has dissolved.  Allow to cool until luke warm.  Pour in the club soda or ginger ale then just lightly stir.  Carefully pour into jello shooter cups.  Chill until set.

jello shooters ready to serve
Pictured are a couple of the rum & coke and vodka jello shooters I made.  Jello shooters are rather pretty with a jewel-like sparkle and the consistency of jello.  Be warned though that those made with alcohol are potent.  They should be enjoyed responsibly.  Jello shooters whether alcoholic or non-alcoholic made with soda are a taste bud sensation!  The soda gives a tingling, very slight almost but not quite burn that is quite pleasant.

Jello shooters can be served simply on a serving tray without garnish.   They should be kept chilled until serving.  I make 2 per guest which is usually enough with a few left over. 


Thursday, June 27, 2013

Kitchen Quick Tips - Storing Block Cheese

kitchen quick tips Wrap block cheese in cheese paper or parchment paper, then place the wrapped cheese in a plastic zipper storage bag or container and refrigerate in the warmest part of the fridge (eg. cheese drawer).


Tuesday, June 25, 2013

Bacon Ranch Sliders - Creation Stage Recipe

Ladies and gentlemen, I am pleased to say I was selected as one of Canada's top online influencers to participate in this years Hidden Valley RanchTM Ranchify Recipe Challenge.  This is the second year running for me.  Last year's entry for the Hidden Valley RanchTM Recipe Challenge was Grilled Zucchini Boats.  Although it was not a winning entry, it is still a very good recipe perfect for summer time grilling.  This year only one recipe can be submitted so I've been busy working on a few to narrow down my choice.  The deadline is July 1st at 12 AM.  The recipes will be judged by Chef Ned Bell.

bacon ranch patties in grilling rackNote:  This is a recipe in the creation stages with the goal of a possible entry into a contest.  No creation stage recipe will be posted here however, the final recipe may appear here after the entry deadline closes so please check back. 

Mini burgers aka sliders have become rather popular so I decided to create slider recipe, more specifically a bacon ranch slider recipe.  I started with hormone free, grass fed lean ground beef to ensure a high quality burger pattie.  While I won't disclose all the ingredients that went into the patties, I will tell you that I used no fillers (eg. bread crumbs) so they are all beef patties and I used Hidden Valley RanchTM Spicy Creamy Dressing & Dip as an ingredient.  Additional ingredients and a spin on the patties remain a secret for now but don't worry as I will tell you what I did in the final version after the contest closes.

I shaped the prepared meat mixture into large meatballs then flattened to fit into the mini burger grilling rack.  This helped me keep the burger patties uniform shaped while making it easier to grill.  The grill rack is made by Cuisinart but other brands are available.  These can be found in the grilling section wherever outdoor grills are sold.

mini sesame seed burger buns
Sensations is a Sobey's brand.  We no longer have a Sobey's close by but during one of my recent travels I found one.  Sobey's tends to have a few extras that No Frills doesn't.  Anyway, I spotted these cute mini burger buns with sesame seed tops. I thought they would be perfect for my contest creation stage recipe

Buns plan an important role in any burger.  I chose this bun because it was cute and perfectly shaped so each slider would look the same for presentation.  Each bun measures about 2½ - inches in diameter and about 1½ - inches combined thickness.  A package of 12 cost $2.79 so they are a bit pricer than regular burger buns.  I was after a particular look for this contest creation stage recipe with the full intentions of substituting a homemade bun for the final recipe.

bacon ranch patties on the grill
Homemade burger patties should not look like those used in fast food restaurants.  There are burger presses on the market that will allow you to make your own burger patties, uniformly shaped and perfect for freezing but honestly, hand shaped gives a nicer homemade touch.  A grilling rack simply keeps the smaller burgers in one piece while grilling, making them easier to turn.

I sprayed the inside of the rings with cooking oil in a health mister help prevent the patties from sticking.  I grilled the patties on medium high direct heat turning once.  I liked the hash marks the grill rack gave the patties!

bacon ranch sliders
I tested the patties on lightly toasted and toasted buns.  I topped each slider with Asiago cheese and a dollop of ketchup - simple and easy.  The end result was quite delicious!  The patties were nicely flavoured, tender and juicy.  I immediately knew I was heading in the right direction with this recipe!

Regardless of the initial success that my husband declared a winner, I knew I would have to get a bit more creative if I wanted a winning recipe.  So it was back to the drawing board, armed with a few tweaks to test.  Ketchup was ok but common.  I had something else in mind!  The buns were good and while I liked the texture from toasting, I had plans to kick them up a notch.  I was off on a culinary adventure.  Stay tuned...


Monday, June 24, 2013

Frugal Kitchens 101 - A Foodie Road Trip

Frugal Kitchens 101
The vast majority of our foodie road trips are within a 100 mile (160 km) radius of our home however, when we are in the GTA which is almost double that radius we tend to take advantage of any foodie finds.  I keep a list and have a couple of apps for finding the perfect foodie stops when traveling.  This past weekend we spent in Niagara Falls were one of our kids completed a half marathon of 22 km (13.1 miles).  That in itself was an amazing event to attend!  Prior to the marathon, the focus for her was on high protein intake but for the rest of us it was business as usual.  The marathon was in the morning so after resting for the afternoon, we enjoyed a 5 course gourmet dinner, chef's choice at Vineland Estates Winery.  That in itself will be the subject of a couple of blog posts!  My husband and I took our time coming home making several stops so we arrived home with purchases from Vineland, Dillon's Small Batch Distillery, Oak Manor, as well as rye whiskey (made with rye grain not corn), grape based vodka, grape based gin, strawberries, raspberries, peas, plain honey, blueberry honey and 92% raw cocoa with pure maple syrup.  All of our purchases were grown and produced in Canada. 

The Niagara area is rich in vineyards, producing some of the finest award winning wines there are.  The sad reality is on 20% of wines produced in Ontario are carried in the LCBO, the only place to buy wine for home use outside of the wineries.  As a Canadian I do feel this is wrong!  The LCBO owned by the provincial government and funded by our tax dollars should be supporting our locally produced wines considerably more than what they are.  The Niagara region is the place to go for superior quality grape juice as well as peaches, strawberries, and other Ontario produce.  It is a mecca of farm fresh produce stands, farm markets and wine market stores all set in the beautiful and picturesque landscape.  There are also microbreweries and distilleries in the Niagara region.

Unless I am making a specific foodie road trip where the focus is only on food, most of our road trips involve some type of food, more often than not bring home one or more foodie finds.  What we generally look for is foods grown and produced in that particular area.  We have several resources for finding these great gems!  Here are a few:

  • Foodland Ontario signs - Foodland Ontario is the long-established consumer promotional program of the Ontario Ministry of Agriculture, Food and Rural Affairs.   Growers and producers as well as Ontario produce sold in grocery stores are identified by the familiar Foodland Ontario green and white logo.  This helps to distinguish farm markets selling Ontario produce from those that may be selling imported produce although generally that is not a big problem.  Farmland Ontario also has free publications located at various retail outlets and farm markets throughout Ontario as well as a wealth of consumer information on their website. 
  • apps -  Apps for iPad, iPhone and Android are available for finding restaurants, wineries, food trucks and various food stops of interest in Ontario.  Some are free while other cost a small amount.  Street Food Toronto is a great free app for finding all types of food stands in the GTA complete with locations, hours of operation and contact information.  Ontario Natural Food Co-op is another great free app to help find natural and organic food growers and producers.  This is really a must have app for foodie road trips!
  • social media - A lot of food vendors, growers and producers are turning to Twitter and Facebook.  I follow several on both.  The nice thing about using social media is you can easily contact them directly, often getting a response within minutes and all from the comforts of your smartphone or tablet.
  • GPS - A GPS either stand alone or as a smartphone app is quite useful for finding those out of the way foodie gems that may be difficult to find using only a road map.  
  • word of mouth - Honestly this can be one of the best ways to find a foodie gem.  Before leaving the Niagara region our daughter texted for us to check out Dillon's which is a new small batch brewery on a service road off of Highway 403.  The thing is from the road, it looks nothing more than a large storage building and really not all that large, something we certainly would not have been looking for.  We found it only because of her.  That is the way with a lot of foodie finds much the same way I will tell someone if you want great local honey go down this road, turn right at the white house with the green shutters, go down to fourth house on right and turn in their driveway then drive up to garage where you will see the honey for sale sign on the garage side door.  There's no signage on a regular basis at the road but rather it is available when they are there.


Friday, June 21, 2013

Grilled Corn on the Cob

Summer time fun goes hand-in-hand with outdoor living!  For many, including us that means spending a lot of time with family and friends.  Keeping the food prep and clean-up is always appreciated but more so for summer meals 

grilled corn on the cob ready to be husked
Grilled corn on the cob is delightful!  It develops a lovely flavour with just a hint of smokiness to accent the sweetness of the corn.  This really is an easy way to cook corn without having to heat a huge pot of boiling water.  Be warned that corn on the cob can take up a significant amount of grill real estate so plan accordingly.

Of note, corn is prone to European corn borers and corn beetles.  Corn borers as their name implies bore into the corn.  These greyish white worm-like pests can be flicked out of the kernels with the tip of a knife then cut the affected kernels off.   Genetically modified corn (Bt corn) has be transgenetically altered to include a gene from Bacillus thuringiensis ssp. kurstaki to produce a toxin to kill off the corn borer.  This corn while beautiful looking and damage-free from the corn borer should be avoided as evidence is now coming out that the gene remains active in the human gut causing gastro-intestinal problems (eg. leaky gut, IBS, and etc).  Corn beetles are sometimes found around the silk end of the cob.  They can easily be brushed off.

Method:  Soak the corn in the husk for 15 minutes.  Remove from the water and place on hot grill.  Grill for 30 minutes turning to cook evenly.  The husks will get quite charred.  Hold the cob of corn with an oven mitt then peel back the husk.  The silk will come off easily with the husk.  Serve

grilled corn on the cob husked
Just look at those mouthwatering golden kernels of delicious corn just waiting for a little butter and sea salt!  The grilled corn kernels are plumb, tender and juicy, full of flavour.  The reason being the corn is steamed in its own husks so flavour is not lost  Although this cob of corn did not get any grill marks on it, sometimes there are.

Grilled corn on the cob is one of our favourite sides with grilled steak and foil wrapped potatoes.  However, grilled corn on the cob need not be reserved for summer meals.  We have been known to grill up a couple of dozen ears of corn to enjoy around the campfire as a snack.   There's no need to fire up the grill either when the corn can be grilled right on the campfire!  Hmm, I think a camping trip this summer is in order...


Thursday, June 20, 2013

Kitchen Quick Tips - Storing Nuts

kitchen quick tipsVacuum seal nuts in mason jars then store in the freezer to keep them fresh until needed.  This will prevent the nut oils from becoming rancid.


Tuesday, June 18, 2013

Grilled Stuffed Mushrooms

We love our mushrooms!  Mushrooms are quite versatile as they can be eaten raw or cooked, and they can be cooked in a variety of ways.  My preference is to buy mushrooms directly from one of the local mushroom farms especially for canning, freezing or bulk cooking.  However, a fair share of the mushrooms we buy also come from the grocery store.  When buying from either source there is the option to get larger stuffing mushrooms, one of our favourite ways to enjoy as an appetizer.

grilled
Large mushrooms (aka stuffers) can be stuffed with a fruit or vegetable mixture, bread stuffing, escargot, or a seafood mixture.  The possibilities are almost endless.  Stuffed mushrooms are delicious but grilled stuffed mushrooms are divine!  Grilling adds a hint of smokiness to the grilled stuffed mushrooms that can't be duplicated in the oven. 

I made grilled stuffed mushrooms as an appetizer at our vacation home.  The stuffing was simply cubed bread with a little butter, sea salt, pepper, finely chopped onions and homemade poultry seasoning.  I mixed the bread cubes with the butter and seasonings then formed into generous sized balls to fit inside the cap of each mushroom.  I placed the stuffed mushrooms into a foil baking dish then topped with shredded mozzarella cheese.  The stuffed mushrooms were cooked on indirect medium heat on the grill until the cheese was bubbly with golden brown highlights.  The grilled stuffed mushrooms delicious and ever so easy to make, perfect as an appetizer!


Monday, June 17, 2013

Frugal Kitchens 101 - Shopping at Road Side Stands

Frugal Kitchens 101
This is the time in beautiful Ontario, Canada when road side stands selling produce, honey, baked goods, jams, jellies and even fish appear in abundance.  These road side stands generally will operate for the length of the season of whatever produce they are selling.  This means some will pop up for just the strawberry season (about 11 days) while others will run until late September adding produce as it becomes available.  Road side stand hours are hit and miss so it is common to come across one closed during the day or only open for a short period of time during the day and evening hours.  Most road side stands are family operated extensions of their larger home gardens or small farms so everything works around their life events.  Some of these stands are not manned but rather produce is sold on the honour system.  Of note, it is common for road side stands to specify 'so Sunday sales'. 

I normally make a circular route when making a road trip to stop at specific road side stands that usually involves stops at the mushroom farm and/or orchards and farm markets.  Other times I simply stop when en route to do other errands.  I never leave home with the expectation that any of my favourite road side stands will be open.  My experience has been that shopping the road side stands call for a different style of preparation.  Here are a few things I do to prep:

  • pre-planning - Spur of the moment stops to buy a small quantity of a particular fruit or vegetable for dinner doesn't really require pre-planning but road trips with the specific goal of getting larger quantities of fruits or vegetables for preserving require a bit of pre-planning.  The reason being, foods being preserved need to be the freshest and highest quality possible.  Timing becomes critical in that the soon the produce is processed the better.  That means before buying larger quantities I need to have all the necessary supporting ingredients (eg. sugar, salt, other fruits or vegetables, vinegar, etc) and equipment (eg. canning jars, canning lids, freezer bags or containers, etc) on hand and ready to use as soon as I get back with the produce.  I also need to limit my purchases to what I can comfortably process within 24 hours or less.  Bringing home two hampers of green beans even if they are a bargain price is not a bargain if a good portion spoils because I can't comfortably process them.
  • location - The vast majority of fruits and vegetables I purchase for processing comes from road side stands within a 25 km (16 mile) radius of our home or less.  If I know we will be in another location visiting (eg. in the GTA), I do a bit of research for planned foodie stops some of which include road side stands.  The stops are en route or short side trips from where we are visiting.
  • timing - Produce allowed to sit in the hot sun will be lower quality than fresh picked.  In general, I prefer to stop at road side stands as early in the morning as possible which usually coincides with when the produce was picked. 
  • bags/baskets/bins - Many road side stands are quite limited with respect to bags to cart your purchases home in.  I keep a good supply of reusable bags, a couple of larger baskets and a couple of plastic grocery totes in the trunk of the car as well as a similar set-up for the truck.  I often bring along a couple of empty produce hampers just in case I find a good deal on something I want to preserve.
  • cold storage -  Some road side stand purchases can be sensitive to heat so I have cooler/thermal bags as part of my supplies.  I also bring a picnic cooler on those trips where I may be come across foods that need to be kept cold )eg. fish, cheeses, delicate berries). 


Sunday, June 16, 2013

Grilled Peameal Bacon

Boneless pork loin is a good budget stretching meat as not only is it lower price per pound, it is a very versatile meat that can be used fresh or cured.  Last week I shared how I prepare a boneless pork loin at our vacation home.  Half is cured for peameal bacon, our must have taste of home while the other half is sliced into thick chop for grilling.  If need be, the chops can be cut into slices or pieces for other dishes.

grilled peameal bacon
One of the most common questions I get with respect to peameal bacon is "What do you do with it?"  The simple answer is, peameal bacon can be used much the same way you would use a ham.  The texture and flavour differs from ham.  The most common way to use peameal bacon is thin sliced then fried as bacon but it can be cooked other ways.  Thick sliced peameal bacon is quite lovely when grilled. 

I cut the peameal bacon into about three quarters of an inch thick slices.  Thick slices ensure the meat does not become dry while cooking.  I place the peameal bacon slices on a pre-heated medium hot grill.  Once the grill marks form nicely on one side, I turn and grill until the marks form on the other side.  The peameal bacon slices are then ready for serving.  They pair nicely with zucchini and baby carrots, both of which cook quickly on the grill.  Simply cut the zucchini in half lengthwise and brush with olive oil then sprinkle with a little sea salt.  Grill cut side down until grill marks are nicely formed and the squash is tender.  Baby carrots cook quickly in a foil pouch on the grill.  This entire meal can be cooked on the grill in about 20 minutes.  Complete the meal with a tossed salad sprinkled with fresh squeezed lemon juice and sliced watermelon for the perfect low fat and low calorie meal that is sure to please! 


Saturday, June 15, 2013

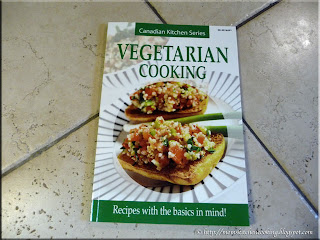
June's Giveaway - Canadian Kitchen Series Vegetarian Cooking

I rather like the idea of hosting a monthly giveaway.  The last two giveaways were successful so will continue with them throughout the summer, perhaps longer.  In the meantime, I hope you enjoy these little freebies!

Canadian Kitchen Series Vegetarian Cooking
As promised, here are the details for June's giveaway.  June's giveaway is a copy of Canadian Kitchen Series Vegetarian Cooking, recipes with the basics in mind!  This is one in a series of eight cookbooks featuring uncomplicated recipes and so much more.  The Canadian Kitchen Series is written and designed in Canada, published by Telegraph Road.  There are some really nice recipes in this book, complete with full page colour pictures!

This giveaway is open to residents of Canada and mainland United States.  Leave a comment with your email on this post.  The giveaway closes on June 30th.  The winner will be notified by email.  In the event the winner does not reply to the email within 48 hours, another winner will be chosen.  Good luck and thanks so much for reading my blog!


Thursday, June 13, 2013

Kitchen Quick Tips - Herb-Infused Oil

kitchen quick tips
Place about a tablespoon of chopped herbs in each ice cube tray well.  Top with extra virgin olive oil and freeze.  Pop one out anytime you need herb-infused oil when cooking.


Wednesday, June 12, 2013

Using the Grill to Cook Mac & Cheese and Nachos

We spent much of May at our vacation home in sunny Florida where it was considerably warmer than at home in beautiful Ontario, Canada.  Warm weather regardless where we are means a stronger reliance on the outdoor grill.  Our outdoor grill at our vacation home is propane only while our main home grill is a dual fuel (charcoal, propane) Nexgrill.  The outdoor grill is considered one of our must have kitchen appliances.  While we use our grills year round, they definitely see an increased use during the warmer summer months.  An outdoor grill can be used not only grilling (short cook time) and barbequing (long cook time), it can also be used very much the same way an oven is used.  It is however, even more versatile as certain foods like some vegetables can be cooked without the use of pots and pans, although a grill pan or mesh tray is nice if cooking smaller pieces.  Other than that, I use the same bakeware I use in the oven. 

using the outdoor grill to cook mac and cheese and nachos
Nachos are incredibly easy and quick to make on the grill if you start with pre-cooked ground beef from the freezer or home canned ground beef, either plain or seasoned.  Pre-heat the grill to medium heat (350°F).  Place the nacho chips on a baking sheet.  Top with browned ground beef and shredded cheese.  Bake on the grill until cheese is nicely melted.  Remove from grill.  Transfer to serving dish.  Top with chopped tomatoes, onions and green peppers or toppings of choice.

Mac & cheese is another very easy dish to prepare on the grill.  Use your favourite recipe, 7 Cheese Mac 'n Cheese, or variation.  I like keeping cooked macaroni on hand for this purpose.  Simply mix with cheese and bake on the top rack on the grill in an oven proof baking dish. 

Bring a bit of extra flavour when cooking dishes like nachos on the grill by using a smoker packet or box.  A small reusable smoker box will cost less than $10 or you can make a simple smoker packet from aluminum foil.  You will need about a quarter cup of wood chips.   Wood chips of sugar maple, apple, hickory, pecan, cherry, mesquite and more are available wherever grilling accessories are sold.  Soak the wood chips in liquid of choice for 30 minutes.  Drain and put them in the smoker box or in the centre of a square of aluminum foil.  Seal the aluminum foil to form a pouch.  Poke a few holes in the foil.  Place the smoker box or foil smoker packet over direct heat.  Place food on the grill when chips start releasing smoke.  Smoking with add a subtle, mellow flavour to the food.


Monday, June 10, 2013

Frugal Kitchens 101 - Liquidation Stores

Frugal Kitchens 101
A frugal kitchen tends to be a very well equipped kitchen.  Acquiring that equipment takes time, money, effort and sometimes patience.   Regardless of how careful you with any of your kitchen equipment, ranging anywhere from decor and servingware to bakeware and cookware to small kitchen appliances, it will be necessary to replace or upgrade from time to time.  Things break or wear out, tastes change, family size and lifestyle change, and so forth so of all rooms in the house there is always something needed or wanted for the kitchen.  There there are the necessary kitchen items that are consumable (eg. dishwasher detergent, rinse agent, serviettes, paper towels, and etc.) that are ongoing purchases based on need.  There are many ways of acquiring anything needed for the kitchen without breaking the bank.  Aside of shopping the sales and box stores, discount stores like dollar stores can save a lot of money on kitchen essentials.  Liquidation stores can offer larger ticket savings!

Liquidation stores (closeout retailers) essentially sell off stock bought from other businesses going out of business or otherwise liquidating their current stock for a variety of reasons. What this means is the stock in any given liquidation store is limited, may be one of a kind, or even seconds.  This differs from dollar stores that tend to be fairly consistent with their stock that is replaced with similar when out.  We discovered Big Lots which is an American chain liquidation store and Liquidation World, a Canadian chain liquidation store that first opened in Calgary in 1986 and now owned by Big Lots (purchase completed July 19, 2011).  We have also shopped in liquidation stores that aren't part of a larger chain.

Our experience shopping in liquidation stores has been quite favourable.  Unlike dollar stores, the food section is quite small but they have larger items like furniture, small kitchen appliances, dinnerware and items perfect for entertaining as well as items for kitchen decor.  It is common to find brand names like Cuisinart, Chicago Cutlery, Oneida, George Foreman, T-fal and etc.  I found a four place setting of Sabatier Porcelain in Travertine Grey for $2, perfect for entertaining.  I bought my Cuisinart kitchen knife set at a liquidation store.  It was the only one there, marked down to a third of regular retail price.  I also found a Geneva pressure cooker at Liquidation World for $35 (retail $140).  The interesting part of shopping a liquidation store is you never know what you are going to find.  It is like going on a treasure hunt for bargains.  The only caveat is if you see something you want, buy it then because chances are very good you won't see another item the same again.

Liquidation stores are the place to look for the following kitchen items:

  • small kitchen appliances
  • dinnerware
  • bakeware
  • novelty kitchenware (eg. coasters, salt & pepper shakers, tea pots)
  • servingware
  • kitchen furniture
  • limited kitchen decor


Sunday, June 09, 2013

Boneless Pork Loin

We travel by car or by plane to our vacation home for a total of three times a year.  Both modes of transit have their pros and cons with respect to length of time and what we can bring with us from home.  Car trips are less restrictive to what we can bring but take a considerably longer period of time.  Air travel while restrictive as to what we can bring, means we are usually at our vacation home and settled in by late afternoon with a morning flight.  Our mode of travel is determined by flight costs for the desired time using driving as a back-up plan if we can't get a good price but other factors influence our choice as well.

We flew for our spring 2013 trip, May 6 through May 29.  After reaching the airport and picking up our rental vehicle, our first stop is at the Publix near our resort.  We have tried other grocery stores in the area but the Publix is our favourite even though it is a bit higher priced.  The meat and fish counter there is quite nice!  What we really appreciate is the wide variety of organic and natural products available at Publix.

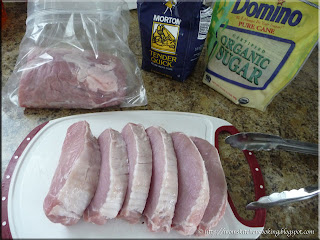
preparing the pork loin
A pork loin roast is always included with our first grocery purchases at our vacation home.  Publix has all natural, fresh never frozen pork loins that have no preservatives or artificial ingredients and are minimally processed.  This is comparable to the quality of pork we buy at home.  We bought a 4.13 lb boneless pork loin for $11.17 ($2.69/lb).

Pork loin is a versatile cut of meat.  A four pound pork loin will comfortably give a yield of five meals for the two of us with left overs.  I cut the pork loin in half.  One half was cured for peameal bacon while the other was cut into pork loin chops.   Pork loin chops can be grilled as is, breaded and baked, or they can be cut into cubes or strips to be used in casserole dishes and stir fry.  Peameal bacon is our must have taste of home, a true southwestern Ontario delicacy.  This versatile home cured meat has a five day cure time so is the first thing to be set up at our vacation home.

I could not find Morton's Tender Quick in the nearby grocery stores so ended up bringing a 2 lb bag with me one trip.  I routinely buy Morton's Tender Quick in Michigan and have never had a problem at the border.  However, airport security did do an extra check even though it was in the original, unopened bag.  Next time I need specialty food products at our vacation home, I will either send them ahead or take them with us when we drive.

grilled pork loin chops
We saw the first signs of local asparagus the day we left for our Florida home.  That was enough to trigger cravings for asparagus!  We picked up asparagus along with our other grocery purchases.  Our second home cooked dinner at our vacation home was grilled boneless pork loin chops with baked potatoes and asparagus cooked on the grill.

The chops were grilled on medium heat to form well defined hash marks.  They were generously coated with Sweet Baby Ray's barbeque sauce  then allowed to cook until the sauce started to caramelize.  It was a simple, delicious meal enjoyed on the lanai listening to the sounds of evening setting in.  After dinner we took a ride in the golf cart so capture the sights and sounds of wildlife, chatting about what we would do the following day.  It was a beautiful end to another day in paradise!


Thursday, June 06, 2013

Kitchen Quick Tips - Storing Fresh Ginger

kitchen quick tips Store fresh in the freezer then grate as is when needed.  There is no need to peel it before grating.  Place the remainder in the freezer until needed.


Tuesday, June 04, 2013

My Busy Home Canning Season Starts With Asparagus

While I home can year round, my busy canning season runs from mid-May through mid-October.  Since buying our vacation home I have had to shorten that timing to run June through September which really cuts it close for missing the local asparagus.  Our first local crop is asparagus usually appearing the third week of May.  This spring was unseasonably cool and wet so the asparagus crop was delayed.  We were leaving for our vacation home in sunny Florida just after lunchtime on May 6 so I kept a close eye for the signs to go up for local asparagus.  The first sign actually went up the day we left.  I was disappointed to think I may miss the local asparagus season but knew one of our kids could get some near them where their season starts about a week later than ours.

home canned asparagus
We arrived home just before midnight on May 29.  The following day I bought local asparagus while grocery shopping.  It wasn't from the farm I usually buy from but it was raining and I was more concerned about getting some asparagus canned.  This asparagus was from a farm 40 km from our home so still local.  The going price for asparagus this year is $2 to $3 per lb in the grocery stores.   I paid $9.42 for 6 bundles of asparagus at $2 per lb.   It will be so nice when my asparagus bed is mature enough for harvesting, two years from now!

Home canned asparagus is perfect for making cream of asparagus soup.  I will likely make another batch if I can find enough local asparagus.  I'd like to dry some asparagus as well for asparagus powder.  Off to do a bit of shopping...


Monday, June 03, 2013

Frugal Kitchens 101 - Ten Benets of Eating Foods Grown and Produced Locally

Frugal Kitchens 101
A couple of weeks ago I discussed a few ways to be a locavore even if you don't have your own transportation other than walking or biking.  With a bit of ingenuity it is quite possible to eat foods grown and produced within a 100 mile radius of your home without necessarily traveling that distance.  One of the best reasons for becoming a locavore is getting a higher quality of food with a lower environmental impact that costs less. 

Ten benefits of eating foods grown organically and produced locally:

  1. Focusing on locally grown and produced foods brings a greater awareness to what you are consuming.
  2. Locally grown and produced foods tend to be less expensive than those foods that are imported.
  3. Locally grown produce ripen naturally rather than being forced and is picked at the peak of freshness so it tastes better.
  4. Produce grown close to home is fresher (aka taste better) with a higher nutritional content than imported produce that has traveled a considerable distance to reach your table.
  5. Supporting local growers encourages sustainable growing practices that minimize the environmental impact of food production.
  6. Buying from local growers promotes variety since local growers are more apt to grow heirloom varieties and other varieties not available in the grocery stores.
  7. Buying from local growers strengthens the local economy as the money those growers earn in turn goes back into the local economy in the form of community support, taxes, and supporting other local businesses.
  8. The risk of exposure to well-traveled pathogens and possibly antibiotic-resistant bacteria is minimized.
  9. Buying from local growers is eco-friendly, reducing your total carbon footprint in food acquisition. 
  10. Being a locavore promotes a healthy lifestyle.


Sunday, June 02, 2013

Barbeque Chicken

We were excited when we bought our vacation home in sunny Florida.  Not only did this make it possible for us to spend extended periods of time on vacation, it gave us a means to still enjoy home cooked meals.  Don't get me wrong as we do love eating out and fining new dining experiences while in Florida, but we also want our taste of home too.  Our vacation home is located in a resort community with a park-like setting and full amenities.  There are ample photo opportunities.  The house itself is a 2 bedroom plus den, 2 bathroom, 2007 Fleetwood manufactured home with carport and lanai.  Our vacation home kitchen is almost as well equipped as our home kitchen so cooking is not a problem.

barbecue chicken legs with backs attachedWe spent most of May at our vacation home arriving back in beautiful Ontario Wednesday night.  During our stay we enjoyed a lot of great food although this trip we ate out a bit less.  It was hot and humid with pop-up thunderstorms the last week of our stay but that didn't stop us from doing a bit of grilling.  Our meats of choice at our vacation home tend to be pork (loin,ribs), beef (steak, ground) and seafood even when eating out.  I spotted a lovely package of chicken legs with their backs attached when we were at Publix and thought that would be a nice change.

Years ago as newlyweds the only way we cooked chicken on the grill was with barbeque sauce.  The biggest problem with grilling chicken was always the flare-ups.  A friend told us to bring the chicken to a boil then drain and finish barbequing.  That method worked to remove some of the fat causing the flare-ups but it also removed flavour.  Overall, chicken cooked this way is grilled as the cooking time is fairly short.  We discovered using lower temperature and a beer spritz to control flare-ups then using a barbeque sauce as a wet mop during the last 15 minutes of cooking gave lovely, moist, barbeque results.  We haven't cooked chicken like this in ages.  I'm not sure why because it is ever so delicious!

The difference between grilling and barbequing is timing.  Grilling is short, quick and high heat sometimes using a marinade whereas barbequing is long, slow with low heat often using a dry rub and/or wet mop (sauce).  Barbequed meats are moist, tender, and fall off the bone delicious.  The sauce is nicely caramelized but not burnt or charred. 

Method:  Heat the grill to medium.  Place the chicken on the grill.  Cook the chicken slowly turning when the first side just starts to brown.  If flare-ups occur, spritz with water or beer.  Continue cooking the chicken turning as needed until both sides are a light golden brown.  Apply the sauce, coating generously.  Cook until sauce begins to caramelize.  Turn the chicken and apply sauce on the other side.  Cook until caramelized.