Our new grandbaby made her debute Dec. 23, 2006 at 8:03 pm. She weighed in at 8 lb 6 oz and is absolutely the most perfect little sweetheart you have ever seen!


Welcome to our kitchen that truly is the heart of our home! One of life's greatest pleasures is enjoying good food with family and friends. Here you will find recipes, tips for frugal cooking, how-tos for food preservation especially canning and anything else food related. Tea is brewing and warm cookies are fresh from the oven. Please sit a spell and enjoy your stay.


We are true cheese lovers here so at any given time will have upwards of 20 different cheeses, some of them homemade at any given time. We just enjoy cheeses so much! Most freeze well so end up being a true convenience food and fresh they just make a meal. I really enjoy playing with cheeses especially when cooking. Cheese Cups
Cheese cups are something I just sort of came up with while looking for a new way to serve salads. I came across the idea for making cheese crisps on the food network. There was a show about low carb that I kind of stumbled upon and really liked the idea of shredding cheese then baking it. So I decided to experiment.
I shredded cheddar cheese then mounded it onto parchment paper and baked it until almost crisp. Now this was really good, a nice type of cheese cracker that I make often. However, I immediately saw the versatility of cheese crackers. What if I formed them into bowls to seve salad in? I thought that would be rather a neat presentation where you could eat both the salad and bowl. So I baked the shredded cheese in rounds and while still warm, I drapped over a juice glass, pressed a bit then let them cool. This was the result and I must say my family loves this presentation! Cheese Sticks
Cheese sticks just sort of happened and I can't really recall why other than our love for cheese and a bit of kitchen experimenting. I use a ABM pizza dough (recipe follows) then the dough into narrow strips and roll in cheddar cheese and bake. This is a true family favourite!
Pizza Dough
1 1/2 c beer
1 1/2 tbsp butter
3 tbsp sugar
1 1/2 tsp salt
4 1/8 c white flour
1 1/2 tbsp instant yeast
Add ingredients as per your breadmaker instructions. Set to dough setting. When finished, remove from bread pan and roll out the dough. Cut into strips and roll into shredded cheddar (or cheese of your choice) cheese. Let the dough rise then bake at 350ºF until cheese is bubbling and bread is golden brown. Cheese on Salad
We eat a lot of salads, usually daily, so coming up with variations can be challenging. For the most part I much prefer fresh cut greens and vegetables from the garden and I do love adding fresh cut herbs as well. But a bit of cheese really makes a salad sparkle. It accents the homemade viniagrette well and just adds that perfect sparkle. I love freshly shredded parmesan cheese for this purpose but often use other cheeses too.
Now If you are wondering the viniagrette is a homemade purple basil, lavender, lemon thyme and organo vinegar combined with a bit of honey, dijon mustard and fresh chopped onions and chives. I make a lot of homemade vinegars from my herb garden and I insist on using fresh herbs whenever possible.
Enjoy!
 My Fridge & Stove
Well, I have to admit this was not quite part of the plan for this blog but I opened my email this morning to two requests as to the appliances I use in my kitchen and another one asking what major appliances I recommended. So this entry is cooking related to address these questions. And before you ask, yes my kitchen is pink! The appliances are all white but not matching brands because I choose appliances based on performance not brand. My kitchen accents are stainless steel and chrome but it has a very country feel. The cabinets are dark walnut something I would like to change perhaps by painting but after living through that once, the idea is just floating right now. The kitchen flooring is scheduled to be replaced just after our holidays in January. I'm sure my husband chose this time since I will be a little more mellow because I do not do change well, especially in my kitchen!
My stove is a Jenn-Air Electric Downdraft Slide-In Range model JES9860AC purchased in 2005. Previous to that I had an Admiral black-glass front range, non-self clean purchased in 1989 that was a real workhorse. The Jenn-Air has a lot of bells and whistles like convenience settings, three oven racks, self-cleaning and downdraft system. I bought two conventional coil cartridges (sold separately) and grill cartridge (sold separately) so basically we bought the shell of a stove then customized. I can mix and match as needed. The grill cartridge is shown in the picture along with a custom made cutting board thanks to one of my kids. I like the look of the stove with the grill cartridge in but during canning season I really need those four burners! If you look closely you will see that one burner is raised by almost an inch. This is a special canning/big pot element originally bought for canning but because I use larger pots on a regular basis I decided to just leave it on the cartridge. The only thing I don't like is there is no storage drawer due to the downdraft system. What I really like is all parts and I mean all parts are easily available for replacement which means if I wanted to go stainless steel it would mean only buying the outer compartments and switching. I think that is a pretty nice option. While this stove might look fancy, it was bought specifically as a workhorse because that is what I demand of kitchen appliances. Performance is always the primary goal!
My fridge is a Whirpool ED2FHGXS Energy Star® rated, white on white side-by-side purchased 2006 about six weeks ago. This refrigerator was a forced purchase since our old side-by-side decided to spew out cold air and not from the door seals. It was a demanding purchase because with the design of my kitchen, the refrigerator would only fit one spot AND my husband was adament he wanted side-by-side with ice in the door. I found one fridge at IKEA on sale that met our requirements but was stainless steel not white. Armed with that information I went online and found two models up from that one but in white. I called our local furniture and appliance dealer, gave them the model and told them to order it so this fridge was bought sight unseen. So far it is performing very nicely!
As far as recommending appliances goes, I really can't for the reason that what works for me might not be a good solution for you. I can recommend small appliances but not major ones. I think one of the most important things we look for in any major appliance is performance followed by energy efficiency. I think my current preference as far as design goes is white on white, sleek with good lines and easy to clean.
So now you've had a glimpse into my kitchen. Perhaps I will add more pictures in the future when I'm not adding pictures of food.

Pork Tourtière is also known as French Canadian pork pie. My early French Canadian ancestors would have brought a very similar recipe with them in the very early 1600's. This pie was originally made with game something that would have served my ancestors well until their farms were established. Because pigs were important for the survival of farms in Québec, pork was later substituted for game.
Traditionally Pork Tourtière is served as part of the Christmas celebrations, often served upon returning from Midnight Mass. My eighth great grandparents would have not only served this meal Christmas Eve but likelyate it often through the winter months. My second great grandparents (cira. 1808-1872) would have served this dish with turnip and perhaps an apple desert of some type, more than likely applesauce. The pie crust would have been made with lard so for an authentic taste, use lard instead of shortening and the pork would have been ground at home. The pie would have been bake either in a fireplace later a woodstove. It is a simple, unpretentious dish that is true comfort food.
Pork Tourtière
source: Canadian Pork Council, Pork Perfect Pork. 1983. Saskatoon, Canada. Pp. 129.
2 lb ground pork
3 small onions, minced
1/2 c boiling water
1 clove garlic, minced
2 tsp salt
2 tsp sage
1/2 tsp celery salt
1/2 tsp pepper
1/4 tsp ground cloves
3 medium potatoes, cooked and mashed
pastry for a deep double-crust pie
In large saucepan, cook pork, onion, water, garlic, and seasonings over low heat, stirring constantly until meat loses its red color and aout half the liquid has evaporated. Cover and cook 45 min longer. Mix mashed potatoes into cooked meat mixture. Cool. Prepare pastry; roll out half and line pie plate. Fill with cooled meat mixture. Roll out remaining dough and cover pie. Seal and flute edges and slash top crust. Bake in 230ºC (450ºF) oven 10 min. Reduce heat to 180ºC(350ºF) and bake 30 to 40 minutes longer.
Makes 6 to 8 servings.
My notes: I steam the potatoes then mash for a nicer texture. This pie freezes well either whole or in one-serving sizes. Freeze on a cookie sheet then vacuum seal when frozen.

I've had a couple of emails requesting clarification. Here we can buy "icing sugar" which is a very fine powdered sugar typically used for making icings, hence the name. It must be a Canadian thing! In other areas it is labelled as powdered sugar which is the same thing. Now if you can't find either, take 2-3 c of granulated sugar and process in a food processor until powdered similar to a fine flour. Sift it then use as needed. Store in an airtight container or vacuum seal for longer storage.
Garden Gnome
© 2006
Life has a tendency to get in the way of the best intentions and so it was yesterday. This is precisely why I do not menu plan. So needless to say I did not get as much cooking accomplished yesterday as I had hoped. The house smelled good despite all the necessary delays.
I make a lot of bread and while I use a breadmachine for the dough, very few loaves are ever baked in the breadmachine. I think baking in the oven gives better results while tantalizing the palate. Apple bread is always a delight but more so this time of year. It brings in all the smells and flavours of the fall harvest. It is a comforting bread that when coupled with yogurt cheese or cream cheese is sure to please. This bread is very easy to make and trust me that's a good thing because it will be gone within minutes of baking!

Apple Bread (ABM but baked in oven)
source: original recipie was from Bread Machine Magic by Linda Rehberg and Lois Conway but I just had to tweak it so what follows is my version
1/2 c unsweetened apple juice
1/2 c unsweetened homemade applesauce
3 c unbleached flour
1 1/2 tsp sea salt
3 tbsp brown sugar
1/2 c cored, peeled and chopped cooking apple (eg. L-star or Northern Spy), in lemon juice water solution until ready to use
1/2 tsp ground cinnamon
pinch fresh grated nutmeg (2-3 quick passes on fine grater)
1 1/2 tsp instant yeast
Put all ingredients into breadmachine pan except for apple pieces. Set to dough setting. When dough is ready, remove from pan onto lightly floured board. Carefully distribute apple pieces through dough with your hands. Shape into loaf and place in lightly grease and floured loaf pan or use a silicone loaf pan. Cover with a damp towel and allow to rise in warm spot until dough is doubled. Remove towel and bake in pre-heated oven at 400ºF for 20 minutes then lower the heat to 350ºF and bake 20 to 30 minutes longer, or until the loaves have a distinctly hollow sound when tapped on the bottom.
Shortbread cookies are one of our family favourites and I don't mind making them as they take only four ingredients that are always in ample supply in our home give or take my modifications. Do not even attempt to mix the ingredients with anything other than your hands. These are melt in your mouth cookies and should never be overbaked. This is a butter only and don't even try to substitute! You want just a light goldening of the bottoms! They are easy to make, inexpensive and just taste good! It is a true, buttery comfort cookie sure to please and make excellent homemade Christmas gifts. The recipe that follows is the original recipe. You can easily multiply as I do for larger batches. I made 9 dozen today and will repeat that amount tomorrow.

Shortbread Cookies
Source: back of corn starch box, Canadian brand long forgotten due to the age
1/2 c corn starch
1/2 c icing sugar
1 c flour
3/4 c butter
Mix well then form dough into small balls about 1-inch in diameter. Pre-heat oven to 300ºF. Place balls on ungreased cookie sheet then use a floured fork to flatten. Bake 20-25 minutes until lightly golden around the edges. Remove from oven an allow to cool on rack.
Grilled Cheese Grilled cheese sandwiches in our home are never the run of the mill thing, ever! And one thing you will never find in our home is those plastic orange things trying to pass for cheese. My husband wanted comfort food last night so we played with cheeses: asiago, sharp cheddar, mild reserve cheddar and pepper jack. Then we played! But grilled cheese sandwiches have to be made a certain way! This is one of the best ways to discover what kind of melted cheese you like. Now our rule is the cheese is always sliced about 1/4" thick and new combinations are always welcomed. These delectable sandwiches are usually served with home made tomato soup. It's a comfort thing!
Roasted Chicken

Roasted chicken is a pleasure and last night despite the alternate meal the chicken filled the house with a wonderful smell. I roasted the chicken unstuffed on a broiling pan, no rack, no roasting pan and used convection heat. I wanted to see specifically the difference between the regular way I roast chicken and the convection way. I was not disappointed as the chicken came out nicely browned with moist and very tasty meat. I want to try this again stuffing the bird just to see the results. So far what I've seen I like!
At this busy time of year it is nice to have quick to make, homemade meals. Quiche is one such meal especially if you use prepared ahead ingredients from your freezer or canning stores. Recipes for my favourite pie crust and quiche filling follow. My Favourite Pie Crust
This is my absolute favourite pie crust! I this recipe for anything requiring a pastry crust. It cannot be beat for deep dish recipes. While I prefer to make it fresh most times, I have frozen several for those busy times. There are three ways to freeze: leave in a ball and vacuum seal; roll out and form into sheets, freeze individually then stack divided with wax paper and put into a zipper freezer bag; or roll out, put into tin foil pie plates. I should mention that the original recipe was the one my mom used and I modified it years ago for flakier results. The recipe is enough for a 9 inch two crust pie. Oh and I like to simplify where I can so use an easy almost no clean-up method for rolling out the dough.
Favourite Pie Crust
Source: my mom, modified by me
2 cups all purpose flour
1 tsp sea salt
2/3 cup shortening
2 tbsp unsalted butter, softened
4 - 6 tbsp ice water
Combine flour and salt then cut in shortening and butter. Add 1 tbsp ice water at a time. Mix until all flour is moistened and dough almost cleans side of bowl. Divide dough into two balls and shape into a flattened rounds. Place the one round on parchment paper. Cover with another sheet of parchment paper. Roll dough two inches larger than inverted pie pan. Remove top piece of parchment. Place inverted pie pan in centre of the dough then slowly flip bottom parchment paper with crust into pie pan. Repeat for a two crust pie inverting onto filled pie or for one crust pie make two pies or freeze the remainder. Broccoli Quiche
Quiche is simply a comfort food and trust me "real men" do eat quiche. I got the original recipe for this quiche several years ago from a girlfriend who did not include a source. The original recipe called for a purchased frozen pie shell, dried parmesan cheese, regular ground pepper, regular salt, dried oregano, butter, and soft bread crumbs as well as being topped with a ring of tomatoes. Well, I simply could not leave this recipe as is so I used it as a base for my own recipe. The recipe will give enough filling for one deep dish quiche and one small crustless quiche for the low carbers. I should mention that this quiche gets my family's five star rating!
This recipe re-heats nicely in the microwave. It freezes nicely too. Simply let cool but be sure no family members are around for sneaked taste tests! Once cooled freeze either whole or in individual servings on a cookie sheet then vacuum seal.
Broccoli Quiche
1 9" raw pie crust in deep dish pie pan
1 lg onion, chopped and sauteed until just translucent
1 1/4 c sauteed fresh mushrooms (can substitute frozen sauteed or homecanned pieces)
1 1/4 tsp sea salt
1/2 - 3/4 tsp powdered pepper
3/4 tsp dried oregano (double if using fresh)
2 c 2% milk
2 c lightly steamed broccoli
12 slices bacon, sliced crosswise and cooked
8 oz package cream cheese
1 c fresh grated parmesan cheese
6 eggs
3/4 c bread crumbs (either fresh or dry)
Preheat oven to 425ºF. Prepare vegetables and let cool. Grate parmesan cheese and set aside. Blend remaining ingredients together. Stir in vegetables and parmesan cheese. Fill pie shell and small baking dish with quiche filling. Bake at 425ºF for 10 minutes then reduce heat to 350ºF and bake until a knife inserted in centre comes out clean.
Notes: The crustless quiche will take less time to bake but can go into the oven at the same time just remove it when a knife inserted in the middle comes out clean. For a nice variation try substituting steamed asparagus pieces for the broccoli.
Enjoy,
Garden Gnome
Not everything cooked in my kitchen is edible so I thought I would share a few pictures of some non-edible things I make that involve cooking. I've included a quick easy shrimp meal for those busy days like today. It was a busy morning followed by "me" time starting off with discovering another draft. Fixing that meant emptying a large bookshelf, pulling the bookshelf out to caulk, then touch-up painting when the caulk was dry. I took the drying to update my personal blog then got back to work. Since the books were stacked on the floor anyway I decided it was as good of time as any to vacuum them good before re-shelving them.
I use a lot of beeswax both solid and sheets bought in bulk from a local beekeeper. I only use unscent, natural beeswax with no artifical colourants. I gives a nice clean burn with a pale amber flame and mild honey scent. While candles in some form comprise a lot of my uses for beeswax, I also use it in soapmaking, toiletries, and decorations. It has a light, pleasant aroma that is just hard to beat. All of these things I make are for our own personal use with some ending up for family and friends.  Hand Dipped Beeswax Candles
I make a lot of beeswax candles with a majority of them rolled sheets either tapers, straights or voltives. Most of my poured beeswax candles are tea lights or voltive but occasionally I use other molds. By far the most rustic of the beeswax candles are hand dipped. I like making them about 6 1/2" long and joined together for hanging. Directly behind the hand dipped candles is a longer pair of rolled beeswax candles. I have multiple pairs of hanging candles in every room of the house and have a store extras on a rod in one closet. Oh I guess before I leave the topic of hanging candles, I usually make them in sessions. I can comfortably make 25 pairs of dipped candles in one session or 50 pairs of rolled candles in a session. Poured candles other than voltives and tealights are generally done in sessions as needed.  Soy Tea Candles
I can't recall when soy wax first came out but it hasn't been that long. Soywax is derived from soybeans I just had to try it and fell in love with the way it handles when making the candles. A very much appreciated characteristic of soy wax is that spills clean up with water. I buy soy wax flakes online. It is a simple melt and pour into the tea light holders or voltive molds. Voltives are done in batches of 10 throughout the day. Tealights are done in batches of 50 because that's easiest.. Molded Soaps
I've been making molded soaps for ages. These are made from scratch using a combination of oils based on they give to the soap, lye and all natural additives like beeswax. These are: combinations opague/transparent, beeswax/honey and transparent. Transparent soap actually starts out as opague but then using a special technique and high content alcohol it becomes transparent. The procedure is not for the faint of heart especially since there is the risk of the alcohol catching fire. I had it happen only once but went onto continue making transparents. Poured Soaps
Poured soups start with a melt and pour base that can either be made from scratch or purchased. Citrus transparent soap and herbs are nice to use for a rustic look with natural scents. Oatmeal is another nice addition for a soothing soap. Paired with a homemade gift bag, pour soups are lovely for gift giving.
Now as promised here is a quick, easy to made shrimp and pasta dinner. This is especially nice when you want something homemade that tastes like you worked for hours. Garlic Pasta with Shrimp
The basis of this dish is spaghettini noodles in a butter garlic sauce. I don't measure the ingredients. Use three burners to cook everything at the same time. Cook spaghettini noodles in salted boiling water until el dente. Drain. At the same time, melt about 1/4 c butter and stir in 1 or two garlic clove that have been pressed through a garlic press. Warm garlic until flavour is released into butter but don't let brown. Stir garlic butter mixture into hot noodles. While noodles are cooking, sautee sliced mushrooms in butter then stir in small frozen shrimp and warm through. Top noodles with mushroom and shrimp mixture.
Enjoy!
Garden Gnome
I love experimenting and playing in the kitchen. This is the perfect time of the year to experiment just a little while relying on tried and true recipes for gift giving and meals. I've been doing a lot of canning for Christmas gift baskets and to restock my jellies. Yesterday I decided to take a bit of a break from canning to do a little dehydrating, freezing, cheese making and candy making. After a day spent doing a lot of genealogy and playing in the kitchen, a pot roast was the ideal meal!
(November 7, 2006 additions to this post. What was I thinking? I forgot to add the sourcing so have made those corrections. )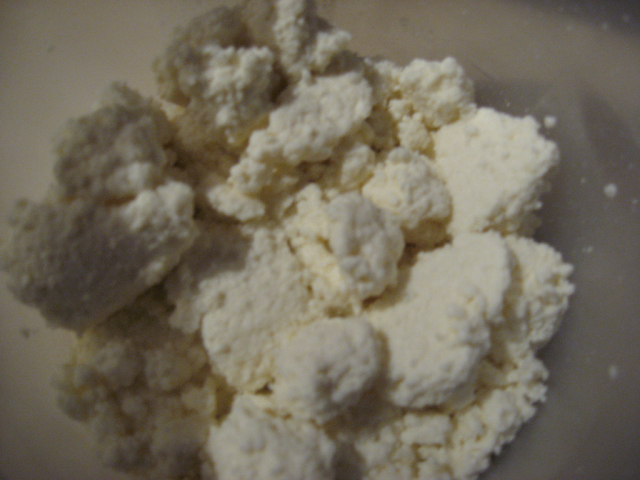 Ricotta Cheese
Ricotta cheese is a creamy white cheese with a rich mildly sweet taste and grainy texture. Homemade ricotta cheese is very easy to make. It is best made in small batches because ricotta does not keep long. So make it fresh in small amount and use up within a week. This is a cheese best used fresh as it does not freeze well. Ricotta cheese can be used in main dishes and desserts. Two notes when making ricotta cheese. Use a high fat milk. The higher the cream content the creamier the ricotta cheese will be. Low fat milks will not work well for this recipe. I prefer using pure cider vinegar as it give a slightly better flavour to the finished cheese.
Ricotta Cheese
Source: unknown
1 qt 3.25% MF Milk
1/8 c white or cider vinegar
Heat milk to 180ºF. Remove from heat and stir in the vinegar. The milk will separate into curds and whey. Let the mixture sit to develop curds. Line a strainer with cheesecloth. Pour the milk mixture into the strainer and allow to drain until curds are dry but moist. This will take two to four hours. Transfer the curds to a container and seal.  Yogurt Cheese Setup
Source: unknown and one handed down through the family, modified by me to use homemade yogurt
I make a lot of yogurt and the method can be found in an earlier blog entry. Not only do we eat a lot of plain yogurt since we eat it daily, I use plain yogurt for dips, cooking and making cheese. Yogurt cheese is very easy to make and it is quite versatile. It is a very creamy cream cheese that can be flavoured with fresh herbs or other seasonings. It is perfect for spreding on crackers as a base for appetizers.
The setup for making yogurt cheese is rather simple. Line a strainer with cheese cloth. Pour in about 2 cups of plain yogurt. The higher the fat content, the creamier the cheese will be. Homemade yogurt is perfect for this. Set the stainer and yogurt on top of a container then lightly cover the top of the yogurt with the cheese cloth. Put the entire setup into the refrigerator and let drain 18 to 36 hours. The long the cheese drains the firmer it will be. Yogurt Cheese
Once the cheese it at the desired consistency you can stir in seasoning or leave as is. Transfer the cheese into a 8 oz (250 ml) wide mouth mason jar. Place a lid on then vacuum seal. Store in the refrigerator. Use as a spread for bagels or crackers. It makes a nice dip base too, simply use in place of cream cheese. This makes a lovely gift just be sure to keep it refrigerated.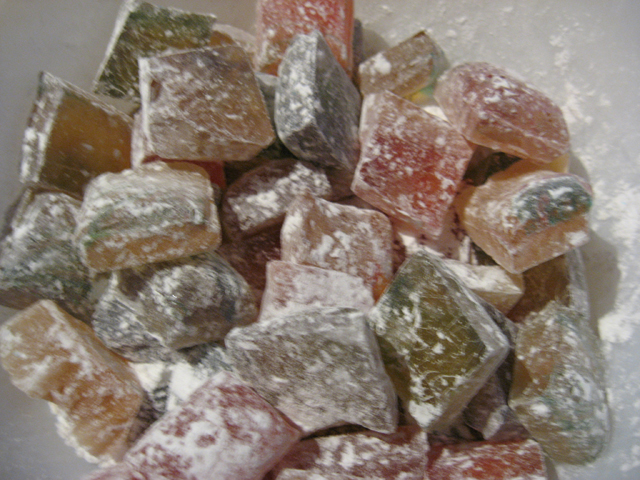 Old Fashioned Crystal Cut Candies
Crystal cut candies are an old fashioned candy with a lot of flexability. They are perfect for gift giving. Flavour and colour as desired. You can use candy molds or cut into square puffs the old fashioned way as described in the instructions.
Crystal Cut Candies
Source: Better Homre and Gardens®, Cookies and Candies, 1972. Meredith Corporation, 1966, New York. Pp. 82.
2 c granulated sugar
1/2 c light corn syrup
1/2 c water
dash of salt
food colouring
candy flavouring
Combine ingredients in large saucepan. Bring to a boil and cook to soft-crack stage (290ºF). Add desired food colouring and 4 to 6 drops of candy flavouring like oil of cinamon. Gently swirl the mixture to blend. A neat trick I use is to drop two or three colours of food colour on top of the candy after adding flavour. Then I use a toothpick to create multi-colour swirls for an interesting effect. Pour the candy into a 8"x8"x2" metal pan. Do not use glass and be very careful as the candy is hot enough to cause burning. Let stand a few minutes until a film forms over top. Mark the candy into 3/4" squares being very careful to not break through the film. The candy will cool from the edges first. Go over the markings pressing downward slightly but not breaking the film. Continue this procedure until the candy has cooled. Once cooled pop out of the pan and break into pieces. Sprinkle about 1/2 cup icing sugar over the candy for storage in an air tight container.
My Notes: Instructions for crystal cut candies have modified to get the results pictured.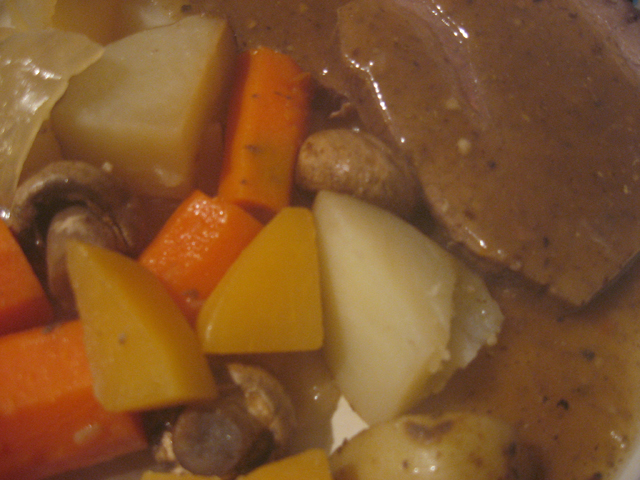 Roast Beef Dinner
After a day full of genealogy and cooking a nice easy meal straight from the oven is a true delight. I put a small rib eye roast into a roasting pan, seasoned with Worchestershire sauce, Montreal steak seasoning, sliced onions and a little water. This cooked for about 2 hrs at 275ºF. I added potato, carrot and turnip pieces along with whole mushrooms and raised the temperature to 350ºF and let the roast and vegetables continue cooking until the vegetables were cooked. The roast was removed to rest before slicing and the vegetables were transferred to a serving bowl. I used the juices to make gravy by adding mushroom powder, salt, pepper and thickened with a corn starch slurry. The end result was a nice meal with very little effort.
Enjoy!
This is the perfect time of year to can apple pie filling since are fresh, plentiful and inexpensive. It is also the perfect time of year to can jellies for gift giving and to restock the pantry. Yesterday I decided to can up another batch of apple pie filling and make two wine jellies and apple jelly. My intent was to also make port wine jelly but the little liquor store here didn't have port wine so it will have to wait until tomorrow.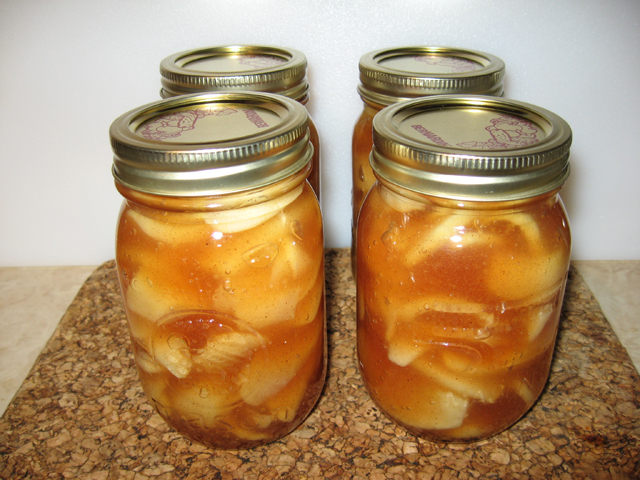 Apple Pie Filling
Apple pie filling is nice to have on hand and not just for pies. I usually make two or three batches this time of year using a nice firm cooking apple like Northern Spy or L-star. This year's batches are Northern Spy. I like doing batches of 5 - 6 pints at a time so I can use other apple varieties if desired. I use the USDA recipe from the Complete Guide to Home Canning, Agriculture Information Bulletin No. 539, USDA. Reviewed 1994. The measurements in the following recipe will yield 5 - 6 pints.
Apple Pie Filling
9 1/2 c blanched, sliced fresh apples
2 c + 4 tbsp granulated sugar
5/8 c Clear Jel®
1 1/4 tsp cinnamon
1 1/4 c cold water
1 7/8 c apple juice
5 tbsp bottled lemon juice
1/4 tsp nutmeg (optional)
Wash, peel and core apples. Slice apples and place in water containing ascorbic acid or lemon juice to prevent browning. Bring 1 gallon water to a boil. Drain apples and pour into boiling water. Bring to a boil and boil one minute. Drain, but keep heated fruit in a covered pot. Combine sugar, Clear Jel®, cinnamon, nutmeg in large kettle with water and apple juice. Stir and cook on medium high heat until mixture thickens and begins to bubble. Add lemon juice and boil 1 minute, stirring constantly. Fold in drained apple slices immediately and fill jars with mixture with delay. Leave 1 inch headspace. Adjust lids and process 25 minutes in boiling water bath canner. Cranberry Claret Jelly, Apple Jelly, Cabernet Jelly, Apple Pie Filling
Jellies always look so pretty sparkling like jewels in the jars. The nice thing about some jellies is they can be made year round as the need arises. They are quick and easy to make and have very short processing times. I make several kinds of jelly and surprisingly most are used as condiments, appetizer topping or in cooking. We seldom eat jelly on toast. I've include all three jelly recipes as they are perfect for gift giving. Be sure to label the wine jellies as they are not intended for children since they still contain alcohol. Wine jellies are nice served on top of fancy crackers and cream cheese. The are perfect condiments for meats and poultry or use as a glaze ingredient for chicken and ham.
Cranberry Claret Jelly
1 c cranberry juice
1 cup dry red wine (eg. cabernet)
3 1/2 c granulated sugar
1 pouch CERTO Liquid Pectin
Combine juice, wine and sugar in large saucepan. Bring to a boil over high heat. Boil hard 1 min. Remove from heat and stir in CERTO. Stir and skim for 5 minutes. Pour into hot, steriliaed jars leaving 1/4 inch headspace. Cap with two piece lids. Process 5 minutes in boiling water bath canner.
Yield: 4 pt
Apple Jelly
5 c apple juice
2 tbsp lemon juice
7 1/2 c granulated sugar
1 pouch CERTO Liquid Pectin
Combine apple juice, lemon juice and sugar in large saucepan. Bring to a boil over high heat. Boil hard 1 min. Remove from heat and stir in CERTO. Stir and skim for 5 minutes. Pour into hot, steriliaed jars leaving 1/4 inch headspace. Cap with two piece lids. Process 5 minutes in boiling water bath canner.
Yield: 8 pts
Cabernet Jelly
2 c dry red wine (eg. cabernet)
3 c granulated sugar
1 pouch CERTO Liquid Pectin
Combine wine and sugar in large saucepan. Bring to a boil over high heat. Boil hard 1 min. Remove from heat and stir in CERTO. Stir and skim for 5 minutes. Pour into hot, steriliaed jars leaving 1/4 inch headspace. Cap with two piece lids. Process 5 minutes in boiling water bath canner.
Yield: 4 pt
Enjoy!
Garden Gnome
My husband is back from hunt camp. They were successful but only got one deer and on the last day no less. The deer is being dressed not then will be divided between whoever wants some in the hunt camp tradition. I won't know how much meat I will have to work with until tomorrow but have included the canning method for vension after the applesauce. Hunting aside, the fall is the perfect time to go apple picking with your family however you can buy them already picked in large quantities suitable for preserving. This is the time to re-stock on homecanned applesauce, apple pie filling, apple butter, canned apples, and apple leather. Don't forget to make an apple pie or two.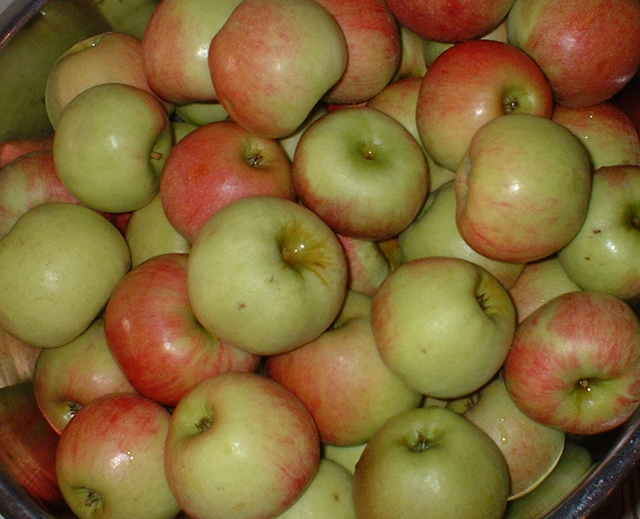
L-star Apples
Apples are divided into two main groups, eating or cooking. Cooking varieties have more of a sharp flavour compared to the sweet flavour of eating apples. When making applesauce, use a nice cooking apple like the L-star that keeps it's shape well when used for pies. You don't need to use just one variety of cooking apple either. Some of the best applesauces are made using a blend of two or more varieties of cooking apples. If you want a sweeter applesauce without adding sugar include one or two eating apples.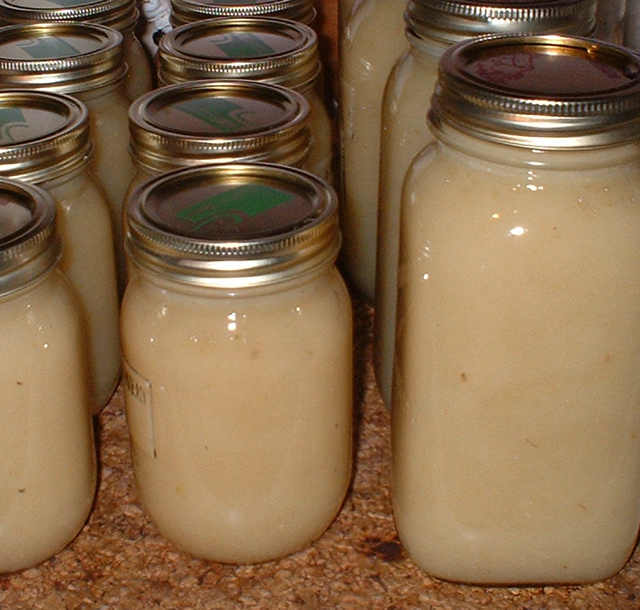 Applesauce
I follow the Blue Ball Book (2000, pp. 17)method of making applesauce. This method is by far the easiest way to make applesauce. I make both plain and spiced applesauce with no sugar added.
Applesauce
Per quart: 2 1/2 to 3 1/2 lbs of apples.
water
sugar (optional)
spices (optional)
Wash, stem and quarter the apples without coring or peeling. Cook the apples until soft in a large covered pot with just enough water to prevent sticking. Process the apples through a food strainer or food mill to remove seeds and peels. Return pulp to pot. Add 1/4 c sugar per pound of apples or to taste if desired. Bring apple sauce to a boil, stirring to prevent sticking. Reduce head and simmer 5 minutes, stirring to prevent sticking. Ladle hot sauce into hot jars, leaving 1/2-inch headspace. Remove air bubbles. Adjust two-piece caps. Process pints and quarts 20 minutes in a boiling water bath canner.
For spiced apple sauce add desired ground spices - cinnamon, nutmeg, allspice to the sauce during the last 5 minutes of cooking.
Venison
Venison can be either froze or canned. Last year then venison was froze right after processing to kill any parasites that may be present. The person processing the deer said this was the proper way to do it so when we picked up the meat it was already froze and ready for our freezer. If you have a lot of venison you may want to process both ways.
Chopped Venison: Cook meat in hot skillet until seared. Stir in 1 to 1 1/2 cups boiling water, broth or tomato juice. Add 1 tsp salt to each qut ground meat if desired. Pact hot meat and liquid into hot jars, leaving 1-inch head space. Remove air bubbles. Adjust two-piece caps. Process pints 1 hour 15 minutes, quarts 1 hour 30 minutes at 10 lbs pressure.
Steaks and Chops: may be raw or hot packed. For raw pack, cut meat into 1-inch slices. For hot pack cut meat into 1-inch slices and quickly brown meat in small amount of fat. From this point the instructions are the same. Add 1/2 tsp salt to each pint, 1 tsp salt to each quart, if desired Pack meat into hot jars, leaving 1-inch headspace. Ladle hot broth over meat, leaving 1-inch head space. Remove air bubbles. Adjust two piece caps. Process pints 1 hour 15 minutes, quarts 1 hour 30 minutes at 10 lbs pressure.
A cookie press is nice to have and it can be used for much more than just cookies. Other uses include spritz crackers, fillings for deviled eggs or twice baked potatoes, appetizers and deserts like cream puffs. It's one of those fun kitchen gadgets! Wreath Shaped Spritz
Spritz are a pretty Scandanavian cookies that are formed into fancy shapes when the dough is forced through a cookie press. Just there are a large variety of other types of cookies there is a wide variety in spritz cookie flavours. One thing in common all spritz cookies and crackers is they are rich and buttery. You can leave them plain or decorate with sprinkles or icing sugar and even icing. Spritz cookies make a nice holiday cookie because they look fancy but are very easy to make. They are the perfect holiday cookie for gift giving! Classic Spritz Cookies
These spritz cookies remind me very much of my shortbread cookies both in flavour and texture. They have a nice buttery flavour. What I learned very quickly is to keep a close eye on the cookies when they are baking to prevent the bottoms from browing too much. They are small cookies so bake fairly quickly. Ideally for this recipe you are aiming for light browning around the edges. If you are baking in a convection oven be sure to reduce your temperature by 25º F and you may have to reduce baking time by a minute or two. Be sure to check out my notes at the end of the recipe. While one brand of cookie press is specified in the recipe I don't see any reason why the recipe wouldn't work in other brands of cookie presses.
Classic Spritz Cookies
1 1/2 cups butter, softened
1 cup granulated sugar
1 egg
2 Tablespoons milk
1 teaspoon Wilton Pure Vanilla Extract
1/2 teaspoon Wilton Almond Flavoring
3 1/2 cups all-purpose flour
1 teaspoon baking powder
Preheat oven to 375°F. Thoroughly cream butter and
sugar. Add egg, milk, vanilla, and almond extract; beat
well. Stir together flour and baking powder; gradually
add to creamed mixture, mixing to make smooth
dough. Do not chill. Shape dough into small logs and
place in Cookie Master™ Plus. Using desired disk, press
shapes onto ungreased cookie sheet. Sprinkle with col-
ored or chocolate jimmies. Bake 10-12 minutes or until
lightly browned around edges; remove cookies from
sheet. Cool on rack.
Makes 7-8 dozen cookies
source: Manual for Wilton Cookie Master™ Plus, downloaded from http://www.wilton.com
My Notes: I have the Cookie Max™ Cookie Press. It came with 12 disks in favourite shapes and 3 recipes. Unlike the Cookie Master™ Plus the Cookie Max™ is manual and works by pushing the pump action lever. It is very easy to use with easy dishwasher clean-up on the top rack. Wilton offers many recipes on their website.
Enjoy!
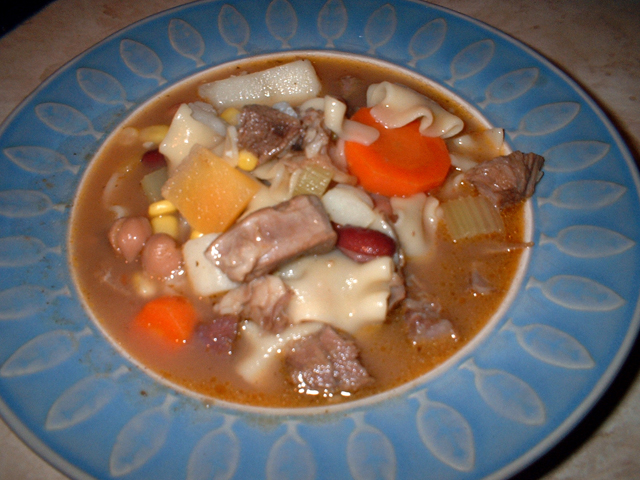
My husband leaves for hunt camp early Tuesday morning. One of the traditions they have is to take a meal made with venison from last year's kill. It is supposed to bring good luck for this year's hunt. One of the guys is bring venison sausage. I'm still working on getting his recipe. I'm making venison chili for them.
 Venison Chili Reducing
Venison chili or at least the way I make it looks very much like beef based chili. Don't let this picture fool you either. This is a large batch in my largest stock pot that is a 20 qt capacity. Like many things I make, there isn't an actual recipe. What is important is using good quality ingredients. For this batch I will start with 2 lb ground venison, 1 lb bacon, 5 lb cooking onions, 1 spanish onion, 2 stalks celery, about 1/2 green pepper, 3-4 cloves minced garlic, home canned or frozen tomatoes, dried or home canned kidney beans, about 1 tbsp cocoa powder, about 1 tbsp brown sugar, chili powder, onion powder, garlic powder, paprika, cumin, and filtered water. I have been fairly specific about certain ingredients for a reason. Onions are a key ingredient. I like to use cooking onions for flavour and heat. A spanish onion provides sweetness to balance any sharpness to the cooking onions. I will only use home canned or home frozen tomatoes if fresh is out of season. Home canned or frozen tomatoes impart an almost fresh taste that commercially canned tomatoes seem to lack and there is none of the tinny flavour some commercially canned tomatoes have. That is important because that tinny flavour throws off the final flavour of the chili. Cocoa powder add depth and colour to the final chili. It's not something that when you taste the chili you can say "hey, that's cocoa"! So it is one of those ingredients that works in the background adding to the final results without being obvious. Brown sugar, preferrably organic, melds the flavours. Again, this should not be an obvious flavour but one that works in the background. I put kidney bean in my chili, both beet and venison. They add protein, body, texture and visual appeal. However, I willonlyuse dried or home canned kidney beans. These lack the salt of some commercially canned kidney beans but more important they have a fresher flavour. Bacon also plays a key role in venison chili. Some like to use ground pork but to me the bacon just says so much more and it imparts that all important mouth feel. Filtered water is also important as it will not impart any off flavourings to the final chili. So that's the basic ingredients.
Method: First, if using dried kidney beans, allow to soak overnight then drain. Get your mis en place in order especially for the seasonings and vegetables. Guestimate with the seasonings. I'd say I used about 1/4 c chili powder, 1/2 tbsp paprika, 1 tsp onion salt, 1 tsp garlic salt, and 1 tbsp cumin but that can always be adjusted as you are cooking. Once started, you do not want to find out you are missing an ingredient. For the seasonings, I use a larger bowl and mix them together before adding to the chili. Once you have your mis en place in order, it is time to start cooking! Cut the bacon across the strips in about 1/2-inch increments. Pan fry the bacon until browned but not crispy. Remove the pieces from the pan reserving the grease. Allow the bacon pieces to drain on a paper towel while reheating the grease. Add the ground venison to the pan and allow to brown. Do not over cook! Remove from the pan and allow to drain. Venison is quite lean so needs the extra fat but you still don't what a lot of extra fat.
Now the fun starts. Put the chopped vegetables into a large stock pot including the garlic and if you are using dried beans add them now. Do not add any seasonings yet! Some will sautée or even lightly heat the vegetables. I prefer to lightly heat the vegetables then add the browned venison and bacon pieces. Pour in 1 -2 quarts of home canned tomatoes (quart = 32 oz) and stir well. Add a little filtered water if the mixture is too dry. Bring the meat and vegetable mixture to a boil then reduce to a low simmer, stirring occasionally. Simmer until the onions are translucent. Now it is time to add the cocoa and brown sugar and if you are using canned beans, add them now too. Note the depth of the colour and add up to a 1/2 tbsp if the colour is too bright but keep in mind the chili powder and other seasonings will add colour depth as well. Now add the other seasonings and mix well. Waft the smell using your hand to gently bring the smell towards your nose. Then do a small taste test putting a tsp of chili mixture into a bowl then tasting. Careful of the taste testing as you can go through a lot of chili that way! A good idea is to get another guinea pig aka family member to do a taste test as well. My husband loves doing this and has become quite an expert of "yep, needs more garlic" even if it's cheesecake. All kidding aside, what you want is a total melody of smell and flavours. If all goes well there will be no seasoning adjustments needed. This will give you a nice chile eveyone likes without being a mouth burner. If you want more heat, add either chili powder, paprika, cayenne pepper or hot sauce.
Oh I almost forgot, I love serving chili with homemade sourdough bread. I make an entry for the starter and bread recipe shortly.
I have to admit we do not eat a lot of sandwiches. I came up with this idea as a party sandwich. It gives a nice presentation to the standard sandwich. The real trick with this sandwich besides creativity is a fresh made bun, but not any bun will do!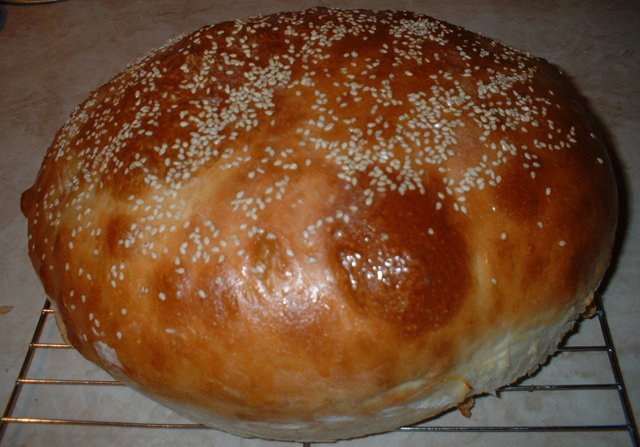 The Bun
The bun is a basic white bread but slightly modified. It is one whole loaf of bread cut in half bun style. The dough is shaped into a round and baked in the oven. I have specified organic for both the sugar and the honey for a reason. Organic granulated sugar looks like regular granulated sugar but is a light tan. It imparts flavour instead of just sweetness. I only use organic honey, never pasteurized and bought directly from the beekeeper. The flavour of the honey will depend on the time of year and what flowers the bees have collected pollen from. The deeper the amber colour of the honey, the stronger the flavour. For this recipe a medium amber honey works nicely.
Basic White Bread Modified - ABM
1 1/4 c milk
2 tbsp butter
1 tbsp granulated organic sugar
1 tbsp organic honey
1 1/2 tsp salt
1 egg
3 1/4 c unbleached flour*
1 1/2 tsp instant yeast
-----
2 tbsp melted butter
sesame seeds
Place ingredients in breadmachine pan in the order your manufacturer suggests. Set to dough setting. When finished, remove from pan onto a floured board or countertop. The dough will be sticky. *Work just enough flour in to remove stickiness. Shape into a round loaf and place on ungreased cookie sheet. Cover with moist towel and leave to rise until doubled. Brush with half of the melted butter. Sprinkle on sesame seeds. Bake at 400℉ (375℉ convection)for 15 minutes, reduce temperature to 350℉ (325℉ convection). Bake until bread is golden brown and sounds hollow when thumped on the bottom. Remove from oven, lightly brush with remaining melted butter and allow to cool on a rack before cutting in half. The Fillings
Here's where the creativity comes in. You can use whatever fillings you want. I did one of these when the kids were home for the weekend. My husband grilled a giant hamburg patty about 4 lbs of meat and his special knack. We made a huge burger then cut it into six wedges. It was a huge hit! I have a picture of one of my kids trying to take a bite out of a wedge that had to be almost 5" thick. There was a lot of laughter as one kid tried to outdo the next. The bun is just the start. The whole idea of this is to have fun with your food!
If you have access to a deli, use the fresh sliced ingredients. This party sandwich started with a light spreading of Miracle Whip on each bun half. The bottom half was loaded with a lettuce mixture, deli sliced smoked turkey and cooked ham, deli sliced swiss cheese, onions and honey mustard. I cut it into six wedges and served with homemade dill pickles.  Party Sandwich Cut
This sandwich got rave reviews. Now really it is just a regular sandwich presented differently but the looks it got was priceless! Obviously a few eyes were bigger than the tummies and again there was a lot of laughter. It's funny that food plays such an important role in all of our family and friends get togethers yet in the end the real importance is the bonding and reinforcing of relationships.  Homecanned Carrots
Carrots are quite inexpensive this time of year. One way of preserving carrots is to can them. As produce goes, carrots are one of the easiest to can.
Canning Carrots
Wash and peel the carrots. Wash again. Slice into coins or cut as desired. Pack the carrots tightly into hot jars, leaving 1-inch headspace. Add 1/2 tsp salt to each pint or 1 tsp salt per quart. As always when canning vegetables, salt is optional so you can reduce the amount or omit entirely. Ladle boiling water over the carrots leaving 1-inch headspace. Remove air bubbles. Adjust the two-piece caps. Process pints 25 minutes, quarts 30 minutes, at 10 lbs pressure.
I've had a few emails requesting budget stretching meals. The past week has been extremely busy and my new fridge still has not arrived. I'm trying to keep the refrigerator contents to a minimum. All of the freezer contents have been moved to the larger freezers. This bit of disruption would be an ideal time to order out but I decided to use up some cheese, eggs, and milk in two dishes along with a couple of pre-prepared foods from the freezer. Spanish onions are inexpensive right now so they are also ideal as an inexpensive ingredient. Good food need not be expensive! Mac & Cheese
Homemade Mac & Cheese is a true comfort food and taste so much better than the boxed kind! It is extremely easy to make and quite inexpensive depending on the amount and kinds of cheese you use. It can be a full meal in itself or served as a side dish and it does reheat well. I like using different cheeses especially extra sharp cheddar. Good quality cheese is essential but need not be expensive either. Experiment with the cheeses to get the combinations you like. You can freeze it homemade mac & cheese in trays for convenience if you choose. Here's how I make homemade mac & cheese. Please note, the measurements are only approximates as I don't really measure for this type of dish.
Method: The first prep was the cheese. For this particular mac & cheese I shredded extra sharp, colby, and mozzarella cheeses for a total amount of about three cups. Then I cooked elbow noodles until el dente and drained. A 13" x 9" glass baking dish was greased and enough noodles were poured in to form about an inch layer. Half of the shredded cheese was distrubuted evenly over the noodles. Another layer of noodles was added along with the remaining cheese. Then about three cups of bechemel (white sauce) was poured over the noodles. A bechemel sauce is simply milk thicken with flour. For this application, the sauce should be of a thinner consistency like a thin gravy. A light sprinkling of bread crumbs was the final layer. I baked the mac & cheese at 350 degrees farenheit until the top was lightly browned and the cheese was bubbling. Liver & Onions
Liver and onions is a favourite dish here. It is very inexpensive! Serve the meal simply with the addition of potatoes and a vegetable. Bread and salad are optional. Many are turned off of liver because of they way they experienced, dry and like leather, but that is not the way it should be. The first trick is to use calf liver as it is more tender. The second trick is to never overcook liver. H
Method: You will need a sautee pan and fry pan for this method. Timing is important so be sure to use mis en place. Cut two large spanish onions in half then into slices against the layers. Melt about 2 tbsp butter in the sautee pan then add onions. Stir occasionally and if need be add a little extra butter. While the onions are sauteeing, dredge the liver in flour seasoned with a little salt and pepper or garlic salt if you prefer. Lightly brown on both sides in heated fry pan on medium heat. Remove from heat. When the onions begin carmelizing, transfer the liver to the sautee pan. Continue cooking until the onions are carmelized, stirring often.  Frittata
Frittata is one of the easiest, inexpensive meals you can make. They are ideal for using up left-overs. Imagination is really the only limiting factor when making frittatas. Even though they are egg based, frittatas can be enjoyed for lunch or dinner. A frittata is basically an open faced omelet that is started on the stovetop then baked in the oven. Be warned, a slice of frittata is quite filling. While I have not tried freezing frittata, left-overs do reheat nicely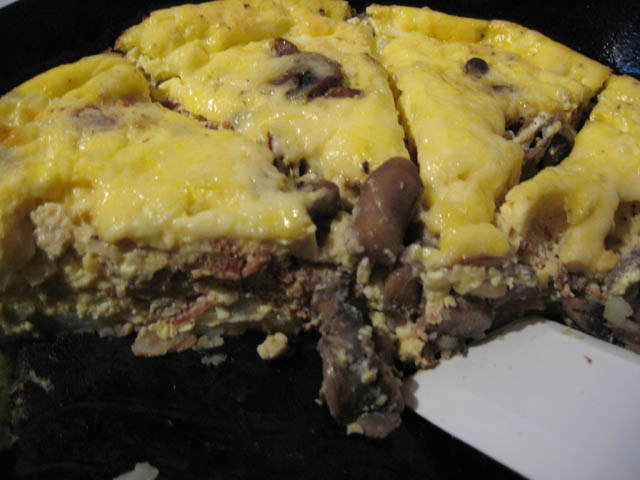 Frittata cut
Like an omelet, a frittata starts with eggs, about 8 to 10. To do your mis en place assemble the ingredients you are adding. Frozen hash browns can be used as they are but if using fresh potatoes, microwave until almost soft.
Method: Slice the potatoes. Assemble other ingredients like bacon pieces, mushrooms and shredded cheese. Wisk the eggs then stir in about 1/3 c of milk and seasonings. For a nice seasoning try adding tomatoe powder (previous entry). Now, pour a little olive oil into a cast iron fry pan and heat. Add a layer of potatoes followed by other ingredients. Allow to cooke on medium-high for about 5 to 7 minutes. Pre-heat oven to 350 degrees farenheit. Pour egg mixture over the other ingredients, reduce heat to medium then cook just until the egg mixture around the sides starts to cook. minutes. Transfer the pan to the pre-heated oven. Bake until puffy and lightly browned on top and a toothpick inserted into the centre comes out clean. Remove from oven. Cut into wedge shaped pieces.
I keep bits and pieces of left-overs in the freezers all vacuum sealed for just these types of meals. However, I always have sauteed mushrooms and homemade bacon pieces in the freezer in meal sized portions. This frittata was made this past Saturday for brunch when the kids were here and I simply didn't feel like spending a lot of time in the kitchen. Our new grandbaby is due soon so I wanted to spend more family time with them instead of cooking. So I pulled a package of bacon bits and sauteed mushrooms from the freezer. After the potatoes were almost cooked, I defrosted the bacon and mushrooms and got my mis en place ready: chopped onion, shredded extra sharp cheddar and wisked eggs. From there is was basically dumping everything into the pan, cooking on the stovetop then transferring to the oven. Everything came together nicely, very quickly freeing up the time I wanted.
Enjoy!
Soon it will be hunting season and every hunter hopes to lucky enough to bag a deer. Preserving the meat is important but the real fun comes in cooking the venison. I thought I would make a few entries on some of the ways I preserve and cook venison. Watch for other venison methods and recipes to be published over the next week or so.
Venison roast is a nice change from pork or beef roasts. Here is how I make venison roast.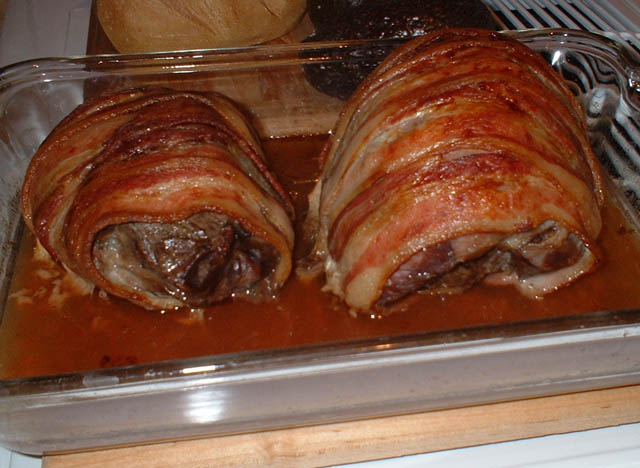 Venison Roasted
There are a few important things to know when cooking venison. Venison is very lean so a fat needs to be added when cooking. Usually the fat is ground pork if cooking ground venison or bacon for roasts. Do not over cook venison or it will be too dry. When I was first looking for recipes for cooking venison, one source indicated to soak in salt water but most sources say to avoid salting the meat prior to cooking. If there is any connective tissue on the roast, remove that as it will give an unpleasant taste.
I started with two frozen venison roasts, one was sirloin tip and the other rump. The roasts were thawed in the refrigerator overnight. Any connective tissue was cut away. Each roast was wrapped with bacon strips and placed in a glass baking dish. Wrapping the roast is easy. Just start at one end wrapping around the roast then move slice by slice until the entire roast is wrapped.
I cooked the uncovered roasts at 300 degrees farenheit on convection oven setting until the interal temperature was 140 degrees farenheit.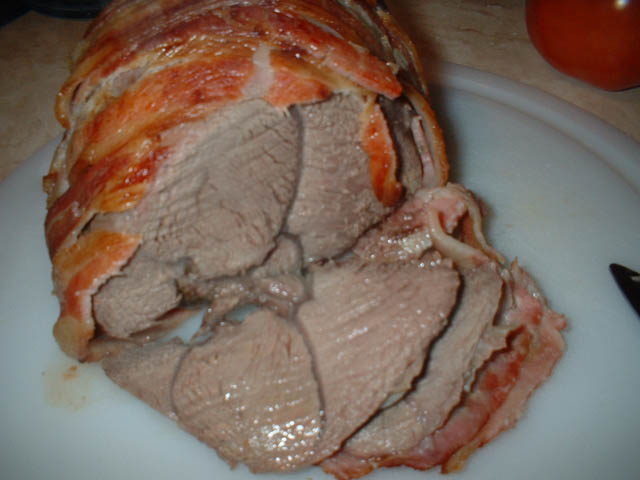 Venison Cut
The roasts where carefully removed from the baking pan and allowed to rest before cutting. There was enough juices for gravy but they needed to be put through a gravy separator to remove the fat first. Then I placed the juices in a sauce pan, added a little Worchestershire sauce and brought to a light boil. I used an arrowroot flour slurry to make a thin gravy. When the gravy was finished it was time to cut the meat.
Each slice of meat has an outer layer of bacon that looks nice when plated especially with a little gravy. I like to keep roasted venison meals more like old fashioned country cooking. This venison was served with baked potatoes, carrot coins and homemade sour dough bread.
Enjoy!
Garden Gnome
It's that time of year for baking cookies. One of my family's all time favourite is peanut butter cookies so I'm sure to include them in the holiday baking.  Peanut Butter Cookies
The recipe I use comes from the old Betty Crocker's Cookbook given to me by my late mother-in-law the first Christmas after we were married. The pages have yellowed and some have spills along with the first 5 pages missing so I don't have a publication date but I know the book is a least over thirty years. This cookbook got me out of many a near cooking disaster when I was first married. It is still the first cookbook I turn to despite having a lot of other cookbooks.
These cookies are so popular with family and friends that I multiple the recipe by four and often have to make a second batch. Some of the dough balls always find their way into my husband's mouth with his feeble attempt to convince me he is just taste testing. Then he calmly pours himself a huge glass of milk and hovers in the kitchen waiting for the first hot cookies. Once he has loaded his plate and wandered off to enjoy his snitched treats I can get on with the rest of the cookies.
Be sure to check my notes at the end of the recipe.
Peanut Butter Cookies
1/2 c shortening (half butter or margarine, softened)
1/2 c peanut butter
1/2 c granulated sugar
1/2 c brown sugar (packed)
1 egg
1 1/4 c all-purpose flour
3/4 tsp baking soda
1/2 tsp baking powder
1/4 tsp salt
Mix thoroughly shorening, peanut butter, granulated sugar, brown sugar and egg. Blend in flour, baking soda, baking powder, and salt. Cover and chill.
Heat oven to 375 degrees farenheit. Shape dough into 1-inch balls. Place 3 inches apart on lightly greased baking sheet. With fork dippen in flour, flatten in crisscross pattern to 2 inches. Bake 10 to 12 mintes or until set but not hard.
About 3 dozen cookies.
My Notes: I use half butter and half shortening as it gives a better flavour. The original recipe just said "soda" so I have corrected that to "baking soda". The original recipe indicates to bake at 375 degrees farenheit. This temperature works fine for regular baking pans and ovens. I had to adjust the temperature by lowering 25 degrees farenheit for baking with convection. I found the timing is slightly lowered because of convection and using insulated cookie sheets. Oh and the orginal recipe did not indicate whether to grease the cookie sheet. With these cookies greasing in unnecessary.
Enjoy!
We are cheese lovers so I've been experimenting. What I have found is those blocks of supermarket cheese all taste the same. I want more! So we have been having a lot of fun.
I'd say the vast majority of the cheeses I use are always vacuumed sealed after opening. I do this to prevent the cheese from picking up other fridge odours as well as keeping the flavour as fresh as possible. At the same time it keeps the cheese from spoiling extending the shelf life of the cheese.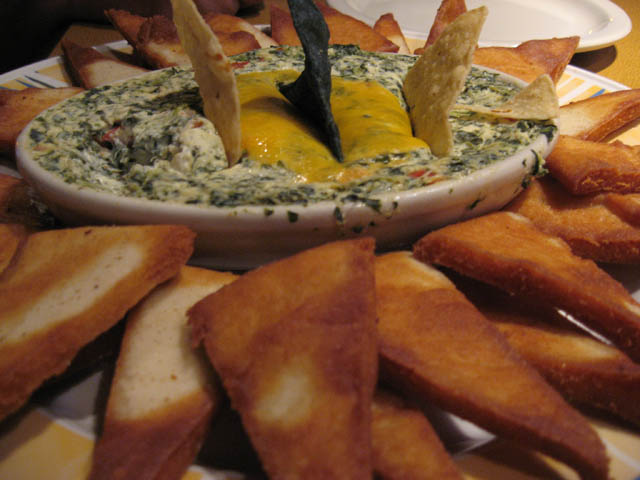 Kelsey's Four Cheese Spinach Dip
Last weekend, we took a road trip to purchase the new to us car and visit our kids. Along the way we stopped at Kelsey's to meet with friends Friday night. Their four cheese spinach dip is really nice! It has a nice rich flavour and is well presented. It is served warm with a melba toast type of triangles. This is one dish I would like to duplicate at home. I have checked online for copycat recipes. I think I can make a suitable but not identical dish using fresh spinach.  Saganaki
This is a ripened firm cheese served fried. We were introduced to it so decided to try it at home without the flaming brandy extract. It really is more of an appetizer. The cheese is sliced about 1/4 to 1/2 inch thick then fried on both sides until golden brown. I like to drain a little to remove the extra fat. Then we use a pizza cutter to cut into bite sized squares. I like adding a toothpick to each square when serving to guests and a little garnish looks nice as well.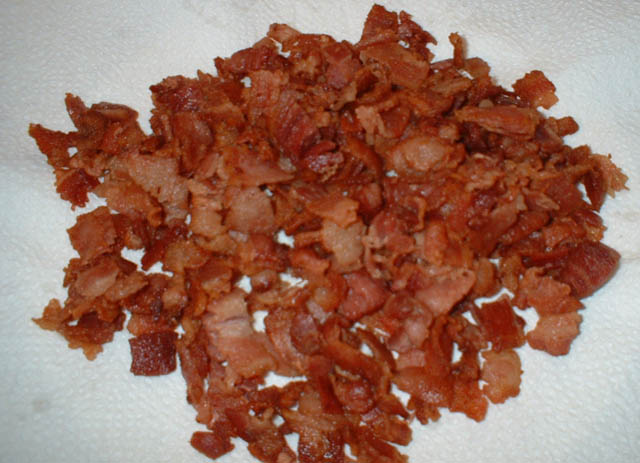 Homemade Bacon Bits
There are two ways to preserve bacon, raw and cooked. I like to cook bacon strips then vacuum seal them for those times I'm in a hurry. I prefer re-heating the bag in a pan of boiling water to prevent any further cooking from the microwave. The easiest way to do pre-cooked bacon is to cook the strips, drain and cool. Then simply vacuum seal in meal sized portions. I also like making my own bacon bits.
Homemade bacon bits are just so easy to make and I think they taste a lot better than store bought. Cut across the strips to form small pieces. Fry the pieces, drain and cool. I freeze these using two methods. A ziploc container is perfect for bacon bits that will be used up within a couple of months in the freezer. A small container is nice to have on hand just to sprinkle on salads or baked potatoes especially for individual servings. Vacuum sealing is my preferred for bacon bites for family sized meals. I divide into meal sized portions and vacuum seal. If you read through my cooking blog, you will quickly realize vacuum sealing is a must for anyone serious about food saving. Sorry to sound like a broken record but I feel this is a must have kitchen tool!
Enjoy!
Wow! Things are just happening way too fast here. I've finished up canning the vegetables so am now onto canning meat products. So that's where it is in the kitchen.
On the exciting front, we bought a new car and ordered in our new fridge, both not by choice. The car was tired period but we really wanted to make it last the winter. No dice! Apparently cold air blowing out the fridge is not a real good thing either. Why both decided to go at once is beyond me but they did. Like it is not as if having the money sitting in the bank would have been a better idea in my book.
Our soon to be born grandbaby is still doing well despite the problems so we took a road trip to visit as well as power shop. We stayed the weekend so that was very nice. Food plays an important role in our family so we managed to find just the right food to keep everyone happy. Nino D'Aversa Bakery
Saturday in the late morning we sealed the deal on the new car. Beside the car lot was a wonderful little Italian eatery and bakery. We left the new car at the dealership while they finished the final details while we went for lunch. Our kid and kid-in-law were with us. Our senses were bombarded with the most delicious aromas as soon as we entered. To the left there was a large dining area backed by an open kitchen for wood baked pizza. I just had to take pictures of that! The oven was magnicifant! Directly in line with the front door was a very large island with buffet style Italian foods, and delectable smelling coffees. This island wrapped around to the right to include three huge pastry coolers. But the right side of the building was just amazing!
This picture shows just a very small idea of the sight! The owner was thrilled I was taking pictures, something I always wonder about so normally ask permission. The bakery portion aside of pastries was huge! Three walls were covered with stainless steel racks all overflowing with various breads and rolls. Between the two long walls there were two shorter height rows of stainless steel racks also over flowing with various buns and rolls. Oh the smell! What an absolute delight! I just had to buy a loaf of Vienna Style bread, buns and pastries. After lunch we waddled over to pick-up our new car. We left the dealership with a box of pastries, waved good-bye to our old car then made our way to one of our kid's house. Aberfoyle Model Train Show
On the way to their house, we stopped in Aberfoyle to see the model train show. This is not a business but rather a personal hobby comprising some 1500 square foot of model railroad built in "O" scale. The show opens to the public two weekends in the spring and three weekends after the Canadian Thanksgiving in the fall.
Here's a link if you would like to find out more information about this absolutely outstanding and impressive display by folks who just love what they are doing and want to share - http://www.aberfoylejunction.com/tframe.htm Aberfoyle Model Train Show
I took several mini video clips of the trains. Unfortunately video.google.com just doesn't seem to like dial-up so keeps booting me off. That's what I really wanted to share. That aside, the attention to detail is absolutely amazing. I think I snapped somewhere close to seventy pictures while we were there. The detail, that what really gets to you. They even have people eating in the little dining cars complete with very detailed place settings. It was very, very impressive!
There is nothing better than being with family, sharing great food and seeing soming interesting. The day wasn't over even though we were getting a little tired. Chinese Take-Out
On the way to our kids' house we stopped at a Matag store. Wow! Talk about nice appliances. I thought my new JennAir was slick but holy mackinolies! Unfortunately we did not find a fridge that would fit our space. Once we arrived at our kids' house, we decided we had had enough excitement for one day so changed into comfort clothes to relax, watch football and order in Chinese food.
It is a real treat for us to get good Chinese food and this was good!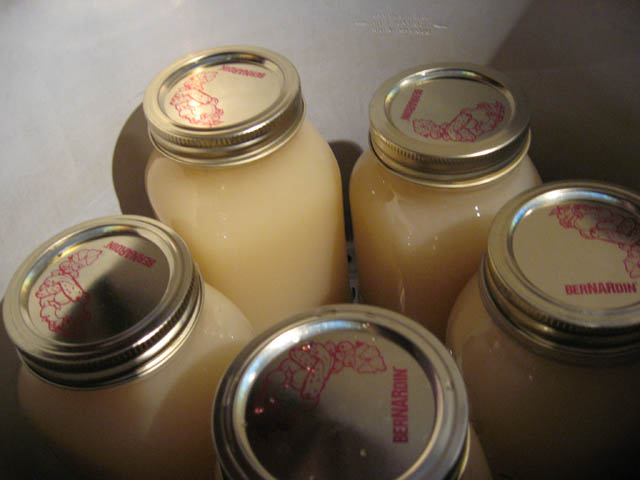 Turkey Stock
I usually make turkey stock whenever we have turkey. It is a two day process. My turkey stock is not clear. The reason for this is I still stuff the turkey so there is always bits of left-over stuffing in the carcass. What I do is debone the turkey and place all the bones in a large stock pot. Then I add an unpeeled onion cut into quarters. Not peeling the onion adds a nice, natural colour to the stock. I also add about 2 large carrots, cleaned, not peeled and cut in half along with celery sticks. The stock is cooked low and long, cooled then defatted. The next morning the stock is strained then raised to boiling for canning.