My photo
Ontario, Canada
I am a wife, mother and grandma who enjoys the many aspects of homemaking. A variety of interests and hobbies combined with travel keep me active. They reflect the importance of family, friends, home and good food.
Cook ingredients that you are used to cooking by other techniques, such as fish, chicken, or hamburgers. In other words be comfortable with the ingredients you are using.
--Bobby Flay

For Your Information

Please watch this area for important information like updates, food recalls, polls, contests, coupons, and freebies.
  • [March 19, 2020] - Effective Mar 17, this blog will no longer accept advertising. The reason is very simple. If I like a product, I will promote it without compensation. If I don't like a product, I will have no problem saying so.
  • [March 17, 2020] - A return to blogging! Stay tuned for new tips, resources and all things food related.
  • [February 1, 2016] - An interesting report on why you should always choose organic tea verses non-organic: Toxic Tea (pdf format)
  • Sticky Post - Warning: 4ever Recap reusable canning lids. The reports are growing daily of these lids losing their seal during storage. Some have lost their entire season's worth of canning to these seal failures! [Update: 4ever Recap appears to be out of business.]

Popular Posts

Monday, August 31, 2009

Frugal Kitchens 101 - List of Pantry Items That Seldom Go On Sale

Frugal Kitchens 101

Throughout much of August I have focused on pantry stocking as the theme for Frugal Kitchens 101. Ideally by now you have been working on your personal usage list as the first step to setting up your well stocked pantry. When you are stocking your pantry two factors become critical and those are unit price and sale price. Any food bought for the purposes of stocking your pantry should have the lowest unit price and if possible combined with some type of sale discount. That being said when you are stocking your pantry there are some food items that very seldom if ever go on sale. This week's Frugal Kitchens 101 focuses on these pantry items.

When it comes to pantry items that seldom if ever go on sale is to buy at the lowest price if possible. For example if I consider 3 larger grocery stores in my area - nofrills®, Sobey's® and Real Canadian Super Store® (RCSS), nofrills® is consistently the cheapest on the pantry items that do not go on sale. Buying these same items at Sobey's® can add as much as 50% to the cost while RCSS will cost anywhere from 20-35% more. So with that in mind for me nofrills® is the best choice when stocking up on these items. However, we also have a couple of Bulk Barn® stores that I frequent when necessary because of the distance from home. Some but not all of these pantry items are cheaper bought in bulk there than from nofrills®. What this really means is you have to know your prices and know where you can get that pantry item the cheapest. The way to deal with these items is to stock up for a 1 year supply then re-stock per item once your supply gets down to the quarter mark for that item. In some cases especially just before the Christmas holiday season some baking ingredients may go on sale briefly and usually not by much so stock up enough to get you to the next sale. It also pays to check online for cheaper sources as sometimes even with shipping you can save a fair amount on these items.

Here is the list of pantry items that I have found seldom if ever goes on sale. Your list likely will differ based on your location.

  • dried beans/legumes
  • instant milk
  • instant potatoes
  • some powdered cheeses especially cheddar
  • cocoa
  • baking powder
  • baking soda
  • salt(s)
  • dried herbs, spices, seasonings, seasoning blends
  • flavourings (eg. vanilla extract) and colourants (eg. food colouring, gravy browning)
  • some sweeteners - honey, maple syrup, fructose, sugar substitutes
  • popcorn (not microwave packages)
  • loose leaf teas
  • most vinegars
  • rices
  • specialty items such as just about anything gourmet
  • some flours mainly the specialty flours (eg. spelt, seminola, dark rye) and whole wheat
Enjoy!


Sunday, August 30, 2009

He Said (4) - Glazed Prosciutto Wrapped Shrimp

If you recall my husband and I are having a bit of a contest with each of us using a recipe from Better Homes and Gardens® New Grilling Book to create a meal. In total there will be 12 recipes, 6 of his choosing and 6 of mine. The contest ends August 31 so the first week of September I will post a poll where you can vote for the meal you liked best. The rules are all the ingredients must be used but the amounts can be altered.

glazed Prosciutto wrapped shrimpGlazed Prosciutto Wrapped Shrimp

My husband chose a shrimp dish as his fourth contest recipe. The recipe for the glazed prosciutto wrapped shrimp said that serving with couscous was optional. My husband served this recipe without the couscous as an appetizer. This is definitely a keeper recipe especially for using as an appetizer.

The recipe called for a bourbon grilling sauce but did not give a recipe so I made one. There are a lot of flavours going on in this appetizer. There is the sweet seafood flavour of the shrimp mixed with the saltiness of the prosciutto that mingles nicely with the mild smoky heat of the grilling sauce. It really is a lovely combination, one sure to please!

Glazed Prosciutto Wrapped Shrimp
source: Meredith Corporation, Better Homes and Garden New Grilling Book, 2005. Pp. 336

½ c bourbon grilling sauce (see my recipe below)
½ tsp chili powder
24 fresh or frozen large shrimp in shells
8 thin slices prosciutto

Soak wood skewers 15 to 20 minutes. Peel and devein shrimp. Pat dry and set aside. Mix grilling sauce and chili powder. Wrap each shrimp with a half of strip of prosciutto. Thread onto a skewer. Brush with grilling sauce. Grill on medium heat until shrimp is opaque and prosciutto has defined grill marks, about 6 minutes. Remove from grill and serve as desired.

bourbon grilling sauceBourbon Grilling Sauce

The ingredients for the grilling sauce are pictured in the top photo. The bottom photo shows the 2 - 250 ml jars of canned sauce along with what was used for the shrimp (brush) and put aside for later use. I used a Vadalia onion and Jack Daniel's® Tennessee Whiskey in this recipe. I also eliminated the salt, reduced the liquid smoke and increased the tomato paste. The yield was about 1 L (4 c). Each and every time I cook I'm always alert to a canning opportunity. The flavour of this sauce even without a bit of mellowing gets rave reviews from both of us. I was impressed enough with the flavour that I canned up 2 - 250 ml test jars so will report back on those results. The remaining sauce was refrigerated for an event we are hosting mid-week.

Bourbon Whiskey Barbeque Sauce
source: my recipe

½ onion
4 cloves garlic
¾ cup bourbon whiskey
¼ tsp ground black pepper
2 c ketchup
½ c tomato paste
⅓ c cider vinegar
1 tbsp liquid smoke flavoring
¼ c Worcestershire sauce
½ c packed brown sugar
⅓ tsp hot pepper sauce, or to taste

Combine onion, garlic, and whiskey in a large skillet over medium heat. Simmer mixture for 10 minutes, or until onion is translucent. Stir in remaining ingredients. Bring to a boil. Reduce heat to medium-low, and simmer for 20 minutes.
Yield: about 1 L (4 c)

Canning Instructions: Ladle the hot sauce into 250 ml (half-pint) jars leaving ¼-inch headspace. Wipe rims. Adjust 2 piece lids. Process 20 minutes in BWB canner at altitudes under 1,000 feet above sea level. For higher altitudes refer to altitude adjustment chart.


Friday, August 28, 2009

She Said (6) - Salmon and Vegetable Packets

If you recall my husband and I are having a bit of a contest with each of us using a recipe from Better Homes and Gardens® New Grilling Book to create a meal. In total there will be 12 recipes, 6 of his choosing and 6 of mine. The contest ends August 31 so the first week of September I will post a poll where you can vote for the meal you liked best. The rules are all the ingredients must be used but the amounts can be altered.

salmon and vegetable packet ingredientsIngredients

I chose a salmon dish for my 6th and final recipe of the contest. The recipe indicated that the meal is cooked on the grill then served in its foil pouch which would make this an ideal recipe for camping. I did not serve in the foil pouch choosing to plate the meal instead.

The ingredients for the meal are pictured. I used wild Pacific salmon fillets and homemade chicken stock. The dried rosemary was from my previous garden. All of the produce used in the dish was locally grown some from my garden and some purchased. The recipe said to use 4 small yellow summer squash (zucchini) but I used 3 medium green summer squash instead.

Salmon and Vegetable Packets
source: Meredith Corporation, Better Homes and Garden New Grilling Book, 2005. Pp. 322

1 lb fresh or frozen skinless salmon
2 c carrot strips
2 c red sweet pepper strips
12 fresh asparagus spears
4 small summer squash
½ c dry white wine or chicken stock
2 tsp snipped fresh rosemary or ½ tsp dried rosemary
2 cloves garlic, minced
¼ tsp salt
¼ tsp black pepper
2 tbsp butter
hot cooked white or brown rice (optional)

Thaw fish if frozen. Rinse fish and pat dry with paper towels. Measure the thickness of the fish then cut into 4 serving-size pieces and set aside. [Foil pack formation method changed by me.] Cut eight 18-inch pieces of heavy-duty foil. Layer in 4 sets of two. Spray the top layer of foil with oil in health mister or brush lightly with vegetable oil. Arrange the vegetables and salmon in equal portions on each top layer of foil. Mix chicken stock, rosemary, garlic, salt and pepper together in a bowl. Drizzle over the fish and vegetables. Top each packet with a pat of butter. Fold the 2 opposite sided together and make a double fold to hold them together. Fold the each end together using a double fold to create a sealed packet. Repeat with the second layer of foil for each packet making it slightly looser than the first. Place on preheated medium heat grill. Cook 12 to 14 minutes per ½-inch thickness of fish. When finished cooking remove from heat. Carefully open each packet avoiding the steam. Serve in foil packet or plate as desired.

assembling foil packetsGrilling

Pictured is the assembly of the foil packets (top) and on the grill (bottom). Once you have the fish and vegetables ready on the 2 layers of foil it is time to form your packet. This is quite easy using a double fold method that forms a centre seam. The same double fold method is used to form each end seam. The end result is a tightly sealed rectangular shaped foil packet with 3 double folded seams. To made a double seam: As oriented in the picture bring the top and bottom edges of the foil together over the fish and vegetables. Hold the two edges then fold them over about a ½-inch. Press along the fold with your fingers. Fold the first fold over again about a ½-inch. Press with your fingers then press the fold flat across the packet. You have now created a double seam. Repeat this fold on each end to create a tightly sealed foil packet.

Foil packet cooking whether at home or camping is a convenient method for cooking moist, tender and tasty meals with little clean-up. The foil packet itself can serve as the serving dish especially when camping. The food is cooked by the steam produced from the food as it cooks inside the packet. This method results in moist, tender and flavourful meats, poultry and fish. A variety of vegetables and/or sauces can be added to the packets for a complete entrée or cooked in separate foil packets as a side dish.

salmon and vegetable packetsSalmon and Vegetable Packets

Pictured is the salmon and vegetable packet after cooking served with a side of Calrose rice. Calrose rice is a medium grain rice grown in California. It was developed in California in the early 1970s from a radiation-bred variety of japonica medium-grain rice. The rice is sticky when cooked making it ideal for sushi. My favourite way to cook Calrose rice is in the rice maker with homemade chicken stock and butter.

What I love about using any steaming method of cooking is the colour retention in vegetables. Don't they look lovely? The salmon and vegetable packet did not disappoint. The salmon was nicely cooked, definitely flakey and tender. I liked the addition of asparagus in the vegetable mix. The sauce used was pleasant and not overpowering. I would be tempted to add a bit of maple syrup to the sauce. Overall we found the meal quite pleasing so this is a keeper recipe.


Thursday, August 27, 2009

Kitchen Quick Tips - Hamburg Patties

kitchen quick tips
When shaping homemade hamburg patties make a shallow divot or even a hole in the middle. This will allow the burgers to cook faster without the outsides getting overcooked and prevent the pillowing. The hole disappears as the burger cooks.


Wednesday, August 26, 2009

Creamy Penne with Vegetables

If you have been following this blog you likely read about the foodie road trip I made recently. While the trip was mainly a produce gathering trip I managed to make a stop at one of my favourite places to shop, the Bulk Barn®. It was at a different location than the Bulk Barn I wrote about in this post but basically all of the Bulk Barn® stores offer pretty much the same selection. There always seems to be something new to try too!

organic penne product of ItalyOrganic Penne

The current buzz word of the day with respect to food is organic. Now the problem I have with this term is unless you grow the food yourself you are trusting someone else's definition of organic. It's very difficult to look at two tomatoes side-by-side and determine which one is organic. It becomes more difficult when assessing the organic label on processed foods. So there is the trust factor.

At any rate, Bulk Barn® is now carrying a limited variety of organic pastas from Italy. They are on average 69¢ per pound in comparison to the regular pastas at 39¢ per pound. I bought enough penne rigate for a meal just to try it.


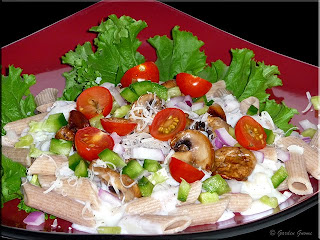
creamy penne with vegetablesCreamy Penne Rigate with Vegetables

Penne is a cylindrical shaped past that gets its name from Latin penna meaning feather or quill. There are
two variants: "penne lisce" (smooth) and "penne rigate" (furrowed). Penne is traditionally cooked to al dente then served with pasta sauces such as marinara. The shape makes penne a versatile pasta because the hollow centre allows it to hold sauce, while the angular ends act as scoops. The ridges on penne rigate
allows it to hold still more sauce while providing texture to the dish.

I cooked the penne rigate to al dente and drained. Then I place the hot penne on Chinese mustard and topped with a basic béchamel sauce lightly seasoned with Herbs de Provence, sautéed mushrooms, sweet green pepper, sweet banana pepper, Sweet Millions cherry tomatoes, red onion and fresh grated Parmesan cheese. The warmth of the penne released some of the peppery warmth of the Chinese mustard. The end result was a delightfully simple, home style meal that really came in on the frugal side despite the additional cost for the organic pasta.

Would I buy organic pasta again? I have to say that I would likely buy this particular brand of organic pasta again but not necessarily because it is organic but rather for the flavour. The penne had a nice almost a mild nutty flavour and texture that is quite often missing from some of the newer whole wheat pastas. As a specialty pasta this one is well worth buying!


Tuesday, August 25, 2009

She Said (5) - Apple Glazed Chicken Kabobs

If you recall my husband and I are having a bit of a contest with each of us using a recipe from Better Homes and Gardens® New Grilling Book to create a meal. In total there will be 12 recipes, 6 of his choosing and 6 of mine. The contest ends August 31 so the first week of September I will post a poll where you can vote for the meal you liked best. The rules are all the ingredients must be used but the amounts can be altered.

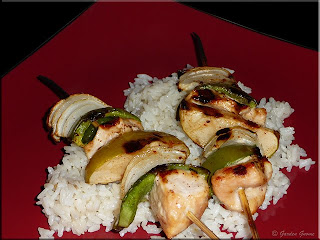
apple-glazed chicken kabobsApple Glazed Chicken Kabobs

I decided to make the apple-glazed chicken kabobs as my fifth contest recipe. It appealed to me because kabobs are always a fun presentation. The recipe was intended for the indoor grill but I used the outdoor grill instead. The aromatic apple glaze tantalized our senses while waiting for the kabobs to cook. This recipe is a definite keeper! It could easily be modified to include red sweet pepper, sweet banana pepper or any vegetable that pairs nicely with apple.

I used homemade apple jelly, a Granny Smith apple and a Vadellia onion in this recipe. The kabobs were served on a bed of Calrose rice cooked in homemade chicken stock and butter.

Apple Glazed Chicken Kabobs
source: Meredith Corporation, Better Homes and Garden New Grilling Book, 2005. Pp. 390

1 c apple jelly
2 tbsp honey
2 tbsp lemon juice
2 tbsp butter
1 tsp ground cinnamon
¼ tsp ground cloves
1 lb boneless, skinless chicken breasts
1 tsp garlic powder
½ tsp celery salt
½ to 1 tsp ground black pepper
1 large onion
1 large green sweet pepper
1 large apple
1 tbsp olive oil

Place 8 wood skewers in a shallow pan. Cover with water and allow to soak at least 30 minutes. Combine jelly, honey, lemon juice, butter, cinnamon and cloves in a medium saucepan. Bring to a boil then reduce to simmer. Simmer 6 to 8 minutes or until reduced to 1⅓ c whisking frequently. Remove glaze from heat and set aside. Cut the chicken, onion and pepper into 1 - inch pieces. Wash and cut apple into wedges. Remove core. Place in bowl of water with a splash of lemon juice until ready to use. Preheat the grill to medium high. Sprinkle chicken with garlic powder, celery salt and black pepper. Alternately thread chicken, onion, pepper and apple wedges. Place the kabobs on the grill and grill until chicken is no longer pink and vegetables are crisp-tender with well defined grill marks. Reheat glaze. Brush kabobs with glaze just before serving.


Monday, August 24, 2009

Frugal Kitchens 101 - Almost Painless Stocking-up

Frugal Kitchens 101
In the past couple of Frugal Kitchens 101 I have discussed ways to stock up the pantry along with a few tips for organizing and protecting your food supply. In previous posts I have spoke of larger bulk food purchases especially with respect for beef and pork. The problem with larger bulk purchases is they require a bigger outlay of money. While larger bulk purchases are quite necessary for creating a well stocked pantry including freezers it is surprising at how easily it is to stock up both with a little bit of creativity and just a few dollars per grocery shopping trip. So this week the topic for Frugal Kitchens 101 is almost painless stocking-up.

Have you ever heard the phrase take care of the pennies and the dollars will take care of themselves? Well the same principle holds true for stocking your pantry. Don't try to establish a one year food supply all at once! Do it in small, painless steps by constantly adding small amounts to your pantry while working from your personal usage list and keeping in mind never to stock something your family may not/will not use.

  1. use a percentage of your food budget - If your food budget is $100 use 5 - 10% strictly for stocking up. That is if you have budgeted $100 for that grocery shopping trip, use $5 - 10 for stock-up items preferably bought on sale. It is surprising at how much you can buy for the pantry using only $5. This amount is enough to buy 4 - 5 lb dried beans or 6+ tins of tuna or 5+ bags dried pasta or 3 bags of sugar or even 10 cans of canned vegetables. If you do this every grocery shopping trip and you will find your pantry filling up in no time without you even missing that $5 per grocery shopping trip.
  2. bank those coupon savings - I'm not a big coupon user because we seldom get coupons for what we use and there is no such thing as doubling them. However, if you use coupons set up a bulk food fund jar or envelope. If you save $5 on your grocery bill buy using coupons put the savings into your bulk food fund. It won't be long before you have a tidy little sum saved up that can be used towards a bulk meat purchase or a pantry shopping spree.
  3. bank your actual vs budget difference - If you budgeted $100 for a grocery shopping trip but the total came to $97 take the $3 difference and put that in your bulk food fund. You had planned on spending it anyway so this is just saving it for spending at a later date.
  4. bank your garden savings - Home gardens can save quite a bit of money. For example we eat salad greens almost daily. Growing them saves me anywhere from $5 - $10 per week. The savings are fair game for the bulk food fund.
  5. be prepared to take advantage of sales - This really goes without saying however taking advantage of sales is an excellent way to help stock-up. You really need to be flexible. The real sales quite often are unadvertised in store specials. So with you 5 - 10% of your grocery budget destined for pantry stock-up look for these in store specials. Quite often I will leave the house figuring I am going to stock-up on item A but when I get to the store there is a great deal on item B so I buy item B instead.
  6. invest some time - There are several commercially made convenience mixes available and on the surface they seem like a good deal especially when on sale for 99¢. The reality is you are paying upwards of 60¢ per mix just for the convenience of the factory putting it together for you plus you have the packaging to deal with. Invest a bit of time to make your own mixes. For example in less than 15 minutes you can assemble 10 cake mixes in mason jars ready to use just as commercial mixes for a fraction of the cost and just as convenient. You now have 10 cake mixes in your pantry at an approximate cost of $3 vs $9.90 and less than 15 minutes of time. Do the same thing for any mix you would normally buy. There are a lot of online sites with home made mix recipes. Virtually all of these mixes will come in at a third or less than the cost of commercial mixes.
  7. home canning - I can't stress enough how much money this can save you even if you have to buy the produce. If you have a pressure canner which I highly recommend as it will pay for itself in food savings in less than 3 months you can take advantage of most produce and meat/poultry/fish in store sales. I picked up pork shoulder roast for $1/lb and canned up several jars for a very convenient, low cost pantry shelf product. Store bought canned chicken or ham usually goes for about 99¢ per 4 oz can. Chicken often goes on sale here for 69¢ per lb so I can that at a cost to me of 17¢ per 4 oz yet it is the same product only I've saved 82¢ per 4 oz.
  8. once stocked - Once fully stocked at a year to 18 month supply you will find yourself not doing a lot of grocery shopping. Shop only when necessary which will save on impulse buying. The exception to this rule is cherry picking the good sales but again only if it something you will use. In order for your pantry to run smoothly you need to rotate the food but now you have a focus of maintaining your supply. For example, when you get to the half way mark of any food item in your pantry make note of that. Now start watching the sales so that by the time you get to the quarter mark you will have with any luck replenished your supplies. The focus becomes that particular food item. For example your supply of home canned or home frozen chicken is getting low. Chicken is going on sale next week so wait until it goes on sale then buy 30 lb which at my price would be $20.70. In the same grocery trip I would likely pick-up milk, eggs, produce and any cheese we needed so my shopping trip would come in at less than $40 total for that week. That night chicken would be on the menu then the rest divided in half with part going towards canning and the other half into the freezer. Now the following week I really don't need anything so don't do a grocery shopping. And so it goes with the food in the pantry being constantly rotated and yet remaining at a year to 18 month supply.


Sunday, August 23, 2009

She Said (4) - Mixed Berry Shortcake

If you recall my husband and I are having a bit of a contest with each of us using a recipe from Better Homes and Gardens® New Grilling Book to create a meal. In total there will be 12 recipes, 6 of his choosing and 6 of mine. The contest ends August 31 so the first week of September I will post a poll where you can vote for the meal you liked best. The rules are all the ingredients must be used but the amounts can be altered.

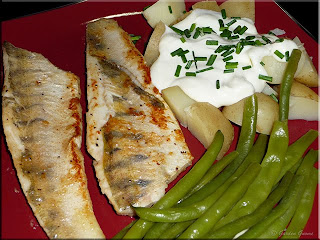
pickerel dinnerPickerel Dinner

We eat a fair amount of pickerel simply because we have a lot of it between what I catch and what friends give us. My preferred method of cooking pickerel is pan frying. The thin filets fry up quickly so even with serving with steamed vegetables the meal takes about 15 minutes from start to finish. The pickerel was lightly seasoned with garlic pepper served with steamed new potatoes and steamed string beans.

Method for Steaming Vegetables: Place one inch of water in a sauce pan. Place the prepared vegetables in the steamer basket and put it into the saucepan. The basket should not touch the water. Place lid on saucepan. Bring the water to a boil. Reduce heat to just maintain the steam. Steam vegetables until just al dente with the exception of root vegetables that should be steamed until just tender. Remove from heat and serve.

Shortcake

We do not eat a lot of desserts so I thought it would be interesting to choose a dessert recipe Better Homes and Gardens® New Grilling Book as one of my contest recipes. Pictured is the shortcake portion of the Mixed Berry Shortcake I decided to make. Ontario berries are in season which influenced my choice. I used organic sugar and unbleached flour in this recipe.

Mixed Berry Shortcake
source: Meredith Corporation, Better Homes and Garden New Grilling Book, 2005. Pp. 430

6 c sliced fresh strawberries, raspberries, blueberries, and/or blueberries
½ c sugar
2 c all-purpose flour
2 tsp baking powder
½ c butter
1 beaten egg
⅔ c milk
1 c whipping cream, whipped

Grease a 8x1½-inch round baking pan. Mix the berries and ¼ c of the sugar in a small bowl and set aside. Combine the remaining sugar, flour and baking powder. Cut in butter until mixture resembles coarse crumbs. Combine egg and milk. Stir into flour mixture just enough to moisten. Spread the dough into prepared pan. Bake at 450ºF for 15 to 18 minutes or until a wooden toothpick inserted in centre comes out clean. Cook in pan for 10 minutes. Remove from pan. [Split into two layers and spoon half of berries and half of whip cream over the bottom. Place top layer and top with remaining whipped cream and berries. Cut into wedges. Serve immediately.] Modified to: Spoon berries over the shortcake. Top with berries. Cut into wedges and serve immediately.

Whipped Cream [my method]: Place cold whipping cream in chilled bowl of stand mixer. Whip until the cream forms soft peaks. Mix is ½ tsp vanilla and 2 tsp organic sugar. Serve.

mixed berry shortcakeMixed Berry Shortcake

The shortcake portion of this dessert is very heavy and dense yet surprisingly quite tasty. It paired nicely with the lighness of the berries and whipped cream. The shortcake could easily be baked on the grill rather than in the oven as well.

Pictured is the entire desert before cutting into wedges. This is a dessert I would make again with one modification. Once the dessert is assembled any left-overs will not keep easily. To remedy thisI would spread the shortcake mixture into the bottoms of large muffin tins to make 6 individual serving sized portions. An alternative solution is to make the shortcake in the round pan and cut it into wedges then just top the desired number of wedges rather than the entire shortcake.


Saturday, August 22, 2009

He Said (3) - Burgers with Mushroom-Vermouth Topper

If you recall my husband and I are having a bit of a contest with each of us using a recipe from Better Homes and Gardens® New Grilling Book to create a meal. In total there will be 12 recipes, 6 of his choosing and 6 of mine. The contest ends August 31 so the first week of September I will post a poll where you can vote for the meal you liked best. The rules are all the ingredients must be used but the amounts can be altered.

ingredients for burgers with mushroom-vermouth topperGreat Ingredients

My husband loves burgers! He makes one of the best homemade burgers you will ever taste so it was not a surprise when he chose a burger recipe from Better Homes and Gardens® New Grilling Book as one of his contest recipes. Good food always starts with fresh, quality ingredients! My husband stopped at the LCBO (Liquor Control Board of Ontario store) to pick up dry Vermouth. Vermouth is a fortified wine flavoured with aromatic herbs and spices. He bought Martini Dry-Sec a, 18% alc/vol vermouth product of Italy. He also stopped at the grocery store for fresh mushrooms and Vidallia onions. While there he spotted mozzarella cheese so picked up 5 packages. This mozzarella cheese has a nicer flavour and texture than the store or name brand (eg. Kraft®) cheese. It actually is less expensive per gram than the store or name brand mozzarella. We have found this to be true for most cheeses. I made a small platter for the salad toppings as a side for the burgers.

burgers with mushroom-vermouth topperThe Burger

Pictured is one of the burgers with mushroom-vermouth topper. The burger itself was not highly seasoned so there was a lovely, full bodied beef flavour that really offset the mushroom-vermouth sauce. Unlike other burgers that you would add toppings like tomatoes, pickles and onions the only topping on this burger was the mushroom-vermouth topping. The sauce was rich and creamy. This resulted in a unique and very tasty burger! The burgers were served with a simple side salad topped with balsamic vinaigrette dressing.

My husband added a couple of pieces of the mozzarella cheese on his second burger. He declared it even better than the first burger! So the next time we make these burgers and we will definitely be making them again we'll add mozzarella on top of the burger before adding the mushroom-vermouth topper. Kudos to my husband for trying this keeper recipe!

Burgers with Mushroom-Vermouth Topper
source: Meredith Corporation, Better Homes and Garden New Grilling Book, 2005. Pp. 148

½ c finely chopped sweet onion
¼ c fine dry bread crumbs
1 beaten egg
½ tsp salt
¼ tsp black pepper
2 lb lean ground beef
6 hamburger buns, splite and toasted
1 recipe Mushroom-Vermouth Topper

Combine onion, bread crumbs, egg, salt and pepper in large bowl. Add ground beef and mix well. Shape into six ¾-inch thick patties. Grill on medium until centre reaches 160ºF. Remove from grill and place on toasted buns. Top with Mushroom-Vermouth Topper.
Yield: 6 burgers

Mushroom-Vermouth Topper
source: Meredith Corporation, Better Homes and Garden New Grilling Book, 2005. Pp. 148

¼ c melted butter
3 c quartered small mushrooms
½ c thinly sliced shallots
½ tsp salt
¼ tsp black pepper
1 tbsp all-purpose flour
⅔ c dry vermouth

Combine butter, mushrooms, shallots, salt and pepper in skillet. Cook over medium heat until cooked. Stir in flour. Cook and stir 1 minute. Remove from heat and carefull add the vermouth. Return to heat. Continue cooking and stirring until thickened and bubbly. Cook and stir 1 minute more. Serve immediately.


Friday, August 21, 2009

Three Hot Pepper Jellies

My garden is producing nicely which means along with other produce I have an abundant and steady supply of hot peppers. I made three different small batches of hot pepper jelly last Wednesday. All were made with various hot peppers from my garden.

Hungarian Wax peppers, Banana peppers, long red slim cayenne pepper, cherry tomatoesFrom the Garden

Pictured are a few peppers and cherry tomatoes from my garden. On the left there is Sweet Banana peppers and a Red Long Slim cayenne pepper. Hungarian wax peppers (hot) are on the right. One website said it is difficult to tell the difference between the Sweet banana peppers and the Hungarian wax peppers other than taste. I beg to differ with this opinion. On the plants the two peppers look quite different. The Hungarian wax peppers are a deeper yellow and a straighter pepper. The Sweet banana peppers are a paler greenish yellow with rather distinctive wrinkling, bumping and curling. Even though Hungarian wax peppers are a hot pepper they really are rather mild in terms of heat. They are usually harvested when yellow and about the length of your palm. If left on the plant they will mature to a nice red colour. Both Hungarian wax and Sweet banana peppers can be used in stews and salads or made into jellies. Both are good roasted.

hot pepper jelliesHot Pepper Jellies

Pictured are the hot pepper jellies: jalapeno jelly (1), hot pepper jelly (2) and basil banana pepper jelly (3). Each are slightly different yet the flavour of each is quite unique. I really like the flavour hot pepper jelly (2)! I tweaked this recipe to include both Hungarian Wax peppers (hot) and sweet banana peppers. I think they all look pretty in the jars but I'm a bit partial. As with most jams and jellies I make these jellies have been modified to use Pomona's Universal Pectin because it is considerably cheaper than regular pectin and I can adjust the amount of sugar or sweetener used. It also gives consistently good jelling unlike regular pectin. Here are the recipes.

Basil Banana Pepper Jelly

½ c thinly sliced Hungarian Wax yellow peppers
¼ c thinly sliced hot banana peppers
3 - 4 large basil leaves, cut into ribbons
¼ tsp dried basil
¾ c white wine vinegar
3 c organic sugar
½ tsp Pomona's pectin
1 tsp calcium water

Mix peppers, basils, vinegar and calcium water in a saucepan. Mix sugar and pectin in a separate bowl. Bring the pepper mixture to a boil. Stir in sugar mixture. Bring to a boil, stirring well and boil 1 minute. Remove from heat. Pour into hot, sterilized jars. Wipe rims and adjust 2 piece lids. Process 5 minutes in BWB canner at altitudes up to 1,000 feet above sea level. For higher altitudes, please refer to the altitude adjustment chart (here).
Yield: 3 - 250 ml (half pint) jars

Hot Pepper Jelly

1 c finely chopped red bell peppers
¾ c finely chopped green bell peppers
2 tbsp finely chopped jalapeno peppers
¼ c finely chopped Hungarian Wax peppers
¼ c finely chopped hot banana peppers
½ c cider vinegar
2½ c organic sugar
1¼ tsp Pomona's pectin
2½ tsp calcium water

Mix peppers, vinegar and calcium water in a saucepan. Mix sugar and pectin in a separate bowl. Bring the pepper mixture to a boil. Stir in sugar mixture. Bring to a boil, stirring well and boil 1 minute. Remove from heat. Pour into hot, sterilized jars. Wipe rims and adjust 2 piece lids. Process 5 minutes in BWB canner at altitudes up to 1,000 feet above sea level. For higher altitudes, please refer to the altitude adjustment chart (here).
Yield: 3 - 250 ml (half pint) jars

Jalapeno Jelly

1 c finely chopped green pepper
¼ c finely chopped jalapeno peppers
3½ c organic sugar
1 c cider vinegar
⅝ tsp Pomona's pectin
1¼ tsp calcium water

Mix peppers, vinegar and calcium water in a saucepan. Mix sugar and pectin in a separate bowl. Bring the pepper mixture to a boil. Stir in sugar mixture. Bring to a boil, stirring well and boil 1 minute. Remove from heat. Pour into hot, sterilized jars. Wipe rims and adjust 2 piece lids. Process 5 minutes in BWB canner at altitudes up to 1,000 feet above sea level. For higher altitudes, please refer to the altitude adjustment chart (here).
Yield: 3 - 250 ml (half pint) jars


Thursday, August 20, 2009

Kitchen Quick Tips - Potatoes

kitchen quick tips
Potatoes should be stored in a cool, dry place. Do not refrigerate. Place an apple in the bag to prevent budding. If budding occurs, cut the potatoes into quarters with 3 - 4 eyes per chunk. Plant in garden to enjoy new potatoes in a couple of months.


Wednesday, August 19, 2009

She Said (3) - Canadian Bacon and Pineapple Pizza

If you recall my husband and I are having a bit of a contest with each of us using a recipe from Better Homes and Gardens® New Grilling Book to create a meal. In total there will be 12 recipes, 6 of his choosing and 6 of mine. The contest ends August 31 so the first week of September I will post a poll where you can vote for the meal you liked best. The rules are all the ingredients must be used but the amounts can be altered.

classic pizzaHubby's Pizza

My husband does not like green peppers or pineapple on his pizza. There were two Boboli crusts so we made two pizzas each topped as desired. My husband's toppings included sauce, peameal bacon, shredded ham and grated cheeses. He decided he would bake his in the oven to serve as a bit of comparison for my pizza that would be baked on the grill.

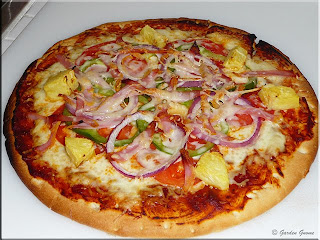
Canadian bacon and pineapple pizzaCanadian Bacon and Pineapple Pizza

Pork and pork products such as shredded ham and peameal bacon just go nicely with pineapple so when I saw this recipe I knew it was one to try. The pizza was topped as per the recipe but I added thin tomato slices and thin red onion slices. It just was crying for a bit more with respect to the toppings.

Canadian Bacon and Pineapple Pizza
source: Meredith Corporation, Better Homes and Garden New Grilling Book, 2005. Pp. 243

1 8-ounce can pizza sauce
1 14-ounce Italian bread shell (Boboli)
1 small green sweet pepper, cut crosswise into thin rings
1½ c chopped fresh pineapple
1 c finely shredded mozzarella cheese
2 tbsp grated Parmesan cheese

Spread the pizza sauce over the Boboli then top with toppings. Place the assembled pizza on a medium high grill. Grill 15 to 20 minutes or until cheese is melted and the bottom of the Boboli is crisp. The edges of the pizza should be golden brown. Remove from the grill and cut into wedges.

fresh off the grillFresh Off the Grill

This really is a very simple recipe that gave good results. The pizza had a lot of flavour! I definitely recommend using homemade peameal bacon. I can't say I'm all that impressed with using a pre-made Italian bread shell (Boboli). These toppings would be ideal on my favourite pizza dough recipe.  Using homemade pizza dough will still allow you to cook the pizza on the outdoor grill. The Boboli came with two packets of sauce so we used those but really homemade pizza sauce would have been a bit better,

On a whole it was a good pizza that with a bit of tweaking could be better. I really liked the overall flavours and tones. So I will be using this flavour combination again.


Monday, August 17, 2009

Frugal Kitchens 101 - Pantry Stocking Basics

Frugal Kitchens 101

As soon as spinach and chards are up home gardeners already have visions of how they are going to stock their pantries with home preserved foods. As the season progresses the canners and dehydrators come out along with vacuum food savers. What can't be canned or dried is frozen. At the same time the summer brings a few great stock-up sales at the grocery stores especially as the school year approaches. There is no doubt about it keeping a well stocked pantry can save you a lot of money but only if done properly. This week's Frugal Kitchens 101 addresses some of the pantry stocking basics.

A well stocked pantry will contain all your cooking/baking essentials (salts, seasonings, spices, herbs, sugars, flours, leaveners, and etc), dinner essentials (vegetables, canned meats/fish, fruits, soups and etc), dried foods (instant potatoes, pastas, grains, lentils, beans), beverages including water, snack items and extras (nuts, peanut butter, sauces, condiments, dressings and etc). At any given time you should be able to pull a few items from your pantry to make a meal without having to buy anything. My pantry holds a one year plus supply of food (in reality about an 18 month supply) in a large walk-in room. The main portion is 10' x 8.5 plus a smaller entry portion and the area under the stains so there is a considerable amount of storage room. It also houses 2 chest freezers. Here's a few tips I use for my pantry stocking.

  1. lists - There are many pre-made pantry lists available in organizing books and online. While they may be useful for someone trying to get an idea of what to stock they are essentially useless. The reason being they are generic list based on what someone else thinks needs to be stocked. The two lists I recommend are personal use and inventory. The personal use list is based on what foods you actually use. This list is extremely important when initially stocking your pantry. Create this list by keeping track of every food item and the amount you use in a one month period. You now have created a list of foods that is based on what you use. Repeat this for each season as your food habits change according to the seasons. From your lists you can now determine your yearly usage. For example if you eat canned green beans once a week you should have 52 cans of green beans (home or commercially canned) in your pantry. However, if you can your own green beans you will have an influx of the 52 jars that will steadily decrease until the next growing season. If green beans go on sale twice a year then you need only stock 26 cans at a time which will get you from one sale to the next. The inventory list is also extremely important. When you are stocking a larger supply of food it is easy to end up with too much of one food item and run out of another. So take a full inventory of everything you have in your pantry including the amounts. Print out the inventory and as you use that item place a tick beside the item. If you have 26 cans of green beans consider re-stocking when the number of ticks ads up to 20. That way you never run out.
  2. organization - There are many, many ways to organize your pantry but the most important thing to remember is to organize it in a style that suits your needs. My personal pantry organization groups like things together. So all baking goods are on one shelf unit. Commercially canned foods, snacks, grains, flours and etc. each have their own areas in the pantry. A good portion of my pantry is stocked with home canned foods so I group fruit products on one shelf, meat products on another, vegetables on another and soups on another usually in rows of 4 jars deep. Home canned foods that will not fit on the shelves are packaged into the canning jar box 12 to a box then labelled and stacked up to 7 high. I'm just going into the busiest part of the canning season with 14 full cases of food, filled shelves and almost full freezers so that really is not a good position. Take advantage of any wall and ceiling space using hooks and hanging baskets.
  3. rotation - As each row on the canning shelves become empty they are restocked with jars of food from the cases. This ensures a steady rotation of home canned foods. However, rotating any food in your pantry is a good practice. Arrange you food so that the newest food goes to the back and using up the oldest food first. This applies to virtually every food product in your pantry.
  4. don't stock what you won't eat - This sounds rather simple but it is a trap many fall into. Green beans are on sale at a ridiculously low price. You buy 20 cans forgetting you don't like green beans! Don't do this. Stock only what you know you will use and only in the amounts that you will use within a 1 to 2 year period. With home canning there is a huge temptation to make a large batch of something you're not quite sure if you will like. Don't do this! Make a test batch of 2 - 4 small jars. Test out the product then decide if this is a product you want to make in larger quantities. The same applies to drying and freezing. Your goal is not to fill the given space with as much as possible it is to fill the given space with the foods you will eat.
  5. buy in bulk - Buy whatever you use in bulk. In general larger packages are cheaper than smaller packages but not always so do check those unit prices. Many stores hold case lot sales so take advantage of these. Dried beans, rices and lentils should be bought in the largest size possible as they are always cheaper per unit than smaller packages. Flours are generally cheaper in larger quantities and if possible buy direct from the mill for more savings. Warehouse type stores (Sam's, Costco's) have excellent prices for large container foods (condiments, sauces, spices) as well as bulk items (flours, sugar, pasta) and many regular grocery stores now have a bulk (large package/container) section.
  6. shop direct - Buying direct from the source means you cut out the middleman and transportation giving you more savings. Buy flours from the mills, produce for home canning, freezing or drying from the farmer, meats from the farmer, fish from the fisheries. Check the food factories for their warehouse store where they sell products produced at greatly reduced prices. Buy direct from wineries and cheese factories. While most cheese products are not shelf stable some are so this is a cheaper way to get those.
  7. dried foods - Some of these fall under emergency supplies but are good to have on hand. They include instant potatoes, powdered cheese, powdered eggs, instant milk and butter buds. Other dried foods will be part of your normal stocking and will include both commercial and home dried products.
  8. protect your investment - Ideally your pantry will be dark unless you are in there and cooler than the rest of your house. It should be in a location that will not freeze. All foods should be in glass, metal or heavy duty, food grade plastic (if food touches the plastic) pails or non-food grade plastic bins (if the food is already packaged) with tight sealing lids. This will protect your food stores from rodents, flooding, humidity and insects. Dry foods should be vacuum sealed if possible. Routinely check home canned and vacuum sealed foods for loss of seal. If you are storing root vegetables, squashes, apples or pears in your pantry line an old freezer basket (available at yard sales) with 1/4-inch carpenter's cloth. Place your produce inside then attach a top layer of carpenter's cloth on top. This wire mesh will prevent any hungry rodents from getting to your produce. If you have a rodent problem or a potential one - seal, seal and seal to keep them out! Continue to be on the outlook just in case one slips through. At any signs of rodents set traps both inside and out. Do not use rodent bait in your pantry as this could contaminate food. Wash the tops of all jars and cans before opening.


Sunday, August 16, 2009

He Said (2) - Asian Marinated Round Steak

If you recall my husband and I are having a bit of a contest with each of us using a recipe from Better Homes and Gardens® New Grilling Book to create a meal. In total there will be 12 recipes, 6 of his choosing and 6 of mine. The contest ends August 31 so the first week of September I will post a poll where you can vote for the meal you liked best. The rules are all the ingredients must be used but the amounts can be altered.

Asian marinated round steak on the grill.On the Grill

Round steak, a cut from the hind (rump) end of the cow, is a lean but tougher cut of beef due to lack of marbling. As a result it tends to easily dry so is best braised or cooked in liquid. If grilling a round steak should be marinated to tenderize the meat. Pictured is a round steak with the eye round, bottom round, and top round still connected together. It was marinated in an Asian Marinade for 6 hours. As you can see this is a large steak! It fed 3 adults and 1 pre-teen for dinner with enough left-overs for another dinner for 2 or 4 lunches for 2.

The Asian Marinade is suitable for beef, pork, poultry or fish. It added a lovely flavour to the round steak while tenderizing the meat. This is a marinade that we will definitely make again! The recipe was doubled for this size of steak. The beef broth was home canned beef stock and apple juice was used.

Asian Marinade
source: Meredith Corporation, Better Homes and Garden New Grilling Book, 2005. Pp. 40

½ c beef broth
⅓ c bottled hoisin sauce
¼ c reduced-sodium soy sauce
¼ c sliced green onions (2)
3 tbsp dry sherry, apple juice, orange juice, or pineapple juice
1 tbsp sugar
4 cloves garlic, minced
1 tsp grated fresh ginger

Place ingredients in a small bowl. Whisk together. Pour marinade over meat, poultry or fish in a self-sealing plastic bag set in a shallow bowl. Alternately place the meat in a non-reactive dish with a lid and pour the marinade over. Turn the meat to cover with marinade. Marinate in the refrigerator at least 4 hours or up to 24 hours, turning occasionally. Drain and discard marinade. Grill to desired doneness.

Asian marinated Round Steak DinnerAsian Marinated Round Steak

After a day of boating and swimming a grilled steak dinner was a pleasant way to end the day. The weather had actually warmed enough with high humidity that for the first time this summer we put on the air conditioning. The steak was served with corn on the cob and steamed potatoes. The sides were cooked on the grill side burner to keep the heat out of the house. It was a simple summer meal!

Corn is now in season so we will be eating a fair amount of corn on the cob. It is one of summer's simple pleasures! We enjoy corn on the cob either boiled on the side burner of the grill or cooked directly on the grill.

Method for Cooking Corn

boiled: Bring cold, salted water to a boil. Husk corn and remove silk. Place cobs of corn in the water. Cover and return to boil. Boil 5 minutes. Remove from heat and drain. Leave cover on until ready to serve. Serve with butter and salt.

grilled: Carefully pull back husk just enough to remove silk. Pull husk back into place. Alternately cut across top of cob to remove exposed silk. Soak cobs in cold water 10 minutes. Place on medium hot grill. Allow to cook turning occasionally until outer husks are dried with well defined grill marks. Remove the corn from the grill. Remove husks and any silk. Serve with butter and salt.


Saturday, August 15, 2009

Bacon Fried Chicken

A few days ago I as I was doing my almost daily browsing of food blogs I came across a dish called bacon fried chicken on a few blogs. The ingredients listed for all were basically the same - bacon grease, chicken, salt and pepper. The method was the same as well. Simply melt the grease and fry the bacon. What I found interesting is how each blogger thought this was the best fried chicken they had ever tasted. So I just had to try it!

bacon fried chicken with rice and spinachBacon Fried Chicken

I used the bacon grease left over from the Farm-Style Green Beans. This was a maple flavoured bacon that I thought would really go well with chicken. Instead of salt and pepper I used a little garlic pepper. The method was very simple. I heated about ½ c of bacon grease in a skillet on medium high then added the chicken to fry to a golden brown. The chicken was served with Arborio rice cooked in chicken stock and steamed spinach topped with bacon pieces.

Pictured is the completed meal. The house filled with the tantalizing aroma of bacon cooking mixed with a hint of chicken. It really was a mouthwatering smell! This really was very good chicken but I cannot say it is the best fried chicken I've ever had. The chicken fried to golden brown looked gorgeous. The meat was very moist and tender. However, there was no actual bacon taste to the chicken not even on the nicely crisped skin which is something I was expecting. Bacon grease is usually used to give a hint of flavour to a dish. At any rate give it a try if you have a bit of left-over bacon grease. I'm sure you will be very pleased with the results. Just don't expect any bacon flavour.


Friday, August 14, 2009

She Said (2) - Farm-Style Green Beans

I just realized I'm behind getting the He Said/She Said posts up. Don't worry they will all be up before the end of the month. If you recall my husband and I are having a bit of a contest with each of us using a recipe from Better Homes and Gardens® New Grilling Book to create a meal. In total there will be 12 recipes, 6 of his choosing and 6 of mine. The contest ends August 31 so the first week of September I will post a poll where you can vote for the meal you liked best. The rules are all the ingredients must be used but the amounts can be altered.

frying baconFrying Bacon

I found a method for chicken I wanted to try that called using bacon grease. It only needed some of the grease. Now when I frying bacon I really like frying up a lot at one time then putting some aside in the freezer for use in salads and other dishes. Looking through the Better Homes and Gardens® New Grilling Book I found a rather interesting yet easy to prepare side dish calling for 3 tbsp of bacon grease and 4 slices of bacon. Just what I needed! This would give me a couple of meals from the bacon plus bacon pieces in the freezer.

I took a package of frozen bacon from the freezer and cut it across the strips. Once fried this gives lovely sized homemade bacon bits for Caesar salad so is handy to have a few packages on hand. I drained the bacon pieces then reserved 2 dessert spoons of them for the dish I was currently making. The rest of the grease was spooned into a heat proof bowl reserving about 3 tbsp of the grease in the pan.

tomato mixtureTomato Mixture

This dish consists of a two step process in which you make the sauce in one pan and cook the beans in another then combine them for the finished side dish. It would be possible to cook this on the side burner of an outdoor grill. The only two changes I made to this recipe is I did not peel or seed the tomatoes and I steamed rather than boiled the beans.

Farm-Style Green Beans
source: Meredith Corporation, Better Homes and Garden New Grilling Book, 2005. Pp. 136

4 thick slices bacon, cut up
2 medium onions, sliced
3 medium tomatoes, peeled, seeded and chopped.
½ tsp salt
1 lb green beans

Wash and trim green beans. Cook bacon until crisp. Spoon out the bacon using a slotted spoon and drain. Stir the sliced onions into the bacon grease and cook over medium heat until onions are tender. Stir in the tomatoes and salt. Cook uncovered for 5 minutes or until most of the liquid is absorbed. Place the beans in a small amount of salted water. Bring to a boil. Cook until tender crisp. Drain. Transfer the beans to a hot serving dish and top with the tomato mixture.

Farm-Style Green BeansFarm-Style Green Beans

We grilled pork steaks for dinner. Unfortunately there is only one recipe in this book for pork steaks which is really a shame. Pork steaks are larger and just as tasty. The pork steak was grilled then lightly caramelized with Diana Sauce®. Sides were steamed potatoes with fresh chives and Farm-Style Green Beans.

The Farm-Style Green Beans quite tasty and easy to prepare. It was a nice way to serve green beans. The tomato mixture itself would pair nicely with meats, rice and potatoes as well. I think the tomato mixture would be nice kicked up a notch with the addition of a splash of hot sauce.
\


Thursday, August 13, 2009

Kitchen Quick Tips - Celery

kitchen quick tips
When putting it into the refrigerator remove it from any store packaging. Wrap in aluminum foil then refrigerate. It will keep for weeks! If celery is limp, renew it by soaking in ice water.


Wednesday, August 12, 2009

Chicken Barbeque Dinner

Summertime is filled with so many wonderful food events! They range from family picnics, fruit based socials, ribfests, fish fries to full blown large community events. The common theme is good food mixed with the social aspect. Quite often they are put on by local service clubs, church groups and other groups as a fundraiser. Behind the scenes these events are often organized and manned by a large number of volunteers.

chicken on the barbequeThe Barbeque

We attended a chicken barbeque fundraiser organized by a service club last weekend. This barbeque is part of a considerably larger annual event and has competition from other service club food fundraisers. These included a steak dinner and several hot dog/hamburger fundraisers along with other commercially operated food booths. Competition means the food has to be both good and reasonably priced!

This year the cap for the chicken barbeque was 800 dinners and they sold out, so this is a rather large food event. The dinner consisted of a chicken leg with bac attached, baked potato, corn on the cob, coleslaw, sliced cucumbers, sliced tomatoes, rolls and condiments for $11 per plate. Preparing that many meals takes a lot of organization, preparation and even more volunteers.

Pictured is one of three huge propane barbeques the chicken was barbequed on. Each holds two large 2-sided mesh screens. The chicken pieces is sandwiched between the two screens. The chicken is barbequed on one side then then the screens are flipped for cooking on the other side. It takes two people to turn these screens! No sauces or seasoning are used on the barbequed chicken so it is just pure chicken flavour with a wonderful smokiness.

It is hot and heavy work for the volunteers who barbeque the chicken to perfection. The large barbeques throw off a lot of heat and quite often the day is hot with little to no shade. Once the chicken is cooked it is transferred to special foil lined bins ready for plating.

barbeque chickenBarbequed Chicken

The tantalizing smell of the barbeque chicken fills the air long before you get to the huge tent! This particular fundraising barbeque is organized so you line to pay first then pick-up your paper plate, serviette and cutlery. The line then goes along a series of food stations. The line moves slowly depending on the number of people but it is a pleasant wait.

The first stop is the chicken ready for plating in large foil lined bins. A volunteer places a piece of chicken on your plate. The next stretch holds the baked potatoes (unwrapped by a volunteer), rolls, cucumbers, coleslaw, tomatoes and condiments. Following that is the corn station where the foil wrapped cob of corn is unwrapped by another volunteer. The final stop before finding a spot to sit under the tent is for soft drinks.

sliced tomatoesSliced Tomatoes

Several volunteers ensure the sides are prepped and trays stay full for the hungry diners. A few steps away from the U-shaped serving zone there are smaller food prep areas set up. Under the tables and on tables within the U-shape were generous supplies of butter, salt and pepper packets and rolls for restocking. Just inside near the chicken large hot bins held baked potatoes. The commercially made coleslaw was in 2.5 gal plastic pails.

More volunteers hand slice locally grown tomatoes and cucumbers. Just look at how gorgeous those tomato slices are! The tomato prep area was a banquet sized table so about 4' x 8'. From one end to the other there was nothing but tomatoes. It was indeed a beautiful sight! The cucumber prep station (not pictured) was the same size although it was not end to end with cucumbers. The cucumbers were peeled then sliced ready for the trays. Trays of tomato and cucumber slices went from the prep area to the serving area.

corn on the cobCorn on the Cob

The sweet corn on the cob is cooked in a special broiler (2) inside a huge metal basket (1, 2). This is hot, heavy work manned by two volunteers. I would hazard a guess that the basket holds about 6 dozen ears of corn all hand husked by volunteers. Once the corn is cooked each cob of corn is wrapped in tinfoil then placed into a insulated box where it stays warm until serving.

If you get a chance to enjoy an foodie fundraiser event I'm sure you will enjoy the food immensely. It's one of the best ways to spend a few summertime hours. While there take a moment to look around and enjoy all the sights, sounds and efforts that go into putting on such an event. Organizing such an event can easily be a year long process. It is indeed really quite impressive!


Tuesday, August 11, 2009

Pickerel with Summer Garden Salad

We are very lucky to enjoy locally caught fish year round where we live.  We can fish from our dock and boat.  If we don't catch enough fish ourselves we have several friends that will keep us in stock of locally caught fish.  The most commonly caught here are smelt, perch, pickerel, bass and blue gill but there are others depending on the time of year. 

pickerelPickerel

Pickerel is the common name for three closely related carnivorous, soft-rayed fishes in the Pike family (Esocidae). The fish pictured was purchased frozen from a food distributer and identified only as wild caught pickerel but appears to be Chain pickerel (Esox niger). Pickerel is a popular fish for anglers.

Pickerel is a lean boney whitefish with nice flavour. The Y-bones should be removed when cleaning. There may be bones remaining in the fillets especially in commercially cleaned fish so use caution when eating. The fillets are small so it is easy to overcook them. This fish really is best cooked by lightly coating then pan frying although larger fillets can be coated and deep fried if desired.

pickerel dinnerPickerel Dinner

I used the electric griddle to cook this meal. An electric griddle is a very useful kitchen appliance that can be used to prepare food in a series eliminating extra pots and pan. The meal consisted of herbed hash browns, seasoned pickerel and a summer salad.

Method: Washed and cut 6 medium small potatoes into cubes. Steam until al dente. Remove from heat. Place the steamer basket with potatoes on a plate. Pour the steaming water and set aside to cool for watering plants. Pour a little EVOO and a add a couple of pats of butter to the griddle. Heat to 325ºF. Pour the potatoes onto the griddle. Fry until golden brown. Season lightly with salt and pepper if desired. Push the potatoes to one side. Place the thawed fish fillets on the empty side of the griddle skin side down. Sprinkle lightly with Old Bay Seasoning or seasoning of your choice. Fry until the fillets are just turning opaque. Turn and sprinkle lightly. Cook until just golden brown. Garnish fish and potatoes with fresh herbs.

garden saladSummer Garden Salad

My garden is producing nicely despite the below average temperatures. The last couple of days have been quite warm causing a growth spurt in the garden! Anything growing in my garden with the exception of inedible weeds is fair game for the salad bowl. It will be a few more days yet before we can enjoy fresh sweet/hot peppers and peas. I just re-seeded radishes and pole beans so will be enjoying those as they become available.

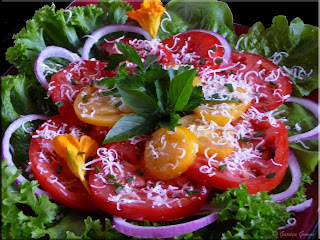
I made a simple garden salad, dinner plate sized plate with what I could find ready for picking. The salad was made in layers beginning with Chinese lettuce, red leaf lettuce, red onion (store bought), red slicing tomato (store bought), Lemon Boy tomato and nasturtium flowers. I drizzled EVOO over the salad and added a few splashes of lemon juice. Then I sprinkled with fresh chives and fresh rated Parmesan cheese and finally garnished with basil and mint. To serve the salad I cut into wedges pizza style. I thought the colours were quite summer looking!


Monday, August 10, 2009

Frugal Kitchens 101 - Keeping the Heat Out of the Kitchen

Frugal Kitchens 101
With today's trying economic times more people are turning to cooking their meals at home. This time of year with higher temperatures and/or humidity presents the challenge of being able to cook without adding a lot of extra heat in the kitchen. If you have your air conditioning on, cooking adds both moisture and heat to the house so savings made by cooking the meal at home could be eaten up by increased air conditioning costs. If you don't have air conditioning adding any heat and moisture to the house can make it uncomfortable. Today's Frugal Kitchens 101 will highlight some effective ways to keep the heat out of the kitchen while still enjoying home cooked meals.

There are three main ways to keep the heat out of the kitchen during the hot summer months. The first method involves changing your cooking style. The second method involves changing your eating habits. The third method is to change the actual cooking method.

Cooking Style

Your cooking style is determined by both where, when and how you cook. Simply modifying one or more of the factors will help keep heat out of the kitchen.

  1. where - During the summer months, cook outdoors as much as possible. A gas grill with a side burner will give you plenty of cooking possibilities. The grill can also be used as an oven or large surface griddle. If you have a sunporch, covered porch or balcony you can set up a temporary cooking station where foods could cook in a crockpot or countertop roaster or on an electric grill. If you have a basement, set up a summer kitchen. Basements are naturally cooler in the summer so are ideal for cooking. In fact my kitchen is located on the lower level of an earth bermed house so is essentially in a walk-out basement. This was a real buying feature for us.
  2. when - Plan your cooking so you are not cooking during the heat of the day especially during the hottest part of the day. The best times to cook are early morning and late evening.
  3. how - Plan ahead so that if you are making something like rice, pasta, potatoes or even meats that you will have enough for two or three meals. For example you are making a hot pasta dish for dinner make enough pasta that you can make a cold pasta side for the next night's dinner. Grill several boneless, skinless chicken breasts then cool and slice for salads and wraps. Package into convenient size freezer bags then use as needed. Brown 10 lb lean ground beef then divide it into thirds. Season three different ways then package into family sized packages and freeze. To use just re-heat in the microwave. These meal quick starts will help curb the urge to get take-out on hot, humid days.

Cooking Method

Choose the most efficient appliance and least heat producing method for the food you are cooking. During the hot summer months instead of using your oven use a countertop roaster or outside grill. Instead of boiling vegetables, steam them. This uses less water. Set the steaming water outside to cool for watering plants. My list of useful summer cooking appliances is:
  • countertop roaster
  • crockpot
  • outdoor grill (gas preferably to double as an oven)
  • rice maker
  • electric fry pan or griddle
Other useful appliances for summer cooking: blender, toaster and coffee maker.

Eating Habits

Changing your eating habits to reflect the seasons is a natural thing to do. During the winter months we need a bit of extra fats and hot foods to help keep us warm but during hot summer months the opposite is true. Work as many raw foods into your summer diet as possible. Raw foods provide much needed hydration. Substitute beef dishes for those made with lighter chicken or fish. Change out that heavy and expensive soda for homemade ice tea, homemade iced coffees or water. Instead of a hot breakfast start your morning with yogurt and fresh fruit or a fruit smoothie. Instead of the heavier type deserts go for the sherbets and iced deserts. Power sandwiches (here), BLT's, wraps, dinner salads, pasta salads and stir fry are all wonder summery type meals. Unless you grill year round this is the time to get as much grilling in as possible!