My photo
Ontario, Canada
I am a wife, mother and grandma who enjoys the many aspects of homemaking. A variety of interests and hobbies combined with travel keep me active. They reflect the importance of family, friends, home and good food.
Cook ingredients that you are used to cooking by other techniques, such as fish, chicken, or hamburgers. In other words be comfortable with the ingredients you are using.
--Bobby Flay

For Your Information

Please watch this area for important information like updates, food recalls, polls, contests, coupons, and freebies.
  • [March 19, 2020] - Effective Mar 17, this blog will no longer accept advertising. The reason is very simple. If I like a product, I will promote it without compensation. If I don't like a product, I will have no problem saying so.
  • [March 17, 2020] - A return to blogging! Stay tuned for new tips, resources and all things food related.
  • [February 1, 2016] - An interesting report on why you should always choose organic tea verses non-organic: Toxic Tea (pdf format)
  • Sticky Post - Warning: 4ever Recap reusable canning lids. The reports are growing daily of these lids losing their seal during storage. Some have lost their entire season's worth of canning to these seal failures! [Update: 4ever Recap appears to be out of business.]

Popular Posts

Showing posts with label he said/she said contest. Show all posts

Friday, September 03, 2010

Second Annual He Said/Shed Said Contest Summary

Earlier this month I announced the Second Annual He Said/She Said Contest. The focus of this year's contest was Company's Coming Heart-Friendly Cooking by Jean Paré, one of my favourite cookbook authors. Originally the contest was designed to have 4 recipes from this cookbook each for a total of 8 recipes made during the month of August. As luck would have it or simply bad timing life managed to get in the way so we ended up with 3 recipes each resulting in a total of 6 recipes. Of the 6 recipes 4 were definite keepers.  Don't worry as there are still a lot of great recipes in this book that we will be trying and I will be blogging about them as well.  Click on any of the pictures to take you to the recipe.  It would be great to hear the feedback as to which recipe you liked the most. 

crunchy vegetable macaroni
poached sole rolls


Saturday, August 28, 2010

She Said - Stuffed Chicken Breast

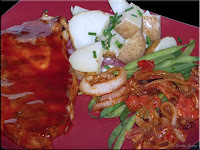
Yesterday I posted about the baked potatoes my husband made for his third selection for the Second Annual He Said/She Said Contest.  My gosh they were delicious!  While he was making the potatoes I made the stuffed chicken breast (Pp. 86) from Jean Paré's Company's Coming Heart-Friendly Cooking for my third entry.  Lately I have been doing a fair amount of experimenting with various stuffings.  I thought the stuffing in this recipe sounded interesting.

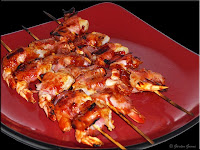
My apologies, in hindsight I should have taken pictures of each dish separately rather than the complete entrée.  Unfortunately I didn't so had to use the same picture as yesterday's post.

I used the stuffing to make 2 stuffed chicken breasts, substituted unbleached flour for the all-purpose flour and used olive oil in a health mister in place of cooking spray.   The chicken breasts did not brown up as nicely as I would have liked but they were cooked through.  This will be something I work on the next time I make them.  

The stuffed chicken breasts were quite tasty and they did pair nicely with the baked potato dinner (stuffed potatoes).  It is definitely another keeper recipe!  The stuffing makes about 1¼ c but I used it all between the 2 large chicken breasts.  I would do it the same way the next time I make them as the stuffing had a lovely flavour.  I think the stuffing would also be suitable for making a stuffed chicken loaf.  All the way around it was a great tasting meal that we will make again.

Stuffed Chicken Breast
source: Jean Paré Company's Coming Heart-Friendly Cooking, 2003, Pp. 11

1 medium leek, thinly sliced
2 garlic cloves, minced
½ c finely chopped red pepper
1 tsp olive oil
6 oz jar marinated artichokes
1 tbsp balsamic vinegar
1 tbsp brown sugar, packed
1 - 3 tbsp fresh sweet basil, chopped
8 boneless, skinless chicken breast halves
½ all-purpose flour
1½ c fine dry whole wheat bread crumbs
2 large eggs
2 tbsp mil

Thinly slice the white and tender parts of the leak.  Drain and chop the artichokes.  Sauté lee, garlic and red pepper in olive oil on medium-high until leek is soft.  Reduce heat to medium.  Add artichoke, vinegar, and brown sugar.  Heat and stir until sugar is dissolved.  Remove from heat and stir in basil.  Cut a deep horizontal slit into 1 side of each chicken breast to form a pocket.  Fill each pocket with stuffing.  Secure the openings with wooden picks.  Put the flour and bread crumbs into separate bowls.  Beat eggs an milk with fork in a third bowl.  Dredge the chicken in flour to coat, dip into the egg mixture then into the bread crumbs.  Spray the chicken with cooking spray.  Bake at 350ºF (175ºC) until chicken is golden and no longer pink inside, about 25 minutes.  Remove from oven.  Allow to cool slightly.  Remove wooden pick.  Cut chicken in half diagonally to serve.

Serves 8


Friday, August 27, 2010

He Said - Baked Potato Dinner

Potatoes are our favorite side usually steamed or baked.  My husband's third selection for the Second Annual He Said/She Said Contest from Jean Paré's Company's Coming Heart-Friendly Cooking is baked potato dinner (Pp. 111).  You just can't go wrong with stuffed baked potatoes sometimes referred to as twice-baked potatoes!  Stuffed baked potatoes freeze nicely too.  Simply cool the stuffed baked potatoes then place on a baking sheet to freeze.  When frozen place the potatoes into a zipper style freezer bag.  Reheat in oven or microwave oven. 

The baked potato dinner is the name of the recipe for the potatoes in Jean's cookbook.  While my husband was making the potatoes I made the stuffed chicken breast (Pp. 86) to complete the meal.  I will post the recipe for that tomorrow.  Jean recommends adding a salad or steamed vegetables with the potatoes to make a complete meal which would also make the meal vegetarian.

The baked potatoes were delicious!  This recipe is another keeper.  It was easy to make with minimal prep as well.   My husband substituted 4 medium sized potatoes for the extra large which make 8 stuffed potatoes.  He substituted MiracleWhip® for the Caesar salad dressing and omitted the dill. 

Baked Potato Dinner
source: Jean Paré Company's Coming Heart-Friendly Cooking, 2003, Pp. 111.

2 extra large baking potatoes, with peel
1 - 2 garlic cloves, minced
2 c sliced mushrooms
2 tsp canola oil
1 green onion, sliced
½ c mashed soft tofu
2 tbsp light Caesar salad dressing
2 tsp chopped fresh dill
dash coarsely ground pepper
½ c grated light sharp cheddar cheese
sprinkle paprika

Bake the potatoes at 400ºƒ (205ºC) until tender.  Remove from oven.  Cut in half lengthwise.  Let stand until cool enough to handle then scoop out the pulp into a mixing bowl leaving the shells about ¼ - inch thick.  Set the shells aside.  Mash the potatoes with a fork.  Cook the garlic and mushrooms in canola oil in a non-stick skillet on medium heat until mushrooms are golden.  Stir mushroom mixture into the potatoes.  Add onion, tofu, salad dressing, dill and pepper.  Mash.  Stir in cheese.  Spoon the filling evenly into the shells.  Sprinkle with paprika.  Place in ungreased casserole dish.  Bake uncovered at 400ºF (205ºC) about 30 minutes until heated through.

Makes 4 stuffed potatoes.


Wednesday, August 25, 2010

He Said - Crunchy Vegetable Macaroni

One of the nice things about doing these contests is my husband and I get to experience dishes we may not otherwise try.  I think pasta is a staple in many homes.  One of our favourites is home made macaroni and cheese.  While mac and cheese is great comfort food there are a lot of ways of dressing it up.  My husband's second entry for the Second Annual He Said/She Said Contest from Jean Paré's Company's Coming Heart-Friendly Cooking is crunchy vegetable macaroni (Pp. 113).  This dish gives a nice spin on homemade mac and cheese making it a keeper recipe.

crunchy vegetable macaroni
Adding crunchy vegetaables to mac and cheese is a nice way to kick it up a notch!  This recipe added crunchy carrots, asparagus, peas and red peppers.  Now a recipe is always a starting point so no ingredient is written in stone.  In fact one of the signs of a good cook is the abilitiy to look at a recipe and easily substitute.  In this case my husband substituted shelled Laxton's Progress sweet peas for the sugar snap peas because the peas in our garden did not do well this year and that is what we could get from the organic farm.  The parsley in the dish was from our garden.  He omitted the red pepper because it is one of the very few vegetables he doesn't like unless puréed into a sauce.    He served the crunchy vegetable macaroni with herbed buttermilk marinated chicken topped with home canned plum sauce.  It was a delightful meal!

Crunchy Vegetable Macaroni
source: Jean Paré, Company's Coming Heart-Friendly Cooking, 2003, Pp. 113.


2½ c water
⅓ c thinly sliced carrot
1½ c fresh asparagus
1 c sugar snap peas
1 diced red pepper
¼ice water
13½ oz can skim evaporated milk
1 tsp garlic and herb no-salt seasoning
½ tsp lemon pepper
2 c uncooked whole wheat elbow macaroni
2 finely sliced green onions
1 c grated light sharp cheddar cheese
chopped fresh parsley for garnish

Bring water to boil in medium saucepan.  Add carrot.  Cover and cook on medium for 4 minutes.  Add remaining vegetables.  Cover and cook for 3 minutes.  Remove vegetables with slotted spoon to ice water to cool quickly,  reserving 2 c of the cooking water.  Drain cooled vegetables and set aside.  Add evaporated milk and seasoning to reserved cooking water in same saucepan.  Bring to a boil.  Add macaroni.  Cook uncovered on medium until macaroni is tender and most liquid is absorbed.  Do not drain.  Pour into a large bowl.   Stir in vegetables and cheese.  Turn into a greased 3 qt casserole dish.  Cover.  Bake at 175ºC (350ºF) for 30 minutes or until warmed through.  Garnish with parsley.

Makes 8 cups, serves 4.


Tuesday, August 24, 2010

He Said - Poached Sole Rolls

My husband's entry for the Second Annual He Said/She Said Contest from Jean Paré's Company's Coming Heart-Friendly Cooking is poached sole rolls (Pp. 94).  Sole is an ocean flatfish that has a mild, delicate flavour yet flaky flaky texture.  Sole fillets are very thin.  They can be  quickly pan-fried or pan sauteed, baked or poached.  The fillets are done when  you can flake the thick end with a fork.

seared shrimp
Pan seared shrimp were the perfect appetizer for the meal adding a second layer of flavour.  We used frozen raw shell on 16/20 count per lb shrimp for both dishes. 

Pan Seared Shrimp

Thaw shrimp in cold water.  Peel and de-vein shrimp.  Melt about ¼ c of butter in skillet on medium high.  Add shrimp.  Sear shrimp to just browning.  Use a slotted spoon to remove the shrimp from the skillet.

poached sole rolls
Despite the notation in the recipe that this would be a wonderful dish for a special occasion, and it would be, the dish is easy enough to make that it can be enjoyed anytime.  My husband paired the poached sole rolls with steamed new potatoes, steamed asparagus spears and garnished with a few of the pan seared shrimp.  The poached sole was delicious!  He did not chop the shrimp for the filling, omitted the dill and substituted apple juice for the wine.  I was surprised cream cheese was an ingredient because cheese isn't paired with fish very often.  This dish is a definite keeper!

Poached Sole Rolls
source:  Jean Paré.  Company's Coming Heart-Friendly Cooking, 2003, Pp. 94.

8 sole fillets
¼ c light spreadable cream cheese
1-3 tbsp chopped fresh dill (omitted)
3 tbsp chopped green onion
12 oz raw medium shrimp, chopped
¾ c dry white wine
½ c water

Lemon Sauce

1 tbsp butter
3 tbsp all-purpose flour
2 tbsp lemon juice

Lay fillets on cutting board.  Blot dry.  Mash cream cheese, dill and green onion in medium bowl until well mixed and smooth.  Add shrimp mixing well.  Spread about 2 tbsp of the mixture over each fillet.  Roll up securing with wooden pick.  Combine water and wine in ungreased shallow casserole dish.  Arrange rolls in a single layer in the wine mixture.  Cover.  Bake at 175ºC (350ºF) for 20 to 25 minutes until fish flakes easily when tested with a fork.  Gently remove fish from liquid using a slotted spoon.  Keep warm.  Strain the liquid reserving 1½ c.

Melt butter in medium saucepan on medium heat.  Stir in flour until smooth.  Heat and stir for 1 minute.  Whisk in reserved liquid and lemon juice.  Heat and stir until boiling and thickened.  Makes about 1 c.  Serve over fish rolls.

Serves 8


Sunday, August 22, 2010

She Said - Black Beans

My second entry for the Second Annual He Said/She Said Contest from Jean Paré's Company's Coming Heart-Friendly Cooking is black beans (Pp. 14).  Surprisingly I very seldom cook beans from scratch on the stovetop.  The reason I don't cook them on the stovetop is I can beans (eg. kidney, navy, black, etc) instead.  Canning eliminates the long stovetop cooking for beans while giving me a convenient ready to use product for the pantry.  I choose this recipe for the experience of cooking beans on the stovetop and the extra flavours it offered.  The black beans will (?) also be used in another of my contest recipes. 

Black beans are one of my favourite beans.  They can be mashed to use in place of meat for tacos, taco salad or as a meat extender in meatloaves.  We enjoy them as a side with a little butter as well. 

Cooking the black beans on the stovetop was quite easy.  They did take the full 55 minute cooking time.  Despite the added ingredients the beans only had a bare hint of the extra flavours.  I noticed more splitting than with the home canned version.  I put two 1 cup packages of the beans into the freezer as I have froze black beans before so I want to see how they are when thawed. 

Black Beans
source: Jean Paré,  Company's Coming Heart-Friendly Cooking, 2003, Pp. 14

1 lb dried black beans
water to cover

14 c water
4 sprigs fresh thyme
4 cloves garlic
1 strip lemon peel*

Pour beans into a bowl and cover with water.  Let sit overnight.  Drain.  Pour beans into large pot.  Add 14 c of water and remaining ingredients. Bring to a boil on medium-high.  Reduce heat to medium-low.  Simmer 55 minutes or until beans are tender but not mushy.  Drain.  The beans can be portioned out in 1 c size and froze if desired.

*I used most of the peel of one lemon.


Saturday, August 21, 2010

She Said - Peach Spice Muffins

Earlier this month I announced the Second Annual He Said/She Said Contest.  The focus of this year's contest will be Company's Coming Heart-Friendly Cooking by Jean Paré, one of my favourite cookbook authors.  From now until the end of the month 8 recipes will be posted from this cookbook, four of my husband's choosing and four of mine.  Ontario peaches are in season so I've been busy canning them.  I chose the Peach Spice Muffin recipe as my first She Said contest recipe.

I'm always looking for muffin recipes.  Muffins are so easy to make.  They are great for breakfast or snacks and they travel well so I make  them quite often.  Peaches added to muffins sounded like a wonderful match.  The Peach Spice Muffins have a delightful taste.  They are low fat (1.6 g) and low in sodium (153 g) with 173 calories per muffing.

I made three substitutions in this recipe.  I used unbleached flour instead of all-purpose, home canned peaches instead of store bought and vegetable oil in place of canola oil.

Peach Spice Muffins
source: Jean Paré, Company's Coming Heart-Friendly Cooking, 2003, Pp. 38

1 c all-purpose flour
¾ c whole wheat flour
1 tbsp baking powder
½ tsp ground cinnamon
½ tsp ground ginger
¼ tsp ground allspice
¾ c dark brown sugar, packed

14 oz can peach halves
1 large egg
¾ c buttermilk
⅓ c apple juice
2 tbsp canola oil

Combine the dry ingredients in a large mixing bowl.  Make a well in the centre.  Combine the last 5 ingredients in a separate mixing bowl.  Pour into the well.  Stir until just moistened without overmixing.  Fill greased muffin cup ¾ full.  Bake at 190ºC (375ºF) for 20 to 25 minutes until wooden pick inserted in centre of muffin comes out clean.  Remove from oven.  Let stand in pan 5 minutes before turning out onto wire rack to cool completely.

Yield: 12 muffins


Sunday, August 01, 2010

Second Annual He Said/She Said Contest

Company's Coming Heart-Friendly by Jean Paré


Last year my husband and I ran a 6 week He Said/She Said Contest with recipes from  Better Homes and Garden New Grilling Book, 2005 by Meredith Corporation.  The rules of the contest is that each of us chose 6 recipes from the book, cooked them and then blogged about each recipe.  In the end there was supposed to be a winner but by the end of the contest we were both winners because we had explored new recipes.  This year's he said/she said contest will focus on exploring Company's Coming® Heart-Friendly™ by Jean Paré.

Jean Paré has been a favourite Canadian cookbook author of ours for years.  We have several of her cookbooks.  Company's Coming® cookbooks are published in Edmonton, Alberta.  Her recipes are always top notch!  This cookbook was a very generous gift to my husband from our kids.  This is the perfect opportunity to explore another great Company's Coming® cookbook.

This year the contest will run from August 1 to August 31.  It is a shorter time frame than last year's contest.  In light of that each of us will choose 4 recipes from this cookbook, cook them and then blog about them.  Each will be identified by a he said or she said notation in the title.  At the end of the contest there will be 8 recipes total from the cookbook.  I will run a poll for each of us followed by a final combined poll for voting.  If last year is any indication this will be another great contest pitting husband and wife together.  I hope you enjoy our little challenge and the recipes we come up with.


Sunday, November 01, 2009

October Contest Wrap-up & Kitchen Chit Chat

Campbell's Soup Kids Cook

My gosh I can't believe it is November 1st already! Where has the year gone? We are now starting to gear up getting things ready for the holiday season. So it's time to sit and do a little chit chatting in the kitchen. October began with a lovely five day road trip of which I shared some of the highlights. When we arrived home I was back into preserving mode thanks to the generosity of a friend who dropped off nine dozen ears of corn. As you know my husband and I ran a small contest in October to discover a couple new ingredients. My husband chose ground turkey for his two creations and I used coconut milk. This contest was fun simply because neither of us built on what we already knew. I'm not going to create a poll for this contest because it was just meant to add a bit of inspiration in our cooking. Towards the end of the month I ran a poll regarding microwave usage. I have to tell you I was a bit surprised at the results.

Of the seventy seven voters 46% used their microwave ovens 2 or more times a day, 24% used their microwave ovens at least once a day, 14% used their microwave 2 to 6 times per week, 2% used their microwave oven once a week, zero used their microwave oven less than once a week and 11% did not have a microwave oven. From this data it appears for those owning a microwave oven use them. What I also realized is we are in the minority at using ours at maybe at best just barely squeaking into using our microwave oven 2 to 6 times a week but that is really stretching it. In keeping with my philosophy that every appliance in my kitchen must earn it's keep I am embarking on an adventure on how to use the microwave oven more effectively.

I have a few ideas for what is to come in November's posts. Many are trying to find frugal Christmas presents so I will be posting a few loving from the kitchen ideas that aren't going to cost you a lot. It also a busy and expensive time of the year so I will be posting a bit more about using the microwave oven. Finally I have venison, moose, wild geese, wild duck and fresh caught fish (perch, bass, pickerel) so will be posting on that as well. Aside of that you will likely notice a few subtle changes in the layout but nothing disruptive of major. If there is I will be sure to give you a warning.


Saturday, October 31, 2009

She Said - Coconut Milk

If you have been following this blog you will know my husband and I hold special cooking contests called He Said/She Said. This month's contest (announced here) was for each of us to find one ingredient we had not cooked with then use that ingredient to make 2 dishes/recipes. That sounds simple doesn't it, but trust me it is a bit more challenging than it first appears.

I decided to follow my husband's approach of KISS (keep it simple silly). What I did was modify a tried and true recipe to create a new flavour for a lovely dessert to take to a friend's. Now here is where I cheated just a little as I didn't make two stand alone dishes but the cake could be finished using another method and the icing I created could also be used as a topping for other desserts. So technically I used the coconut milk in two ways for this contest.

white cakeWhite Cake

The beauty of my favourite basic white cake recipe is it can easily be modified. What I wanted to create was a cake that wasn't overly sweet yet moist and flavourful. I wanted it to be a little bit different. The recipe calls for ¾ cup of milk so I decided to substitute coconut milk instead. Coconut milk is not the thin watery liquid found inside a coconut but rather it is a sweet, milky white cooking base that is derived from the meat of mature coconuts. Canned coconut milk can be found in most larger grocery stores. If you cannot find coconut milk you can make it yourself by soaking grated coconut in hot water or milk to extract the oil and aromatic compounds then straining. Coconut milk has a fat content of approximately 17%. It should not be left at room temperature as coconut milk spoils quickly so always refrigerate.

Using coconut milk as a substitute in the white cake mixture resulted in a richer flavour and moister testure than the plain white cake. This comes from the higher fat content of the coconut milk. While the cake was baking and cooling I set about looking for an icing thinking something lightly flavoured with pineapple would be nice but then looking at the half can of left over coconut milk I came up with another idea that would give me the not too sweet result I was after.

coconut white cakeCoconut White Cake

While I was searching for a topping that would use the rest of the coconut milk I came across a site that said coconut milk could be whipped to use as a replacement for whipping cream for those who can't or don't eat dairy. I decided to test this out and see what I could come up with. I placed the cold coconut milk in the bowl of the KitchenAid® stand mixer. Using the whisk attachment I beat on setting 10 for 3 minutes. The coconut milk did thicken somewhat but not to the same degree that heavy whipping cream does. In comparing the stiffness of the peaks after whipping, meringue is stiffer than heavy whipping cream which is stiffer than coconut cream. The problem was I wanted a topping with a bit more body. The first two additions that came to mind was gelatin and xanthum gum. Xanthun gum is a polysaccharide food additive used as a thickener. It is produced by fermenting glucose or sucrose by the Xanthomaonas campestris bacterium. , gluten free . Xanthan gum is gluten free so is a popular thickener for those on gluten free diets. It is also the ideal thickener for salad dressings. I thought xanthan gum would be quicker and easier so I used that. The main trick when using xanthan gum is using a blender or whisking at high speed while incorporating it into the mixture. I used about one eighth tsp of xanthan gum adding while whisking on speed 10. This gave the whipped coconut milk a nicer body. Then I spread the frosting over the cake and garnished with sweetened flaked coconut. I think it came out quite nice and it did get 2 thumbs up from our friends.

Note: This cake needs to be refrigerated because of the topping.


Wednesday, October 28, 2009

He Said - Ground Turkey

If you have been following this blog you will know my husband and I hold special cooking contests calle He Said/She Said. This month's recipe contest was for each of us to find one ingredient we had not cooked with then use that ingredient to make 2 dishes. That sounds simple doesn't it, but trust me it is a bit more challenging than it first appears.

My husband took the KISS approach to this contest of which I called him up on that. He reminded me the only criteria was to use and ingredient and make 2 recipes using that ingredient. So essentially I could not complain about him keeping it simple. His ingredient of choice was ground turkey. Now here the stores if we are really lucky might have ground turkey but not very often. Anything other than ground beef is rather iffy which is one reason we have a meat grinder attachment for the KitcheAid® stand mixer. A few days ago we stopped for groceries and he spotted ground turkey so that was it.

three meat meatloafThree Meat Meatloaf

You certainly cannot get much simpler than meatloaf. The thing with meatloaf is everyone makes it different and there are as many variations as there are cooks. My husband used ground turkey, ground pork and ground beef to make this yummy variation of meatloaf. Paired with Old Fashioned Chili Sauce and an oven baked potato this meatloaf was wonderful. It has a firmer texture than all beef meatloaf but it slices just as nicely the following day for meatloaf sandwiches.

Three Meat Meatloaf

1 lb ground turkey
1 lb ground pork
1 lb lean ground beef
2 eggs
¼ c Heinz 57® sauce
¼ c Diana® sauce
½ c dry bread crumbs
garlic pepper
garlic salt

Mix the ingredients well with your hands. Form into a loaf and place in a loaf pan or baking dish. Bake at 180ºC (350ºF) until golden brown and interior temperature reads 22ºC ( 72ºF). Remove from oven. Drain any grease and let sit 10 minutes before slicing.


bacon wrapped turkey roundsBacon Wrapped Turkey Rounds

His second dish using ground turkey was even simpler yet it didn't look simple. He made bacon wrapped turkey rounds topped with a little cranberry claret jelly served with oven baked potatoes, oven baked acorn squash, home canned green beans along with apple and avocado wedges topped with cream cheese making this a a lovely Sunday dinner. The bacon wrapped turkey rounds while simple were delicious! The bacon kept the rounds nice and moist while adding extra flavour.

Method: Mix garlic pepper and a little onion powder into the ground turkey. Form into for thick patties. Wrap a piece of thick sliced bacon around each patty. Place on Silpat® lined sided baking sheet. Bake at 180ºC (350ºF) until interior temperature reads 22ºC ( 72ºF). Remove from oven and plate.


Friday, October 02, 2009

October He Said/She Said Contest

If you have been following this blog you will know for 6 weeks ending August 30, 2009 my husband and I were running a He Said/She Said contest that resulted in 12 different recipes from Better Homes and Gardens® New Grilling Book. The winning recipes by popular vote were:

Texas style barbecued chickenmaple sauced chicken

He Said She Said

We are going to be doing a different He Said/She Said contest for the month of October. I think you are really going to enjoy this one! This contest is not going to be quite as involved but I think it is going to be very interesting. The focus of this contest will be investigating new ingredients. The rules are: Choose 1 ingredient you have not cooked with before. The ingredient can be anything of your choosing providing you have not used it before in any dish you have prepared. Create two dishes using the ingredient. Pictures and recipes will be posted throughout October. The contest ends October 31, 2009. Voting for the best recipe will begin on November 1, 2009 and run for 1 week.


Sunday, September 13, 2009

Starting Tomatoes

[The poll results for the recipes my husband used for the He Said/She Said contest are posted. His winning recipe was the Texas Style Barbeque Chicken Legs. Please take a moment to vote for your favourite recipe in the She Said entries.]

The tomato season is a bit late here by about a week with respect to the hampers of tomatoes I use for canning. My husband brought home 2 hampers of tomatoes Wednesday night for me to process on Thursday. It marked the beginning of tomato processing season for me. However the weather is already threatening to turn much colder At the same time the garden is producing nicely so I've been picking tomatoes daily especially the Sweet Millions cherry tomatoes.

roasted tomato sauceI have mentioned roasted tomato sauce on this blog quite often. It is one of our favourites. There is no recipe only a method and that is to roast the tomatoes on an outdoor grill (1). I add a little fresh garlic, fresh basil, green pepper, onion and drizzle of olive oil. Then the mixture is slow roasted adding more as it cooks down. The tomato mixture is ready when there is a good indication of caramelization (2). This is a must! It is the caramelization process resulting from this slow outdoor grilling that cannot be duplicated in an oven.

Once the caramelization process is completed I use a stick blender to smooth the mixture. Then the sauce is ladled into hot jars and processed in a pressure canner at 10 lb pressure for 20 minutes. When the jars are cooled the rings are removed and the jars washed. The jars are then ready for storage (3). This roasted tomato batch gave a yield of 10 - 500 ml jars.

crushed tomatoesCrushed Tomatoes

Crushed tomatoes are always a useful product on the pantry shelf. Plain and unseasoned, these tomatoes are very versatile for many dishes. I slipped the skins using the boiling water method, cut the tomatoes into quarters then across the strips forming larger chunks. The chunks were raw packed into hot jars. To raw pack simply put the tomatoes into the jars, packing as tightly as possible leaving 1-inch headspace. The tomatoes are then pressure canned at 10 lb pressure for 25 minutes. Pictured are the 13 L of tomatoes as they came from the canner (4). Initially there were 14 L but one of the jars broke (5).

Jar breakage is something every home canner will encounter at one time or another. There is always the chance of breakage due to dropping a jar but dreaded type of jar breakage is in the canner. The primary reason for jar breakage in the canner is themal shock. This happens when a cold jar is placed into the hot water of the canner stressing the glass to the point it breaks. This is why it is important to pack food into hot jars then place in the canner and bring the canner to temperature. This is also why it is important to use mason jars for canning not recycled mayonnaise and similar jars. Mason jars are thicker and tempered to prevent breakage especially under pressure. Another cause of breakage is old age. Glass gets brittle as it ages making it more susceptible to breakage. Using metal utensils in glass jars can cause scratches on the interior surface of the canning jar. This causes a weak spot that may cause the jar to break. Finally some jars have minor flaws such as bubbles that occur during the manufacturing process. If you fail to notice one of these bubbles the jar could break especially if pressure canning. In this case the jar that broke was a Canadian Mason so likely about 30 years old. Breakage was likely due to age and/or interior scratches. It was a clean break yet still a mess to clean-up.

Velveeta DinnerVelveeta Dinner

The month of September always means long canning days. This particular day 2 hampers of tomatoes were cleaned. One was peeled and chopped so that's a fair amount of prep time while the other was turned into a sauce so there was a fair amount of prep work. The canner ran 3 times with one run spanning the dinner hour. These are the days that something quick and easy to prepare for dinner is very much appreciated.

I like to keep Velveeta cheese on hand as part of my pantry stores. Velveeta cheese is a shelf stable, processed cheddar cheese that requires no refrigeration until it has been opened. It won't keep as long as powdered cheeses in the pantry but cuts and looks more like a block of cheese. It also is rather versatile. While the canner was running we made a quick Velveeta dinner. It was nothing fancy but it was easy, tasty and frugal. I used homemade salsa and home canned jalapeno peppers for this dish.

Velveeta Dinner

1 lb extra lean ground beef
2 c elbow macarroni
¾ c Velveeta cheese
½ c chopped onion
½ c salsa
canned jalapeno peppers

Bring water to a boil then add pasta and cook to al dente. While the pasta is cooking, brown the ground beef. Drain beef and pasta. Return pasta to sauce pot. Stir in ground beef and Velveeta cheese. Place lid on pot and let sit 5 minutes until cheese is fully melted. Stir and plate. Top with salsa, onion and jalapeno peppers.


Sunday, September 06, 2009

Looking Back on the He Said/She Said Contest


The Cookbook of Choice

One of the easiest ways to discover new recipes is to pick a cookbook then go through it marking recipes that sound appealing to you. That's exactly what my husband and I did then to make it a bit more challenging we turned it into a contest identified here as He Said/She Said. Both of us are accomplished home style, cooking from scratch cooks so this became one more aspect of being able to share of love of food. At the same time we each learned something about each other's cooking style along with discovering a few new ingredients.

When I originally came up with the idea for this contest the premise was each would do 6 different recipes of their choosing without assuming any help from the other. Well that idea fell by the wayside with the very first recipe, Texas Style Barbecue Chicken. As we browsed through the recipes questions arose over certain ingredients so one of us would rush off to do an online search. The curiosity of what was happening in the kitchen quickly turned into me acting as hubby's sous-chef and he in turn acted as mine. In the end the entire contest became less of a competition and more of a team work effort. We seriously had a lot of fun with this so already have plans for our next joint venture in cooking coming soon so watch for that coming as October's feature.


Saturday, September 05, 2009

He Said/She Said Contest Summary

For the past 6 weeks my husband and I had a contest with each of us making a recipe from Better Homes and Gardens® New Grilling Book to create a meal. The primary goals for this contest was to discover new recipes while learning a bit more about our cooking styles in a fun yet slightly competitive contest. In total there were 12 recipes, each choosing 6. The contest ended August 31 with all dishes completed by that date. Originally I was going to post one large poll so you the reader could vote for your favourite dish of the 12 recipes. Instead I will post one poll for the best of he said and one poll for the best of she said followed by a final polling with the first poll to go live tomorrow and running one week. Tomorrow's blog post will give some of the highlights we discovered from the contest.

BHG New Grilling Cookbook
The Cookbook of Choice

Here is a summary of the He Said/She Said recipes. Click any of the pictures to take you to the full write-up for the dish. If you try any of these dishes please let us know. Please leave comments on the individual posts or on this post if you wish. Happy voting!


He Said
Texas style barbecued chickenAsian Marinated round steakglazed Prosciutto wrapped shrimpshrimp po boymushroom stuffed pork chops


She Said
maple sauced chickenfarm style green beansCanadian bacon and pineapple pizzamixed berry shortcakeapple glazed chicken kabobs


Wednesday, September 02, 2009

He Said (6) - Mushroom Stuffed Pork Chops

If you recall my husband and I were having a bit of a contest with each of us using a recipe from Better Homes and Gardens® New Grilling Book to create a meal. There were 12 recipes in total, 6 of his choosing and 6 of mine. The contest ended August 31 so here is final recipe. I will post a summary with links to all of the recipes and the first poll where you can vote for the meal you liked best later this week. I will also post a follow-up on some of the things we learned with this fun contest. The rules were all the ingredients must be used but the amounts can be altered.

preparing mushroom stuffed pork chopsThe Prep

The prep work for the mushroom stuffed pork chops was quite simple. My husband picked up fresh butterflied pork chops from our local butcher shop (1). The nice thing is the butcher shop custom cuts to our specifications so we always get exactly the cut we want. The recipe called for making a pocket in the pork chops but getting them butterflied is easier so the instructions have been modified to reflect that. He mixed the mushroom stuffing together then placed it in the centre of each pork chop (2). Then he fold the pork chops together to form a pocket (3) and grilled on a covered grill on medium heat. During the last 5 minutes of grilling he brushed on orange marmalade (4) which reminds me I need to make orange marmalade.

Mushroom Stuffed Pork Chops
source: Meredith Corporation, Better Homes and Garden New Grilling Book, 2005. Pp. 214

4 pork loin chops (1¼-inch thick)
½ c coarsely chopped fresh mushrooms
¼ c chopped onion
1 tbsp butter
1 tsp grated fresh ginger
¼ tsp salt
¼ tsp black pepper
1 c coarsely chopped fresh spinach
¼ c soft bread crumbs
¼ c orange marmalade

Cook mushrooms and onion in hot butter until onion is translucent. Remove saucepan from heat. Stir in ginger, salt, pepper, spinach and bread crumbs. Gently toss to mix. Spoon the stuffing onto the butterflied pork chops. Fold the pork chops to form a pocket. Secure with a wooden toothpick. Grill on indirect heat on medium for 35 to 40 minutes or until chops are slightly pink in the centre and juices run clear (160ºF), turning once. During the last 5 minutes of grilling, brush with orange marmalade.

mushroom stuffed pork chopsMushroom Stuffed Pork Chops

I think it is official! My husband is seriously trying to show me up when it comes to grilling. These are some of the best tasting pork chops you will ever taste! The meat was nicely grilled and tender. The simple stuffing was just a delight. The orange marmalade added a nice high note without being over powering. The flavours just complimented each other so nicely! Hands down I really think this is the best of the 12 recipes. It was simple yet delicious with all the hallmarks of a great recipe!

I served the pork chops with grilled potatoes and fresh lettuce, tomato, basil from the garden accented with cucumber slices. It was an excellent meal!


Tuesday, September 01, 2009

He Said (5) - Shrimp Po' Boy With Dried Tomato Aїoli

If you recall my husband and I are having a bit of a contest with each of us using a recipe from Better Homes and Gardens® New Grilling Book to create a meal. In total there will be 12 recipes, 6 of his choosing and 6 of mine. The contest ended August 31 so the first week of September tomorrows post will be the 12th and final recipe. I will post a summary with links to all of the recipes and the first poll where you can vote for the meal you liked best later this week. I will also post a follow-up on some of the things we learned with this fun contest. The rules were all the ingredients must be used but the amounts can be altered.

making the shrimp po'boy sandwichThe fifth contest recipe my husband made was Shrimp Po' Boy With Dried Tomato Aїoli with two minor modifications. Aїoli is a sauce made from garlic and olive oil. An egg is often added for ease of mixing but there are many variations of the sauce. Aїoli is traditionally served with seafood. The recipe called for chopped oil packed dried tomatoes but the garden is overflowing with cherry tomatoes so he used those instead. He also used a Vadelia onion instead of a red onion.

The French loaf of bread was cut in half, brushed with olive oil and grilled along with the shrimp (top right). When the shrimp was cooked the tails were removed. The sauce was spread on the bottom piece of the grilled bread and topped with shrimp (bottom left). The top piece of the bread was place on top then the assembled loaf was wrapped in tinfoil and returned to the grill where it heated through nicely (bottom right).

Shrimp Po' Boy With Dried Tomato Aїoli
source: Meredith Corporation, Better Homes and Garden New Grilling Book, 2005. Pp. 335

1 lb fresh or frozen jumbo shrimp in shells
2 tbsp lemon juice
2 tbsp olive oil
1 tsp seafood seasoning (eg. Old Bay)
half loaf unsliced French bread
½ c mayonnaise
¼ c chopped dried tomatoes (oil packed), drained [used fresh]
2 tbsp dairy sour cream
2 cloves garlic, minced
½ of a medium red onion, thinly sliced [used Vadelia]
shredded lettuce (optional)

Peel and devein shrimp removing tails. Rinse and pat dry. Place the shrimp in a lidded container. Stir together 1 tbsp of the lemon juice,1 tbsp of the olive oil and the seafood seasoning in a separate bowl. Pour the marinade over the shrimp and put the lid on. Marinate for 1 hour gently shaking container occasionally. Thread the shrimp onto soaked wooden skewers. Halve bread horizontally and lightly brush with remaining olive oil. Grill bread and shrimp on medium 7 to 9 minutes or until shrimp are opaque and bread has well defined grill marks. While the shrimp and bread are grilling combine the remaining ingredients in small bowl. Remove shrimp and bread from grill. Place bread bottom on large tinfoil square. Spread the mayonnaise mixture onto the bread bottom. Top with shrimp and onions. Add the bread top. Form a sealed packet over the sandwich. Return to the grill and grill 12 to 15 minutes or until heated through turning once.

Shrimp Po' Boy With Dried Tomato AїoliShrimp Po' Boy With Dried Tomato Aїoli

If you like seafood submarine sandwiches then you are going to love this sandwich! Pictured is the Shrimp Po' Boy With Dried Tomato Aїoli sandwich my husband made. This wonderful tasting sandwich served 3 adults and was served for peaches & cream corn-on-the-cob. The mayonnaise sauce was rich and creamy, just perfect with the shrimp!

This recipe is a definite keeper with a couple of modifications. The lemon juice flavour was a bit pronounced so the next time we make this sandwich we'll cut back on the lemon juice a bit. I also think this sandwich would be even better with crab meat stirred in.


Friday, August 28, 2009

She Said (6) - Salmon and Vegetable Packets

If you recall my husband and I are having a bit of a contest with each of us using a recipe from Better Homes and Gardens® New Grilling Book to create a meal. In total there will be 12 recipes, 6 of his choosing and 6 of mine. The contest ends August 31 so the first week of September I will post a poll where you can vote for the meal you liked best. The rules are all the ingredients must be used but the amounts can be altered.

salmon and vegetable packet ingredientsIngredients

I chose a salmon dish for my 6th and final recipe of the contest. The recipe indicated that the meal is cooked on the grill then served in its foil pouch which would make this an ideal recipe for camping. I did not serve in the foil pouch choosing to plate the meal instead.

The ingredients for the meal are pictured. I used wild Pacific salmon fillets and homemade chicken stock. The dried rosemary was from my previous garden. All of the produce used in the dish was locally grown some from my garden and some purchased. The recipe said to use 4 small yellow summer squash (zucchini) but I used 3 medium green summer squash instead.

Salmon and Vegetable Packets
source: Meredith Corporation, Better Homes and Garden New Grilling Book, 2005. Pp. 322

1 lb fresh or frozen skinless salmon
2 c carrot strips
2 c red sweet pepper strips
12 fresh asparagus spears
4 small summer squash
½ c dry white wine or chicken stock
2 tsp snipped fresh rosemary or ½ tsp dried rosemary
2 cloves garlic, minced
¼ tsp salt
¼ tsp black pepper
2 tbsp butter
hot cooked white or brown rice (optional)

Thaw fish if frozen. Rinse fish and pat dry with paper towels. Measure the thickness of the fish then cut into 4 serving-size pieces and set aside. [Foil pack formation method changed by me.] Cut eight 18-inch pieces of heavy-duty foil. Layer in 4 sets of two. Spray the top layer of foil with oil in health mister or brush lightly with vegetable oil. Arrange the vegetables and salmon in equal portions on each top layer of foil. Mix chicken stock, rosemary, garlic, salt and pepper together in a bowl. Drizzle over the fish and vegetables. Top each packet with a pat of butter. Fold the 2 opposite sided together and make a double fold to hold them together. Fold the each end together using a double fold to create a sealed packet. Repeat with the second layer of foil for each packet making it slightly looser than the first. Place on preheated medium heat grill. Cook 12 to 14 minutes per ½-inch thickness of fish. When finished cooking remove from heat. Carefully open each packet avoiding the steam. Serve in foil packet or plate as desired.

assembling foil packetsGrilling

Pictured is the assembly of the foil packets (top) and on the grill (bottom). Once you have the fish and vegetables ready on the 2 layers of foil it is time to form your packet. This is quite easy using a double fold method that forms a centre seam. The same double fold method is used to form each end seam. The end result is a tightly sealed rectangular shaped foil packet with 3 double folded seams. To made a double seam: As oriented in the picture bring the top and bottom edges of the foil together over the fish and vegetables. Hold the two edges then fold them over about a ½-inch. Press along the fold with your fingers. Fold the first fold over again about a ½-inch. Press with your fingers then press the fold flat across the packet. You have now created a double seam. Repeat this fold on each end to create a tightly sealed foil packet.

Foil packet cooking whether at home or camping is a convenient method for cooking moist, tender and tasty meals with little clean-up. The foil packet itself can serve as the serving dish especially when camping. The food is cooked by the steam produced from the food as it cooks inside the packet. This method results in moist, tender and flavourful meats, poultry and fish. A variety of vegetables and/or sauces can be added to the packets for a complete entrée or cooked in separate foil packets as a side dish.

salmon and vegetable packetsSalmon and Vegetable Packets

Pictured is the salmon and vegetable packet after cooking served with a side of Calrose rice. Calrose rice is a medium grain rice grown in California. It was developed in California in the early 1970s from a radiation-bred variety of japonica medium-grain rice. The rice is sticky when cooked making it ideal for sushi. My favourite way to cook Calrose rice is in the rice maker with homemade chicken stock and butter.

What I love about using any steaming method of cooking is the colour retention in vegetables. Don't they look lovely? The salmon and vegetable packet did not disappoint. The salmon was nicely cooked, definitely flakey and tender. I liked the addition of asparagus in the vegetable mix. The sauce used was pleasant and not overpowering. I would be tempted to add a bit of maple syrup to the sauce. Overall we found the meal quite pleasing so this is a keeper recipe.


Tuesday, August 25, 2009

She Said (5) - Apple Glazed Chicken Kabobs

If you recall my husband and I are having a bit of a contest with each of us using a recipe from Better Homes and Gardens® New Grilling Book to create a meal. In total there will be 12 recipes, 6 of his choosing and 6 of mine. The contest ends August 31 so the first week of September I will post a poll where you can vote for the meal you liked best. The rules are all the ingredients must be used but the amounts can be altered.

apple-glazed chicken kabobsApple Glazed Chicken Kabobs

I decided to make the apple-glazed chicken kabobs as my fifth contest recipe. It appealed to me because kabobs are always a fun presentation. The recipe was intended for the indoor grill but I used the outdoor grill instead. The aromatic apple glaze tantalized our senses while waiting for the kabobs to cook. This recipe is a definite keeper! It could easily be modified to include red sweet pepper, sweet banana pepper or any vegetable that pairs nicely with apple.

I used homemade apple jelly, a Granny Smith apple and a Vadellia onion in this recipe. The kabobs were served on a bed of Calrose rice cooked in homemade chicken stock and butter.

Apple Glazed Chicken Kabobs
source: Meredith Corporation, Better Homes and Garden New Grilling Book, 2005. Pp. 390

1 c apple jelly
2 tbsp honey
2 tbsp lemon juice
2 tbsp butter
1 tsp ground cinnamon
¼ tsp ground cloves
1 lb boneless, skinless chicken breasts
1 tsp garlic powder
½ tsp celery salt
½ to 1 tsp ground black pepper
1 large onion
1 large green sweet pepper
1 large apple
1 tbsp olive oil

Place 8 wood skewers in a shallow pan. Cover with water and allow to soak at least 30 minutes. Combine jelly, honey, lemon juice, butter, cinnamon and cloves in a medium saucepan. Bring to a boil then reduce to simmer. Simmer 6 to 8 minutes or until reduced to 1⅓ c whisking frequently. Remove glaze from heat and set aside. Cut the chicken, onion and pepper into 1 - inch pieces. Wash and cut apple into wedges. Remove core. Place in bowl of water with a splash of lemon juice until ready to use. Preheat the grill to medium high. Sprinkle chicken with garlic powder, celery salt and black pepper. Alternately thread chicken, onion, pepper and apple wedges. Place the kabobs on the grill and grill until chicken is no longer pink and vegetables are crisp-tender with well defined grill marks. Reheat glaze. Brush kabobs with glaze just before serving.


Saturday, August 22, 2009

He Said (3) - Burgers with Mushroom-Vermouth Topper

If you recall my husband and I are having a bit of a contest with each of us using a recipe from Better Homes and Gardens® New Grilling Book to create a meal. In total there will be 12 recipes, 6 of his choosing and 6 of mine. The contest ends August 31 so the first week of September I will post a poll where you can vote for the meal you liked best. The rules are all the ingredients must be used but the amounts can be altered.

ingredients for burgers with mushroom-vermouth topperGreat Ingredients

My husband loves burgers! He makes one of the best homemade burgers you will ever taste so it was not a surprise when he chose a burger recipe from Better Homes and Gardens® New Grilling Book as one of his contest recipes. Good food always starts with fresh, quality ingredients! My husband stopped at the LCBO (Liquor Control Board of Ontario store) to pick up dry Vermouth. Vermouth is a fortified wine flavoured with aromatic herbs and spices. He bought Martini Dry-Sec a, 18% alc/vol vermouth product of Italy. He also stopped at the grocery store for fresh mushrooms and Vidallia onions. While there he spotted mozzarella cheese so picked up 5 packages. This mozzarella cheese has a nicer flavour and texture than the store or name brand (eg. Kraft®) cheese. It actually is less expensive per gram than the store or name brand mozzarella. We have found this to be true for most cheeses. I made a small platter for the salad toppings as a side for the burgers.

burgers with mushroom-vermouth topperThe Burger

Pictured is one of the burgers with mushroom-vermouth topper. The burger itself was not highly seasoned so there was a lovely, full bodied beef flavour that really offset the mushroom-vermouth sauce. Unlike other burgers that you would add toppings like tomatoes, pickles and onions the only topping on this burger was the mushroom-vermouth topping. The sauce was rich and creamy. This resulted in a unique and very tasty burger! The burgers were served with a simple side salad topped with balsamic vinaigrette dressing.

My husband added a couple of pieces of the mozzarella cheese on his second burger. He declared it even better than the first burger! So the next time we make these burgers and we will definitely be making them again we'll add mozzarella on top of the burger before adding the mushroom-vermouth topper. Kudos to my husband for trying this keeper recipe!

Burgers with Mushroom-Vermouth Topper
source: Meredith Corporation, Better Homes and Garden New Grilling Book, 2005. Pp. 148

½ c finely chopped sweet onion
¼ c fine dry bread crumbs
1 beaten egg
½ tsp salt
¼ tsp black pepper
2 lb lean ground beef
6 hamburger buns, splite and toasted
1 recipe Mushroom-Vermouth Topper

Combine onion, bread crumbs, egg, salt and pepper in large bowl. Add ground beef and mix well. Shape into six ¾-inch thick patties. Grill on medium until centre reaches 160ºF. Remove from grill and place on toasted buns. Top with Mushroom-Vermouth Topper.
Yield: 6 burgers

Mushroom-Vermouth Topper
source: Meredith Corporation, Better Homes and Garden New Grilling Book, 2005. Pp. 148

¼ c melted butter
3 c quartered small mushrooms
½ c thinly sliced shallots
½ tsp salt
¼ tsp black pepper
1 tbsp all-purpose flour
⅔ c dry vermouth

Combine butter, mushrooms, shallots, salt and pepper in skillet. Cook over medium heat until cooked. Stir in flour. Cook and stir 1 minute. Remove from heat and carefull add the vermouth. Return to heat. Continue cooking and stirring until thickened and bubbly. Cook and stir 1 minute more. Serve immediately.