My photo
Ontario, Canada
I am a wife, mother and grandma who enjoys the many aspects of homemaking. A variety of interests and hobbies combined with travel keep me active. They reflect the importance of family, friends, home and good food.
Cook ingredients that you are used to cooking by other techniques, such as fish, chicken, or hamburgers. In other words be comfortable with the ingredients you are using.
--Bobby Flay

For Your Information

Please watch this area for important information like updates, food recalls, polls, contests, coupons, and freebies.
  • [March 19, 2020] - Effective Mar 17, this blog will no longer accept advertising. The reason is very simple. If I like a product, I will promote it without compensation. If I don't like a product, I will have no problem saying so.
  • [March 17, 2020] - A return to blogging! Stay tuned for new tips, resources and all things food related.
  • [February 1, 2016] - An interesting report on why you should always choose organic tea verses non-organic: Toxic Tea (pdf format)
  • Sticky Post - Warning: 4ever Recap reusable canning lids. The reports are growing daily of these lids losing their seal during storage. Some have lost their entire season's worth of canning to these seal failures! [Update: 4ever Recap appears to be out of business.]

Popular Posts

Showing posts with label recipe. Show all posts

Wednesday, November 30, 2011

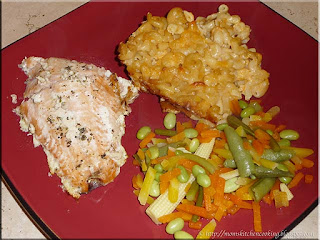
Baked Salmon with 7 Cheese Mac 'n Cheese

I grew up in a small town with a population just under 2,000.  We had one restaurant, a soft ice cream shop that was open only in July and August, a tavern,  a bakery and two very small and I do mean small grocery stores.   Oh, and we had a canning factory so the whole town smelled deliciously like tomato soup in the fall.  To this day, my favourite fall drink in the morning is not coffee but rather tomato soup.  My high school Home Economics teacher was adamant that using good quality food and easy recipes  was all that was necessary to prepare tasty home cooked meals.  Well, she would have to because she lived in the same small town where the choice of ingredients to cook with was rather limited.  Mind you back then there was not the variety of ingredients readily available like sea salt, organic sugar, fresh seafood, exotic seasonings and those types of things.  There was a lot less commercially prepared convenience foods (eg. cake mixes, etc.).   Even back then she taught us the value of food dollars and how to get the most for our food dollars.  I still use many of the recipes learned in that class!  One of the very first dishes she taught us was how to make macaroni and cheese.

baked salmon with seven cheese mac and cheese

When I was growing up, the only fresh fish we had was smelt.  We had canned tuna, canned salmon and once they came to town, frozen fish sticks.  My Mom was not a huge fish fan.  I can remember my excitement the first time I saw fresh fish at the market!  Now I buy fresh fish at one of the grocery stores or nearby fisheries.  We also enjoy locally caught fresh fish like bass, perch and pickerel.  While I enjoy a wide variety of fish, salmon is one of my favourite.

I baked a salmon fillet for dinner a couple of nights ago.  The fillet was about 10 - inches long, enough for two people.  I served the salmon with homemade 7 Cheese Mac 'n Cheese (recipe below) and an Asian vegetable mix consisting of yellow and orange carrots, snap peas, shelled edamame, whole baby corn and garlic sprouts.  It was delicious, easy to prepare, and frugal meal!

Baked Salmon
recipe by:  Garden Gnome

1 salmon fillet
1 tbsp butter
1 tsp Herbes de Provence

Place the salmon fillet on Silpat or parchment paper lined baking sheet.  Divide the butter into four portions then put the portions along the centre of the fillet.  Sprinkle the herbs evenly over the fillet.  Bake at 350ºF until salmon is cooked through, about 15 minutes.

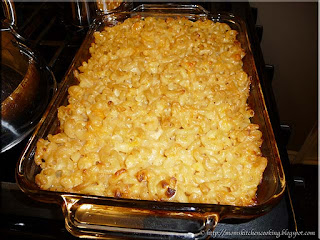
seven cheese mac and cheese
Our Home Ec teacher taught us to make macaroni and cheese from scratch using a simple cheese sauce consisting of milk, flour and cheddar cheese.  It is still a classic method but I love experimenting with macaroni and cheese.  There are so many wonderful cheeses available so I've developed several versions of macaroni and cheese. The cheese sauce in this version is rich and creamy.  The liquid smoke is a secret ingredient I discovered in the macaroni and cheese served at Mike's Smokehouse BBQ & Grill in Tampa Bay, Florida.  It adds a wonder note to macaroni and cheese!  The trick when using liquid smoke is to add one drop at a time until you get the desired aroma and flavour.

7 Cheese Mac 'n Cheese
recipe by: Garden Gnome

¼ c Asiago cheese
¼ c Parmesan cheese
¼ c sharp cheddar cheese
¼ c mozzarella cheese
¼ c colby cheese
¼ c cream cheese
1 tbsp Cheez Whiz
¾ c milk
7 cups cooked elbow macaroni
4 - 6 drops liquid smoke

Grate the Asiago, Parmesan, cheddar, mozzarella and colby cheeses.  Stir the grated cheeses to mix.  Cook the elbow macaroni and drain.  Pour the hot pasta into a mixing bowl.  Stir in the cream cheese and Cheez Whiz.  Mix then stir in the grated cheeses.  Mix well then stir in 4 - 6 drops of liquid smoke.  Mix.  Pour the macaroni mixture into a 2 quart baking dish.  Pour the milk over the macaroni mixture.  Cover with foil and bake at 350ºF until cheese is bubbling.  Remove foil and bake until the top starts to brown slightly.  Remove from oven and serve.


Saturday, August 21, 2010

She Said - Peach Spice Muffins

Earlier this month I announced the Second Annual He Said/She Said Contest.  The focus of this year's contest will be Company's Coming Heart-Friendly Cooking by Jean Paré, one of my favourite cookbook authors.  From now until the end of the month 8 recipes will be posted from this cookbook, four of my husband's choosing and four of mine.  Ontario peaches are in season so I've been busy canning them.  I chose the Peach Spice Muffin recipe as my first She Said contest recipe.

I'm always looking for muffin recipes.  Muffins are so easy to make.  They are great for breakfast or snacks and they travel well so I make  them quite often.  Peaches added to muffins sounded like a wonderful match.  The Peach Spice Muffins have a delightful taste.  They are low fat (1.6 g) and low in sodium (153 g) with 173 calories per muffing.

I made three substitutions in this recipe.  I used unbleached flour instead of all-purpose, home canned peaches instead of store bought and vegetable oil in place of canola oil.

Peach Spice Muffins
source: Jean Paré, Company's Coming Heart-Friendly Cooking, 2003, Pp. 38

1 c all-purpose flour
¾ c whole wheat flour
1 tbsp baking powder
½ tsp ground cinnamon
½ tsp ground ginger
¼ tsp ground allspice
¾ c dark brown sugar, packed

14 oz can peach halves
1 large egg
¾ c buttermilk
⅓ c apple juice
2 tbsp canola oil

Combine the dry ingredients in a large mixing bowl.  Make a well in the centre.  Combine the last 5 ingredients in a separate mixing bowl.  Pour into the well.  Stir until just moistened without overmixing.  Fill greased muffin cup ¾ full.  Bake at 190ºC (375ºF) for 20 to 25 minutes until wooden pick inserted in centre of muffin comes out clean.  Remove from oven.  Let stand in pan 5 minutes before turning out onto wire rack to cool completely.

Yield: 12 muffins


Friday, August 20, 2010

Blackberry Peach Jam

This is such a wonderful time of year in Ontario!  The home gardens are producing nicely while local produce is readily available.   It signifies the gearing up to the heaviest canning season for me.  I like to get the in season fruits canned before starting into tomatoes and apples.  So it really is a great time of year.

blackberries and red haven peaches
One of our friends generously gifted us with about a quart of blackberries (left).  At the same time Ontario peaches were coming into season.  My husband brought home almost 19 lb of red haven peaches (right).  Red havens are cling free (free stone) peaches that have a red blush.  The pit is even reddish.    The first few peaches were combined with the blackberries to make a luscious gourmet jam.

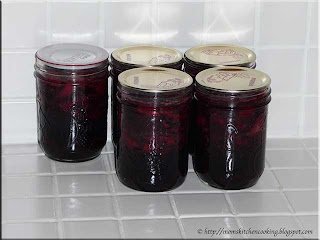
blackberry peach jam
One of the best ways of stretching out a fruit for preserving when there isn't a lot of it is to combine it with another fruit.  It's also a way to get the taste of more expensive fruits by extending those fruits with less expensive fruits.  Fruit combination jams are wonderful because you do get that blend of flavours.  I paired the blackberries with red haven peaches for a lovely jam.  The flavour really is superb!

Blackberry Peach Jam
source: Garden Gnome

2 c crushed blackberries
2 c chopped peaces
¼ c preservative free lemon juice
2 c organic sugar
2 tsp Pomona's pectin*
2 tsp calcium water

Prepare blackberries and peaches.  Place in large saucepan.  Stir in lemon juice and calcium water.  Mix sugar and pectin together in a separate bowl.  Bring fruit mixture to a boil then stir in sugar/pectin mixture.  Bring to a boil and boil 1 minute.  Remove from heat.  Ladle into hot, prepared jars.  Adjust lids as per instructions depending on what lids you are using.  Process jars in a boiling water bath canner for 10 minutes at altitudes to 1,000 feet or at higher altitudes refer to altitude adjustment chart on canning information page.  Remove from canner.  Let cool 24 hours and test seal.

Yield: 4 - 250 ml (half pint) jars

*Do not substitute regular pectin in this recipe.


Wednesday, August 18, 2010

Spirited Peaches

Ontario peaches are now in season as mentioned in yesterday's post.  I started off with 2 - 2 L baskets to try out a couple of new recipes.  This week I will be into my regular canning for peaches perhaps adding a new recipe or two but for the most part the peaches will be canned as quarter or slices.  Unlike the first peaches I started with and pictured below the peaches for the main canning sessions will come directly from the orchard.  We a doing a foodie road trip this week to pick up in season fruits and vegetables that will include peaches.  I would like to get these canned up before starting tomatoes which also starts this week so there will be a few busy days ahead.

cutting peaches
Peaches come in two varieties with respect to the pit.  By far the easiest peach to prepare for canning has a cling-free pit.  What this means is the pit will pull freely from the fruit.  Some peach cultivars are not cling-free so the meat of the fruit sticks firmly to the pit.  These cultivars are a lot more difficult to prepare for canning.

The general recommendation for peeling peaches is to dip them in boiling water for 30 seconds then slip the skin similar to the way you would slip the skins from tomatoes.  A method I like using for firm, ripe  peaches is scoring to the pit to form quarters.  A little twist of the knife will release the first quarter and the others can easily be removed from the pit.  A couple of passes of the knife quickly removes the skin.  Then I turn the quarter on one edge and slice through to form two slices.  When it comes to any food prep for canning use the method that works for you. 

spirited and plain peaches
I was testing two variables in this small canning batch.  First, as you know if you have been following this blog I have been testing out the Tattler reusable canning lids.  The second variable was adding spirits (eg. alcohol) to the product which is something I don't do a lot of.  Adding alcohol gives a wonderful gourmet product but it makes the product less versatile in that it cannot be served to everyone.   Spirited peaches are delightful especially served with vanilla ice cream.

Spirited Peaches
source:  Garden Gnome

6 c prepared sliced peaches
¼ c preservative free lemon juice
4 c water

1 lemon
2½ c water
2 c organic sugar

8 tbsp peach schnapps

Mix lemon juice with 4 c water in large bowl.  Wash, peel, pit an slice the peaches place the prepared peach slices in the lemon water as you work.  Grate the rind of the lemon and place in medium sized sauce pan.  Squeeze juice from lemon and add to rind.  Stir in water and sugar.  Bring to a boil on high heat then boil gently for 1 minute.  Remove from heat.  Pour 2 tbsp peach snapps int prepared jars.  Pack jars with drained peach slices leaving ½ - inch headspace.  Ladle hot syrup over peaches leaving ½ - inch headspace.  Wipe the rim.  Adjust two piece snap lids (metal) or reusable Tattler lids on the jars.  Process for 20 minutes in BWB canner at altitudes to 1,000 feet above sea level or at high altitudes refer to altitude adjustment chart on canning information page.  Remove from canner.  Tighten ring if using Tattler lids.  Allow to cool 24 hours.  Remove rings and check for seal.  Wash jars and rings.  Rings can be placed loosely on the jars for storage.

Yield: 4 - 500 ml (pint) jars


Tuesday, August 17, 2010

Peach Lavender Jam

Ontario peaches are now in season here.  We have not made a trip to the orchard for them yet but my husband brought home 2 - 2 L baskets for me to experiment with.  I would like to get any peach products canned before starting into tomato and corn products.  This is likely wishful thinking as various fruits and vegetables tend to overlap this time of year.  At any rate I had a chance to can a couple of peach products so it was a peachy day!
 

dried lavender flowers
Lavender has wonderful medicinal properties but it is also an amazing culinary herb that adds a subtle flowery note to dishes.  Lavender is one of the key herbs in herbes de province, one of my favourite herb blends.  Lavender accents the flavour of fresh fruits as well so it is perfect for adding that extra special flavour element especially when making jams and jellies.  It also happens to be one of my favourite herbs to grow second only to basils.  I love getting a waft of lavender as I brush against it while in the garden.  I have a couple of problem areas that I am going to try dividing my lavender and planting those spots in the hopes it will do well.  

If you don't grow lavender yourself but would like to experiment cooking with it look for organically grown lavender.  Many organic farm stands are now selling a wide range of fresh organic herbs.  Another good source is health food stores.  I also recall seeing dried lavender flowers at World Market so check specialty kitchen stores.  You should be able to order online as well.

peach lavender jam
A simple addition of lavender water can be just the ingredient that puts your homemade jam into the higher end of the gourmet category.  It's a combination you likely will not find in regular grocery stores although some gourmet specialty shops may possible have something similar.  When buying gourmet style jams expect to pay somewhere around the $8 mark for an 125 ml (pint) jar if not more so about $1 per 15 ml (about 1 ounce).  The homemade version will cost a third or less of that even with buying the produce.

The peach lavender jam is simply delightful.  I made several changes including halving the recipe something I normally do when testing any new canning recipe and I converted the recipe to use Pomona's pectin* rather than regular pectin (eg. Certo).   The flavour of the jam is wonderful. 

Peach Lavender Jam
modified from:  Topp, E. and Howard M., Peach-Lavender Jam, Small-Batch Preserving.2005. Pp. 41.

1 tbsp dried lavender flowers
¼ c boiling water
2 c finely chopped peaches
1 tbsp preservative free lemon juice
3 c organic granulated sugar
1½ tsp Pomona's pectin*
2 tsp calcium water

Place the lavender flowers in a small bowl.  Pour the boiling water over them.  Allow to steep for 20 minutes then strain reserving the liquid.  Combine peaches, lavender liquid, calcium water, and lemon juice in a medium sized saucepan.  In a separate bowl mix the pectin and sugar together.  Bring the peach mixture to a boil.  Stir in the sugar, pectin mixture.  Continue stirring until sugar is dissolved.  Return to a boil and boil for 1 minute while stirring.  Remove from heat.  Ladle into hot prepared 250 ml (half-pint) jars leaving ¼ - inch headspace.  Wipe rim.  Adjust 2 piece lids.  Process 10 minutes in boiling water bath canner.  Remove from canner and tighten ring further is using Tattler reusable lids or leave ring as is for single-use  metal lids.  Allow to sit undisturbed for 24 hours.  Remove ring and test seal.  Wash jars and rings.  The rings can be stored loosely on the jars for storage.

*Pomona's pectin is a low methoxy pectin.  Do not substitute regular pectin in this modified recipe.


Wednesday, May 12, 2010

Imitation Crab Meat (crabmeat) Salad

Unless you ask what the ingredients are when you are eating out chances are very good you are going to consume imitation foods of some type.  Anyone who has eaten crab meat salad has likely eaten imitation crab meat.   I am not a huge fan of anything imitation especially when it comes to food.  Imitation foods tend to be chuck full of preservatives as well as artificial colourants and flavours. One of the grocery stores had flake style crab flavoured seafood aka imitation crab meat as one of their items in their $1 sale so my husband picked up 2 packages to try.  I admit to being extremely critical when it comes to trying this type of food.

imitation crab meatSurimi which means fish slurry (Chinese) or ground meat (Japenese) is a fish-based food product intended to mimic the texture and color of the meat of lobster, crab and other shellfish.  The fish is usually a white fish that has been pulverized into a paste, flavoured and shaped as desired.  It has a rubbery texture when cooked.  Surimi is extremely popular in Asian countries.  Imitation crab meat is the most common surimi product in Western markets.  It is availabe as chunks or artificial crab legs. 

The brand he purchased was Green Ocean Seafood Products.  Each package was 227 g of fully cooked, ready to serve flake style crab flavoured seafood.  According to the package it is low in fat at only 2% fat per 3 oz serving and is suitable for use in salads and pastas.  The ingredients were whitefish, water, starch, sugar, salt, mirin, soybean oil, sorbitol, crab extract, crab flavour seasoning and natural colour.  The type of whitefish was not specified but typically fish used to make surimi include milkfish, swordfish, tilapia, big-head pennah croaker, golden threadfin bream, cod, bigeyes, pacific whiting, Alaskan pollock and various shark species.

imitation crab meat salad
The imitation crab meat came frozen so I thawed one package to make a crab meat salad.  Despite being labled as "flaked" the meat did not flake as suspected.  I was however extremely impressed with the flavour.  I definitely picked up the sweet notes of the meat.  The meat had a nice, slightly rubbery texture that did pair nicely with the crunchy vegetables added to make the salad.  Overall this product did perform nicely.  The salad was quite good and definitely a keeper.  The next time I make it though I will be using real crab meat as it really is a tasty salad that we both enjoyed (please see notes below recipe).

Imitation Crab Meat Salad

1 - 227 g (about ½ lb) imitation crab meat
¼ c diced red onion
¼ c diced green bell pepper
¼ c diced celery
1 generous dessert spoon mayonnaise
3 generous dessert spoons plain yogurt

Thaw meat then pull or cut into chunks.  Prepare vegetables and stir into meat.  Add mayonnaise and yogurt.  Mix well.  Chill about 1 hour then serve as a side salad or use as a sandwich filling. 

The attracting feature of imitation crab meat is the price.  The reality is when trying to reduce food costs using a product like imitation crab meat is one more way to get the taste without the high cost of crab meat.  This is a good product for this purpose and it does give rather good results.  However, two things stand out in my mind and that is the addition of sugar and sorbitol (a sugar alcohol) which accounts for the immediate sweet notes.  At about 6.9% carbohydrate content it's not surprising the imitation crab meat tasted sweet.  Fresh cooked and canned crab meat have 0% carbohydrates.  In addition to the carbohydrate content, the imitation crab meat had more than double the sodium content but was surprisingly lower in chloresterol.

Over all I certainly cannot fault this product in terms of performance or taste.  It is in my opinion a great product for what it is essentially a clone of something it isn't.  On a scale of 1 to 10 I would rate this product a 7.  In terms of a cheaper product to replace fresh crab meat, I feel canned crab meat would be a healthier choice.  A word of caution when buying imitation crab meat some brands do contain MSG so if you are avoiding MSG for any reason look for one that doesn't have it added.  This product also is not a good choice for those watching carbs.


Wednesday, January 13, 2010

French Canadian Braised Beef

I love finding new but old recipes that still work well. Old recipes are wonderful in that they don't specify brands and we all know that in some cases brand A may vary in taste from brand B not that it is ever much of a concern for me as I tend to use my home canned or home frozen variants. They also tend to use less ingredients specifically less exotic ingredients. If you want frugal recipes for saving a few dollars when cooking look for the older recipes.

French Canadian Braised BeefFrench Canadian Braised Beef

This recipe really starts out a lot like a stew and believe me I'm not exactly sure what makes this recipe French Canadian either. Likely this was a dish that was popular in French Canada at the time this cookbook was published (1965). In the end the sauce was quite thick, creamy in texture and tasty even thicker than a stew. It was rich, creamy and flavourful, definitely comfort food. In my opinion this dish could be adapted rather easily to using a slow cooker (crockpot) or the pressure cooker.

I made a couple of substitutions in the French Canadian Braised Beef recipe. The recipe didn't call for any oil so I added a bit to help with the searing. I substituted Montréal Steak Seasoning for the salt and pepper and I added a splash of Worcestershire sauce to bring a sparkle to the beef. I also exchanged the new potatoes called for in the recipe with cubed potatoes as I'm quite sure my ancestors would have made this type of dish during the winter when new potatoes were not available. In fairness the recipe does call for condensed cream of mushroom soup so I think my ancestors would have used heavy cream and perhaps mushrooms if they had them. I used the condensed cream of mushroom soup. I also changed the cooking method to add the fresh green beans in a few minutes before serving to keep the beans nice and bright.

French Canadian Braised Beef
modified from: French Canadian Braised Beef, Kate Aitken's Canadian Cook Book, 1965. Pp. 192.

2 lb stewing beef
¼ c corn starch
1 tsp Montréal Steak Seasoning
¼ c olive oil
1 medium onion, finely chopped
1½ c water
splash of Worcestershire sauce
1 c carrots, diced
1 c green beans, cut into 1-inch pieces
6 small potatoes, bite sized pieces
10 oz can condensed cream of mushroom soup

Place the stew been, corn starch and seasoning in a covered bowl. Shake until meat is well coated. Heat oil in Dutch Oven then add onion and cook until translucent. Add the beef. Sear meat on all sides. Add water and Worcestershire sauce. Stir well. Cover tightly. Reduce heat to simmer and let simmer until meat is tender. Stir in potatoes, carrots, and mushroom soups. Continue cooking until vegetables are tender. Stir in green beans. Cook until beans are just tender.
Serves 6


Tuesday, September 01, 2009

He Said (5) - Shrimp Po' Boy With Dried Tomato Aїoli

If you recall my husband and I are having a bit of a contest with each of us using a recipe from Better Homes and Gardens® New Grilling Book to create a meal. In total there will be 12 recipes, 6 of his choosing and 6 of mine. The contest ended August 31 so the first week of September tomorrows post will be the 12th and final recipe. I will post a summary with links to all of the recipes and the first poll where you can vote for the meal you liked best later this week. I will also post a follow-up on some of the things we learned with this fun contest. The rules were all the ingredients must be used but the amounts can be altered.

making the shrimp po'boy sandwichThe fifth contest recipe my husband made was Shrimp Po' Boy With Dried Tomato Aїoli with two minor modifications. Aїoli is a sauce made from garlic and olive oil. An egg is often added for ease of mixing but there are many variations of the sauce. Aїoli is traditionally served with seafood. The recipe called for chopped oil packed dried tomatoes but the garden is overflowing with cherry tomatoes so he used those instead. He also used a Vadelia onion instead of a red onion.

The French loaf of bread was cut in half, brushed with olive oil and grilled along with the shrimp (top right). When the shrimp was cooked the tails were removed. The sauce was spread on the bottom piece of the grilled bread and topped with shrimp (bottom left). The top piece of the bread was place on top then the assembled loaf was wrapped in tinfoil and returned to the grill where it heated through nicely (bottom right).

Shrimp Po' Boy With Dried Tomato Aїoli
source: Meredith Corporation, Better Homes and Garden New Grilling Book, 2005. Pp. 335

1 lb fresh or frozen jumbo shrimp in shells
2 tbsp lemon juice
2 tbsp olive oil
1 tsp seafood seasoning (eg. Old Bay)
half loaf unsliced French bread
½ c mayonnaise
¼ c chopped dried tomatoes (oil packed), drained [used fresh]
2 tbsp dairy sour cream
2 cloves garlic, minced
½ of a medium red onion, thinly sliced [used Vadelia]
shredded lettuce (optional)

Peel and devein shrimp removing tails. Rinse and pat dry. Place the shrimp in a lidded container. Stir together 1 tbsp of the lemon juice,1 tbsp of the olive oil and the seafood seasoning in a separate bowl. Pour the marinade over the shrimp and put the lid on. Marinate for 1 hour gently shaking container occasionally. Thread the shrimp onto soaked wooden skewers. Halve bread horizontally and lightly brush with remaining olive oil. Grill bread and shrimp on medium 7 to 9 minutes or until shrimp are opaque and bread has well defined grill marks. While the shrimp and bread are grilling combine the remaining ingredients in small bowl. Remove shrimp and bread from grill. Place bread bottom on large tinfoil square. Spread the mayonnaise mixture onto the bread bottom. Top with shrimp and onions. Add the bread top. Form a sealed packet over the sandwich. Return to the grill and grill 12 to 15 minutes or until heated through turning once.

Shrimp Po' Boy With Dried Tomato AїoliShrimp Po' Boy With Dried Tomato Aїoli

If you like seafood submarine sandwiches then you are going to love this sandwich! Pictured is the Shrimp Po' Boy With Dried Tomato Aїoli sandwich my husband made. This wonderful tasting sandwich served 3 adults and was served for peaches & cream corn-on-the-cob. The mayonnaise sauce was rich and creamy, just perfect with the shrimp!

This recipe is a definite keeper with a couple of modifications. The lemon juice flavour was a bit pronounced so the next time we make this sandwich we'll cut back on the lemon juice a bit. I also think this sandwich would be even better with crab meat stirred in.


Monday, September 08, 2008

Freezing Corn and Home Canned Cream Style Corn

Friday I froze niblet corn and canned cream style corn so the kitchen was a buzz of activity. Ontario sweet corn is available from July to October. By far the most popular sweet corn available is the hybrid varieties of peaches and cream aptly named for the tender yellow and white kernels of quite sweet corn. While this is lovely fresh eating corn I don't find it the best for canning or freezing. I previously posted the method for freezing and canning sweet corn as well as the recipe for making corn relish. When choosing corn for canning or freezing look for yellow sweet corn mid-season that has tender, large kernels. Late season corn can be used but the kernels won't be as tender.

Yellow Sweet Corn

I haven't grown corn since my earlier gardens mainly because I use the square foot gardening method and corn takes up too much space for the yield. Instead, I buy local sweet corn in season. For years I bought a variety known as Libby's yellow sweet corn. The cobs were quite large with densely packed even rows of plump, bright golden yellow kernels. When peaches and cream sweet corn became popular the old fashioned yellow sweet corn became virtually impossible to find for a few years. Finally a couple of years ago a few local farmers began growing yellow sweet corn.

We have had a rather poor growing season this year so the price of corn has not come down much. Gone are the days of being able to buy corn for 99¢ per dozen but I can usually find it for $1.75 per dozen from the farmers. My husband paid $3.50 per dozen for this lovely yellow corn Thursday afternoon. He bought 5 dozen; 4½ of that was slated for freezing and canning. That night we had some with dinner. The kernels were full, tender and sweet with a wonderful flavour. Friday morning I husked the corn then set aside 1 dozen ears for canning. I had already decided instead of canning niblet corn, I would can cream style corn. The ears were a nice size with dense rows of good sized, golden yellow kernels not quite a large as Libby's but still large enough for my needs.

Freezing Prep

This was my first preserving session since the kitchen renovation was completed. I had to establish a new work pattern as we had moved the sink. I stacked the 3½ ears of husked corn (2) ready for blanching (1). Working in batches of 6 - 7 ears of corn I blanched them then transferred to ice water in the sink (3). When the batch was cooled I moved them to a glass baking dish (4) ready for cutting. This sequences was repeated several times. I used another glass baking dish (5) to catch the kernels as I cut them from the cobs. This dish was emptied into my large stainless steel bowl. By the time I was finished this bowl was filled almost to the top. The bowl was covered and placed in the refrigerator to ensure the kernels were cooled before packing. The last dozen (7) was set aside for the cream style corn.

Weighing In

Niblet corn is one of the very few things that I prefer zipper style bags to vacuum sealing. Instead I press out as much air as possible to prevent freezer burn. I generally leave the vacuum sealing for corn that has had butter or seasonings added for boil-in the bag pouches. Zipper style bags allows me to use what I want and reseal the rest.

The yield of the 3½ dozen ears of corn was 12.5 lb (200 oz) at a cost of $12.25, so just shy of $1 per lb. This is comparable if not slightly less than brand name frozen corn. Sorry I don't have a price per lb for store bought but the next time we stop I will check and post a comparison.

This brings me to the kitchen scale. The number one question when it comes to canning and freezing is "Is it cheaper?". The only way to answer this is to figure out your yield, convert it into comparison units then calculate the cost per unit. Now you can easily see if your product is cheaper than store bought. Some home frozen or home canned foods will be very close in price so then it depends on uniqueness and quality rather than price. For calculating costs of foods prepared for freezing a kitchen scale is a must. It need not be a fancy or expensive scale but it should be accurate.

Cream Style Corn Prep

Cream style corn despite its name has no cream in it rather the cream comes from the preparation method. This takes a bit of practice to master the technique so expect a bit of a mess. If you hit the kernels the wrong way the milk and/or bits of corn will fly everywhere. One thing about any large amount of white in a kitchen is it keeps you honest. There is no hiding or overlooking splatters like those created while prepping cream style corn. Keep a wet washcloth handy to wipe up those splatters as they happen.

Method: Blanch corn 4 minutes. Hold the cob at a 45º angle. Working from the centre of the cob cut mid way through the kernels with blade of knife facing away from you. Work around the cob. Turn you knife so the blade faces you and place your thumb on the mid portion of the blade for pressure. Scape the knife across the the remainder of the cut kernels to extract the pulp and milk. The cob will be clean. Turn the cob and working from the center repeat. Once you have all of the corn prepped measure the kernels, pulp and milk together. For each 2 cups (500 ml) add 1 c (250 ml) water. Bring to a boil. Reduce heat and boil gently 3 minutes. Ladle corn and liquid into 500 ml (pints) jars. [Do not use 1 L (quart) jars!] Wipe rims. Adjust 2 piece lids. Process 85 minutes at 10 lb pressure in weighted gauge pressure canner.*

*Altitude adjustment chart here.

In The Canner

With the cream style corn safely processing away in the All American 921 and 81 minutes to go according to the timer, it was time to reflect on how the changes to the kitchen were working. If you recall, the original sink was in the corner less than an inch from the corner of the stove. That meant there was no work space beside the stove on the right and a very small of about 18 - inches work space on the left occupied by the KitchenAid® stand mixer. So that meant there really wasn't much work space on the left. The grill cover can serve as a small work space but most times when I'm canning I have the other burner cartridge in instead of the grill. Removing jars from the canner meant having to lift hot jars from the canner over the sink to the waiting cork board. This was not an ideal set-up! Moving the sink created a large, deep work area with the stand mixer out of the main work area. Removing jars from the canner would now mean the jars would go right to the waiting cork board beside the stove. This is important because unlike jars coming out of a boiling water bath canner, the contents of the jars coming out of a pressure canner are still boiling. The less movement when taking them out the better to prevent breakage or seal failure.

Cream Style Corn

The first time I tried cream style corn it was a disaster! The recipe I used did not say to add water so the contents were too thick. This is really a product I wanted in my pantry. For this attempt I added a little extra water to be on the safe side figuring I could easily thicken later. This batch of cream style corn was just slightly thinner when first out of the canner but has thicken a bit after cooling.

One dozen ears of yellow sweet corn gave a yield of 5 - 500 ml (pint) jars. Total cost including lids and electricity was $4.20 for a cost per ounce of 5¢. In comparison Del Monte cream style corn with no salt added ($1.09/14 oz US) is 8¢ per ounce. This is not a huge savings but given the rising food costs every penny counts. In perspective it is a 48¢ savings per jar. I was surprised at any savings with paying $3.50 per dozen ears corn. While not totally free, if you grow your own or can buy corn at a lower price, you will realize a greater savings.


Sunday, August 12, 2007

Home Canned Corn

We bought ten dozen ears of corn for the pig roast. About four dozen were left over so I decided to preserve most of it. I prefer to freeze corn because of the taste but decided to can the corn instead to save on freezer space. Instructions for freezing corn can be found on an earlier blog (here).

Home Canned Corn

Corn is one of the easier vegetables to can but as with other vegetables it is low acid (pH higher than 4.6) so must be processed in a steam-pressure canner. One of the most common questions asked in preserving forums is "Can a pressure cooker be used for canning?" The answer is no. A pressure canner larger and heavier than a pressure cooker designed to maintain the proper pressure to raise the internal temperature of the food being processed to 240ºF at or below 1,000 feet above sea level. The regulator on pressure canner can be adjusted to compensate for higher altitudes or lower PSI for some fruits whereas most pressure cookers have only one pressure setting of 15 PSI. The higher setting would overprocess most foods at or below 1,000 feet above sea level and would underprocess foods being processed at higher altitudes.

I like to process most foods in 500 ml (pint) mason jars. I also prefer to run the canner full (20 pint jars) whenever possible as processing but that is not always possible. The amount of corn needed will depend on the size of the kernels. Yellow corn gives better results than the peaches & cream variety for both canning and freezing but is not always available in all areas. I had a combination of both varieties. Corn can be either raw or hot packed but the processing times are the same. I used the raw pack method as I think that gives a nicer texture. The total yield was 8 - 500 ml jars (canned) and six 1 - guart vacuum bags (frozen).

Home Canned Corn

Husk the corn and remove the silk. Cut the corn from the cob without scraping. Pack the corn loosely into hot jars leaving 1 - inch headspace. Add 1/2 tsp salt* to each pint or 1 tsp per quart if desired. Ladle boiling water over the corn leaving 1 - inch headspace. Remove any air bubbles. Wipe the rim and adjust two-piece caps. Process 55 minutes for pints or 85 minutes for quarts at 10 pounds pressure in a steam-pressure canner.

*salt - is always optional when canning most vegetables and tomato products so feel free to omit or reduce if desired