My photo
Ontario, Canada
I am a wife, mother and grandma who enjoys the many aspects of homemaking. A variety of interests and hobbies combined with travel keep me active. They reflect the importance of family, friends, home and good food.
Cook ingredients that you are used to cooking by other techniques, such as fish, chicken, or hamburgers. In other words be comfortable with the ingredients you are using.
--Bobby Flay

For Your Information

Please watch this area for important information like updates, food recalls, polls, contests, coupons, and freebies.
  • [March 19, 2020] - Effective Mar 17, this blog will no longer accept advertising. The reason is very simple. If I like a product, I will promote it without compensation. If I don't like a product, I will have no problem saying so.
  • [March 17, 2020] - A return to blogging! Stay tuned for new tips, resources and all things food related.
  • [February 1, 2016] - An interesting report on why you should always choose organic tea verses non-organic: Toxic Tea (pdf format)
  • Sticky Post - Warning: 4ever Recap reusable canning lids. The reports are growing daily of these lids losing their seal during storage. Some have lost their entire season's worth of canning to these seal failures! [Update: 4ever Recap appears to be out of business.]

Popular Posts

Thursday, March 29, 2007

Glazed Pork Shoulder Roast

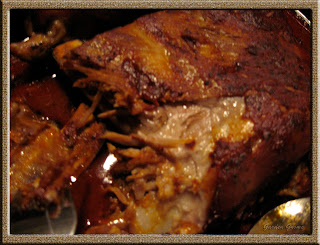
Pork shoulder roast is a family favourite. I like using some type of sauce usually tomato based or semi-sweet glaze. Quite often the semi-sweet glaze has a home canned jam, jelly or chutney as an ingredient for my glazes. Last night I decided on a semi-sweet glaze for the pork roast and as normal used the clay baker. A clay baker needs to be soaked in water before using for best results but it does cook a pork roast beautifully!

Glazed Pork Shoulder Roast
The glaze for this roast is very easy to make and can be use in one of two ways. Depending on the desired thickness of the glaze, pour over roast while raw (thicker) or about 15 minutes before the roast is cooked (thinner). For a variation, substitute the French dressing with Catalina or Russian dressing.

This pork roast was glazed while raw, then then basted a few times while cooking allowing the flavours of the glaze to penetrate the meat. I used low fat French dressing since there was a nice layer of fat on the pork roast. The apple jelly was homemade using the recipe in an earlier entry. The roast was served with basmati rice and home canned Kentucky Wonder green beans.

Glaze
1 c French dressing (low fat)
1/2 c apple jelly
1 tsp honey
3/4 tsp dijon mustard

Wisk together and pour over roast.


Wednesday, March 28, 2007

A Couple of Blogging Foodie Friends


Sunset
March 26, 2007
As this blog approaches it's 1 year birthday, I'd like to take a moment to thank each and everyone of your for reading my cooking blog. I appreciate all the emails and comments. Thanks to my many friends on my Yahoo groups who check in to see what I'm cooking. I'd like to say a special thanks to those who link to my blog.

Jodi who has a link on her blog, This Handmade Life. Jodi lives in Central Maine with her husband Halis, son Isaac (an adorable 2 year old) and friend Meaghan who stays with Jodi's family quite often. Meaghan is like a big sister to Isaac. She is a wonderful person with a great blog so please stop by and say hello to her! I met Jodi on a Yahoo group dedicated to frugal living in all aspects but especially with respect to frugal cooking.

JeanC's Cat House & Shooting Society links to my blog and she was kind enough to mention it on The Good Eat's Fan Club so thank-you very much Jean! Jean lives in the wilds of North Idaho with her husband and three spoiled cats. She loves cooking and is an ex-army brat. Trust me, Jean is a real sweetheart and her cats are pretty cute too! She's going through health problems right now so hugs and good wishes are always welcomed. Please stop by and say hi to her.

The Little Red Hens is a delightful blog by Jessica, Julie, Ruth and Bonny who are dedicated to the fine art of homemaking. This is a family run blog from what I gather. Their recipes and food ideas are great, well worth the stop over to say hi.

To each and everyone of you who have made this blog a success, thank-you so very much!


Tuesday, March 27, 2007

Potato and Leek Soup

I spent another enjoyable 80 minutes in the dentist's chair yesterday then made a stop at the grocery store in the same mall. I've been doing this as a way of treating myself. This time I picked up some nice leeks. Potato and leek soup came to mind as a comforting meal.

Potato and Leek Soup

Once home, I checked Jean Paré's Leek and Potato Soup in Company's Coming, Soups & Sandwiches, Pp. 23. Her recipe called for chicken stock and I knew I was out of that but had home canned turkey stock. Her recipe also called for light cream but I thought 1/2 and 1/2 would work fine. Chives or parsley were used as a garnish in her recipe so I changed that. Finally her soup was smooth and no bacon which I though would add nice flavour. I started by using her recipe as a guide but that quickly fell by the wayside as my creativity took over. Each step of the way, I jotted what I did in my cooking journal so I can repeat the recipe again.

I used Eco-Spuds™ Adora potatoes. These are quickly becoming my favourite potato to use because of their texture and flavour. They are grown much the same way I grow my own produce without the use of non-organic fertilizers or pesticides. The soup was nice and creamy accented with potato pieces and bacon. My husband declared the soup delicious!

Potato and Leek Soup
recipe by: Garden Gnome

2 qt homemade turkey stock
1 leek, chopped, white and light green portion only
1 medium onion
6 medium Adora potatoes, peeled and cut into chunks
1 bay leaf
white pepper to taste
sea salt to taste

4 small potatoes, peeled, diced and steamed
1/4 - 1/2 lb bacon, cut to form small pieces, fried and drained
2 tbsp chives, chopped
1 c 1/2 & 1/2 cream

This is a two part recipe. Prepare the small potatoes then steam. At the same time prepare the bacon by cutting across the strips to form small pieces. Use one full pound of bacon the remaining can be froze or refrigerated for bacon bits on salad. Set these ingredients aside to be used later.

Prepare the medium size potatoes, leek and onion then put into a large saucepan. Add the turkey stock, salt and pepper to the vegetables. Bring to a boil. Reduce heat and let simmer until the potatoes are cooked. Remove from heat. Using a stick blender, blend these ingredients until creamy smooth. Return to heat on low setting. Add the prepared potato pieces, bacon and chives. Slowly pour in the cream while stirring. Continue heating until soup is desired serving temperature, stirring to prevent the soup from burning.


Monday, March 26, 2007

Faux Lasagne

Anyone following my blogs will know I've been undergoing a lot of dental work at the moment. I'm dealing with a major and irrational phobia of dentists and we have no dental coverage. So that means we're paying for this torture out of our pockets and heaven helps us when my husband goes! After spending so many hours in the dentist's chair last week, I really only wanted soft foods. Honestly, when the freezing wore off the dental work itself didn't hurt just my jaw from keeping my mouth open so long and the multiple injection sites! Saturday, I was tired, irritable and still in discomfort that wasn't being helped by knowing I had another appointment on Monday so I decided to do a fly by meal.

Faux Lasagne

This dish started out as a faux lasagne or quick lasagne whatever you want to call it. I simply stood in front of my canning shelf to see what looked good. The roasted tomato sauce (method in archives) kind of popped out as did the mini lasagne noodles. The noodles are from Italy, made from durum wheat semolina and are about the size of broad egg noodles except with ruffled edges. Sorry, I don't read Italian but I find I like the Italian pastas better for texture. With two ingredients in hand I looked in the larger deep freezer and found a package of pre-cooked ground beef with mushrooms. One look into the refrigerator gave me my final ingredients, four kinds of cheese which meant I had a chance to play with the food shredder attachment for the KitcheAid® and have a bit of fun just creating. I didn't measure for the cheese but rather grated until it looked like enough. The cheeses were: colby, extra aged sharp cheddar, cheddar and fresh mozzarella.

Method: I cooked 1/2 package of the noodles while the meat was defrosting in the microwave and I grated the cheeses. Once the noodles were cooked, I drained those and poured into a large mixing bowl, poured on the sauce and cheese then stirred well. The mixture was poured into a large baking dish and baked at 350ºF until the cheese was well melted and bubbly.

Wensleydale Cheese with Cranberries

Around Christmas, I saw cheese with cranberries or blueberries on a flyer. Since we are playing with cheeses, I really wanted to try this cheese. Well, with our new grand baby two days before Christmas and not being home much, the idea of cheese went on the back burner. However, one of my purchases after my last dental appointment was Wensleydale Cheese with Cranberries. This is an English semi-hard cheese studded with cranberries and coated with a deep burgundy wax.

This is a wonderful snacking cheese! The flavour of the cranberries meld nicely with the slight tang of the cheese. I think this would be a nice appetizer cheese served by itself or perhaps a very light tasting cracker. At any rate, this is a definite cheese to try.


Saturday, March 24, 2007

Creamy Greens Soup & Sourdough Bread

Soup is an year round favourite, easy to make and inexpensive. As a frugal meal goes, you cannot get much cheaper than a soup made from garden greens and homemade sourdough bread.

Creamy Greens Soup

This recipe was adapted from an episode of Christine Cushing Live on Food Network Canada. I use fresh picked vegetables and herbs where possible for this soup for a nice garden fresh flavour.

Creamy Greens Soup

2 tbsp butter
1 leek, white and light green parts only, chopped
1 medium onion, chopped
2 stalks celery, chopped
2 medium carrots, chopped
1 clove garlic, minced
3 sprigs fresh thyme
2 sprigs fresh parsley
1 bay leaf
4 c chicken stock (use homemade if possible)
2 handfuls fresh spinach (about a half package)
2 handfuls fresh Swiss Chard (about half package)
1/3 c basmati rice
1/3 c heavy cream

garnish: chopped chives, sour cream

Prepare the vegetables. Heat butter on medium heat and stir in leek, onion, celery and carrots. Cook, stirring often about 10 minutes. Add the garlic, thyme, parsley, bay leaf and chicken stock. Bring to a boil then stir in the rice and reduce heat. Simmer for 25 minutes or until rice is tender. Remove the thyme sprigs and remove from heat. Stir in greens until just wilted. Purée the soup in a blender. Return soup to a large, clean pot and stir in the cream. Heat over low heat. Ladle into soup bowls. Garnish with a dab of sour cream and sprinkling of chopped chives.

Garnish: To make the sour cream teardrop, drop about 1/2 tsp of sour cream in the centre of the soup. Insert a toothpick in the centre of the sour cream on a slight angle facing away from your. Draw the toothpick away from you then up.

I've been experimenting with sourdough breads. This recipe used no yeast to help with rising so that means a longer rise time. Sourdough purists will tell you that adding yeast means you do not trust your starter. The rise time can be five hours or more but the taste is worth it. This particular loaf was left overnight before it was finally doubled.

Sourdough Sponge

Sourdough recipes always refer to the sponge. Some will start out having you make the sponge that day but the best sourdough is one that has been left to ferment and age. I know I mentioned how I made the sourdough starter but to save you from going through the archives, I use 1 c of flour and 1 c of water. Stir that together then set it aside. Once the wild yeast has had a chance to multiply, the starter develops a sponge like texture. It is thick and bubbly. This is what you are looking for when using a sourdough starter.

Sourdough Dough

Sourdough at its simplest is starter, flour, salt and sugar. This dough was made using no additional yeast. I can't recall where I got the recipe but I have made a few changes. The important thing to remember when making sourdough bread without additional yeast is to have patience. The rise time can be long so start early in the morning if you want the bread for dinner. Or start the dough so that it can rise overnight. This particular dough was left to rise overnight.

Sourdough Bread

2 c sourdough sponge
2 c unbleached flour
2 tbsp olive oil
4 tsp honey
2 tsp salt
about 1/2 c to 3/4 c water

Place dry ingredients in Kitchen Aid bowl. Mix then attach dough hook. In a separate bowl stir the wet ingredients together with the exception of the water. Set the mixer to setting 2 and slowly pour in the wet ingredients. The dough will be very stiff. Depending on your kitchen temperature and humidity levels you may need to add water to get the dough to the right consistency. Knead 2 minutes. Remove from the bowl and shape into a round loaf. Pour about 1/2 oz olive oil in your hands then rub over the loaf. Set the loaf on an ungreased cookie sheet sprinkled with cornmeal. Let rise until double. Place a cookie sheet filled with water on a lower shelf in the oven. Place the dough above the cookie sheet on another rack. Do not preheat the oven. Bake at 350ºF 30 to 45 minutes or until loaf sounds hollow on the bottom. Allow to cool then store in a paper bag to keep the crust crunchy.

Note: The rise time for this is quite long. That's ok because it is developing flavour as it rises.

Sourdough Bread

Here's the finished loaf fresh from the oven this morning. It has a nice rustic appeal with a deep, rich flavour and pleasant aroma. It is a perfect, low cost bread for any meal but really lends itself well to simpler, down home type meals. The crust has a nice crunch with a typical sourdough bread texture.


Friday, March 23, 2007

Baked Salmon

Those following my blogs will know I've been undergoing a fair amount of dental work recently. Considering the degree of my dentist phobia, this has been no small accomplishment. Yesterday, I spent another hour or so in the dentist chair and since I didn't bite them, I rewarded myself with a quick stop at the grocery store and M&Ms. Once home I made the cookies on yesterday's entry

I picked up fresh asparagus, a bag of Eco-Spuds™ Adora potatoes and fresh garlic but couldn't find anything browsing through the meat counter. Salmon steaks came to mind so I stopped there.
Wild Pacific salmon fillets 142 g/5 oz are on sale at M&M Meat Shops for $2.19 individually or $1.99 if you buy four or more. For that price, I decided to try the fillets instead of the steaks I normally buy.

On the menu was baked salmon fillets, steamed Adora potatoes and steamed asparagus, nothing fancy. This meal is rather frugal at about $3.50 per serving. It is nutritious and very quick meal to prepare. I love butter on my steamed vegetables and I use butter for baking salmon but if you omit that, the meal is also low fat. Grilling and baking are my two favourite ways to cook salmon. For this meal I decided to bake but the method is similar for both.

Method: Brush thawed salmon fillet or steak with butter on both sides. For baking, place on broiling pan. Drizzle fresh lemon juice over the fillet. Sprinkle lightly with lemon pepper. Place a couple of slices of lemon or lime on the fillet. I like adding a sprig of fresh rosemary as well during the growing season. Bake uncovered at 450ºF (425ºF) for 10 minutes per inch of thickness.

There are so many ways to cook vegetables. One of my favourite methods is to steam them. Steaming gives a nice colour and texture while preserving the nutrition. The nice thing is unlike boiling there is no watery or soggy texture. Mashed potatoes made from steamed potatoes in particular have a much nicer texture. Both Adora potatoes and asparagus lend themselves perfectly for steaming.

Method: I use a steaming basket and about 1" of water in a saucepan with a lid or for larger batches, I use a pasta basket in a pasta pot with a lid. Bring water to a boil. Prepare the vegetables and place in the basket. Lower temperature just enough to keep the steam going. Put the lid on and steam vegetables until tender.


Thursday, March 22, 2007

My Chocolate Chip Cookies

Having returned from the dentist for the second time this week, I really needed to just cook. I did splurge on salmon but that will be another post. It didn't matter what just anything to get my mind off things. I love playing with recipes to make my own creation so today was no acception. I started with a tried and true chocolate chip cookie recipe from Betty Crocker's Cookbook by favourite recipe except my husband doesn't like nuts in cookies and I had no chocolate chips. What I did have was multi-coloured chocolate chips and a left over from Christmas.

Chocolate Chip Cookies

This really is a very modified recipe but one that fit my mood today. I like the base but then play with it from there. I used the Kitchen Aid® to mix but you can use a regular mixer then just stir in the chocolate.

Chocolate Chip Cookies
2/3 c shortening
2/3 c butter
1 c raw granulated sugar
1 c brown sugar (packed)
2 eggs
2 tsp pure vanilla
2 c unbleached flour
1 tsp baking soda
1 tsp sea salt
6 oz multi-coloured chocolate chips
1/2 bar or about 4 oz Cȏtes' Ore dark chocolate bar

Cut chocolate bar into 1/4" pieces. Place shortening, butter, sugars, eggs and vanilla in mixer and mix until well mixed. Stir dry ingredients together, leave chocolates until last. Add one cup at a time mixing well. Stir in the chocolate chips and chocolate bar chips. Bake in a pre-heated oven 350ºF on convection heat until golden brown but not crisp.


Tuesday, March 20, 2007

Spare Ribs & Rice

Well, by now you have figured out my plans for yesterday went astray! I was in the dentist's chair from 10 am to 1:15 pm and still didn't get the wisdom tooth extracted! He gave me two freezings plus a buccal freezing and I still jumped when he was doing a filling so he decided against pulling the tooth. I am sporting two nice white fillings and talk about an ego boost. They look so much nicer than the old amalgam. I am proud to say I only teared up but no actual crying and I did not bite him so that's progress! I go again on Thursday for the first of four cleanings since they divide the mouth into quadrants. He thinks will be easier for me to deal with.

As a treat, I popped into the grocery store a couple of doors down an bought a package of spareribs. We had used Stubbs™ barbeque sauce on the pork rib chops so my husband really was itching for ribs. So ribs sounded pretty good for dinner

Rice Maker

This is my rice maker. Sorry but I seldom cook rice any other way. I've tried the stove method and the microwave with horrid results. The problem was we really like rice but I don't cook it right! Then I discovered rice makers. My first rice maker had two settings, cook and warm. On larger batches it would make a mess and after about 15 years of faithful use it started browning the rice on the warm setting so I replaced it wtih the Aroma® that came with a small recipe book by Martin Yan from Yan Can Cook.

There are a couple of things I like about using a rice cooker. First I know I'm a good cook but am smart enough to realize when something just doesn't work for me regardless of the reason. Using a rice cooker ensure my rice is perfect each and everytime without worrying about it. Second, the rice maker keeps the rice warm until ready for serving. That means I can stir in other ingredients or leave as it but know it is always hot and ready for the table. So, if you are like me getting frustrated over rice failing, check these small appliances out. You will be pleasantly surprised at their performance and price! Then buy your rice in bulk for more savings and wherever possible cook your rice using something flavoured like chicken stock.

Ribs

I do ribs one of two ways, the first being grilled and the second in the oven but they always start off the same way. Done this way, the meat is very tender, fall of the bone and juicy.

Method:
I like to use fresh ribs but if using ribs from the freezer, I thaw overnight in the refrigerator. Then I place the ribs in a roasing pan and pour in 1/2 c of water, nothing else. The ribs are then covered and baked at 250º for about 4 hours. baking - Carefully drain the water and pour on your favourite barbeque sauce. Turn the temperature to 350ºF and let bake about 1 hour.
barbequing - Carefully drain the water and place the ribs on the hot grill. Using a silicon pastry brush, slather on barbeque sauce on one side, grill about 10 minutes, flip and repeat..

Either way these are mouth watering ribs sure to please!


Monday, March 19, 2007

A Guest Blogger

Today will be special in that I'm planning on posting two entries today. In less than 2 hours I'm having a lower wisdom tooth extracted which means soft foods for me for a few days. I thought I would focus on that since I haven't seen any sites with these types of recipes. Oh sure I could toss everything into a blender but that wouldn't be much fun. So watch for the second posting later today.

I've posted over a hundred entries now! It doesn't seem possible especially since most of them have pictures and recipes. Since my blog started last April you have seen a change in the way I present pictures of my food. I've been playing with Adobe Photoshop CS for the past few months and learning animation. My goal is to enhance my blogs with pleasing photos.

Please welcome my guest for the week, WannabeTVChef Kevin Aston has been a chef for 30 years who has worked in Amsterdam, Bermuda and the USA. He has been the chef for Her Majesty Queen Elizabeth II, President Bush, President Reagan, former President Nixon, former Vice-President Mondale, Senator E. Kennedy, Ethel Kennedy, Alexander Haig, Admiral Crowe (former US Ambassador to Britain) also many famous movie stars including...Michelle Pfeiffer, Paul Newman, Linda Carter, Omar Sheriff, and TV personalities such as Larry King. He is an experienced cooking demonstrator having performed in front of large audiences at food shows both sides of the Atlantic including the BBC Good Food Show (NEC), The Homes & Garden Show(NEC), and The Total Sandwich Show at Olympia in London. I've worked for companies including, Asda, Heinz, Somerfield, Pork Farm Bowyer's & Knorr, doing cooking demonstrations. Kevin is currently writing a weekly recipe column for the Birmingham Sunday Mercury and writing his first book. Please visit his blog by clicking on the link in the right hand side.


Sunday, March 18, 2007

Update & Fruit Smoothies

There has been a lot going on lately meaning a heavy dose of relying of food I previously made also known as Once a Month Cooking (OAMC) but I wanted to touch base with my loyal readers. Last night we ate out. We both had fish and no green beer but it was a nice outing. Tonight a couple of the kids are home so I threw in the traditional Sunday roast with fixings. That's likely not to be very interesting as I've already blogged on how I do those.

Along comes this problem and if you've read me on the Yahoo groups, you will know I'm terrified of dentists. Ok, I'm not even going to go as mild as terrified as I start getting the day the appointment is made. Tomorrow my nice new very friendly dentist will extract an impacted wisdom tooth that should have been according to him removed well over 20 year ago. In my mind and know what I went through in November, I know this tooth needs to come out. So in honour of that and knowing I won't be eating solid food for a few days, here is how I make fruit smoothies, something I will be making a lot of.

Fruit Smoothies
1 banana
3-5 frozen strawberries
1/2 c frozen blue berries
2-4 pc frozen watermelon
1/2 c plain yogurt
1/2 c unsweetened orange juice

Blend the ingredients in a blender. Pour into a glass and enjoy.
Serves 2 plus a little


Saturday, March 17, 2007

Ten Ways to Go Green in the Kitchen


Ten Ways to Go Green in the Kitchen

  1. compost kitchen scraps
  2. replace old refridgerator with Energy Star® qualified refridgerator
  3. buy organic foods
  4. avoid buying over-packaged foods
  5. store foods in re-useable containers
  6. concentrate on in-season food grown locally
  7. cook from scratch
  8. buy foods in recycleable containers
  9. use dishcloths instead of paper towels
  10. use non-toxic cleaners


Monday, March 12, 2007

Pork Sirloin Dinner & Eco-Spuds

My husband stopped to pick up two items, one being potatoes. He forgot the other item but managed to make a splurge purchase on pork sirloin chops.

Eco-Spuds

I must say I'm impressed. He bought Eco-Spuds something I have not seen in this area before. These are Adora light creamy golden fleshed potatoes are grown using ecological practices developed by the World Wildlife Fund Canada. The potatoes were grown from non-chemically treated seeds. They are not genetically modified and were grown using natural pest management, plant nutrition and health as well as protecting the natural environment. No herbicides are used and no chemicals treatments are used during storage. Despite all the pluses, I did not see the word organic on the bag which I found rather surprising. According to the labelling, these potatoes can be boiled, roasted, baked, stewed or fried. The store well at home and will not discolour after cooking.

It was a beautiful sunny and mild day yesterday so we decided to cook dinner on the outdoor natural gas grill. The potatoes were rolled in seasoned olive oil then wrapped in foil to bake on the grill.

Pork Sirloin Chops

The itch to grill outdoors was just too great for my husband yesterday. One look at these beauties and I could see why. There is just something about seeing a good cut of meat that gets your mouth watering well before it is ever cooked. There were six lovely pieces about an inch and half thick. While pondering how to prep them for grilling, I spotted the bottle of Stubb's™ Original Bar-B-Q Sauce I picked up at the last ribfest. We don't use a lot of barbeque sauce so I thought it would be a nice change. The sauce was applied using a silicone brush after the first turn.

Plated

Dinner consisted of the grilled sirloin chops, sauteed mushrooms, the grilled potatoes, steamed baby carrots and cottage cheese. The chops were nice and tender, lightly flavoured with the barbeque sauce. True to the promise on the potato bag, the potatoes had a fantastic taste. It is more gourmet in flavour and texture with thin skin, shallow eyes. I will definitely be buying these potatoes again. They are more expensive at $3 per 10 lb and here they are only available at one store chain but the flavour alone without even the the ecological benefits are well worth it! An added bonus is they have a 30% lower calorie value than Russet potatoes which is good news for those watching their caloric intake. According to one source no butter or milk is needed to make a smooth creamy mashed potato! I will report back whether they actually do make smooth creamy mashed potatoes


Friday, March 09, 2007

Crabmeat Dip & Bacon Wrapped Scallops

Everyone loves appetizers! I tend to favour appetizers that are quick to make and not overly fancy. Last night I made crabmeat dip, a standby appetizer I've used for years. I also made bacon wrapped scallops, one of my husband's favourites.

Crabmeat Dip

I'm not sure where I got the recipe for this appetizer. I think it may have come from my husband's aunt as I seem to recall having it for the first time the first Christmas after we were wed. The crabmeat dip appetizer always goes over well and shows up at just about every family function. It is so quick and easy to make! Crabmeat dip is a fairly inexpensive appetizer to make at usually under $6 CDN.

Crabmeat Dip

1 8oz package cream cheese
1 120g can crabmeat
1/2 c ketchup
prepared horseradish to taste

Place the cream cheese in the centre of a serving plate. Mix crabmeat and ketchup together. Add horseradish to taste. Spoon the mixture over the cream cheese then mold using a fork. Serve with a hearty style cracker. I like to place 2 to 4 small butter knives on the tray as well.

Note: There may some weepage from the ketchup mixture. I simply clean any weepage with paper towels just before serving.

Bacon Wrapped Scallops

Bacon wrapped scallops are another easy to make appetizer. The prep time is very short but they taste like you spent a lot of time making them. These are a little more expensive to make. They are surprisingly filling though. I generally figure an average of 4 per person then add extra just in case.

There really isn't a recipe for bacon wrapped scallops. What you will need is a pound or more, depending on number of guests, of 20/40 ct fresh sea scallops and one pound of sliced bacon. Cut across the bacon strips in the centre forming two rows of half package length strips. Wrap a strip around each scallop and place onto a silpat or parchment paper lined baking sheet. Some like to secure the bacon with a toothpick but I've found a little pinch is all that's really needed to secure the bacon. Bake at 350ºF until scallops are no longer translucent and bacon is browned but not crisp. Remove from oven and drain on paper towels. Place on a serving plate. Add toothpicks for easy pick-up.


Thursday, March 08, 2007

Lobster

Ok, I will admit to being a real wuss when it comes to dentists. Actually it is more like a phobia. So because of an abscessed tooth in November and still trying to clear the antibiotics from my system, I finally went to see a new dentist. The only way I could tolerate that abomination was to bribe myself. The plan was if the news was bad, I got to do a little garden shopping and a lobster. Since after the next few visits, I will be drinking from a staw (yep that sounds like a lot of fun!) I figured what the heck, that lobster looked pretty good!

Fresh Lobster

Fresh lobster is expensive here so you really do want to pick out one in excellent contition. This one cost me about $14 CDN. Things to look for are good movement and clear eyes. The body should be deeply coloured and healthy looking. They packed him into a box lined with plastic but with no water. Despite a couple of stops, he managed fine. So when I got him home he went into the sink. I named him Hermin. I know you are not supposed to play with or name your food but I felt entitled last night.

Fresh lobster come with elastic bands on their claws. This is for your protection! From experience, if you cook the lobster with the elastic bands on, there is a bit of an off rubbery taste. I don't like this so just before cooking I snip the elastic bands off.

Cooked Lobster

Cooking lobster is actually rather easy. Bring enough water to cover the lobster to a boil. Some salt the water but I do not. Snip the elastic bands from the claws then drop the lobster into the water. Some have complained about the lobster squealing but I've never had that happen. Lobsters have a built in timer. They turn an orangy red when cooked.

When eating lobster, hot drawn butter is a must. It does add to the experience and flavour. Don't think you can get away eating lobster without making a mess and don't underestimate how filling a lobster can be. It doesn't look like a lot of meat but looks are definitely deceiving in this case! In general, the tail and claws have the most meat. It's sweet and tender. The smaller legs do have a bit of meat for the determined.

While lobster is more expensive than other meats, you can easily make a nice lobster meal at home for a fraction of the cost. So give it a try. I'm sure you will be pleasantly surprised!

Enjoy!


Tuesday, March 06, 2007

Cheese Bowls & Cheese Lace

A quick reminder: This blog has really grown in size. There are several recipes in the archives so settle in with a hot cup of coffee and take a few minutes to browse the archives. There are a lot of good recipes to spark your interest.

The new KitchenAid® RVSA rotary slicer and shredder attachment arrived Saturday so I decided to use for Sunday's meal. My goal with the KitchenAid® attachments is to eliminate a few single or limited use kitchen appliances thus freeing up a bit of kitchen space. I'm hoping this attachment will replace my slowly fading food processor.

KitchenAid® Shredder Attachment

This is a blatant plug for KitchenAid® stand mixers and attachments. I am extremely impressed with the quality of these appliances. At the front of the mixer there is a little port covered by the logo that flips up. The attachements fit in there.

When I opened the box for the rotary shredder/ slicer attachment, the first thing I said was "Oh my!". Talk about impressive looking! There were four cones: thin slice, thick slice, fine shred and thick shred. Immediately this gave me more options than my food processors. Each cone is about 4" long and 4" diameter. The housing is a heavy plastic that reminds me of melamine. The food pusher is built into the handle and the hopper itself is at least a good double the size of my food processor. Assembly is super easy. Just put the desired cone onto the shaft, give a slight twist then put the shaft into the housing and attach to the mixer port.

I initially had two problems. First, out of habit with my food processor, I was pushing to hard and caused the entire attachment to swing free. There is no need to apply pressure at all! Now this would not have happened if I had attached it properly in the first place. Each attachment has a little divet where the attachment knob tightens into. Looking at the attachment after it popped off gave me the clue I had attached it improperly. The second problem is the removal of the cone from the shaft. It does need a bit of a tap but that was easily solved.

Cheese Cups & Cheese Lace

Cheese cups and cheese lace are two ways to get a lot of protein without the fat. Both pack a lot of flavour! Cheese cups are used for presentation while the cheese lace is used for snacking or garnishing. Whenever I make either, I grate enough cheese to make extra cheese lace. We are rather partial to using cheddar cheese.

I think I stumbled upon this method when researching low carb diets for one of our friends. Immediately I saw the potential for presentation. Making cheese cups is rather easy but gives a very nice presentation for salads. Grate the cheese of your choice, spred into large circles on parchment paper for cheese cups or smaller circles for cheese lace then bake at 350ºF until all the cheese looks to be almost crisping.

Note: The following instructions require a fair amount of paper towels!
You will be surprised at the amount of oil depending on the cheese. For the cups, remove from oven and cut each circle roughly away so you are working with one circle at a time. Work quickly as they do harden rather fast. Invert a glass into the centre of the cheese, quickly flip over and peel the parchment paper away. Using paper towels, press the cheese towards the glass then let cool. Repeat for all the cups you are making. Remove from the glasses and swab up any oil on the inside of the cups with paper towels. If making cheese lace, move the baked cheese circles while still on parchment paper to a cooling rack. When cooled, place onto a layer of paper towels to absorbe and extra oil. I find both keep well when vacuum sealed in canisters and refrigerated. However, I normally make only what we will use up within a day or two.

Salad in Cheese Cup

Salad served in an edible bowl is a nice treat and perfect way to fancy up a simple salad. It makes a nice presentation that looks like it took a lot of time but in reality didn't.

I have a couple of tricks when serving salad this way. First, the cheese cup should be cold as should the plate. Second, the lettuce should be dry. Third, fill the cup just before serving. I prefer using a homemade viniagrette at the table for salad dressing.

Homemade Viniagrette

2/3 c extra virgin olive oil
1/3 c herbed vinegar
1 tsp dijon mustard

Here's where it gets fun. Substitute half the vinegar with lemon juice for a different flavour. Homemade herbed vinegars are easy to make (method in archives) so play with the flavours. You can substitute the dijon mustard with a mustard of your choice, honey or even sugar so the possibilities are endless.


Friday, March 02, 2007

Sweet & Sour Country Style Ribs

We buy the majority of our meat in bulk, usually a hind quarter of beef and a half of pig. Sometimes I pick a particular cut I want at our local butcher shop. Since I don't grocery shop the way most do, I like checking out the meat section when I do get to a grocery store just in case I see something that strikes my fancy. The other day we were at Sam's Club so of course I had to check out the meat section.

Country Style Ribs

This package of pork shoulder Country Style Ribs looked too good to resist. The package was $11.69 for 7.04 lb cut into eight lovely sized ribs of about .90 lbs each. It will give us at least four meals for two people so is still on the frugal side at $2.90 per meal or $1.45 per rib. Served with plain white rice the entire meal is very frugal!

I vacuum sealed half the package for freezing then decided to sear the rest, put into the crockpot then add our favourite homemade sweet and sour sauce.

Searing

I'm not a huge fan of crockpots even though I have two. They see most of their use during bulk cooking sessions, making stew or keeping something warm when entertaining. Any meat that I put in the crockpot is always seared usually in olive oil. This adds a nicer depth in flavour and gives a better colour.

Normally I would have seared the ribs then bake in a clay baker at a low temperature until tender then add the sauce and bake uncovered until the sauce thicked. Last night I decided to try the crockpot instead. Everyone rants about how much they love their crockpot so I wanted to see if I could get similar results to the baking method. I seared the ribs in a hot pan with olive oil. Then I transferred the ribs to the crockpot and added just a little water to prevent sticking and set to high. I let them cook about 40 minutes then added the sauce.

Ready to Enjoy!

I used our favourite sweet & sour sauce. It was my mother-in-law's recipe and even though I tweak it a bit on occasion, I don't deviate by much. This sauce just seems to have the right balance using ingredients right from your pantry. This sauce is perfect for making sweet & sour meet balls, sweet & sour chicken wings and of course sweet & sour ribs. The minor deviations I have made include using dijon mustard instead of regular, using Worchestershire sauce instead of soy sauce, and adding a little extra vinegar. The deviations are always based on the meat I'm using. For this dish, I used the recipe in its original format.

Sweet & Sour Sauce
recipe by: my dear MIL

2 c ketchup
1/2 c vinegar
1/2 c brown sugar
dash of soy sauce
dash of mustard (about 1 tsp)
corn starch and water slurry

Wisk ingredients except corn sstarch slurry. Pour over the meat and continue cooking the desired length of time. Add the corn starch slurry to thicken during the last 15 to 20 minutes of cooking time.


Thursday, March 01, 2007

Grilled Steaks

The smell of grilling steak filled the air last night all from the indoor comforts of our home. The weather has turned and we have been having a bit of nasty stuff so firing up the outdoor grill wasn't too appealing.

Steaks on Indoor Grill

Pictured here are the three about 1-inch thick rib eye steaks we grilled last night. There are a couple of tricks to grilling indoors. For years we used a table top indoor grill but now have one as part of our stove. There should not be any flare-ups although we have seen very small quick flames, here then gone. If there are larger flare-ups is turn off the heat! All indoor grills will smoke but some deal with this problem better than others. If you have a table top model of grill add about 1/2 inch of water to the bottom then grill. The water will help reduce the smoking. My stove has a downdraft system so the smoke is sucked right out. We set it to low.

Now you can't really see much from this picture as far as cleaning but it is best to let everything cool before cleaning. The two black grill come off as does the white centre vent that does get pretty dirty when grilling. Soak all of these in hot soapy water after cooling. At this point cleaning a table top model and built-in is the same. However, a built-in has a grease drain so what you have to do is pour hot water down the drain. It will take a couple of cups to be sure the tube is clean. Empty the drain cup, wash with hot water and replace. There you go!


Grilled With Mushrooms

This is a picture of one of the rib eye steaks grilled and topped with sauteed mushrooms. Steaks are generally grilled to medium rare here but sometimes rare. Sauteed mushrooms are a given. We sauté the mushrooms in butter then pile them on the steak. This is just the perfect accompaniment for any steak. Served with an oven baked potato an corn, you have a hearty meal.

I guess I should mention about seasoning steaks for grilling. I like adding a little Montreal Steak Spice when grilling steaks. My husband does not season expecting instead his skills to make the full flavour of the meat shine and he always does! He has a knack of knowing exactly when to turn the meat and it is only turned once, that's the rule.