My photo
Ontario, Canada
I am a wife, mother and grandma who enjoys the many aspects of homemaking. A variety of interests and hobbies combined with travel keep me active. They reflect the importance of family, friends, home and good food.
Cook ingredients that you are used to cooking by other techniques, such as fish, chicken, or hamburgers. In other words be comfortable with the ingredients you are using.
--Bobby Flay

For Your Information

Please watch this area for important information like updates, food recalls, polls, contests, coupons, and freebies.
  • [March 19, 2020] - Effective Mar 17, this blog will no longer accept advertising. The reason is very simple. If I like a product, I will promote it without compensation. If I don't like a product, I will have no problem saying so.
  • [March 17, 2020] - A return to blogging! Stay tuned for new tips, resources and all things food related.
  • [February 1, 2016] - An interesting report on why you should always choose organic tea verses non-organic: Toxic Tea (pdf format)
  • Sticky Post - Warning: 4ever Recap reusable canning lids. The reports are growing daily of these lids losing their seal during storage. Some have lost their entire season's worth of canning to these seal failures! [Update: 4ever Recap appears to be out of business.]

Popular Posts

Monday, April 30, 2012

Frugal Kitchens 101 - Tips for Making Stock

Frugal Kitchens 101
I make a lot of stock because I cook with a lot of stock.  My reasoning is there is no point using water which has no flavour when flavour can be added using stock.  More importantly using stock adds nutritional value.  Meat or vegetable stocks can be used as the liquid in mashed potatoes or the liquid for cooking pasta, rice, barley, beans or vegetables in.  It can be used as a liquid in some breads and biscuits.   Stocks are also used for making soups, stews and casseroles.  So in the big picture, the average home cook who cooks from scratch can use a lot of stock.

Homemade stocks are tastier and considerably less expensive than store bought stocks.  Made from meat scraps (eg. bones, fat, skin) that many would toss, the frugal home cook realizes the potential savings.  A litre of homemade stock comes in at only pennies in comparison to store bought that costs about $2 per litre.  Contrary to popular belief that it takes hours to make a good stock, one can easily be made in a couple of hours using a pressure cooker.  Here are a few tips for making stock:

  • meat/bones - Choose bones with a little meat left on.  You can use any type of meat: ham, beef, venison, moose, chicken, fish.  Bones and meat scraps can be froze until you have enough to make stock.  Roast meat bones and scraps for a richer flavoured stock with deeper colour.  Place meat scraps and bone in countertop roaster or roast in the oven until browned.
  • include the fat and skin - Both fat and skin add a lot of flavour to the stock so be sure to include those types of meat scraps in your stock making pot.
  • vegetables - Good stock includes vegetables for flavour.  The vegetables are removed later during the straining process.  Typically, the vegetables for meat stocks include: onion, carrots, celery and/or celery leaves, and parsnip.  Tomato may be added for a flavour boost in beef stocks.  Wash but do not peel  the vegetables.  Cut both ends off the onion then quarter and add the unpeeled onion to the stock pot.  The onion skin adds natural colour to the stock.  Cut both ends from the 1 - 2 carrots and 1 parsnip.  Cut into about 2 - inch pieces and add these to the stock pot.  There is a lot of nutrition just below the skin on carrots and parsnips so this keeps the nutrition in the stock.  Parsnip adds a lovely note to the stock.  Celery should be washed then trimmed and cut into about 3 - inch pieces.  Celery leaves add wonderful flavour to the stock.  If using tomato, cut an unpeeled washed tomato into quarters and add to stock pot or use about a cup of crushed tomatoes.
  • seasonings - Unless making a stock for a specific purpose, I don't heavily season my stocks.  The reason being, it makes the stock more versatile.  I use 1 bay leaf, 5 - 6 whole peppercorns, a splash of Worcestershire sauce for red meat stocks, and about a half teaspoon sea salt. 
  • cooking - Stock making is generally a long, slow cook process unless using a pressure canner.  If using a regular stock pot, cover the bones and vegetables with water to about 2 - inches below the top of a large stock pot.  Bring to a boil, reduce heat to a simmer.  Cover and let simmer adding more water if necessary for about six hours.  If using a pressure cooker, cover bones and vegetables with water to the 2/3 mark.  Cover and bring to pressure.  Reduce the heat just low enough to maintain pressure.  Cook at pressure for 50 to 90 minutes.  Turn off heat and allow pressure cooker to de-pressurize.
  • straining - Remove any chunks of meat with a slotted spoon and reserve for soup.  Strain the remainder through a colander to remove bones, skin and vegetables.  Strain the stock again through a cheese cloth lined mesh strainer. 
  • defatting - Defatting the stock gives a lovely flavoured, low-fat stock suitable for most culinary purposes.  Allow the stock to cool completely.  Peel the hardened fat off the top.  Chicken stock can be defatted using a gravy separator while it is still warm.
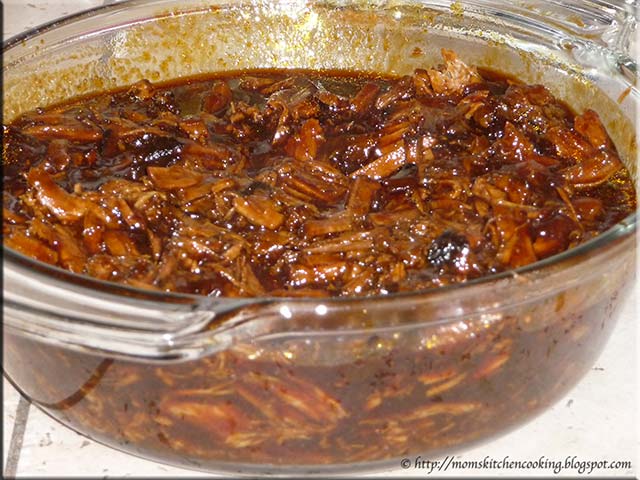
  • concentrating - Stock can be reduced to a concentrated stock, ideal for culinary applications where you want the flavour but not a lot of additional liquid.  Bring the defatted stock to a boil then reduce heat to a low boil.  Boil until the stock is reduced by half or three quarters.  Concentrated stock will gel when cooled.
  • storage - Stock can be refrigerated for 3 days in the refrigerator for use that week as well as  home canned or froze for longer storage.  Home canned gives a ready to use, shelf stable stock without having to thaw.  Concentrated stock can be spooned into ice cube trays, froze then popped out and stored in a zipper freezer bag in the freezer for convenient use.  A 2 oz frozen concentrated stock cube is equivalent to 4 to 8 oz of stock depending on how much you reduced the original stock.


Sunday, April 29, 2012

Yesterday's Comfort Cooking

It has been a brutal week, full of activity which really when combined with service and contract people coming in resulting in a hectic and frustrating week.  Our custom window treatment contractors were in last Saturday.  Both window treatments were wrong!  The kitchen panels were the wrong material and the front California shutters were only partially installed.  At almost $2,500 I was beyond being disappointed.   They came out yesterday to replace the panels so the kitchen is one step closer to being completely finished.  The shutters are scheduled to be fixed Wednesday evening.   I've been canning when I could get a stretch of a couple of hours and I did one smaller bulk cooking session but yesterday I was in the mood for homemade cookies after the custom window treatment contractors fixed the panels in the kitchen (looking good now!).   That translates into peanut butter or shortbread cookies, our two favourite homemade cookies.  It's not like I don't make other cookies but those are our comfort cookies!  I made a small batch (3 doz) of peanut butter cookies. Hey, these are a need right now!

peameal bacon roast
Carrying on the theme of comfort cooking for the day,   I popped a homemade peameal bacon roast in the oven along with a couple of potatoes for baking.  Peameal bacon is our favourite quick cook, low fat meat.  Although peameal bacon is a home cured pork loin, the texture is a bit different than ham.  Roasting the peameal as a chunk gives a bit smoother texture when cut compared to raw sliced then fried.  However, frying the peameal bacon slices gives a nice caramelization and bit of crisping to the coating that roasting does not achieve.  Either way, peameal bacon is a delicious, comfort meat!

peameal bacon roast meal
Baked potatoes are the perfect side for a peameal bacon roast as they can bake while the roast is cooking.  Any time you can cook more than one component of a meal in the same vessel, in this case the oven, it is a frugal use of energy.  I served the peameal bacon roast and baked potatoes with lightly buttered sweet peas and tomato slices.  Not pictured is the sour cream I topped my potato with for just a touch of creamy comfort.  Rounding up our comfort meal, we ate in front of the television watching Coronation Street.  The beauty of comfort cooking is the end result always makes you feel better :)


Friday, April 27, 2012

Cupcakes

I had to slip to the pharmacy today and while waiting to check out my prescription, I spotted the mini Taste of Home Cupcakes & Mini Dessert magazine.  While I don't buy a lot of magazines, I am rather partial to Taste of Home and Cook's Illustrated so occasionally splurge.  We will be doing a bit more entertaining this summer so I'm looking for a few easy but different, easy desserts.  Now everyone loves homemade cupcakes and the ladybug picnic cupcakes on the cover were just so cute, I couldn't resist the magazine.  All of the desserts are individual serving size which will make it quite easy to serve them for summer entertaining.

cupcake soaps
Cupcakes are so well loved that some brides are serving them instead of wedding cake.  Special cupcake display stands are available at baking supply shops for this very purpose.  Homemade cupcakes were one of the favourite things our kids loved to help make in the kitchen.  Trust me, nothing tastes better than a homemade cupcake decorated by little helping hands!

Homage to the love for cupcakes goes further than that. Just look at these two delicious cupcakes.  To the left is Oreo Cookie and to the right is Pina Colada.  Don't they look scrumptious?  Surprise!  They are not edible but they sure are adorable and they are regular cupcake size.  They are two decorative soaps I bought for the bathroom.  Despite all the cooking I do, there are a fair number of non-edible products that I make as well in the kitchen like homemade soaps, homemade toiletries and candles (beeswax, soy).  When the kids were young I made goop, playdough, cornstarch sand, and oceans in bottles for them to play with in the kitchen while I cooked.  Of course, we made various renditions of the erupting volcano and various school science projects.  Ah, a trip down memory lane...


Thursday, April 26, 2012

Kitchen Quick Tips - Frozen Meats

kitchen quick tips
If you find a package of meat nearing its limit for freezer storage, defrost it and cook it.  The cooked meat can then be froze for later meals.


Wednesday, April 25, 2012

Shredded Rump Roast Sandwiches

Last Wednesday I removed the last of the beef and venison from the large chest freezer then unplugged it for cleaning in preparation for the arrival of our beef on the hoof purchase.  If you are not familiar with that term, it means buying the cow when it is still a calf.  The calf is raised grass fed and hormone free by one of our friends then we arrange to take it to slaughter at an abattoir we have dealt with for years.   We pay our friend directly for the actual cow, then pay a butcher & disposal fee and a cut & wrap fee to the abattoir.  The abattoir last Friday that our beef was ready so it is a good thing I had the freezer cleaned and ready for filling yesterday when I picked up the beef.
 

shredded rump roast
The final roast from last year's purchase was a rump roast.  This is a tougher cut of beef suitable for braising.  I used the pressure cooker to tenderize the roast much the same as I did for the round roast except I used more Sweet Baby Rays and no water for a thick, rich sauce.  My intent was to can up the shredded beef but there was only enough to fill about four 500 ml jars, hardly worth running the pressure canner so I made shredded rump roast sandwiches with half of the meat mixture and froze the remainder.  Shredded meat freezes nicely and reheats well.  It is an ideal quick start for a variety of meals.

shredded rump roast sandwiches
Shredded beef or pork are long time ribfest favourites as well as being a popular southern US states' restaurants popular menu item usually as a sandwich meat.   However, you can make shredded meat for sandwiches from other meats like venison, moose and chicken.  

The meat is cooked long and slow usually on a wood fired barbecue.  I prefer using the outdoor grill in the warm weather and the pressure cooker in the cooler weather but you can get similar results using the oven or slow cooker.  The meat is ready for shredding when it falls off the bone and is melt in your mouth tender then shredded using two forks.  Once shredded the meat can be used as is, or cooked further slowly in the oven with a braising sauce (eg. bbq sauce or au jus) or either may be served topping the shredded meat or as a dipping sauce.  You can use a commercial or homemade bbq sauce, gravy or simply seasonings to get a tasty au jus.  

I served the shredded rump roast on soft Kaiser buns with homemade Miracle Whip, red leaf lettuce, Provolone cheese and a thin slice on onion.  It was a tasty sandwich, packed full of flavour!  The sandwiches looked lovely as well.


Monday, April 23, 2012

Frugal Kitchens 101 - Vegetables and Children

Frugal Kitchens 101
There is a perpetual myth that children do not like vegetables.  While some foods are an acquired taste, in reality children will like what they are exposed to at an early age.  A child especially one under the age of six cannot go out and get food on their own.  They are dependent on the parent to do this for them.  If a parent feeds the child a diet rich in heavily processed foods, high in sodium, high in sugars, high in food additives of which we now know some are habit forming, that is more than likely what the child will eat later in life, and worse what the child will feed their children.  However, if a parent feeds the child healthy foods, heavier on the fruits and vegetable side, home cooked meals, as well as a variety of culinary experiences, that child will go on to more than likely foster those same ideals.  In turn, they will go onto pass those ideals onto their children.

The Canadian Food Guide recommends children ages 2 to 3 eat four servings of fruits and vegetables daily, children ages 4 to 8 five servings, children ages 9 to 13 six servings and those 14 to 18 seven servings for girls and eight servings.  Adults ages 19 to 50 should eat 7 to 8 servings for women and 8 to 10 servings for men.  Those over the age of 50 should eat 7 servings of fruits and vegetables daily.  One common complaint made by parents is their child simply refuses to eat vegetables.   Here are a few tips for getting your kids to eat more fruits and vegetables without breaking your food budget.

  • keep fruits and vegetables ready for serving - Keep a fruit bowl on the table to encourage your kid(s) to help themselves.  Pre-cut cucumber, carrots, celery, sweet peppers and even cauliflower and broccoli, then keep in the refrigerator for convenient snacking.
  • variety - Offer a wide variety of fruits and vegetables but buy only the quantity you will use within five to seven days.  It is better to buy less and use them up rather than the fruit or vegetable becoming spoiled before you can use it.  For example, with just the two of us most days, I buy two or three each of apples, bananas and then in add a couple of other fruits like plums or pears depending what is on sale.  That way we don't get bored eating the same fruits all the time.  Be sure to unit price when buying produce.  Recently, a 3 lb bag of whole carrots is less expensive than a 2 lb bag of ready to use baby carrots.
  • raw verses cooked - Quite often the problem in getting kids to eat vegetables is a textural one.  For example, your kids may prefer steamed potato pieces or baked potatoes but refuse to eat mashed potatoes.  Use different cooking methods in addition to raw.  Raw vegetables is the frugal choice but certain cooking methods are less expensive than others.  For example, steaming vegetables is less expensive than boiling them and there is less nutrition lost with steaming.  Avoid over cooking vegetables. 
  • use fruits and vegetables as an ingredient -  Shredded vegetables can easily be used in meat loaf and meatballs, quick breads (eg. zucchini loaf) and muffins, yeast breads and even cakes.  Substitute applesauce for the fat in baked goods for a low fat, healthier version.  If you make your own pasta, add vegetables or vegetable powder to the dough.  Buy or make plain yogurt then stir in fresh fruit or use the yogurt as a healthy dipping sauce for fruits and vegetables.
  • whole fruits and vegetables verses juices - In general whole fruits and vegetables are a better choice than fruit or vegetable juices that may contain colour, artificial flavours, preservatives, salt and sugar.  Whole fruits and vegetables are a good source of dietary fiber that help exercise facial muscles.  Homemade juice can be easily made using a juicer or steam juicer.  Take advantage of produce sales and in season produce to make your own juices.  If buying fruit juices, frozen concentrated juices are less expensive per ml or ounce than canned or bottled juices.  Avoid buying expensive single serving juices.  Use a reusable water bottle filled with juice for lunches or traveling if desired rather than single serving juice boxes, cans or bottles.
  • know what a serving size is - Fruits and vegetables are available in different sizes.  For example, apples may be small, medium or large.   The serving size for an apple is medium, so save a bit of money by buying medium rather than large apples.  The serving size for vegetables other than leafy greens is a half cup and leafy greens is one cup.  The serving size for dried fruits is a quarter of a cup while the serving size for fruits like grapes and cherries is 20 pieces.  Many folks eat more than a half a cup of vegetables as part of their evening and while there is nothing wrong with eating extra, you can save money by reducing the serving to closer to the recommended serving size.
  • set a good example -  Kids love to mimic adults so if Mom says she hates broccoli chances are good the kids won't even try broccoli if offered.   If Mom and Dad don't eat fruits and vegetables the kids are less likely to eat them as well.   Involve your kids in the choice of fruit or vegetable, shopping for produce, and meal prep.  All of these activities offer wonderful learning moments.  I don't believe in forcing a child to finish everything on their plate or making them eat a particular food they don't like.  This type of negative reinforcement can result in life long dietary issues.  At the same time, I don't offer a substitute.  If the meal is meat, potatoes, carrots and salad, a healthy child is not going to be harmed if they don't eat the carrots but it doesn't mean a piece of fruit can be substituted for the carrots.  Let kids serve themselves at the dinner table whenever possible.  Surprisingly, when they can control the amount of fruits and vegetables they can put on their plate, they will actually choose more.  It's the broad picture that is most important and the food guidelines are just that.  There needs to be room to be flexible to account for individual tastes and preferences. 


Saturday, April 21, 2012

Using Tattler Reusable Canning Lids

About a year and a half ago, I wrote a review about Tattler reusable canning lids.  I do a lot of home canning and one concern has always been that the two piece metal snap lids were single use.  They can be reused for vacuum sealing and dry storage but not for canning.  On an economic level each lid cost at least 10¢ without any payback.  Now doing low volume canning, that cost wouldn't matter much but I do larger volume canning of 1,200 to 1,400 jars per year meaning my lids were costing me $120 to $140 per year.  On an environmental level, the lids either end up at a landfill or now in the recycle bin.  Both of these cost money for collection and have a high carbon footprint.  When I first discovered Tattler reusable canning lids, I was beyond excited!  Finally, here was a product that would ultimately save me money while being eco-friendly.

The USDA is the leading authority on home canning.  The only approved lid for home canning is the metal two piece snap lid BUT that is because the manufacturers of the metal two piece snap lids paid big bucks for the necessary testing.  There are reusable alternatives including glass inserts and Tattler plastic lids.  Steig has been making the Tattler reusable canning lids since 1976 BUT has not paid big bucks for USDA approval.  Their product is amazing if you ask me.  The lids can be used indefinitely but the gaskets will need to be replaced if damaged or distorted.  With proper care you should get 15 to 20 uses from the gaskets making Tattlers very cost effective for canning.

Tattler lids are used slightly different from the metal snap lids.  The original instructions said to tighten fully then turn back a quarter inch but that has been modified to tight finger tip tight.  Here is a video from Steig demonstrating how to use their lids:


Friday, April 20, 2012

Homemade Fettucine with Creamed Turkey Sauce

Pasta lends itself nicely for a wide variety of sauces.  While tomato and alfredo style sauces are likely the most popular, there really is no end to the types of sauces that can top pastas.  I often pair left overs with fresh vegetables as a pasta topping.  It's quick, easy and oh so delicious plus it is an easy, tasty way to use up left overs.

homemade fettucine with creamed turkey sauce
We have been working on emptying our largest freeze in preparation for our beef on the hoof purchase.  I pulled the last of the frozen left over turkey from the freezer.  It had been frozen with the gravy so I thawed it then used some of the turkey only to make a quick pasta sauce for homemade fettucine noodles.  As an aside, we are loving fresh made pasta.  It is so tasty, beyond dried or store bought fresh!  The fresh pasta stores nicely in the refrigerator too so I can make one batch that will give us two pasta meals for the week.

I cut the turkey into bite sized pieces then stirred into seared mushroom slices and poured a can of condensed mushroom soup over it with almost a full can of milk.  I let the sauce simmer until thickened then topped the cooked fettucine with it.  I garnished with fresh grated Parmesan cheese, sliced green onions, halved cherry tomatoes, shredded carrots and fresh parsley.   It ended up being a rather tasty meal that took almost no time to put together.

Fresh parsley is one of the leading garnishes and for good reason.  Dried parsley lacks the flavour and health benefits that raw parsley has.  Fresh parsley as a garnish is not just for it good looks.  It provides a nice source of Vitamin C, freshens the breath and settles the tummy after a large meal.  Oh and parsley is mildly diuretic reducing water weight gain.  So don't leave it on your plate, indulge in all the health benefits fresh parsley offers.


Thursday, April 19, 2012

Kitchen Quick Tips - Freezing Grated Cheese

kitchen quick tips
Grate cheese then spread it on a cookie sheet and freeze.  Transfer to a freezer bag and freeze for homemade convenience.  Grated cheese can be vacuum sealed if desired.  


Wednesday, April 18, 2012

Double Yolk Eggs

One of our kids brought me a tray of twenty double yolk eggs.  Double yolk eggs are seldom found in store bought eggs because they are removed during packing.  As a kid, I was delighted to find a double yolk egg.  My Mom bought eggs from the local egg lady who actually delivered them to her door.  Years later I had an egg lady who also delivered eggs to our door and since I still buy eggs from a local organic farmer, I come across double yolk eggs more that some may.

double yolk eggs in shell
My gosh, it is not often I get to bring my discipline into the conversation on this blog because it is focused on cooking.  For those who do not know, my discipline is medical genetics.  First, many think there is a difference in flavour between white and brown eggs to the point some stores actually charge more for brown eggs.  The egg colour is determined by the chicken breed, with brown chickens laying brown eggs.

Double yolk eggs (right) are almost double the size of extra large eggs (left).  A double yolk egg is essentially a reproduction error.  Eggs are produced via a process called meiosis, a type of cell division that produces gametes with half the number of chromosomes (n or haploid) of the parental cell (2n or diploid).  One parental cell (2n) forms four gametes (n).  Meiosis is a two step process consisting of DNA replication and reduction division (Meiosis I)  followed by the second stage of equational division (Meiosis II).    The eggs we eat are unfertilized (haploid).  What happens to form a double yolk eggs is the failure of the chromosomes to separate at Meiosis I or the sister chromatids to separate at Meiosis II.  Abnormal separation of chromosomes during meiosis is termed nondisjunction.  Now you know how double yolk eggs happen.

double yolk egg cooking
Double egg yolks are actually quite frugal if you can find an entire dozen or more.   Store bought extra large eggs are currently $3.47 or  29¢ each.  Double yolk eggs are $6 for 20 or 30¢ each but because they are almost double the size of extra large eggs and have two yolks it works out to almost 15¢ per egg (yolk).  Using double eggs reduces the number of eggs you have to crack (aka saves time) while giving the same results as you would get from using two extra large eggs.

Double yolk eggs are particularly frugal when making homemade pastas using only yolks as well as any other recipe using only egg yolks.  They are great for making omelets and scrambled eggs.  As pictured, you only have to crack one for fried eggs.  Don't they look lovely?


Tuesday, April 17, 2012

Sour Cream Bread

Years ago, I had a breadmaker but switched to the KitchenAid® stand mixer back in 2006.  The breadmaker sat in the garage and we finally tossed it when we moved.  Even when I did use the breadmaker, I seldom baked the bread in it.  Several of the recipes in the manual that came with the machine were quite good so when I got the stand mixer, I converted them over to use it instead.  From there, I have gone on to tweak many of the original recipes. 

sour cream bread
Certain ingredients are used when making soft loaves of bread.  Typically these are ingredients like lecithin, sour cream, yogurt, milk and potato flakes.  Sour cream bread is a delicious, soft loaf of bread with crustier type crust and just a hint of tang.  It is a lovely slicing bread, just perfect for sandwiches.  The flavour and texture is wonderful for grilled cheese sandwiches.

Sour Cream Bread
modified from: Black & Decker All-in-One Plus™ Automatic Breadmaker manual, 1994. Pp. 22.

¾ c water
¾ c sour cream
2 tbsp honey
1 tsp sea salt
3¼ c unbleached flour
1½ instant yeast

Measure the salt, flour and yeast into the bowl of the stand mixer.   Mix on setting 1.  In a separate bowl, mix water, sour cream and honey.  Pour into the dry ingredients.  Mix on setting 2 until dough leaves side of the bowl.  Knead on setting 4 until the dough is smooth and elastic.  Lightly oil a large  mixing bowl.   Place the kneaded dough into the bowl.  Cover with a clean, damp t-towel.  Set the bowl in a warm location to rise until double.  Remove from bowl and shape into oblong loaf.  Place on a Silpat lined baking sheet.  Bake at 400ºF/200ºC until golden brown and loaf sounds hollow when tapped.


Monday, April 16, 2012

Frugal Kitchens 101 - Kitchen Multitasking Do's and Don'ts

Frugal Kitchens 101
I am a chronic multitasker, always doing more than one thing at any given time, in constant motion.  For example, as I was writing this post:  I had chicken stock in one pressure cooker, beef stock in another, loaded the dishwasher, de-boned and strained the beef stock, put beef soup starter in the pressure cooker that had just cooled down and put it on to cook, planned for entertaining that night, started entertaining prep, started tidying up and played a couple of online games as a diversion.  This is very much normal for me and quite frankly pays off big in the kitchen because I am able to get a lot accomplished in any given day.  It is also good for me physically as I cannot sit for longer than about 15 minutes at a time due to a neck injury.  Multitasking in the kitchen can be a very frugal use of your time, actually saving you time and money in the long run.  Here are a few do's and don't of kitchen multitasking:

Do's:

  • clean-up as you go - If you watch the food channel especially Top Chef or other food competitions, the chefs/cooks are penalized if their work area is not cleaned as they cook.   This is really a safety issue.  In the home kitchen, cleaning as you go makes a lot of sense.  During food prep I have a sink of hot, soapy water for those items needing hand washing and have the dishwasher open ready to load those items that are dishwasher safe as I use them.   Basically I'm doing the prep work and cleaning at the same time but it really does save a lot of time at the end of a busy cooking session.  
  • take advantage of kitchen conditions - Today, I am running four different products in the pressure cookers for canning tomorrow.  The kitchen is hot and humid, perfect for proofing a loaf of bread.  
  • use kitchen appliances to aid in multitasking -  If you are bulk cooking, multitasking is a must so utilize the countertop roaster, slow cooker, stand mixer, food processor, oven, stove top, pressure cookers and outside grill all at the same time as needed to get the job done.  For example, I can be making stock in the pressure cooker, cooking a roast in the countertop roaster, grating cheese using the KA stand mixer attachment, cooking lasagna noodles and sauce on the stovetop, chicken on the outdoor grill and have a smaller batch of chili in the slow cooker.  At the end of the day, the bulk cooking session will yield a multitude of tasty dishes for the freezer to be enjoyed later in the month.  In short, use what every appliance it takes to help you multitask in the kitchen.
  • take breaks - I tend to work full tilt in 10 to 15 minute increments then take a 5 minute break.   During heavy canning and bulk food sessions, the work session gets extended somewhat but I am constantly taking short breaks.  It might be something as simple as stopping in the middle of food prep to toss a load of laundry in but that is because I need to move. 
  • always plan ahead - Even though I am doing a fair amount of very organized food prep for tomorrow's canning session, my mind is also turning towards tonight's entertaining prep and canning tomorrow.  My pantry is on the lower lever, my kitchen on the upper level.  Each time I go to the lower level to return an item to the pantry, I bring up serving trays and other necessary kitchen equipment and food for tonight.  Tomorrow it will be reversed with me taking the entertaining items back to the pantry while bringing up my canning supplies.  I know now I will be canning tomorrow which means I want the dishwasher loaded with canning jars before I go to bed to night.  They will go through the wash cycle while the stock and soup base reheat for canning.  During my cooking prep today, I knew I needed some of the vegetables cut up for a veggie tray for tonight so cut them up at the same time some were prepared for the stocks and soup bases.
  • keep a grocery list - We do not shop like most folks do with a regular once a week shopping trip.  We keep a very well stocked pantry which means we cherry pick sales and buy only if we are getting low on a particular food.  I keep a little notebook on the kitchen table during food prep.  When I bring up something from the pantry and see it is getting low, I put it on my grocery list.  If I need a particular item not normally stocked in our pantry for a recipe it goes on my grocery list.  Once the list gets to enough items that will fit in my backpack or pull shopping cart, I will walk (now that we live in an urban area) to the grocery store and buy only what is on my list and only those items that aren't on a cyclic sales schedule. 
Don'ts:
  • don't use antagonist foods or conditions together -  I mentioned the kitchen was hot and humid because I'm running the pressure cookers.  While it is good conditions for proofing bread, it is poor conditions for dehydrating anything, drying homemade pasta or making candy.  If you are trying to make a sourdough starter (yeast) do not make yogurt (bacteria) that same day.  The bacteria in the yogurt will kill off the yeast so the starter will fail.  Some go as far as to say not to try baking bread the same day you are making yogurt. 
  • don't work against fatigue - While I am a chronic multitasker, I know my limits.  Fatigue cause inattentiveness that leads to kitchen accidents and inedible food.  I know I can easily run my pressure canner or pressure cookers and make bread in the same day BUT on days where I am running the pressure canner two or more times, I can't make bread.  The reason is simple.  My pressure canner on busy canning days will run three maybe four times.  In addition to prepping jars and food for canning as well as cleaning as I go, I am exhausted.  That is not the time to be making bread or anything else other than focusing on getting the canning and clean-up done in a timely manner.  


Saturday, April 14, 2012

Homemade Fettuccine with a Blush Fire Roasted Tomato Basil Seafood Sauce

Yesterday I wrote about my first adventure using my new KitchenAid® pasta sheet roller and fettuccine cutter attachments.  Both attachments were beyond incredibly easy to use.  I was at the ease of use and the results!  The next thing on my mind was the taste.  Trust me, there is no need to go through a bit of extra work only to end up with a product that doesn't taste better than store bought.

homemade fettuccine with seafood sauce
Earlier this year we enjoyed a delicious meal at a local restaurant that featured a blush seafood sauce topping linguine.  I set out to clone that recipe then I tweaked the seafood sauce slightly to use my gourmet home canned fire roasted tomato basil sauce, crab meat, cod and scallops then up scaled the garnish to use pan seared shrimp and scallop.  The end result is a mouth watering sauce perfect for topping homemade fettuccine.  It is light yet filling,  packed full of rich flavour while being lower in calories than a traditional spaghetti meat sauce.

The fettuccine took about 7 minutes to cook to al dente.  While it looked like cooked dried or store bought fresh in terms of colour and texture, the proof was in the tasting.  The taste of this  fettuccine was incredible!  It had a freshness that dried pasta can't achieve and none of the chemical flavour of store bought fresh pasta.  An added bonus as with many homemade foods, there was no pesky packaging to have to deal with.  In fact, this meal resulted in very little going into the garbage.  There was no packaging and only the shrimp and crab shells had to be discarded although the shrimp shells might have been ok in the compost as there were only six of them.  This is the time of year I keep and grind all egg shells possible for the garden.  They add calcium while controlling slugs and snails.

It is important to realize that home cooking has a positive effect on the environment.  A vast portion of waste from home cooking can go into the compost, resulting in very little going into the landfill.  It really is a win win by home cooking.  You get good, healthy, less expensive food while lessening your carbon footprint.  Nothing wrong with that in my book and quite frankly it is one more reason to cook from scratch at home!


Friday, April 13, 2012

Homemade Fettuccine

Just before Easter I wrote about my new KitchenAid® pasta sheet roller and fettuccine cutter attachments.  Easter Monday, I decided to take a bit of time to play with the attachments.  I've made pasta manually so had an idea of what to expect.  Fresh homemade pasta just has such a lovely flavour!  It is more expensive than dried pasta (not bought on sale) and while I initially calculated it to be more expensive than store bought fresh pasta, it actually comes in less expensive.  If you raise your own chickens, the cost of homemade fresh pasta is considerably less expensive than store bought dried.  Homemade pasta can be easily tweaked to make vegetable or herb pastas as well and you can be sure you are using free range eggs if that is important to you, as it is to us.

first pass of pasta dough through the pasta sheet roller
Pasta dough should be firm and leathery to the touch but also pliable.  It should not be sticky or crumbly.  External factors like humidity or brand of flour can affect the dough consistency so small amounts of additional flour or water may be necessary to get the dough to the right  consistency.

I used the basic egg pasta recipe in the KitchenAid® manualI will be honest in that I had serious doubts about the dough.  It did not come together in a smooth ball and did not look like it would hold together well at all.  It was a very stiff dough!  I was almost ready to give up and try another recipe after the first pass through the pasta sheet roller on setting 1.  However, the dough actually came together quite nicely upon further passes through the roller.
 

Basic Egg Pasta
source:  KitchenAid®, KitchenAid® Pasta Sheet Roller and Pasta Cutter Attachments Manual, Pp. 9.

4 large eggs
1 tbsp water
3½ unbleached flour
½ tsp sea salt

Mix ingredients together using the flat beater.  Change to dough hook and knead 2 minutes on setting 2.  Remove dough from blow and hand knead 1 to 2 minutes.  Let rest 20 minutes.  Divide dough into quarters then flatten for processing with the pasta roller.

folding pasta sheet for next pass through the pasta sheet roller
The pasta sheet roller has 8 settings.  The first time through is on setting 1 which is the folding and kneading.   Each time you roll the pasta sheet, fold the ends in as pictured or fold the entire sheet in half then roll again.  If you use the half fold method, alternate how you feed the dough into the roller so you end up with two relatively straight ends.  Repeat the folding and rolling until you reach setting 2.  After that the dough does not need to be folded, simply passed through the roller until you reach the desired consistency.  Fettuccine can be rolled to setting 4/5 or if you want a thinner fettuccine it can be rolled to setting 6 or 7.   Within a couple of passes through the roller the dough took on a very smooth, uniform appearance.  

pasta sheet as it is being made
I was absolutely amazed at how quickly the dough was formed into smooth sheets of pasta.  It was beyond impressive!  Just look how gorgeous that sheet of pasta looks.  I can easily use these sheets as is to make lasagna noodles and ravioli as well as using the fettuccine cutter.

I had no problems passing the sheets of pasta through the various settings on the roller.   I folded the pasta sheets then stacked ready for cutting (bottom left).  By the time I got to the last couple of sheets, they had started drying a bit more than I would have liked so next time will cover them with a damp towel until ready to cut. 

cutting the pasta sheet
I cut each pasta sheet in half to pass them through the fettuccine cutter simply to make the resulting strands easier to handle.  Cutting the pasta was every bit as easy as rolling the pasta.  Each pasta sheet fed through the cutter, easily cutting the sheet into fettuccine. 

For just learning how to use the roller and cutter, the problems were minimal as was the time it took to get the fresh made pasta onto a drying rack.   I dried the pasta (see below) because I wasn't sure how much we would use for dinner and I wanted to try the drying process.  In all honesty, without the drying, rolling and cutting the dough took me about the same time as spooning batter into muffin tins.  With the drying time, it took less time than getting bread ready for baking.  So, in terms of time, homemade pasta takes very little time.

drying the pasta
I used my brand new (when we moved here) clothes drying rack to dry the pasta.  The thing is too flimsy to dry clothes on anyway.  I found the best way to load the rungs was to catch the pasta half-way through the cutter using my hand turned sideways, thumb up so the pasta draped over my hand.  I then transferred it to the rungs and separated any strands that stuck together.  I let the pasta dry about 45 minutes before transferring it ready for cooking and storage.  KitchenAid® warns that foods containing perishable ingredients like eggs should not be un-refrigerated for more than one hour as this is a food poisoning rick that could cause sickness.  While homemade pastas are not suitable for drying as a shelf stable product, they will keep in the refrigerator and can be frozen for longer term storage.  The only thing I would do differently using this rack would be to place a clean towel under it to catch any pasta pieces that break off.

freshly made pasta ready for cooking and storage
Once the pasta had dried, I set out enough for that night's dinner and the rest was vacuum sealed for the refrigerator.  This is where I had to adjust my calculations.  The recipe basically made the equivalent of four packages of store bought fresh pasta.  That would have cost me about $14 but the homemade only cost me $1.44 which really works out to less than the cost of store bought dried pasta.  I won't eliminate dried pastas from my pantry storage but I will stock less.  Dried pastas will become more of what dried milk and cheese are, part of our emergency preparedness.  What the pasta attachments will do is eliminate buying store bought fresh pastas. 

I am very excited!  Tomorrow I will post about the dinner I made with the homemade fettuccine noodles because after all, taste is everything.  I will be experimenting with whole wheat and a variety of vegetable pastas as well as a few herbed pastas.  So watch for that coming in the near future.  I definitely will be buying the attachments to make spaghetti and thick noodles and I am looking into a pasta extruder to make shapes like elbow noodles. 


Thursday, April 12, 2012

Kitchen Quick Tips - Freezing Bananas

kitchen quick tips
Freeze unpeeled bananas as is.   To use, defrost and cut off the end.  Squeeze the banana out ready to use in your favourite banana bread and cake recipes without mashing.


Wednesday, April 11, 2012

Pressure Cooked Round Roast

Certain cuts of beef tend to be less tender than others.    As a result, these cuts tend to be less expensive but when you buy beef on the hoof as we do, the price is the same over all cuts of beef.  What this means is we end up with a few cuts of beef that are not quite as tender as other cuts but that does not mean they cannot be turned into a delicious dish.  There are a few ways of dealing with this problem ranging from marinating to long, slow cooking, stewing or braising.

round roast in pressure cooker ready for cooking
Acidifying is another common way to break down the meat fibers and cartilage but one overlooked old fashioned method of dealing with tougher cuts of meat is cooking in a pressure cooker.  This is one of my favourite ways to cook tougher cuts of meat because it eliminates the long, slow cooking yet gives excellent, tender results.

I recently bought a Geneva Professional Quality Stainless Steel pressure cooker to compliment my collection of pressure cookers.  A couple of nights ago, I cooked a round roast, from frozen without thawing in under two hours in the Geneva.  This roast was beyond simple to prepare.  I simply put the frozen roast in the pressure cooker, topped with Sweet Baby Ray's BBQ Sauce, onion pieces and a little water.  I put the lid on and brought the pressure cooker to pressure then reduced heat just enough to maintain pressure and let it cook.

round roast ready for shredding
Cooking under pressure raises the effective cooking temperature from 212ºF to 240ºF/250ºF but because the moisture under pressure permeates the food, the end result is tender, delicious meat.  The round roast cooked this way was not only very flavourful, it was fork tender, easily shredded, just perfect for pulled beef sandwiches.  Unless you cook a round roast long and slow, you simply cannot get the gorgeous tender results the pressure cooker is capable of doing.  The nice thing is the pressure cooker gives this wonderful result in a fraction of the time of the long cooking methods.

pressure cooked round roast dinner
I shredded the beef using two forks then served it with oven baked potatoes topped with the au jus.   The au jus could have been thickened for a gravy but it was quite rich, making a lovely sauce as it was.  All around this was a simple yet delightful meal. 


A pressure cooker can be one of the most valuable piece of equipment in your kitchen.   It helps but nutritious, healthy food on the table in the fraction of the time it would take using the slow cooker.  In fact, many meals can be cooked in a pressure cooker in 40 minutes or less.  I have heard that dry beans will cook in 3 minutes using a pressure cooker but have yet to try that method.  It is on my list of culinary experimentation this week.  If you don't have a pressure cooker and would like to buy one, I would suggest at least a 6 qt stainless steel, second generation (pressure control in the handle) model bought on sale of course.  With a bit of patience, you should be able to find one for under $40.  The pressure cooker will quickly pay for itself in both money and time savings!


Tuesday, April 10, 2012

Smoked Salmon Appetizer and Spiral Ham

We had our big Easter celebration this past Saturday.  The kids and grandkids were home with the Easter bunny making a special appearance for the little ones.  The weather was absolutely gorgeous so the Easter egg hunt was held outdoors.  We had a lot of delicious foods, shared a lot of laughter and took lots of pictures for our picture albums. 

smoked salmon appetizers
All family members from the youngest to oldest pitch in helping with food prep for any family get together.  We made a smoked salmon appetizer.  This is a very easy appetizer to make.  You need small crackers, cream cheese, a couple of small packets of thin sliced smoked salmon and capers.

Capers are the pickled, edible flower buds of the caper bush (Capparis spinosa).  They are traditionally used as a garnish, in pasta dishes or in tartar sauce.  Their intense flavour pairs quite nicely with the smokiness of smoked salmon.

spiral ham
Ham is our traditional meat for Easter.  I seldom buy a boneless ham because it usually pressed meat (higher processing) and the bone can be used for other meals.  Our local Wal-mart had spiral hams on sale for $20 regardless of the size.  Needless to say I bought the largest one I could find.  Spiral hams are a great deal because not only do you have a thin sliced ham for dinner as well as left overs for sandwich meat. you have a nice sized bone for making soups or stock.

Most spiral cut hams come with a honey and spiced glaze, as did this one.  The glaze is used during the last 10 minutes of cooking.  These types of hams are usually cooked for about 2 hours (12 - 15 minutes per lb) at 250ºF.   I served the ham with dressed up mashed potatoes, niblet corn and crusty French bread.  It was a delicious, unpretentious home cooked meal.


Monday, April 09, 2012

Frugal Kitchens 101 - Getting the Homemade Groove On

Frugal Kitchens 101The overall mantra for this blog is homemade meals and food products are healthier for you yet less expensive.  In short, every single time you are able to replace a commercially made, store bought food or food product with a homemade version, you are getting a superior product for less money.  You may even see an improvement in your health by eliminating the preservatives, excess salt, excess sugar, artificial colourants and flavours, and HFCS found in so many store bought products.  You can custom tailor the homemade food product to your tastes not what the food manufacturer determines the taste should be.  Not only that, but you reduce your carbon footprint by needing less trips to the grocery store as well as using less packaging that either ends up in the recycle bin or landfill.  But it gets better!  Developing a homemade philosophy for meal preparation builds self confidence and self sufficiency.  It's one thing to know you can stop at a grocery store to buy a loaf of bread but it can be a real ego booster seeing a loaf of freshly baked bread just out of your oven.  But wait, it gets even better!  Making meals, dishes and food products for your pantry provides the perfect learning moments and bonding time for families members of all ages.  Hopefully by now I have convinced you that homemade is better, here are a few tips to get you started on the homemade is better pathway:

  • start slow - I am certainly not suggesting that you go from using store bought convenience foods, fast foods and take-out to suddenly not using any of them.  That would be a bit of a culture shock and definitely is something that is felt the worst when someone suddenly finds themselves having to give up these thing due to a change in their financial situation.  What I am suggesting is to look in your cupboard or pantry and find one product each month that you could make yourself.  For example, you have spaghetti sauce in your pantry.  Homemade will come it at about 10¢ per 500 ml (pint) jar if you have a free source of tomatoes or grow your own.  In comparison, that same amount of spaghetti sauce in the store will cost you $1.29 for plain to $4.50 for gourmet.  If you have once a week, that works out to $67.08 to $234 per year verses $5.20 (minimum cost) per year for homemade spaghetti sauce.  Make a large batch of homemade spaghetti sauce then either can or freeze it in meal sized portions.  The following month look for one more store bought product to replace that could be made at home.
  • think globally - I can buy a cake mix at the grocery store or I can buy the flour to make the cake mix.  The cake mix will give me cake, cupcakes and cake mix cookies.  The flour will give me everything from various breads, dumplings, noodles, pastry products, baked goods and so much more.    In perspective and on a global level, the flour then is the more frugal choice because of it's versatility.
  • think real - Go through your refrigerator and pantry to see all the foods you use that really aren't real like processed cheese spreads, coffee whitener, processed cheese slices, anything in an aerosol can (eg. baking spray, whip cream), margarine, imitation/artificial anything (eg. imitation vanilla extract) and boxed convenience foods.  These are the products to get rid of.  Replace with real foods like cheese, cream, oil, butter and 100% pure vanilla extract. You get much better cooking results using real foods which encourages you cook more.  Did you know making homemade mac & cheese is just as easy as making the boxed version.  The only difference is you use fresh cheese instead of dried cheese AND it tastes so much nicer AND it is less expensive.
  • become analytical - Check those food ingredients.  If the first ingredient is water, you are paying for water as that is the main ingredient.  Aren't you already paying for water through your water company?  I'll bet it is cheaper than the water in that product.  Are you sure you want sugar in your peanut butter?  It only takes a few minutes to blend whole peanuts into peanut butter without any sugar added.  Do you really want sodium benzoate, a known carcinogen yet common preservative, going into your body.  If you see an ingredient on the label that you don't know what it is, do a bit of research.  Find out if that ingredient can have negative side effects.  For those looking for certain ingredients to avoid, if the ending is ose, it is a sugar so while the product might not specifically list sugar (sucrose) it may be laden with other sugars.  Sodium is a salt so while salt (sodium chloride) might not be listed sodium bicarbonate (baking soda, a salt) or sodium benzoate (a preservative)  may be.  If it says sodium and you are on a restricted sodium diet nix these products. 
  • make cooking fun - Involve family members and use KISS.  Home cooking doesn't mean you have to put together a 7 course dinner every night.  Find novel excuses to do a bit of cooking like hosting a cooking get together with a couple of friends.  One of our kids holds a dinner get together with another couple twice a month.  The visiting couple bringing the homemade meal.  It's a great way to find new recipes while learning about home cooking.   The more you cook the more you will want to cook.


Friday, April 06, 2012

KitchenAid® Pasta Roller and Fettuccine Cutter

As a newlywed, I made breads and pasta by hand but as I became busier with raising a young family while earning higher education, I moved onto a few mechanical methods.  I went to a breadmachine, but never pleased with the baking results it ended up being a glorified dough mixer.  I opted for buying dry and fresh pastas at the grocery store.  A few years ago I splurged on a KitchenAid® stand mixer, made bagels and immediately saw the potential so started buying attachments.  Several years ago I started having problems with my wrists and fingers, so these attachments would allow me to save money without stressing my joints.

KitchenAid pasta roller and fettuccine cutter set
I honestly don't think I have ever paid full price for any kitchen equipment including my stand mixer or attachments.  I have no problem waiting for a good sale to pick up a piece of kitchen equipment I want but I won't pay full price!  Canadian Tire really makes it's money off of automotive supplies and repairs which means they tend to offer great deals on the other items they stock.  About a month ago, they had the KitchenAid® stand mixers on sale and a promotional offer for the pasta roller and fettuccine cutter set (KETPRA) for $89.99.  The paster roller is valued at $90 itself on the KitchenAid® site so it was like getting the fettuccine cutter free!  It wasn't in stock so they gave me a rain check.  It came in yesterday so I am beyond excited!

Sometimes being frugal in the kitchen is not about money, it about getting a superior product in terms of freshness and flavour.  So it is with homemade pasta like homemade egg noodles.  If you compare current prices fresh, ready to cook deli pasta is about 10¢ per serving, dried pasta is 18¢ per 85 g serving and homemade is 39¢ per serving.  The price per serving of homemade pasta looks quite high on the surface but it all depends on how much your eggs cost.  I am currently paying 30¢ per egg but I can get them as low as 15¢ per egg when available which reduces my cost for homemade pasta to 23¢ per serving.  Now the thing is, I do pride myself in my homemade, gourmet style tomato sauces so paying a bit extra for that ultimate pasta taste to match the sauces is worth it to me.  Unlike the ready to cook, fresh deli pastas there are no preservatives with homemade pastas either.  I know I'm using free range eggs as well.  Homemade pasta comes in less expensive than the specialty pastas (eg. vegetable, whole wheat).  The neat thing is homemade uncooked pasta can be stored in the refrigerator for use that week or frozen for later use.


Thursday, April 05, 2012

Kitchen Quick Tips - Protect Against Freezer Burn

kitchen quick tips
Freezer burn is caused by air during storage.  Protect against freezer burn by vacuum sealing frozen foods.  If you do not have a vacuum sealer, place the food in a zipper style freezer bag then press as much air out of the package as possible or suck the air out using a straw. 


Wednesday, April 04, 2012

Planned Left Overs for Homemade Convenience

Yesterday I wrote about the pot roast with fire roasted tomato basil gravy I made for dinner a couple of nights ago.  This roast was cooked with planned left overs in mind to be made into a couple of homemade convenience foods.  Since I cook mainly from scratch, homemade convenience foods really help sometimes. 

roast beef slices
Roast beef lunch meat is currently priced at $5 for two 300 g joined packages, 600 g/1.32 lb total.  That works out to $3.78/lb.  We buy our beef on the hoof which works out to $2.35/lb across all cuts of beef we get.  One of these days I am going to invest in a meat slicer but thin slicing the beef or any other meat or poultry is not a huge problem.  The Yoshiblade™ ceramic knife does a really nice job of thinly slicing meats but any sharp chef's knife will do the same thing. 

Of note, the price of $3.78/lb for the joined packages applies to ham and turkey, both of which I can get for a better price than beef.  While store bought lunch meat is convenient, it takes little time to slice your own and with homemade you aren't getting all that salt, artificial colourants or flavourings.  This left over chunk of roast beef took me less than 5 minutes to slice into thin sandwich slices. 

vacuum sealed roast beef slices
Anytime I cook a roast beef, turkey, ham or cook extra BLSL chicken breasts, I reserve a portion to make homemade lunch meat slices.  I vacuum seal the slices then freeze to use as needed.  Each packet is about 1 lb which is a comfortable amount of sandwich meat to use up within a few days.  One of our freezer baskets has been dedicated to store these convenient meat packets.  The beginning of each week I take one packet from the freezer and place in the meat keeper of the refrigerator.  It's thawed by Tuesday ready for making sandwiches which works out nicely as usually we have left over meat from Sunday's dinner for Monday's lunch.

blended roasted vegetables
I cooked the pot roast with potatoes, carrots and cabbage that took on the flavour of the fire roasted tomato basil sauce used to make the final gravy well.  We like cottage pie, aka shepherd's pie made with ground beef or pork.  Years ago I discovered that rustic cottage pie is much more flavourable and more nutritious if you add carrots and/or cabbage to the potato topping.  I pulsed the roasted, richly flavoured vegetables with left over gravy and a little milk in the food processor to make the topping for a small cottage and a vegetable side for another meal.  This really is convenience because all I have to do is thaw and use.  Quite frankly, it would take me about 15 minutes to make a potato, carrot, and cabbage topping but it wouldn't have the extra depth of roasting and it saves me 15 minutes cooking time on a busy night.

blended roasted vegetables ready for freezing
I ended up with about 4 cups of the blended roasted vegetable mixture.  Originally I was going to freeze it together but decided to divide it half so I could vacuum seal.  In order to vacuum sealing this type of dish, it has to be froze first then vacuum sealed.  You can freeze in muffin tins for individual serving sizes or in 2 c containers.  Once frozen, the dish is popped out of the container and placed into a vacuum bag then sealed.

This method is used for anything wet like soups, stews, and some vegetable side dishes.  Whole rolls, loaves of bread and muffins can be frozen then vacuum sealed as well.  This prevents crushing.  The nice thing is you need a lot less freezer containers which translates into less container clutter.

frozen roasted vegetable blend vacuum sealed

Vacuum sealing the frozen dish is highly recommended because it eliminates freezer burn and reduces the freezer space needed.   I use a Sharpie to mark the contents and date just above the seal, right on the bag.  It works well and is low cost.

I like opening bags of foods frozen this way then popping them into a bowl while still frozen to avoid any mess of getting them out of the bag.  I ended up with two 2 c bags of the roasted vegetable mix per bag.  That is enough for one topping of a rustic cottage pie and a side or two cottage pies or two sides.  Not bad for a convenience food, if you ask me :)


Tuesday, April 03, 2012

Pot Roast with Fire Roasted Tomato Basil Gravy

Pot roast is an easy to prepare delicious meal perfect for Sunday night dinners during the winter months.  I pulled one of the last of our roasts from the freezer a couple of days ago.  We are getting the freezers ready for our beef on the hoof purchase this year so there isn't much beef left.  Our beef stock is down to a two packages of soup bones, three roasts and a package of stew beef.  I'm actually quite pleased we have been able to get our beef stock this low before we pick up our new beef.  In the meantime we will enjoy moose, chicken, pork, fish and seafood so it isn't like we have to go without meat.

pot roast prepared for oven
I traditionally make pot roast with a beef roast, potatoes, carrots and whole mushrooms.  The resulting gravy is rich and flavourful.  Most think of gravy as being meat or poultry based but there is the gorgeous sausage gravy for biscuits, brown gravy and mushroom gravy.  A very popular gravy with my Mennonite friends is tomato gravy. 

Tomato gravy is extremely easy to make as it is just lightly seasoned tomato juice thickened to a gravy consistency.  It is used much the same a meat based gravies.  I decided to kick tomato gravy up a notch by using a fire roasted tomato basil sauce to make a gravy.  Once the roast was seasoned (garlic pepper, Worcestershire sauce) and surrounded by potatoes, carrots and cabbage, I poured about 500 ml (2 c) of the fire roasted tomato basil sauce over the meat and vegetables. 

pot roast cooked ready to make the roasted tomato gravy
The roast was cooked in the clay baker at 300ºF until the vegetables were tender and the roast was starting to caramelize.  The internal temperature was 155ºF/68ºC which is medium.  Note that this is a lower temperature than that for ground beef which is done at 160ºF/71ºC.  The reason for this is a whole cut of meat has a smaller surface area than ground meat.  Any bacteria present on the meat will be killed off during the cooking process.  Ground meat has a high surface area and the grinding process itself allows surface bacteria to be transferred throughout the meat giving them a greater chance of multiplying.  This is one reason I prefer to grind my own meat just before wanting to use it.  This also explains why eating a blue steak (just barely cooked on each side) is fine because surface bacteria has been killed off but it is not fine to eat a burger that is still rare in the middle.

pot roast with roasted tomato gravy plated
Cabbage is an underused, inexpensive and nutritious vegetable.  It takes on a lovely sweetness when cooked!  The fires roasted tomato basil sauce accented the flavours nicely.  I simply thickened the juices from the roast using a cornstarch slurry to make a gravy.  We really liked the roast cooked this way.  It would be a wonderful wintertime comfort meal!

I will admit to starting out this meal with an end in mind.  I've talked of making my own convenience foods.  After I made a plate for my husband's lunch the following day, I set about making three packets of convenience foods.  Tomorrow I will share with you what those foods were and how I made them.


Monday, April 02, 2012

Frugal Kitchens 101 - Dealing with Limited Choice of Food Products

Frugal Kitchens 101

I am a very strong proponent of eating locally grown and produced foods within a 100 mile radius of our home.  We live in one of the most abundant food producer areas of Canada, and I fully believe in supporting our local food producers and farmers.  That being said, there are foods that aren't produced locally (eg. citrus fruits, tropical fruits, some varieties of fish, olives, spices, tea, coffee and etc.).  There are times like right now I am looking for a particular food product, in this case crab roe, that there is no way I am every going to find it without going into Toronto or ordering online.  The thing is there is nothing new about not being able to get a particular food product where we live.  I grew up in a small community of about 2,000 and my Mom did not drive.  She had a garden and bought what was available at the two very tiny grocery stores with a rather limited choice of food products.  Friends would bring in peaches, apples, pears and smelt from time to time.  We have lived mainly in smaller communities and last September moved from a rural location to a community of about 11,000.  There are two grocery stores (Sobey's, No Frills), a Wal-mart that has a food section, a fairly new bakery and a butcher shop.  Trust me, I can easily walk or bike to all of them.  My husband and I are very blessed in that we have two vehicles but many in our community do not have a vehicle. Their mode of transportation is walking or biking.  There is no public transportation and a cab will cost you a flat rate of $9.50 each way effectively adding $19 to your cost of acquiring groceries should you choose to use a cab.

The grocery stores here have a fairly descent selection of the basics, a bit of some borderline gourmet, very limited supply of international (Mexican, Italian, Oriental) foods but the community is very much a working class community so that is reflected in what the grocery stores stock.  Regardless where you live, some foods and food products will not be available.  Having dealt with limited choice of food products all my life, I have a few tips for acquiring those food products and ingredients I want or need:

  • larger centres - I keep a list of ingredients needed that I can't get locally.  When I am in the Greater Toronto Area (GTA) or the US (day trips/vacation home), I look for those items and stock up.  
  • substitutions -   Having lived in smaller communities and rural, I keep a well stocked pantry.  I have become the queen of substitutions.  I often substitute my home canned products for a commercially canned product in a recipe.  Quite frankly, even brand name doesn't matter all that much for many recipes.  The only time the brand name really matters is if the ingredient is a propriety product and even then it is possible to substitute a homemade clone.
  • homemade - I cannot stress how important it is to make anything you possibly can from scratch using ingredients from your pantry.  For example, I dry my own herbs so with thyme, chives, rosemary, parsley, sage (and much more) and even vegetable powders I can make a wide range of seasoning blends rather than trying to find these types of blends in the grocery store. 
  • grow your own - One very easy way to get certain varieties of fruits and vegetables is to grow your own.  For the longest time I could not get fresh habanero peppers but I could get the seeds which solved my problem.  I love growing produce that I can't find in the stores like heirloom tomatoes (eg. Brandywine), beefsteak tomatoes, rhubarb, ground cherries, horseradish, and a large variety of herbs that I can't even find as seedlings here.  The neat thing is by joining a seed exchange I can get a nice variety of seeds for the cost of a stamp.  Finding seeds never seems to be a problem. You can grow indoors, outdoors, on balconies and if you have absolutely no where to grow a few plants, many communities have community gardens.
  • mail order -  Many seed companies, specialty and gourmet food companies have free mail order catalogues.  Simply request a catalogue then shop from the comforts of your home.  Once you are on their mailing list, they will send out new catalogues as they become available.
  • shop online - My favourite method of acquiring kitchen items and food products not available locally is shopping online.  It is surprising the vast variety of food products that can be ordered online!  I can even order fresh Canadian seafood and cheeses with overnight delivery to my door.  Shopping online is the eco-friendly alternative to mail order or driving to a larger centre.  The may be a shipping and handling charge so be sure to factor that into the total cost for that food item, but recently more companies are offering free shipping just to get your business.


Sunday, April 01, 2012

Three Days of Canning Dried Beans

While our previous house was on the market and once we sold, I purposely let our supply of home canned foods dwindle down.  The end result was less cases of filled jars to move but ultimately running out of some of the home canned staples we rely on.  One of those foods were home canned legumes like kidney beans, red beans, navy beans as well as some of the various products I can using legumes like a variety of brown beans and bean soups.  I spend three days last week canning up a few dried bean products.  I am nowhere near the amounts I need for a year but it was a start.

day 1 canning dried bean results
Home canned beans are a convenience product in the pantry.  Even though I have a large supply of dried beans and I often cook from scratch, the home canned beans are great for those times I want beans but don't have the time for cooking from scratch.  Home canned beans range in cost from 10¢ to 30¢ per 500 ml jar depending on the type of bean and the bean product.

At the end of Day 1 I had from left to right, 3 - 500 ml small red beans, 1 -500 ml small red/black bean mix, 4 - 500 ml black beans, 4 - 500 ml red kidney beans and 4 - 500 ml dark red kidney beans.  The jar to the right with the ring still on did not seal so went into the fridge leaving me 15 jars for the pantry.  It had a silver metal 2 piece snap lid on that many home canners don't like because of increased seal failures.  You will notice I am using the re-usable Tattler lids more in home canning.  They currently have free shipping so I ordered more.

salted pork belly
Salted pork belly is an ingredient commonly used in brown aka baked bean recipes.  It is that flavour that makes baked beans so tasty.  This is a cut of meat from the belly of the pig that has been salt cured but not smoked.  You can find larger pieces at most butcher shops.  Smaller pieces about 4 oz are usually available where bacon is found in the supermarkets.  If you cannot find salted pork belly you could cure your own using Morton's Tender Quick or you could substitute a thick cut bacon.  Substituting will give a bit different flavour as most bacon is smoked.  Thick cut bacon is also more expensive for this particular use but the remainder can always be used for another dish.

home canned pork and beans
We had some of the tastiest baked beans form Mike's Smokehouse BBQ and Grill in Tampa, Florida.  I have been working on a clone recipe that can be home canned.  I'm almost there but not quite.  Day 2 I ran a test batch of my newest pork & bean recipe.  I did tweak the method a bit by putting less beans in the jars.  That did give better results for the jars that sealed (right) but two jars did not seal.  I used all Tattler lids my explanation is I somehow missed one of the two critical steps - tighten then turn back a quarter inch before putting in the canning AND immediately tighten when removed from the canner.  So, I am chocking the seal failures for this load as user error.  The nice thing is I had a chance to taste the product to see how close I came.  I still need to do a bit more tweaking.  In the background are soaked beans ready for that day's canning.

day 3 of canning dried bean results
I had just a little of the sauce from the pork & beans to use up.  From left to right, I ended up with 1 - 500 ml jar of plain navy beans, 2 - 500 ml jars pork & beans, 4 - 500 ml jars maple baked beans, and 7 - 500 ml jars of dark red kidney beans.   Most of this canner batch had the Tattler lids.  I did have one seal failure (far right) and that was a Tattler lid so I ended up with 13 jars for the pantry.

Over the three days of canning I ended up with a total of 31 jars of dried bean products for the pantry.   It's not a bad start towards restocking but I need a few more canning sessions to get my bean stores up where they should be.  Any jar that did not seal is not wasted.  It goes into the refrigerator to be used within a few days.  Seal failures are not the evil monster some home canners make them out to be.  While I am certainly not used to having this many seal failures in only three canning sessions, it is an opportunity for me to tweak the product, do a bit of troubleshooting and perfect my technique.  Since I plan on switching over to using only Tattler and glass inserts, both of which are re-usable (aka cost effective and eco-friendly) perfecting my technique using them is a must.  All in all, I am pleased with last week's canning results!