My photo
Ontario, Canada
I am a wife, mother and grandma who enjoys the many aspects of homemaking. A variety of interests and hobbies combined with travel keep me active. They reflect the importance of family, friends, home and good food.
Cook ingredients that you are used to cooking by other techniques, such as fish, chicken, or hamburgers. In other words be comfortable with the ingredients you are using.
--Bobby Flay

For Your Information

Please watch this area for important information like updates, food recalls, polls, contests, coupons, and freebies.
  • [March 19, 2020] - Effective Mar 17, this blog will no longer accept advertising. The reason is very simple. If I like a product, I will promote it without compensation. If I don't like a product, I will have no problem saying so.
  • [March 17, 2020] - A return to blogging! Stay tuned for new tips, resources and all things food related.
  • [February 1, 2016] - An interesting report on why you should always choose organic tea verses non-organic: Toxic Tea (pdf format)
  • Sticky Post - Warning: 4ever Recap reusable canning lids. The reports are growing daily of these lids losing their seal during storage. Some have lost their entire season's worth of canning to these seal failures! [Update: 4ever Recap appears to be out of business.]

Popular Posts

Showing posts with label sauces. Show all posts

Thursday, February 26, 2015

Baked Salmon with Buttered Caper Sauce

Food like fashion follow trends.  Currently there is a trend towards healthy eating with a strong emphasis on anti-oxidants.  Anti-oxidants reduce or eliminate the damaging effects of free radicals in the body and the best source for anti-oxidants is your food.  The superfood for 2015 is capers!

Capers are the unripened flower buds of Capparis spinosa, a prickly, perennial bush indigenous to the Mediterranean.  The dark green buds are sun-dried then packed in vinegar brine.  Their tangy, briny, pickly flavour is best balanced against smooth, buttery or velvety flavours and textures.  My favourite way to enjoy capers is with cream cheese and smoked salmon on a bagel. 
 

salmon with buttered caper sauce
Capers are only 2 calories each (23 cal per 100 g).  They are rich in antioxidants (rutin, quercetin) , phytonutrients and vitamins.  Research suggests that quercetin has anti-bacterial, anti-carcinogenic, analgesic and anti-inflammatory properties.  They may reduce risk for cancer, help with circulation, may lower blood pressure and reduce rheumatic pain. 

Capers are salty due to the brine.  This can be reduced by rinsing the capers in water before using if desired.  Capers pair beautifully with salmon as pictured in this simple buttered caper sauce we recently enjoyed.

Method:  Melt about 2 tbsp butter in fry pan.  Stir in 2 -3 tbsp chopped red onion, and cook until just translucent.  Stir in 1 - 2 tbsp rinsed capers. Warm through.  Spoon over baked salmon filets as desired.


Monday, November 11, 2013

Home Canned Picante Sauce

I am constantly looking for as well as developing new, safe home canning recipes.  This fall I added home canned picante sauce to my ever growing list of must make recipes.  Picante means hot but the recipe I used was mildly pungent and stimulating.  The results were delicious!  I will do a bit of tweaking for the next batch but overall, I am quite pleased with the sauce.  This one is a keeper!

home canned picante sauce
I decided to try the picante recipe in Bernardin's Tomatoes Canning & Specialty Recipes.  This easy sauce has the texture of a chunky salsa but different flavour notes.  Parsley can be substituted for the coriander if desired.  It can be served with a rice or meat dish, or used as a dipping sauce for chips and seafood.  This sauce can be puréed for use as an enchilada sauce.  It can be home canned chunky or puréed so be sure to make a batch or two of each!

Picante Sauce
source: Bernardin Ltd., Tomatoes Canning & Speciality Recipes (2000), Pp. 64

7 c coarsely chopped tomatoes
1½ c coarsely chopped Spanish onion
½ c finely chopped jalapeño pepper
2 cloves garlic, minced
1 c malt vinegar
1 can (5½ oz) tomato paste
1 tbsp pickling salt
1 tsp red pepper flakes
1 tbsp finely chopped coriander
1 tsp cumin

Prepare vegetables.  Leave ingredients as is for picante sauce or purée mixture if making enchilada sauce.  Place all ingredients except coriander and cumin into large saucepan.  Bring to a boil over medium heat.  Boil gently for 45 minutes.  Stir in the coriander and cumin.  Continue boiling for 15 minutes for picante sauce or 30 minutes for enchilada sauce.  Ladle sauce into hot 250 ml (half pint) jars.  Wipe rims and cap with metal snap lids, Tattler reusable canning lids or glass inserts as per instructions for type of lid used.    Process in boiling water bath for 20 minutes.  Remove from canner.  Tighten bands fully if using Tattler lids or glass inserts.  Allow to cool undisturbed for 24 hours.  Remove bands and test for seal.  Wash jars and label for storage.

Yield: about 8 - 250 ml (half pint jars), 7 enchilada sauce


Sunday, September 29, 2013

Mom's Pizza Sauce

My busy canning season like the rest of the year has been a bit odd.  In the past, my husband would pick up two hampers of tomatoes at a time so I usually made four to six products sometimes more.  In the end, I would usually process ten hampers of tomatoes over a seven to ten day period which meant long, tiring days back-to-back.  This tomato season has been slow and relaxed.  So far, I've processed two hampers of tomatoes into three products - pizza sauce, dehydrated tomatoes and tomato powder.  I won't reach the ten hamper mark which is fine since I've been busy canning a lot of other foods as well.  This busy canning season is also a bit different in that I am doing a lot of tweaking and fine tuning of flavours to create unique home canned foods tailored to our family's tastes.

two days work resulting in forty-eight jars of pizza sauce
We use a lot of pizza sauce and I make extra to give to the kids.  This year I tweaked the pizza sauce recipe that I had previously modified from Bernardin's Tomatoes Canning & Speciality Recipes (2000).  Pizza sauce must be acidified so both the original and modified versions include lemon juice as the acidifier.

In my newest version, Mom's Pizza Sauce, the acidifier is citric acid added on a per jar basis just before sealing.  I tweaked the seasonings and added that little extra touch of flavour that sets this pizza sauce apart from the ordinary.  My husband determined the exact consistency he wanted for making homemade pizza.  While I make the dough, he usually shapes the dough and does the toppings.  The end result was a delicious, tasty tomato based pizza sauce worthy of being called Mom's!


Friday, September 27, 2013

Pretty in Pink - Low Sugar Chocolate Raspberry Sauce

There has been a breast cancer awareness badge on this blog since it was first created.  Like many, breast cancer has, in more than one way, affected our family.  I was delighted when Brad Steig, President of S&S Innovations, Corp invited me to promote their limited edition pink Tattler reusable lids.  This was an offer I could not refuse!  I have been using the Tattler reusable canning lids for over three years now and cannot say enough good things about them. 
 

low sugar chocolate raspberry sauce using limited edition pink Tattler reusable lids in support of Breast Cancer Awareness Month
I wanted a special product to showcase my new pink Tattler lids.  I chose my original low sugar chocolate raspberry sauce because I thought the pretty pink lids would compliment it nicely.   The original recipe has a firmer consistency which makes the sauce perfect to topping cream cheese or as a dessert topping.  This time I made changes to my original recipe to give a softer texture sauce suitable for use as an ice cream topping.  With a bit of tweaking of the sugar and adding vanilla for a little warmth, I ended up with a delectable ice cream topping worthy of the limited edition pink Tattler lids.  My husband poured some of the left over chocolate raspberry sauce over French vanilla ice cream.  He declared it a winner and went for a second helping with a huge grin on his face.

I'd like to thank Brand Steig and S&S Innovations, Corp for sending me a sample of the limited edition pink Tattler lids.  They perform just as nicely as the regular white Tattler lids except 35% of proceeds from their sale is being donated to the Munson Medical Center Women's Cancer Fund in Traverse City, Michigan!  If you would like to buy some of these lids in support of Breast Cancer Awareness Month, you can you can click the pink button for the sale on the Women's Cancer information page on the Tattler website on October 1.  I just know you will enjoy these lids as much as I do!


Friday, January 18, 2013

The Versatility of Tomato Sauce

Last September I was extremely busy home canning ten hampers of tomatoes into various tomato products.  The total yield was 206 jars ranging in size from 250 ml to 1 L for a total volume of 111.5 L.  This may seem like a large amount but the goal is to home can enough to last from one growing season to the next.  Trust me, this will not be enough to last us a full year.   Guaranteed, we will run out of some of the tomato products well before the next harvest.

The number one question I get when someone sees our pantry for the first time is 'Why?' followed by 'What do you do with all of it?'  Well, the easy answer really is to explain that this is my grocery store so unlike most home makers, I'm not spending my time in the grocery store each week.  It is a way for us to avoid the horrendous amount of food additives, excess salt, HFCS and preservatives the food industry is so good pushing at us without acknowledging the health ramifications.  Essentially, my goal stocking our pantry with good, healthy and safe foods by taking responsibility in doing so.  The bonus of home food preservation and cooking from scratch is the monetary savings.   As to what I do with all of it...

spaghetti with roasted Italian sauce with mushrooms
I have been making roasted tomato sauces for a number of years so have developed several versions like fire roasted Italian tomato sauce with mushrooms.  This is a full bodied with a rich, deep flavour.  It makes for a quick, heat and serve over spaghetti as a meatless meal as pictured.  That is fresh parsley clipped from my continuous indoor garden.

On average, my tomato sauces cost 30¢ to 50¢ per L taking into account all costs (eg. lid, additional ingredients, cooking fuel).  With a 750 ml jar of this home canned tomato sauce, spaghetti and a sprinkling of Parmesan cheese, Caesar salad and home made bread or rolls , I can feed 4 adults for under $3 and still have left-overs.  The beauty of this sauce is, while it is an excellent quick sauce for pasta, it a very versatile sauce.  I use an immersion blender for those dishes if I don't want the larger chunks like mushrooms in some of my sauces but in general all the uses listed can be done with any tomato sauce.  A variety of home canned tomato sauces will always earn their keep in our pantry to help use eat healthy, frugal, home cooked meals.

Here are some of the ways I use my many home canned tomato sauces:

  • a sauce over meatloaf, burger patties or chicken
  • a sauce to cook meatballs or chicken in; brown the meat first then finish cooking in the sauce for tender, juicy results
  • a liquid for poaching fish in
  • a liquid for cooking rice in
  • a blush sauce (mixed with béchamel sauce) for pasta or chicken 
  • an ingredient in meatloaf, burger patties, and casseroles (eg. pasta based, cabbage rolls, chicken)
  • topping for baked brie or cream cheese served with crackers
  • a topping for twice baked potatoes (sauce, pepperoni or bacon, shredded cheese)
  • an ingredient for dip (sour cream, sauce, Parmesan cheese blended in food processor then topped with shredded cheddar cheese)
  • as a dip for cheese, bread sticks, pizza crust or chicken wings
  • as a pizza sauce
  • an olive tapenade (sauce, chopped olives, roasted red peppers, capers, fresh parsley) served with crackers
  • an ingredient in soups, stews, breads or biscuits
  • as a spread in panini 
  • a base for baked beans and sloppy joes


Sunday, November 18, 2012

Balsamic Mushroom Slices

We often have friends and relatives stay with us at our vacation home.  During our fall vacation in October, four of the guys arrived the same day my husband's sister and our nephew left.  They were down for a week of serious golfing while enjoying the sun.  While do a fair share of eating out when they are down, we also cook meals.  Most of the breakfasts and lunches are made at home as well as about half of the dinners.  Don't get me wrong as we love eating out but getting into relaxed mode makes it easier to eat at home some days.

frying the mushrooms
The nice thing is, most of our family and friends are foodies as well so they love to help with the cooking and KP duty.  This is a wonderful way to share recipes and lots of good conversation peppered heavily with laughter.

My husband picked up rib eye steaks to grill for dinner.  Sautéed mushrooms are almost a must have with steak followed closely by caramelized onions.  One of the guys was making his specialty caramelized onions in a bourbon reduction.  I decided to get creative with the sautéed mushrooms.  I started them as I normally do in a mixture of extra virgin olive oil and butter.  When the mushrooms were at the sweat point, I made a change.

balsamic vinegar added to the mushrooms
Balsamic vinegar reduction is absolutely delightful and ever so easy to make.  Simply pour balsamic vinegar into a fry pan then bring to a simmer.  Continue cooking until it is reduced to the consistency of a medium thick syrup.  It is a lovely, rich, full bodied  sauce ideal for serving over meats but also works nicely over some sweets like vanilla icecream.   I reasoned a balsamic vinegar reduction would go nicely with the mushrooms while complimenting the flavour of the grilled steaks.  Instead of making the balsamic vinegar reduction separately, I added about a half cup of balsamic vinegar to the cooking mushrooms.  I thought it would infuse the mushrooms with the rich flavour of the reduction.  

balsamic mushrooms ready for serving
I continued cooking the mushrooms until the balsamic vinegar was nicely reduced.  The mushrooms were nicely sautéed with a lovely hint of caramelization but with a deeper, richer colouring.  The aroma was tantalizing!

The whole kitchen smelled heavenly between my mushrooms and our friend's onions!  Both took about the same time to cook.  Both were simple variations of traditional toppings served with steak.  My husband had raved about our friends bourbon onions so I kept my fingers crossed the balsamic sautéed mushrooms would  be equally well received.

balsamic mushrooms served
The meal was rather simple yet quite delicious consisting of grilled rib eye steaks, grilled potatoes,  balsamic sautéed mushrooms and bourbon caramelized onions, and a garden salad.  I could not believe how such simple variations by adding balsamic vinegar to the mushrooms and bourbon to the onions, made such a difference.  That is not sour cream on the potatoes.  It is Greek style yogurt that is lower in fat with a bit richer flavour than sour cream.

This really is what makes cooking so much fun.  It really doesn't take much to change a recipe for a totally different result.  Simply substituting one type of vinegar for another can change the flavour of a dish.  I found that out years ago with canning recipes.   Adding in flavour enhancers like bourbon, sherry or wine can make a huge difference in the flavour as well.  So don't be afraid to do a bit of experimenting substituting one or more ingredient with a variant of that ingredient.


Saturday, October 20, 2012

Home Canned Plum Sauce

Home canning is one of those activities where you really need to take advantage of what is is season.  While my focus for September was processing tomatoes, I worked in a few other home canned goodies as well.  This broke up the focus on tomatoes giving my mind a bit of a break and my body a change in the routine.  Seriously, this is a good thing.  It isn't uncommon to have more than one type of produce waiting to be processed so being able to switch gears is a benefit.  Plums were on sale so you just know I had to take advantage of that!

home
Sauces often make a good dish spectacular.  So it is with plum sauce.  It is a must have for oriental finger foods and egg rolls.  Now plum sauce is rather inexpensive in the grocery store at $4.99 for a 475 ml squeeze bottle (1¢ per ml).  Plums were on sale for 97¢ per lb so I paid $4 for the plums used in this recipe with a yield of 9 - 250 ml jars (2.4 L) for a total cost with all ingredients and energy to process at .02¢ per ml.  More importantly the home canned plum sauce has an incredible flavour far superior to store bought,  greatly adding to the economic savings.  This really is a must have product in your pantry!

Home Canned Plum Sauce
recipe modified from:  Ball Blue Book, 2001. Pp. 80.

4 lb red plums
2 c brown sugar
1 c organic granulated sugar
¾ c chopped onion
2 tbsp mustard seed
2 tbsp chopped jalapeño peppers
slice of fresh ginger, minced
1 tbsp salt
1 clove garlic, minced
1 c cider vinegar

Wash, pit and chop the plums.  Combine all ingredients except plums in large saucepot.  Bring to a boil.  Reduce the heat and stir in plums.  Cook until thick and syrupy.  Ladle into hot jars.  Adjust two piece metal snap lids (or Tattler reusable lids or glass inserts).  Screw bands on jars (adjust accordingly if not using metal snap lids).  Process 250 ml for 10 minutes in BWB canner at altitudes up to 1,000 feet above sea level.  At higher altitudes refer to altitude adjustment chart on Canning FYI page.  Remove from canner.  Adjust bands if using Tattler or glass inserts.  Allow to cool 24 hours.  Remove bands and test for seal.  Wash and dry bands and jars.  Bands can be placed loosely on the jars for storage if desired.  Label and store.


Wednesday, October 17, 2012

Home Canned Spaghetti Sauce with Meat

As mentioned yesterday, home canned spaghetti sauce with meat is a must have tomato based product in our pantry.  It puts any store bought pasta sauce to shame at a fraction of the cost.  I use my own developed after years and years of tweaking to where I finally have the perfect blend our family so much enjoys.  The original recipe, if you can even call it that, was taught to me by my mother-in-law as a newlywed.  It was a toss this in, cook, taste and adjust with nothing written down very much the same way I learned to cook from my Mom.  It is now been developed into an actual recipe for home canning purposes but I also continue to tweak for fresh use and freezing.

home canned spaghetti sauce with meat
I ended up with 14 - 500 ml jars of ready to use home canned spaghetti sauce with meat.  It also has mushroom slices in it making for a rich, full bodied, flavourful sauce.  This sauce is used on pasta, in homemade lasagna and other casseroles.  I make oodles of this sauce so fourteen jars is nowhere enough for what we will need for the upcoming year but again, I don't mind making a large batch for fresh use and freezing during the cooler months.  It helps heat the house and smells heavenly when cooking.  Having a bit of homemade convenience in the pantry is nice for the days I don't have the time to make fresh!

Home canned spaghetti sauce with meat is low acid so has to be processed in a pressure canner.  While my spaghetti sauce with meat recipe will not be posted here, if you would like to home can your own check out the spaghetti sauce with meat recipe from the NCHFP is a good place to start.  The sauce on that site can be tweaked providing you do not alter the ratios.  I will note, NCHFP does not acidify their spaghetti sauce with met but I do.  Tomatoes are borderline pH 4.6 so the recommendation is always to acidify them and that applies to those tomato products that will be pressure canned as well.  I use citric acid to acidify my tomato products that do not specifically use vingar, lemon or lime juice.


Tuesday, October 16, 2012

Home Canned Chili with Beans and Spaghetti Sauce with Meat

The kitchen has been a flurry of activity with home canning to restock the pantry after our move last year.  Now a lot of folks think home canning is all about jams, jellies, pickles, applesauce and tomatoes.  Well, it is all about those home canned products but it is so much more.  Home canning is also about putting homemade convenience products in your pantry.  This includes delicious home canned foods like chili with beans and spaghetti sauce with meat.  These are two must have homemade convenience foods in out pantry.

home canned chili and spaghetti sauce with meat just out of the pressure canner
I use my own TNT recipes for home canned chili with beans and spaghetti sauce with meat.  Both are processed in the pressure canner (large pot with label) for 60 minutes at 10 lb pressure using 500 ml jars.  I will discuss both in a bit more detail in the next couple of posts.

Pictured are the jars of chili sauce with beans (3 rows closest to wall) and spaghetti sauce with meat (3 rows closest to counter edge).  Jars just removed from the canner will still have the contents boiling and they are subject to thermal shock by sitting on a cold surface or getting a draft.  To the right out of camera range is a set of patio doors.  If they are open I close them to prevent drafts.  Overhead is a ceiling fan that I also turn off.  I set the hot jars on T-towels on the ceramic tile surface just to be on the safe side.  The jars will sit as is undisturbed until well cooled then seals tested after 24 hours, the bands are removed and washed along with the jars.  Don't they just look delicious?


Saturday, October 13, 2012

Home Canned Applesauce

Despite the fact that I have been focusing on home canning tomato products, other home canned products tend to get processed at the same time.  I took a bit of a breather from tomatoes to do a batch of applesauce.  This type of break serves as both a mental and physical change in pace.  A mental break in processing one type of produce helps to stimulate your creative thoughts so it is not uncommon to decide to process some type of sauce rather than just the plain product when you return to processing it.  A physical break helps to prevent repetitive stress injuries.  Each type of produce has specific methods of preparation, some of which (eg. seeding tomatoes) can cause repetitive stress injuries that can range from mild to severe and lingering.  It is best to avoid or minimize the impact of these types of injuries whenever possible.

home canned applesauce
Apples are just starting here so I picked up a 10 lb bag of Courtland apples at the local orchard.  I am so excited they decided to open this year!  They sold the orchard to a rather seedy character who took off in the middle of the night leaving them to clean up the financial mess he left behind.  They are in their late 70's so I really didn't expect they would re-open this year.

Applesauce is very easy to home can.  I simply wash then quarter the apples and put just enough water into a large saucepan to prevent sticking.  Once the apples are soft, I run them through the Kitchen Aid food strainer to remove the skins, seeds and core.  I do not add any sugar or flavouring to my home canned applesauce.  The reason being is I use applesauce as an ingredient for baking so plain works better for this purpose.  Applesauce made this way will take on a hint of colour from the skins of the apples as well as the flesh so the sauce will be a pale yellowish as this one was to having a slight pinky tinge.  I experienced a bit of separation in this batch of applesauce.  That can happen.  I simply stir the applesauce after opening the jar.


Friday, October 12, 2012

Home Canned Pizza Sauce

Homemade pizza has been a long family tradition in our home.  During the busy tomato canning season I put up a fair number of jars of home canned pizza sauce along with the starts of pizza sauce to last us until the following year's crops of tomatoes.  You just can't beat homemade pizza with homemade pizza sauce.  This sauce can be frozen if you don't home can.  You can also tinker with the seasonings to get just the right combination for your family's taste buds.

home canned pizza sauce
This year I processed 12 - 250 ml jars of home canned pizza sauce.  This is not enough for the year but I have plenty of home canned tomato purée to make a couple more batches of the pizza sauce throughout the year as needed.  I also have crushed tomatoes in the freezer from when my husband was in the hospital that I'd like to can up to save freezer space.

I used the squatty 250 ml  Elite jars for the pizza sauce.  Normally I wouldn't use these but I didn't have enough of the jelly jar style of 250 ml jars to process the batch.  The squatty jars were a very generous gift from one of our friends who gave me 19 - 4 pks of the jars.  They are a wide mouth jar (86 mm) rather than standard mouth (70 mm).  I actually like them for salsa and home canned condiments because they look cute on the table.


Tuesday, October 09, 2012

Home Canned Italian Garden Sauce with Mushrooms

I was so impressed with the tomato purée that I canned seven 750 ml jars of it, knowing the tomato purée would be a convenient product in the pantry.  The tomato purée can be used as the base for a variety of tomato based sauces, cooked down further for tomato paste, or dried then ground for tomato powder. It can also be used as an ingredient in many dishes.  While I simply cooked the tomato purée using the slow method to prevent separation, I think a roasted tomato purée would be quite possible.  Encouraged with the preliminary results of canning tomato purée and the first batch of Italian Garden Sauce, I went on to can another 7 - L jars of tomato purée and 7 - L jars and 2 - 500 ml jars of Italian Garden Sauce with Mushrooms.  Something tells me I should have canned more of the tomato purée.  I think it will be a rather popular tomato product in the pantry.

bottling the tomato puree
The vast majority of the home canning pictures on this blog feature the actual product after processing, ready for storage in the pantry.  I have a distinct system for preparing the jars for the canners taking care to prevent thermal shock that would cause jar breakage.  The jars I will be using for that canning session are filled with hot water in the sink with about 5 cm of hot water to the left just out of range of the camera.  The pressure canner (pot with label) has 3 L of water and about 2 tbsp of white vinegar heating on low while filling the jars.  The lids are sitting in hot water in the measuring cup with the rings immediately to the left.  I removed the boiling
sauce from the burner and placed in on a cork trivet.  I fill one jar at a time which is the preferred method over the assembly line method that allows cooling of the first few jars filled increasing the risk of thermal shock.  I ladled the hot sauce into the hot jar leaving 2.5 cm headspace.  I remove another hot jar from the sink placing it close to the filled jar to put the funnel in then I quickly wipe the rim, put the lid on and tighten the ring finger tight.  I lift the prepared jar into the canner and repeat the process until all jars are in the canner.  Once all the jars are in the canner I put the lid on the canner and flip up all six of the securing lugs.  Then I tighten the opposite securing lugs two at a time giving them all a final tightening.  I increase the heat to the sweet spot on my burner.  This is the level of heat where the canner runs nicely at the proper pressure.  The canner is heated without the regulator on until a steady stream of steam comes from the vent.  It is then allowed to vent for 10 minutes.  The regulator is put on the vent stem then the canner is brought to pressure.  Once at pressure, the timing for processing begins and the product is processed for the required time.  After processing the burner is turned off.  The canner sits as is undisturbed until it is fully depressurized (0 pressure) then the regulator is removed.   This takes 20 to 30 minutes.  The canner is left for another 5 minutes without the regulator which allows the temperature to stabilize.  At that time before jars are removed from the canner any source of draft (eg. ceiling fan, open patio door) are eliminated.   Foods processed in the pressure canner will still be boiling when removed from the canner.  A draft can cause a jar to break during the removal process creating a dangerous situation.  The lid is removed and jars carefully lifted one at a time without tilting out of the canner and placed on a folded T-towel.  The jars are left to cool for 24 hours.  The bands are removed, seals checked then jars and rings washed and dried.  At that point the jars can be labeled then stored.  The rings can be put on the jars loosely if desired.

Italian Garden Sauce with Mushrooms
The jars of home canned Italian Garden Sauce with Mushrooms looked gorgeous as pictured.  This rich, full bodied sauce will be perfect on pasta or for making chicken cattorie.   When pressure canning a mixed product it is processed according to the lowest acid ingredient.  In this case the lowest acid ingredient was mushrooms so this sauce was processed for 45 minutes at 10 lb pressure.  I used sliced white mushrooms in the sauce.  Other cultivated mushrooms can be used in home canning but wild mushrooms should not be used.


Sunday, October 07, 2012

Italian Garden Sauce

Several years ago I started experimenting with home canned tomato based sauces spurred on by an increasing number of gourmet style pasta sauces available in the grocery store.  I reasoned that many folks enhance store bought pasta sauce so why not do it with the basic tomato based sauce.  When it comes to home canning it is important to know what can be altered without affecting the safety of the finished product. Basically as long as the sauce is acidified and pressure canned there is a lot of leeway with respect to possible alterations.  There is less leeway if the sauce is to be processed in a boiling water bath (BWB) canner so you can't add too much low acid vegetables (eg. celery, onions, mushrooms) to the sauce as that will affect the pH.  If you want to process using a BWB canner it is essential to properly test the pH of the product.  If higher than pH 4.6 the product must be processed in a pressure canner.

Italian garden sauce
Essentially herbs, salt, cooking method and flavour combinations have no bearing on home canned food safety.  My first huge success was roasting the tomatoes for my sauces on the outdoor grill.  That quickly turned to fire roasting over charcoal which lead to adding wood for a smokiness.  This year I began experimenting with making sauces from a purée.  A tomato purée is thicker than a plain tomato sauce but thinner than a tomato paste, making it the perfect base for many tomato products (eg. ketchup, sauces).

The pasta sauce I made this year using a tomato  purée was and Italian Garden Sauce.  This is a rich, full bodied sauce that got its name from the origin of the base ingredients in it, my garden.  The sauce contained four varieties of tomatoes, two varieties of sweet peppers, onions and fresh herbs from my garden in addition to celery and seasonings. It is a smooth sauce with touch of texture perfect as a sauce for pasta or other dishes.  I acidified using citric acid.  The first batch was a wonderful success so I did go on to make a second batch with a couple of modifications of course (more on that later).  The sauce was pressure canned in Canadian Mason jars, made in Canada.  The jars are about 30 years old.  Doesn't that sauce look yummy?


Saturday, October 06, 2012

Home Canned Seafood Cocktail Sauce

I have been making my own seafood cocktail sauce for a number of years.  Now the thing is you really don't have to can it if you will be using the sauce within a week.  I home can it so I have sauce to use whenever I need it.  The thing to remember about horseradish is it loses it's potency and continues to lose its' potency from the time it is cut.  Horseradish should be shredded outside due to the fumes.

home
I started out home canning seafood cocktail sauce then each year tweaked a bit.  I now have a lovely, flavourful, full bodied seafood cocktail sauce worthy of space on my pantry shelves.

This sauce really starts right from the tomatoes and you do want to use paste tomatoes.  However, the tomatoes are boiled down to form a purée before other ingredients are added.  A purée is thicker than a plain tomato sauce but thinner than tomato paste.  Tomato purée is used as a base for many tomato products including soups and sauces.  With that in mind, this year I canned up a few jars of tomato purée.  I will be discussing tomato purée in more detail shortly.  This is a must have product on your pantry shelves.


Sunday, September 23, 2012

Old Fashioned Chili Sauce

Yesterday, I started writing about my husband's hospital stay just as I was starting my fourth hamper.  While I had all of the ingredients prepped and waiting to be cooked for the old fashioned chili sauce, the tomatoes for the salsas were still draining.  The morning after he was admitted to hospital, I strained off the tomato liquid reserving it for tomato stock and froze those tomatoes then rushed up to the hospital to be there for the ultrasound.  After spending the entire day at the hospital, I headed home at 9:30 PM.  It was late and I was exhausted but knew the chili sauce had to be made and canned that night.  The reality is life doesn't stop because of canning and visa versa.  I had two choices, either make and can the chili sauce or let the produce spoil.

white film on processed canning jars
I have a few quirks when home canning.  I prefer my products to be canned in Canadian made jars.  At one time there were many small glass factories in Canada so I have several older Canadian made mason jars (eg. Consumers, Bernardin, Domglass, Dominion and Canadian mason).  Of those mentioned, Bernardin out of Toronto is still the leading Canadian home canning expert but a few years ago farmed the manufacturing of their jars to a US firm.  Now, don't get me wrong as I do use American made jars (Kerr, Ball, Golden Harvest and now new Bernardin) and I have a few Chinese made jars (Home Discovery), my preference is Canadian made.

I used old Bernardin and Consumers mason jars to can the chili sauce.  Many of these jars were purchased over thirty-five years ago when we were newlyweds so there is sentimental value to the jars as well.  Like my newer jars, the old mason jars see use both in the boiling water bath (BWB) canner and pressure canner (PC) every year and often several times a year.  When I pulled the jars from the BWB canner I noticed a white film on the jars from the first load.  This occurs because of minerals in the water.  The common solution is to add white vinegar to the processing water.  I had forgotten to add the vinegar for the first load but remembered for the second load. Notice how the jar on the right doesn't look hazy?  These mineral deposits can build up on jars that have been run through the canners without vinegar on one or more occasions.  If the build-up is minimal, simply wiping the jars down with white vinegar will remove the film, making the jars sparkle.  If the build-up is a bit heavier, a Mr. Clean Magic Eraser quickly removes it with little effort.

old fashioned chili sauce
Despite having less than four hours sleep, I was up early, antsy to get back up to the hospital Friday morning (Aug 30).  I ended up with nine lovely jars of home canned old fashioned chili sauce.  They had to sit until that night to check the seals and polish up the jars. 

I slipped home for an hour at 4 PM and set up the tomato liquid to strain in the refrigerator while I was gone.  I was back to the hospital by 5 PM until I was sure he was settled around 9:30 PM.  I rushed home to polish the jars of chili sauce.  I think they look rather lovely!  Then it was time to can the tomato stock before heading to bed for another short night of sleep. 


Friday, April 20, 2012

Homemade Fettucine with Creamed Turkey Sauce

Pasta lends itself nicely for a wide variety of sauces.  While tomato and alfredo style sauces are likely the most popular, there really is no end to the types of sauces that can top pastas.  I often pair left overs with fresh vegetables as a pasta topping.  It's quick, easy and oh so delicious plus it is an easy, tasty way to use up left overs.

homemade fettucine with creamed turkey sauce
We have been working on emptying our largest freeze in preparation for our beef on the hoof purchase.  I pulled the last of the frozen left over turkey from the freezer.  It had been frozen with the gravy so I thawed it then used some of the turkey only to make a quick pasta sauce for homemade fettucine noodles.  As an aside, we are loving fresh made pasta.  It is so tasty, beyond dried or store bought fresh!  The fresh pasta stores nicely in the refrigerator too so I can make one batch that will give us two pasta meals for the week.

I cut the turkey into bite sized pieces then stirred into seared mushroom slices and poured a can of condensed mushroom soup over it with almost a full can of milk.  I let the sauce simmer until thickened then topped the cooked fettucine with it.  I garnished with fresh grated Parmesan cheese, sliced green onions, halved cherry tomatoes, shredded carrots and fresh parsley.   It ended up being a rather tasty meal that took almost no time to put together.

Fresh parsley is one of the leading garnishes and for good reason.  Dried parsley lacks the flavour and health benefits that raw parsley has.  Fresh parsley as a garnish is not just for it good looks.  It provides a nice source of Vitamin C, freshens the breath and settles the tummy after a large meal.  Oh and parsley is mildly diuretic reducing water weight gain.  So don't leave it on your plate, indulge in all the health benefits fresh parsley offers.


Saturday, April 14, 2012

Homemade Fettuccine with a Blush Fire Roasted Tomato Basil Seafood Sauce

Yesterday I wrote about my first adventure using my new KitchenAid® pasta sheet roller and fettuccine cutter attachments.  Both attachments were beyond incredibly easy to use.  I was at the ease of use and the results!  The next thing on my mind was the taste.  Trust me, there is no need to go through a bit of extra work only to end up with a product that doesn't taste better than store bought.

homemade fettuccine with seafood sauce
Earlier this year we enjoyed a delicious meal at a local restaurant that featured a blush seafood sauce topping linguine.  I set out to clone that recipe then I tweaked the seafood sauce slightly to use my gourmet home canned fire roasted tomato basil sauce, crab meat, cod and scallops then up scaled the garnish to use pan seared shrimp and scallop.  The end result is a mouth watering sauce perfect for topping homemade fettuccine.  It is light yet filling,  packed full of rich flavour while being lower in calories than a traditional spaghetti meat sauce.

The fettuccine took about 7 minutes to cook to al dente.  While it looked like cooked dried or store bought fresh in terms of colour and texture, the proof was in the tasting.  The taste of this  fettuccine was incredible!  It had a freshness that dried pasta can't achieve and none of the chemical flavour of store bought fresh pasta.  An added bonus as with many homemade foods, there was no pesky packaging to have to deal with.  In fact, this meal resulted in very little going into the garbage.  There was no packaging and only the shrimp and crab shells had to be discarded although the shrimp shells might have been ok in the compost as there were only six of them.  This is the time of year I keep and grind all egg shells possible for the garden.  They add calcium while controlling slugs and snails.

It is important to realize that home cooking has a positive effect on the environment.  A vast portion of waste from home cooking can go into the compost, resulting in very little going into the landfill.  It really is a win win by home cooking.  You get good, healthy, less expensive food while lessening your carbon footprint.  Nothing wrong with that in my book and quite frankly it is one more reason to cook from scratch at home!


Tuesday, April 03, 2012

Pot Roast with Fire Roasted Tomato Basil Gravy

Pot roast is an easy to prepare delicious meal perfect for Sunday night dinners during the winter months.  I pulled one of the last of our roasts from the freezer a couple of days ago.  We are getting the freezers ready for our beef on the hoof purchase this year so there isn't much beef left.  Our beef stock is down to a two packages of soup bones, three roasts and a package of stew beef.  I'm actually quite pleased we have been able to get our beef stock this low before we pick up our new beef.  In the meantime we will enjoy moose, chicken, pork, fish and seafood so it isn't like we have to go without meat.

pot roast prepared for oven
I traditionally make pot roast with a beef roast, potatoes, carrots and whole mushrooms.  The resulting gravy is rich and flavourful.  Most think of gravy as being meat or poultry based but there is the gorgeous sausage gravy for biscuits, brown gravy and mushroom gravy.  A very popular gravy with my Mennonite friends is tomato gravy. 

Tomato gravy is extremely easy to make as it is just lightly seasoned tomato juice thickened to a gravy consistency.  It is used much the same a meat based gravies.  I decided to kick tomato gravy up a notch by using a fire roasted tomato basil sauce to make a gravy.  Once the roast was seasoned (garlic pepper, Worcestershire sauce) and surrounded by potatoes, carrots and cabbage, I poured about 500 ml (2 c) of the fire roasted tomato basil sauce over the meat and vegetables. 

pot roast cooked ready to make the roasted tomato gravy
The roast was cooked in the clay baker at 300ºF until the vegetables were tender and the roast was starting to caramelize.  The internal temperature was 155ºF/68ºC which is medium.  Note that this is a lower temperature than that for ground beef which is done at 160ºF/71ºC.  The reason for this is a whole cut of meat has a smaller surface area than ground meat.  Any bacteria present on the meat will be killed off during the cooking process.  Ground meat has a high surface area and the grinding process itself allows surface bacteria to be transferred throughout the meat giving them a greater chance of multiplying.  This is one reason I prefer to grind my own meat just before wanting to use it.  This also explains why eating a blue steak (just barely cooked on each side) is fine because surface bacteria has been killed off but it is not fine to eat a burger that is still rare in the middle.

pot roast with roasted tomato gravy plated
Cabbage is an underused, inexpensive and nutritious vegetable.  It takes on a lovely sweetness when cooked!  The fires roasted tomato basil sauce accented the flavours nicely.  I simply thickened the juices from the roast using a cornstarch slurry to make a gravy.  We really liked the roast cooked this way.  It would be a wonderful wintertime comfort meal!

I will admit to starting out this meal with an end in mind.  I've talked of making my own convenience foods.  After I made a plate for my husband's lunch the following day, I set about making three packets of convenience foods.  Tomorrow I will share with you what those foods were and how I made them.


Friday, March 09, 2012

Rotini with Roasted Tomato Basil Seafood Sauce

Michael Smith is my favourite Canadian chefs.  I am particularly fond of his wholesome philosophy of cooking without a recipe using whole foods (aka cooking from scratch).  Being laid up, I have enjoyed watching a bit of Food Network Canada so was quite intrigued by his seafood chowder with dill.  My dill has just been started so I have no fresh to use meaning I have to wait to try that yummy sounding recipe.  What stood out was his comment that anything that swims in water is fair came for a seafood chowder.  I decided to take this ideal a step further to create a roasted tomato basil seafood sauce for pasta.

cooked cod and shrimp for the seafood sauce
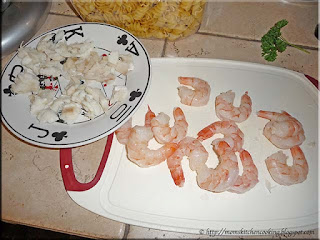
I really started this recipe with a vague idea of what I wanted the end result to be.  We has recently dined at a local restaurant where I enjoyed spaghetti topped with a seafood blush sauce so that was my inspiration for this dish.  I used cooked seafood in my recipe, focusing on cod, shrimp and crab meat.  The premise was each would add texture and flavour without being overcooked and rubbery.  I used a piece of cod fillet that was about 5 - inches long, simply brought to a boil in salted water and cooked to opaque.  The shrimp was pre-cooked and frozen so all I had to do was thaw, peel and cut into pieces.  It was left over from our holiday celebrations so I wanted to use up some of it.

cooked crab knuckle
The crab knuckle is the joint where the crab legs attach.  It is a nice meaty section ideal for making seafood based soups, salads, dips and chowders.  The meat is not quite as sweet as the legs themselves but there is a lot of it.  One crab knuckle will give a yield of about ¾ cup of prepared crab meat.  The taste difference between using the crab knuckle even cooked from frozen when compared to store bought canned crab meat is far superior!

Method for cooking:  Pour about 3 cups of water into a small sauce pan.  Season with about a teaspoon of salt.  Bring the water to a boil then put the frozen crab knuckle into the water.  Allow to cook until the meat is opaque.  Remove the knuckle from the water with a slotted spoon and allow to drain before preparing.

peeled crab knuckle
The crab knuckle yields a nice sized piece of crab meat that has a lovely flavour.  Now doesn't this piece of crab meat from the knuckle look divine?  I was so tempted just to eat is as is but I resisted!

The easiest way to get the meat out of the knuckle is to use a pair of kitchen shears.  Cut horizontally from across the knuckle from narrow end to narrow end.  The meat shell can easily be peeled off leaving the tender, juicy crab meat.  Any remaining crab meat on the knuckle can be removed using the tines of a fork.  Cut the crab meat into bite sized pieces if using for soups, stews or chowder.  If using for dip, shred with the tines of a fork.

rotini with roasted tomato basil seafood sauce
Home canned fire roasted tomato basil sauce formed the base for this seafood blush sauce.  I love basil and quite frankly grow several varieties because there is no such thing as too much basil!  You know that commercial where the lady says "I put the F on everything"?  Well I could say the same thing about basil.  The end result was a yummy, zesty seafood sauce just perfect for topping rotini.  If you notice, I generally do garnish homemade pasta dishes with fresh chopped vegetables that help to add nutrition along with texture.  I also garnished with a little Parmigiano Reggiano (aged over 24 months) and fresh ground pepper for flavour without adding a lot of calories or fat as well as fresh parsley for colour, flavour and digestive properties.

This sauce was a winner hands down!  I think the only thing I would change the next time is to reduce the amount of the roasted tomato basil sauce.  That would allow the seafood flavour to shine through a bit more.  Other than that, it really was an excellent sauce perfect for topping most pastas!

Roasted Tomato Basil Seafood Sauce
recipe by: Garden Gnome

12 jumbo cooked shrimp
1 small cod fillet (or other white fish)
1 crab knuckle

2 c 2% milk
¼ c evaporated 2% milk
1½ c roasted tomato basil sauce
8 oz pk sliced mushrooms
2 tbsp extra virgin olive oil
1 tbsp butter
2 tbsp flour
2 tbsp water or milk
1 tsp

½ small onion
½ small tomato
1 sprig fresh parsley per serving
1 tbsp fresh grated Parmigiano Reggiano
fresh cracked pepper


Cook the cod fillet and crab knuckle in separate small sauce pans and cook until opaque.  Cool, then cut into bite sized pieces.  Sautée the mushrooms in the olive oil and butter mixture.  Drain.  Bring the milks to a simmer then stir in a slurry of flour and water or milk.  Allow to cook until thickened.  Stir in the roasted tomato basil sauce and mushrooms.  Bring to a simmer.  Stir in the shrimp, cod and crab meat.  Remove from heat.  Ladle the sauce over your pasta of choice.  Sprinkle on fresh grated cheese and fresh cracked pepper.  Garnish with fresh chopped onions, tomatoes and sprig of parsley.


Saturday, February 25, 2012

Lemon Dill Tartar Sauce

My husband and I enjoy fish on average two to three times a week.  A good portion of that fish is locally caught perch or pickerel.  I like to fish and we have very generous friends who share their catch with us as well.  We also enjoy a multitude of fish that is not locally caught.  Our preferred methods of cooking are pan fried, broiled, baked and occasionally deep fried or grilled.  Surprisingly neither of us a big on putting anything on the fish when eating other than a little fresh lemon juice however, I occasionally make a basic tartar sauce to serve with fish especially if the kids are home. 

lemon dill tartar sauce
The other day I checked out the FoodNetwork just in time to quickly scribble out the ingredients for a zipped up tartar sauce.  There were no amounts given so I decided to do a bit of experimenting.  My clone recipe is not identical to the one used in that particular restaurant but it is quite delicious with a flavour that really pairs nicely with any white fish.  I served is with lightly coated cod.

Lemon Dill Tartar Sauce
recipe by: Garden Gnome

1 c Miracle Whip salad dressing
1 sm dill pickle, finely chopped
1 tsp fresh lemon juice
¼ tsp Frank's Hot Sauce clone
½ tsp dried parsley
¼ tsp Spanish paparika
¼ tsp organic granulated sugar
¼ tsp Worcestershire sauce
pinch of salt and pepper

Chop the dill pickle in a food processor.  Measure the Miracle Whip salad dressing into a mixing bowl.  Stir in the remaining ingredients, mixing well.  Refrigerate 1 hour to let flavours blend.  Spoon into serving bowl.

Note:  This sauce will keep nicely for 7 to 10 days in the refrigerator.