My photo
Ontario, Canada
I am a wife, mother and grandma who enjoys the many aspects of homemaking. A variety of interests and hobbies combined with travel keep me active. They reflect the importance of family, friends, home and good food.
Cook ingredients that you are used to cooking by other techniques, such as fish, chicken, or hamburgers. In other words be comfortable with the ingredients you are using.
--Bobby Flay

For Your Information

Please watch this area for important information like updates, food recalls, polls, contests, coupons, and freebies.
  • [March 19, 2020] - Effective Mar 17, this blog will no longer accept advertising. The reason is very simple. If I like a product, I will promote it without compensation. If I don't like a product, I will have no problem saying so.
  • [March 17, 2020] - A return to blogging! Stay tuned for new tips, resources and all things food related.
  • [February 1, 2016] - An interesting report on why you should always choose organic tea verses non-organic: Toxic Tea (pdf format)
  • Sticky Post - Warning: 4ever Recap reusable canning lids. The reports are growing daily of these lids losing their seal during storage. Some have lost their entire season's worth of canning to these seal failures! [Update: 4ever Recap appears to be out of business.]

Popular Posts

Showing posts with label low sodium. Show all posts

Saturday, November 09, 2013

Homemade Roast Beef Lunch Meat Packets

The Earl of Sandwich was clearly on to something with his culinary invention that remains a dietary staple today.  Basically a sandwich is a filling between two pieces of bread, quite often including some type of meat.  Commercially prepared, thin and evenly sliced lunch meats are only as far away as the nearest grocery store.   Packages often go on sale or are regularly priced at very low prices to encourage consumers to buy them.  This type of lunch meat is not without fault.  Sure, you are getting it for a very low price but like most commercially processed foods, lunch meat is laden with preservatives, food additives and sodium.  One slice of roast beef lunch meat contains as much as 300 mg of sodium in comparison to 6 oz of home cooked roast beef that contains 92 mg of sodium.  A sandwich made using two slices of roast beef lunch meat contains 600 mg of sodium in just the lunch meat without adding in the sodium content of the bread, condiments or extras.  In perspective, those two pieces of roast beef lunch meat contain almost 30% of the sodium RDA set by Health Canada.  Clearly, if you are on a sodium restricted diet lunch meat is not a food that you should consume on a regular basis.  However, the problem with commercially prepared lunch meats  is more than just sodium.  Sodium nitrate, a known carcinogen, is used as a preservative in commercially prepared lunch meats.  Expectant mothers are advised not to consume lunch or deli meats due to risk of Listeria to the feotus.  Commercially processed lunch meats may also contain a number of food additives including high fructose corn syrup.  All that aside, I have to admit not liking commercially prepared lunch meats and never have.  My work-around is simply making homemade versions of lunch meats using whole cuts of meat, home cured meats and cooked meat loafs, all thinly sliced.

slicing cooked roast beef for freezing
When I am making roast beef, I usually cook two.  It takes the same temperature and time to cook two as it does one.  Part of one roast is used for dinner with the remainder for planned left-overs.  The other roast is typically prepared for homemade lunch meat.  Commercially prepared lunch meat is typically thin sliced.  Using a chef's knife to slice cold roast beef will give nice, thin slices with a bit of practice.  A meat slicer has been on my list of kitchen wants but I haven't bought one yet, so a chef's knife it is.  I slice across the grain, trimming any fat if necessary. 

In general, I find leaner roasts work best for lunch meat slices.  I generally do not add a lot of seasoning other than garlic pepper, onion and Worchestershire sauce although sometimes I add tomato stock.  Once the roast is fully cooked, I let it cool then refrigerate until cold.  The cold meat is easier to slice thinly.

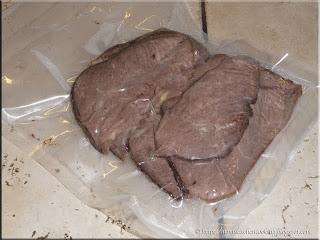
sliced roast beef vacuum sealed ready for freezer
I package the thinly sliced meat in the amount we will comfortable use within three or four days into vacuum bags then vacuum seal for freezing.  Vacuum sealing prevents freezer burn.  The packets thaw nicely in the refrigerator.  We use one sometimes two packets of homemade lunch meat a week.

This method of freezing and storing lends itself nicely to thinly sliced turkey breast, meat loaf, home cured summer sausage, home made pastrami, and wild game.  I have found the price per pound of the home made lunch meats to be generally less expensive than commercially prepared lunch meat.  The quality of the product is significantly higher though with lower sodium content, no preservatives or additives, and it tastes better.  Prep time for freezing the meat is minimal at only slicing and vacuuming time.  Overall, homemade lunch meats are a healthier, cost effective alternative to commercially prepared lunch meat!


Friday, March 29, 2013

Thoughts on New Lagostina Cookware and Whole Wheat Linguine with Roasted Italian Sauce with Mushrooms

Wednesday morning we picked up our new Lagostina Collezion Pro 12 Elite Series cookware that had finally arrived via rain cheque.  We bought the set at a fantastic 60% off.  The cookware was bought to upgrade our cookware at home while allowing us to take our existing pot set down to our vacation home.  It was also bought with the goal of reducing the number of pots and pans needed to prepare certain dishes.  Instead of searing in a fry pan then transferring to a casserole dish, these pieces will allow us to do everything in one pan, stovetop to oven.  I have to be honest with you, aside of oogling the new cookware and reorganizing the cabinet to accomodate it, I did not use any of the cookware until this morning when I started a pot of navy beans for baked beans as part of our Easter dinner tomorrow.

Lagostina Renaissance
We bought a set of Italian made Lagostina Renaissance pots about 10 years ago.  They still look great and perform quite nicely.  As far as pots go, these are a delight to use with their heavy tri-clad bases that eliminate hot spots.  The handles have faded a bit from going through the dishwasher but they still have the high polish protective coating that keeps them shiny.  The only downside to this particular set, is they cannot be used in the oven due to the handles.  Other than that, they are great performers.  I really would not have thought of replacing them had it not been for our cooking style changing a bit and wanting a better set of pots for our vacation home.

Lagostina Collezione Pro in the box
We got a rain cheque for the Lagostina Collezione Pro cookware the day after the sale flyer came out.  It took almost two weeks for them to arrive.  We chose this set because it is a multi-material set.   Cookware is currently available in aluminum, stainless steel, copper, and cast iron.  A non-stick coating is a popular edition.  If buying non-stick, I highly recommend ceramic over tefalon for safety and durability.  At one time, Pyrex had a line of glass cookware available but there were shattering issues so it was removed from the market.  You can still find it at resale shops and yard sales from time to time.  Each of the cookware materials have pros and cons.  The best cookware is actually a combination of more than one material to give even heat conduction and distribution.  As you cook more, you come to realize to realize certain cookware material gives better results than others.  For example, a good sear is best done in a hot stainless steel pan because a non-stick pan cannot be brought to a high enough temperature for a good sear.  If you are getting creative with cooking, then a matching set like the Lagostina Renaissance is not a good choice unless you don't mind buying specialty pieces.

Lagostina Collezione Pro cookware set
The Collezione Pro cookware consists of two tri-ly clad sauce pans for true even heat distribution (eg. sauces, vegetables, soups), one bi-clad sautĂ© pan with anodized exterior for even heat (eg. braising, searing, flambĂ©eing), one tri-ply copper exterior saucepan (delicate sauces, reducing liquids), one tri-ply copper exterior casserole for precise cooking control and an enamel coated cast iron dutch oven for superior heat retention (eg. soups, stews, casseroles).  All of the cookware have matching lids. All of the cookware can be used on the stovetop and in the oven.  The set comes with a lifetime replacement warranty and if a piece is replaced under that warranty, the replacement piece is also covered by the original warranty.  Of not, the guarantee does not apply to any damage resulting from abuse, misuse, negligence, accidents, improper repair, commercial use or dishwasher.  Needless to say, this cookware will not be going into the dishwasher!

My concern was missing the Dutch oven from my old set.  It will take a bit of getting used to the new cast iron dutch oven.  It is more of a conceptual thing with me because the new Dutch oven doesn't look like it can be used on the stovetop.  I've seen the celebrity chefs using this style on the stovetop and so far this morning, the beans are cooking nicely.  I'll report back on those results shortly.
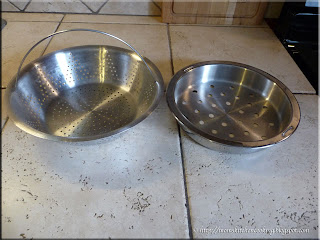
 
steamer baskets
Pots and pans do not always come with everything you want or need.  We do a lot of steaming, often have more than one steamed dish cooking at the same time so really needed steamer baskets.  Our pastaiola came with two steamer baskets, a rather deep one perfect for larger quantities of vegetables or cooking pasta then lifting out for quick draining, and a shallower one (with handle) that fit the Dutch oven of the Renaissance set perfectly.  I kept the steamer basket out of our first rice maker when it quit.  This basket fit the largest saucepan of the Renaissance set perfectly.  Neither of these steamer baskets fit the new Collezion set perfect but they are useable.  The larger one fits down into the new Dutch oven still leaving space between the water level and basket.  The smaller one fits the larger tri-ply clad stainless steel saucepan, sticking up by about a half inch but it will still work.  In the meantime, I will keep checking the resale shops for steamer baskets that might fit a bit better.

whole wheat linguine with roasted Italian sauce and mushrooms
My husband and I really enjoy our pastas!  There are so many varieties of pastas that we just never really tire of it.  We enjoy both dry pasta and fresh made pastas using the Kitchen Aid pasta attachment.  I have been working towards making some of our favourite pasta meals a bit healthier.  All of my tomato based pasta sauces are home canned or homemade from scratch.  While they are rich, full bodied and flavourful, I seldom add salt so they are low sodium.  All have a little olive oil in them which makes the anti-oxidant lycopene more accessible to the body, making them a healthy sauce.  I often top pasta dishes with chopped fresh herbs and vegetables along with a little shredded cheese.  There are now a lot of healthy choices for dried pastas.  Some are made with whole grains while others have vegetables added and some are a combination of both.

Catelli has a line of dry pastas called Healthy Harvest.  I bought a 375g box of their whole wheat linguine that gives 75% of the daily recommended whole grain servings and is a high source of fibre.  It only takes 9 minutes to cook to perfection.  I topped the pasta with home canned roasted Italian sauce with mushrooms, shredded Asiago cheese, chopped green onions and chopped tomato for a lovely, healthy and meatless dinner that was low sodium and low fat.  The entire meal took under 15 minutes to prepare! 

If you have not tried whole wheat pastas, they are well worth the slightly higher price.  I like the whole grain pastas.  They have just a bit  firmer texture than white wheat pastas.  There is a bit more texture, just a slightly noticeable grainy texture.  Whole grain pastas cook up more of a light tan than a pale creamy yellow.  Other than that, whole wheat pastas can substitute in any pasta dish.  This pasta is available in various shapes.  A multi-grain line of pastas is also available from Catelli so you are sure to find one to please.


Tuesday, March 19, 2013

Spinach Rice Vermecilli

Pasta dishes have long been family favourites, anything from cold pasta salads to pasta casseroles to pasta in soups to simply pasta topped with a sauce or sometimes just a bit of butter and garlic or salt.  Pasta dishes tend to be inexpensive, easy and quick to make, and they are kid friendly making them the perfect frugal meal choice.  Pastas certainly aren't boring either as you can find them in a wide range of shapes, different colours (red, orange, purple, green), and even whole grain.  For those needing to avoid gluten, rice based pastas are available and just as inexpensive as wheat based pastas.  However, pasta has a bad reputation for those trying to lose weight, lower their sodium intake or following a low carb diet.  The problem is not just the pasta itself, it's the sauces some which can be high in both calories and sodium combined with portion size. 

We eat a fairly low sodium diet already and we avoid commercially canned foods by home canning which eliminates preservatives and other food additives (MSG, HFCS) that can lead to high blood pressure, diabetes, ADD/ADHD, headaches, asthma and allergies. My husband was thought to be pre-diabetic had a gastrointestinal infection that hospitalized him for five days last fall.  His new doctor ruled out diabetes but recently him with high blood pressure to be controlled by medication and weight loss that will hopefully eliminate the medication.  My blood pressure has been high the last couple of doctor visits and regular testing at home still in the high range so I'm following a few tips to lower my blood pressure without having to take medication. 

In light of these problems, I decided to take a closer look at our diet.  I had already been modifying our favourite pasta dishes to make them healthier as well as getting ideas from healthy pasta recipes from various sources.  Many of the celebrity chefs have great ideas for reducing the calories and sodium in their pasta dishes.

Green pasta gets it's colour from spinach.  Up until now I had only seen wheat based pastas with spinach added.  I also have a recipe for spinach pasta for my pasta attachments.  The other day I saw spinach rice vermecilli in the grocery store so just had to buy it.  This vermecilli was such a pretty pale green that I knew would look lovely cooked. One of our friends eats gluten free so I'm trying find a few good dishes he can eat.  The neat thing about rice vermecilli is to just bring the water to a boil, turn it off and soak the vermecilli in it for 2 minutes then drain. 

I made an alfredo sauce topped with lobster pieces, shredded garlic and dill cheese, and garnished with parsley from my indoor garden.  Alfredo sauce is easy to make but if using a standard recipe thickened with flour contains gluten, and has 996 calories and 1264 mg sodium (53% of recommended daily intake).  I use grated Parmesan cheese melted in a little butter then stir in 2% milk instead of half and half or heavy cream.  I don't add any salt as the cheese has enough salt in it.  Four ounces of steamed lobster has 111 calories, 431 mg of sodium any only 1.5 g of carbs.  I love lobster!  I buy a case of 8 - 7 oz Cuban rock lobster tails along with cod filets and King Crab legs from Elite Gourmet Food Service who delivers right to you door anywhere is southern Ontario.  The problem is, I can easily eat a 7 oz lobster tail (754 mg sodium) or even a whole lobster especially with drawn butter!  I wanted the taste of lobster that night without the calories and sodium so I steamed a lobster tail, cut it into pieces and divided it into 4 portions (189 mg sodium each).  I topped the pasta with a half cup of sauce, added one portion of lobster tail then 1 tsp of shredded garlic and dill cheese for extra flavour.  The end result was a gluten free pasta dish lower in calories, sodium and carbs but still flavourful.  I'm sure our friend will enjoy it the next time he visits!


Saturday, December 15, 2012

Venison Cottage Pie

We spend most of the month of October at our vacation home in Florida.  The day after returning No Frills had a great sale on potatoes, beets, carrots and onions at $1.88 for a 10 lb bag each so of course I had to take advantage of that.  The week after returning home, my husband left for hunt camp with the guys.  He doesn't hunt himself so along with another good friend they are chief cook and bottle washer.  The guys have a lot of good old fashion fun and always share the rewards of any catch.  This year they took down a five point buck, so there was each of them brought home a little over 20 lb of venison each.

vegetables ready to steam for rustic potato topping
I've talked about making rustic potatoes in the previous posts.  Rustic potatoes have a lot of flavour and nutrition and because the skins are left on the potatoes, extra fibre.  Now, the carrots add sweetness, colour and texture but cabbage is a must.  A lot of folks turn their nose up at cabbage or only relate cabbage to coleslaw, but cooked cabbage takes on a mellow sweetness.

I like to steam the vegetables when making rustic potatoes.  In fact, I prefer steamed vegetables to those boiled.  Steamed vegetables lack the sogginess that comes with boiling vegetables.  They are higher in nutrition as well plus steaming vegetables are an eco-friendly way to cook vegetables because they use less water and energy.  Oh and if all those benefits weren't enough, they are very, very inexpensive and beyond easy to make, something every frugal cook loves to hear.

preparing the rustic potato topping
Once the vegetable mixture is tender, I pour it into the bowl of the KitchenAid stand mixer.  Then I add cream cheese, sour cream, milk or stock, a little butter, seasonings (garlic powder, onion powder, white pepper).  I don't add salt so while the dish is higher if fat, it is low sodium.  Low fat sour cream and cream cheese can be used if desired because it really is the flavour that counts in these potatoes, not the fat.  I always use 2% milk if using milk or de-fatted chicken stock depending on how the potatoes will be used.  Then I lightly whip the mixture leaving slightly lumpy but not starchy, adjusting the liquid if needed to get the consistency I want.

Rustic potatoes are ideal as a side dish and topping cottage pies or other casseroles.  They can be used as a pierogi or hot pocket filling as well.  I have also used rustic potatoes as a filling for rolled meatloaf.  A rolled meatloaf has a spiral effect.  The rustic potatoes look lovely when used this way while getting more nutrition into the finished dish.  These potatoes freeze nicely so make up a large batch then make a few dishes for the freezer for a bit of homemade convenience.

prepared venison cottage pie ready for oven
I made a venison cottage pie using the rustic potatoes.  A cottage pie is basically the same thing as a Shepard's pie except it is made with with ground meat other than lamb.  Lamb is traditionally used when making a Shepard's pie. Semantics (vs nomenclature) aside, the resulting dish consists of ground meat with some type of gravy topped with a layer of corn or mixed vegetables and a final layer of mashed potatoes then baked until warmed through and bubbly.   I added a thin layer of shredded extra old cheddar because I had a piece I wanted to use up.  Any shredded cheese can be used but is optional.

I used a covered glass casserole dish for the venison cottage pie.   At this point, I could have froze as is then popped out the frozen casserole and vacuum sealed it or instead of using a glass casserole dish, an aluminium baking tray is what I normally use for casseroles destined for the freezer.  If freezing in aluminium trays, I cover the top of the casserole with wax paper then seal tightly with aluminium foil.  Venison cottage pie can also be frozen in individual serving sizes using large muffin tins to freeze then pop out and vacuum seal.

venison cottage pie ready for serving
The venison cottage pie using up some of my Ontario produce purchase was destined for dinner that night.  Venison is an interesting meat to work with.  It is very low fat and what fat it does have has a poor mouth feel if the meat gets luke warm.  The solution to this problem is to add ground pork to ground venison in about a 1:2 ratio (ground pork:ground venison).  The abattoir that processed the venison actually did this when he ground it but most abattoirs don't.  The ground venison can also be browned in bacon fat.  Once the venison is browned, I drain it and use the drippings to make a gravy seasoned with a bit of Worcestershire sauce.  The pan can be de-glazed with red wine if desired then thickened to make a gravy using a roux but can be made gluten free by simply reducing somewhat and stirring into the meat.  If the corn is substituted with a gluten free vegetable, the venison cottage pie can easily be converted to gluten free if desired.

The venison cottage pie just out of the oven looked delicious and smelled divine   The rustic potato topping is a perfect  match for the rich flavour of the venison.  This was a good sized casserole that gave a yield of six to eight generous servings.  The cooked venison cottage pie reheats nicely.

venison cottage pie serving
Shepard's or cottage pie is usually shown plated as a square as the common restaurant presentation much the same way lasagne is plated.  However, when I serve it, the result is anything but a square.  Neither is my lasagne.  The reason being, both are served piping hot so it does not hold a firm shape.  The cream cheese in the rustic potato topping and gravy added to the meat means the cottage pie will not hold a firm shape.  At the same time, the addition of the gravy and cream cheese gives nice moist results eliminating the need for topping with separate gravy.  Homemade bread and a garden salad rounded out the meal.


Wednesday, December 05, 2012

Roasted Beets

I recently posted about a few great deals I got on Ontario produce only a day after returning home from our fall vacation.  No Frills had 10 lb bags of beets, onions, potatoes and carrots on sale for $1.88 each.  When I come across a deal like this, there is no way I am not going to take advantage of it.  I do a lot of home food preservation so it would take me very little time to home can or freeze 40 lb of produce but I have a bit of a system.  I tend to preserve 25% to 50% of this type of deal and use the rest fresh for very inexpensive, frugal meals.  This is a very frugal method for keeping your pantry and freezers well stocked while using fresh produce.

roasted beets
This meal seriously was about as cheap as you can get with the most expensive item being chicken breast baked in homemade shake and bake coating mix.  I baked a couple of potatoes, roasted a couple of beets and steamed carrots all from my frugal Ontario produce purchases.  That isn't sour cream on the potato either, it is homemade yogurt which is lower in fat and calories than sour cream.  It is butter on the steamed carrots.

Roasted beets have a deep rich flavour.  It rather surprising that you don't often see beets served at restaurants given their delicious flavour element combined with very low price.  In fact, even on the food channel, I seldom see them cooking beets.  Anyway, roasting beets is simple.  Scrub the beets well and trim only the top leaving about 2 - inches.  This prevents the beet from bleeding.  Place the whole beets in a baking dish and bake uncovered at 350°F until the beets are tender, about 45 minutes.  Remove from baking dish and let sit 5 minutes.  Trim both ends and slip the skins.  The roasted beets can be halved or sliced for serving.

This was a very simple, frugal meal yet rich in antioxidants, beta carotene and fairly high in tryptophan.  It was low fat as well even though I did add butter to my steamed carrots.  It was very low sodium.  The most important thing though, it was a delicious meal that took almost no effort.  It was low prep, toss in the oven except the carrots that went into the steamer basket.  Not bad if I don't say so myself !


Wednesday, March 07, 2012

My Version of Starvin' Guy Chicken Pie

Over the past couple of weeks while on crutches I managed to watch a few shows on Food Network Canada.  It was a bit of a treat while icing my ankle and knitting the most testy ever afghan pattern.  I pretty much gave up watching television during the day a few years ago so don't indulge as much as I used to on the food channel.  Greta and Janet Podleski of Eat, Shrink and Be Merry made a healthier version of individual chicken pot pies called Starvin' Guy Chicken Pie that sounded too yummy not to try making it.  I made my version of their dish last night for dinner.

deli bought rotisserie BBQ chicken
Greta and Janet's recipe is based on using a large rotisserie chicken.  This is one of the very few take-out foods that I consider frugal in terms of cost and time.  A whole, raw chicken here costs about $10 in the stores and they very seldom go on sale which explains why we buy chicken pieces rather than whole chickens most of the time.  Whole chicken from the farmers costs us $8.  We can buy rotisserie chicken at Sobey's and Wal-mart for $7.47 but once it gets past 5 PM, Wal-mart marks them down to $5.  Since I needed the chicken for dinner, I ended up paying full price.  It was still a good deal.

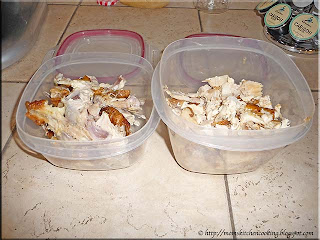
rotisserie BBQ chicken deboned
I deboned the rotisserie chicken cutting the meat into bite sized chunks and reserving the bones that would be added to my bag of frozen chicken bones for making chicken stock later.  Not only would this chicken make a delicious, low cost and healthy meal, it would also go towards making home canned chicken stock for the pantry. 

Greta and Janet's recipe did not specify how many cups of chicken, only to use a large rotisserie chicken (light and dark meat).  I ended up with about 3 cups of prepared chicken. 
swiss cheese bought from local butcher shop
We have dealt with the same local butcher shop that my husband's parents dealt with.  They have good quality meats, lunch meats and cheeses as well as a specialty Dutch foods section.  What I really like about buying there is I can buy according to my need.  Greta and Janet's recipe called for grated Swiss cheese.  Surprisingly, or not so surprisingly, the grocery store here did not have chunk Swiss cheese.  This is rather normal as it is a smaller community.  The butcher shop came to my rescue.  The cheese ended up costing $17 and I only used a piece about 1 inch wide off the end of one of the pieces for this recipe.  However, cheese doesn't go to waste here so I'm sure the rest will get used up without a problem.

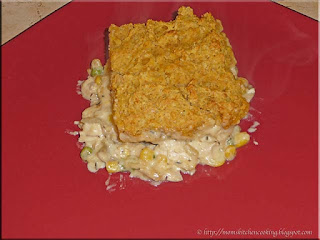
my version of starvin' guy chicken pie just out of the oven
I started tweaking the recipe to eliminate a bit of measuring and using what I had on hand.  What I did keep was their very low fat added for cooking.  Their recipe called for measuring the onion, celery and garlic but I just guestimated for my version.  None of these would add extra calories or fat so a little over their measurements wouldn't hurt.  I used homemade poultry seasoning and home canned turkey stock which lowered the price per serving.  My home canned turkey stock is defatted as well.  I would have used home canned creamed corn but am completely out so had to buy a can.  I also used a frozen mixed vegetable blend (peas, corn, carrots, green beans, Lima beans) as I didn't have just plain frozen peas and carrots on hand.  Rather than make individual chicken potpies as they did, I made one large one saving a bit of time in the process.

While I modified the filling, I kept the biscuit topping the same (refer to link to recipe above).  I will note that the biscuit topping was very much on the wet side and difficult to work with!  Here is the recipe for the filling as I changed it:


My Version of Starvin' Guy Chicken Pie Filling
recipe by: Garden Gnome

1 tsp extra virgin olive oil
1 medium onion, chopped
1 stalk celery, sliced
2 cloves garlic
8 oz package sliced mushrooms
¾ c frozen mixed vegetables
1 tsp dried thyme
¼ tsp poultry seasoning
2 c home canned turkey stock
1 c cream-style corn
1 c 2% evaporated milk
3 tbsp unbleached flour
½ c grated Swiss cheese
1 tbsp chopped fresh parsley
3 c rotisserie chicken

Heat the olive oil over medium-high heat in ceramic coated (or non-stick) fry pan.   Add onions and garlic.  Cook until onions are just turning translucent.  Add celery and mushrooms.  Cook until mushrooms are tender.  Stir in mixed vegetables, thyme and poultry seasoning.  Mix well.  Stir in stock and corn.  Let the mixture simmer for about 2 minutes.  In a separate bowl, whisk the flour and milk together then pour into the vegetable mixture.  Continue cooking and stirring until the mixture thickens.  Remove from heat.  Stir in the cheese, parsley and chicken.  Pour the mixture into an oven proof baking dish.   Cover with dough of your choice.

my version of starvin' guy chicken pie plated for serving
One of our kids warned me that Greta and Janet's recipes are very flavourful bordering on intensive.  We did not find that to be the case with this recipe and in fact we both found the recipe to be on the bland side.  The filling was a definite keeper but needs a bit of tweaking.  It could definitely use a bit of pepper, more garlic and I would use fresh lemon thyme rather than dried thyme.  In fact, Herbes de Provence would work rather nicely in this recipe.  Both of us agreed that a stronger flavoured cheese like Asiago would have added a bit more spark to the filling.  I would be tempted to use a small grated potato as the thickener in place of the flour as well. 

The biscuit topping was an utter failure!  It looked lovely but that's it.  I was expecting flavour but there really wasn't any.  Even though the dough was horrid to work with and that can be easily remedied, the flavour was very much lacking even though I used the flesh from sweet baked potatoes with that bit of extra caramelization.  It was missing the pizzaz!  Perhaps a pinch of nutmeg or even garlic or onion would brighten the flavour.   The nice thing is, their recipe gave me a healthier way to make the filling.  Even though it does need tweaking it is still an excellent starting point.


Saturday, November 06, 2010

Beef Noodle Bowl

Pasta is just one of those foods that is so versatile there is some version in most cultures.  It is inexpensive, can be easily be made from scratch with only 2 or three staples or can be purchased commercially made quite inexpensively.  Wheat based pastas are very popular but there are rice and gluten free pastas available as well.  Pasta is just one of those foods most people enjoy and there are so many ways to enjoy pasta!

3
Chow mein noodles can be found in the Asian section of most grocery stores.  Chow mein noodles are one of the key ingredients for many Chinese dishes.  They are boiled for 3 minutes then used as is for soup noodles or stir-fried for chow mein.  Not only are chow mein noodles quick cooking the ones I bought are egg free with 0% sodium and cholesterol.  In comparison to other pastas they are lower in calories at 280 cal per 1½ pieces (85 g) verses 320 cal per cup (85 g) of gemelli.  The noodles are pressed into 8 squares.  A serving size is 1½ squares per noodle bowl so a package that cost $1.29 will give 4 servings but there may be more servings when used for other dishes. 

beef noodle bowls
On one of our many visits to the Greater Toronto Area (GTA) we discovered noodle bowls at a Chinese restaurant in Chinatown.  A rice bowl is somewhat like a soup but the focus is on the noodles so there is little in the way of other ingredients.  The broth which can be beef, chicken or pork is usually clear.  The noodles are cooked separate from the broth then placed in a bowl using tongs.  The noodles should fill the bowl by at least half.  A generous spoonful of a vegetable with or without meat mixture is placed on top of the noodles then hot broth is added just enough to show slightly around the noodles.

This is an extremely inexpensive dish to make.  I used 2 beef soup bones to make the broth in the pressure cooker.  

Broth

2 lg soup bones
1 lg carrot
1 sm onion
1 stalk celery
1 clove garlic
1 bay leaf
1 tbsp olive oil
12 c water
1 tbsp worcestershire sauce
salt and pepper to taste


Heat oil in pressure cooker bottom.  Brown soup bones.  Add all ingredients except worcestershire sauce, salt and pepper.  Place lid on pressure cooker.  Bring to pressure.  Reduce heat to just maintain pressure and cook for 30 minutes.  Remove from heat and allow pressure to come to zero.  Remove bones and cut meat from them, shredding and defatting as necessary.  Strain the broth.   Return broth to pot.  Stir in worcestershire sauce, salt and pepper.


Beef Noodle Bowl


1½ squares chow mein noodles per person
2 c broccoli, cauliflower, carrot mix
meat from broth
broth
parsley flakes
green onion


Cook the chow mein noodles.  Heat the vegetable mix and meat in the broth.  Stir in two good pinches of parsley flakes.  Spoon drained noodles into bowl.  The bowl should be about half full of noodles.  Top with a couple of spoons of the vegetable and meat mixture.  Ladle hot broth over the vegetable, meat and noodles until just visible through the noodles.  Sprinkle with a few slices of green onion.  Garnish with green onion spike.


Saturday, August 21, 2010

She Said - Peach Spice Muffins

Earlier this month I announced the Second Annual He Said/She Said Contest.  The focus of this year's contest will be Company's Coming Heart-Friendly Cooking by Jean ParĂ©, one of my favourite cookbook authors.  From now until the end of the month 8 recipes will be posted from this cookbook, four of my husband's choosing and four of mine.  Ontario peaches are in season so I've been busy canning them.  I chose the Peach Spice Muffin recipe as my first She Said contest recipe.

I'm always looking for muffin recipes.  Muffins are so easy to make.  They are great for breakfast or snacks and they travel well so I make  them quite often.  Peaches added to muffins sounded like a wonderful match.  The Peach Spice Muffins have a delightful taste.  They are low fat (1.6 g) and low in sodium (153 g) with 173 calories per muffing.

I made three substitutions in this recipe.  I used unbleached flour instead of all-purpose, home canned peaches instead of store bought and vegetable oil in place of canola oil.

Peach Spice Muffins
source: Jean Paré, Company's Coming Heart-Friendly Cooking, 2003, Pp. 38

1 c all-purpose flour
¾ c whole wheat flour
1 tbsp baking powder
½ tsp ground cinnamon
½ tsp ground ginger
¼ tsp ground allspice
¾ c dark brown sugar, packed

14 oz can peach halves
1 large egg
¾ c buttermilk
⅓ c apple juice
2 tbsp canola oil

Combine the dry ingredients in a large mixing bowl.  Make a well in the centre.  Combine the last 5 ingredients in a separate mixing bowl.  Pour into the well.  Stir until just moistened without overmixing.  Fill greased muffin cup ¾ full.  Bake at 190ÂşC (375ÂşF) for 20 to 25 minutes until wooden pick inserted in centre of muffin comes out clean.  Remove from oven.  Let stand in pan 5 minutes before turning out onto wire rack to cool completely.

Yield: 12 muffins


Friday, May 07, 2010

Homemade Puff Pastry Dough

Puff pastry is the basis of croissants as well as  appetizers like filled puff pastry shells and desserts such as napoleons.  The pastry dough is comprised of dozens of layers of chilled butter rolled between sheets of pastry dough.  It is labour intensive and time consuming to make.  I have always used store bough puff pastry dough because of this.   A few days ago I was browsing through my much used Betty Crocker's Cookbook (1969) and came across an recipe for puff pastry dough that really looked easy to make without a lot of work.  The only time involved was mixing then refrigerating the dough.  I don't know how I missed this recipe other than thinking this would not be the same as real puff pastry dough,  So I decided to try it and compare to store bought puff pastry dough.

homemade puff pastry dough
I honestly was quite doubtful about this dough as to whether it would give similar results to store bought puff pastry dough.  The dough was quite easy to make using the stand mixer but could easily have been made by hand.  Once the dough was made I gathered it into an oblong log shape and wrapped in wax paper for the refrigerator (1).  The instructions said to divide in half but I didn't.

The following morning I cut about a quarter of the dough from the dough log to run a test batch.  The dough was surprisingly  easy to work with.  I rolled the dough to about ⅟16 -inch thick (2) and cut with a mini cookie cutter.  I re-wrapped the scraps and baked the prepared tray (3) as per the recipe instructions.

Streamlined Puff Pastry Dough
source:  Betty Crocker's Cookbook (1969)

1 c butter
1½ c unbleached flour
½c sour cream

Cut the butter into the flour until thoroughly mixed.  Stir in sour cream and blend well.  Divide the dough in half.  Wrap each half.  Chill at least 8 hours.  Roll dough and cut as desired.  Bake at 180ÂşC (350ÂşF) 20 minutes or until golden brown.

homemade puff pastry baked
Anytime I am making a homemade version of a store bought food item, I am rather critical.  The homemade version is judged based on how closely it resembles the store bought version, how it tastes and the cost.  In this case the homemade version of puff pastry performed quite nicely!

The homemade version took less than 5 minutes to mix and form into a log for refrigeration.    Store bought puff pastry contains enriched wheat flour, water, unsalted butter, vegetable oils (canola, modified palm and palm kernel), salt.  I liked that only 3 common ingredients were used for the homemade version greatly reducing additional fats and salt.  Rolling the dough out was not difficult or time consuming.  The dough despite being in the refrigerator for over 8 hours was still a bit sticky but was easy to handle on a well floured board.    The pastry did puff and brown much the same as store bought if not a bit better.  The baked results were light, flaky and had a wonderful flavour.  I was extremely impressed!

The homemade puff pastry passed the taste test and excelled at being slightly better than the store version so the next test was the cost.  I usually pay $3.99 for PC brand butter puff pastry for 450 g (.99 lb).  The homemade version made just a little over a pound of dough so is quite comparable.  The homemade version cost 12¢ for flour, $1.15 for butter and 25¢ for the sour cream for a grand total of $1.52.  This is a savings of $2.47 that could be increased if butter and sour cream are on sale.  This is one more product I will not buy store bought again!


Wednesday, March 17, 2010

Irish Soda Bread (1)

Happy St. Patrick's Day!

Many in North America celebrate St. Patrick's Day where the two traditional meals are Irish Stew or corned beef with cabbage usually served with some type of bread and washed down with green beer. My husband and I tend to eat out that night savouring a bit of American Irish cuisine combining celebrating St. Patrick's Day with another social event.

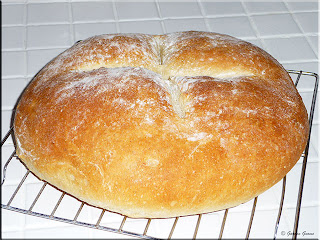
Irish soda breadIrish Soda Bread

It just seems natural to serve Irish Soda bread with the St. Patrick's Day meal. Irish Soda bread is an Irish staple with the traditional version made without yeast. The rise comes from the interaction of the buttermilk and baking soda. This recipe originally written for a bread machine uses yeast to ensure a good rise but still has all the flavour of a traditional Irish Soda bread. I've converted the recipe to use a stand mixer. While this bread does have sodium in the form of baking soda (sodium bicarbonate) it is considerably less than most loaves of bread pushing this bread into the low sodium category. The result is a lovely bread to serve with the meal as well as make corned beef sandwiches for the following day's lunch.

Irish Soda Bread
source: Garden Gnome

1 c buttermilk
1 tbsp butter
1 tbsp honey
¼ tsp baking soda
¼ c rolled oats
2¼c unbleached flour
1 tsp instant yeast

Place dry ingredients in stand mixer bowl. Mix to blend. Measure buttermilk in measuring cup then add in the butter and honey. With stand mixer on setting 1 (mix) slowly pour in the wet ingredients. Mix until dough cleans the side of the bowl. Set to setting 3 for kneading. Knead until smooth and elastic. Remove dough hook. Remove dough, lightly oil bowl then return dough to bowl for proofing until doubled. Punch down and form into loaf on Silpat lined baking sheet. Allow to rise until double in size. Cross-hatch if desired. Bake at 200ÂşC/400ÂşF until golden brown and loaf sounds hollow when tapped.


Tuesday, December 29, 2009

Vegetable Beef and Barley Soup

During the winter months homemade soup is my version of fast food. I can make a lovely, nutritious soup from start to finish completely from the soup bones up in about 50 minutes using one of my pressure cookers and in under 20 minutes if I start with homemade and home canned stock or soup base. Served with homemade bread or biscuits any homemade soup turns into a warm comfort meal on a cold winter's night!

vegetable beef and barley soupVegetable Beef & Barley Soup

As I've previously mentioned many of the meals I make are inspired by an ingredient that caught my eye on one of the many trips I make into the pantry each day. A couple of days I beef soup bones just beckoned to be made into a hearty soup. When I make soup I tend to go with ingredients that inspire me at that time and barley was it for this soup. The vast majority of the non-cream based soups I make are both low fat and low sodium.

I will warn you now that I didn't measure anything for this soup. I started with 2 lg beef soup bones, a stalk of celery, a carrot, small onion and enough water to fill the 4 qt pressure canner ⅔ full. I brought the pressure canner to pressure then reduced the temp just low enough to maintain pressure and let cook 20 minutes. While the stock was cooking, I brought barley and a jar of stewed tomatoes from the pantry then prepared the fresh vegetables (red onion, carrots, mushrooms, tomato) about a handful each. When the stock was finished, I lowered the pressure then removed the bones and cooked vegetables. Beef soup bones have very little fat, usually a nice amount of meat and connective tissue. After pressure cooking the meat will basically fall the bone so I just cut it into bite sized pieces and added it back into the stock. I then added the fresh vegetables, about a cup of barley, a bit of tomato liquid from the stewed tomatoes, a couple of generous spoons of stewed tomatoes, dash of MontrĂ©al Steak Seasoning and a couple of splashes of Worcestershire sauce. Then I put the lid back on the pot, brought the pressure cooker to pressure and let cook for 15 minutes. Once the time was up I depressurized the pressure cooker then ladled the soup into bowls and garnished with green onion.


Wednesday, December 23, 2009

Gingery Maple Thins

Traditionally I did the bulk of my cookie baking the last day the kids were in school before Christmas. I found this greatly increased my yield as more dough was made into cookies rather than getting popped into the mouths of helping elves. My husband was usually out shopping that day so it meant less taste testing if you know what I mean. Times have changed but I still like the house to myself when baking cookies. The Tuesday of this Christmas week I went a bit wild with cookies making 12½ dozen peanut butter cookies, 7 dozen shortbread cookies and a new cookie called gingery maple thins. The new recipe only made 22 cookies but with a bit of tweaking this will become a holiday favourite.

crystalized gingerCrystalized Ginger

There's just something warm and comforting about the aromatic smell of ginger! It beckons Ginger just goes hand in hand with the holiday season. But ginger is not just a pretty face. Ginger is a wonderful natural remedy for nausea. This recipe called for crystalized ginger.

Crystalized ginger is peeled ginger root that has been briefly cooked in a light syrup then dried. The dried ginger is then lightly coated in sugar and stored until use. It can be used as is for medicinal or culinary purposed. Pictured to the left is whole crystalized ginger pieces. The recipe called for minced crystalized ginger so I simply chopped the pieces very fine (arrow).

gingery maple thinsGingery Maple Thins

Glancing through the newest edition of Cook's Country I noticed the Holiday Cookie Contest with a runner-up entry by Diane Nemitz of Ludington, Michigan. Her cookie recipe definitely said holiday cookies to me so I decided to try it. What is nice about this recipe is there is no salt added. I have to tell you this dough is quite sticky to work with so I modified the method to chill the dough slightly similar to when I make peanut butter cookies. Chilling serves two purposes. First it makes it easier to work with the dough and second it helps control the spread of the cookie.

The recipe said to make the dough balls 1½-inch which I did but that really is too big. The next time I will reduce the dough size to 1-inch. Aside of that the cookies looked quite lovely with a nice golden colour, a soft, chewy texture and pleasant gingery flavour. I think they are going to be a huge hit!

Gingery Maple Thins
source: Cook's Country, December/January 2010. Pp. 5

1½ c unbleached flour
1 tsp baking soda
½ c softened butter
½ c packed brown sugar
1 large egg
¼c plus 1 tsp 100% pure maple syrup
3 tbsp minced crystalized ginger

¼ c granulated sugar

Cream the sugar and butter. Mix in the egg and maple syrup Mix the dry ingredients in a separate bowl. Stir the crystalized ginger into the sugar mixture then mix in the dry ingredients blending well. Chill dough 1 hour. Roll into balls then roll the balls into granulated sugar. Place balls on Silpat® lined cookie sheet. Flatten with bottom of glass. Bake at 160ÂşC/325ÂşF convection until golden brown. Remove from oven and allow to cool 5 minutes on the cookie sheet before transferring to a wire rack to complete cooling.


Sunday, December 06, 2009

Tuna Croquettes

Food Network Canada is on most days here. I use the shows to get various ideas and learn more about different foods. Alton Brown of Good Eats is one of my favourites because his shows are all about learning all those interesting facts that make being a foodie fun. A few days ago I watched one of his shows that had a segment on tuna. It was very interesting!

Did you know if tuna is labeled as light or chunky is is skip tuna? If it is labeled as white or solid it is Albacore tuna which is a much larger fish than skip tuna. Solid tuna is exactly that, a solid piece of tuna cut from the fish. It is also interesting that james Beard said tuna 'is the one food that tastes better canned". The reason for this is apparent to anyone who home cans and that is because of the high processing time for fish so canned tuna is already well cooked when you open the can.

tuna croquetteTuna Croquettes

During this segment Alton made tuna croquette. I immediately thought that this could be made into a very easy low fat, low sodium and budget stretching meal. I modified his recipe and method a little then served the tuna croquettes with steamed spinach and carrots topped with a little butter and garnished with sesame seeds and a lemon twist.

The meal was good. We were both surprised at the change of flavour in tuna when it is hot. Thinking back this is the first time we have had hot tuna. So if you haven't had hot tuna before be warned it does have a different flavour, not unpleasant just different. There is a fair amount of room for tweaking this recipe.

Tuna Croquettes
modified from recipe courtesy Alton Brown, 2008

12 oz light tuna, drained well
1 green onions, chopped fine
2 teaspoons Dijon mustard
2 large eggs, beaten
1 tsp freshly squeezed lemon juice
¼ tsp sea salt
pinch freshly ground black pepper
¾ cup panko bread crumbs, divided
olive oil

Place ingredients except for last 2 in mixing bowl. Stir in 1/4 cup of the bread crumb. Stir to combine. Divide the mixture into 8 rounds. Set aside on a parchment lined pan. Allow to rest for 15 minutes. Spoon half of the remaining panko over the rounds and pat in. Flip the rounds and repeat to coat all sides. Heat enough olive oil to cover the bottom of a 12-inch sauté pan over medium heat until shimmering. Add the croquettes. Cook 3 minutes on each side or until golden brown. Drain on paper towels. Plate.

Note: Serve with tartar sauce and lemon wedge for an appetizer or vegetable sides as an entré.


Sunday, October 25, 2009

Slow Cooker Pork Loin Chops

The weather has turned extremely ugly here so that means I'm going into hibernation mode. Well not hibernation as in sleeping the entire winter but finding any excuse as to avoid going outside. That translates into filling, homemade comfort meals using meats from the freezer and ingredients from the pantry. Quite often the evening meal is decided on the spur of the moment starting with an idea I got from something I saw in the pantry or freezers. Now this is actually a good thing in many respects because stored foods are getting used up.

pork loin chops thawingPork Loin Chops

When we took the turkey our of the freezer we moved a few packages of meat to the top of the freezer to get used up. This is really important to help rotate the food in the freezer and prevent foods from staying in the freezer too long. One of the packages of meat was pork loin chops. Aren't they gorgeous? I removed the package the night before to start thawing in the refrigerator which is one of the safest ways of thawing meats. Unlike some I very seldom use the microwave oven for defrosting meats. The following morning I moved the pork loin chops to the counter to finish thawing before browning. By then I had decided to take the easy cooking method of using the slow cooker. Now the slow cooker is not one of my favourite appliances but it's so grey outside that my mood change that normally happens in November has already started.

browning the pork loin chopBrowning

One of the things I really dislike about the slow cooker is it does not brown meats and there is no way to brown meats using a slow cooker. Browning meat aka searing involves using a hot pan just to seal in the juices. My preferred fry pan for this is a stainless steel with copper core bottom but for this dish I reached for a non-stick fry pan. The reason being is I did not want to add any fat to this dish as it would be heavy enough.

Browning serves a couple of purposes. First it seals in the juices keeping the meat tender. Second browning adds to both the flavour and colour of the final dish. Browning give a richness and depth to the final dish that can't be achieved by any other method. I browned the pork loin chops before putting them in the slow cooker.

slow cooker pork loin chopsThe Meal

Despite being rich and creamy looking and tasting this meal is actually low fat. I used 4 tins of low sodium condensed mushroom soup mixed with 2 c of skim milk. The pork loin chops where well trimmed too. Then I added about 8 small potatoes cubes, some niblet corn (home froze) and home canned mushrooms. Using a slow cooker for this dish means the sauce doesn't thicken and darken like it does on the stovetop. I thickened the sauce using instant potatoes, stirring in 1 tbsp at a time until I got the right consistency for the sauce. The end result was a very rich yet low fat, low sodium comfort meal perfect for a cold, damp fall evening meal.


Sunday, June 07, 2009

Rhubarb Pie Filling & Rhubarb Pie

I grew up with a rhubarb patch and have had one at every house we've owned. Rhubarb grows almost like a weed once it is established. We moved here almost 2 years ago just as the rhubarb patch was starting to produce nicely in our former garden and too late to put in a patch that year. Last year we were still in the process of ripping out a lot of the overgrowth so we didn't plant rhubarb although in hindsight we should have. So our rhubarb patch did not get planted until this spring which means if we are lucky it might be big enough to get a pie or two out of next year. Instead we have been getting rhubarb from family, friends and neighbours. That means I'm being very frugal in using some fresh rhubarb and preserving rhubarb for later use.

rhubarb pie fillingRhubarb Pie Filling

My husband loves rhubarb pie so the primary use for rhubarb is making pies. Normally I either freeze or can stewed rhubarb for later use. This year I decided to make a ready to use rhubarb pie filling. The problem was I couldn't find a plain rhubarb pie filling for canning so I relied on my canning knowledge to create one. The end result was a tasty, gorgeous looking, ready to use pie filling testing in at pH 2.9 suitable for boiling water bath canning. If you make this pie filling do not substitute the Clear Jel® with flour or corn starch. Clear Jel® is currently the only USDA approved thickener for canning.

Rhubarb Pie Filling

9½ c prepared rhubarb
2 c water

2 c organic sugar
⅝ c ClearJel®
1 c water

4 tbsp lemon juice

Wash rhubarb then cut into ¾ inch pieces. Place in stock pot. Pour the 2 c of water over the rhubarb. Bring to a boil. Remove from heat. Drain the rhubarb reserving the liquid. Set hot rhubarb aside. Combine sugar, Clear Gel®, 1 c water and reserve liquid in sauce pan. Heat on medium high while whisking until mixture thickens. Remove from heat. Stir in lemon juice. Stir the thickened mixture into the hot rhubarb pieces. Ladle into hot jars leaving 1-inch headspace. Remove air bubbles. Wipe rims. Adjust two piece lids. Process in boiling water bath canner for 15 minutes.

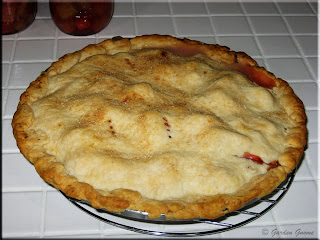
rhubarb pieRhubarb Pie

My husband would have been very upset had I not made him a rhubarb pie. I have made the same rhubarb pie from my aged Betty Crocker cookbook that includes my favourite pie pastry  for as long as I've had the cookbook. This time I made a couple of changes. First and this has always been a problem with my pies is I changed the thickener. The recipe calls for flour but I substituted Clear Jel®. This is a modified corn starch that tolerates high heat without breaking down and doesn't thicken until the pie starts cooling down. By the time the pie had cooled enough to slice the filling had nicely thickened unlike my normal runny results.

Rhubarb Pie

pastry for 10-inch two crust pie
2 c sugar
½ c Clear Jel®
1 tbsp lemon juice
5 c fresh cut rhubarb
3 tbsp butter
organic sugar

Heat oven to 219ÂşC (425ÂşF). Prepare pastry. Wash and cut rhubarb into ¾-inch pieces. Mix Clear Jel® and sugar together then mix with rhubarb. Pour the rhubarb mixture into the prepared pie shell. Drizzle the lemon juice on top. Add the butter in small pieces over the rhubarb. Top with pastry top. Crimp the edges. Poke a few holes in the pastry top with a fork. Sprinkle organic sugar on top of the pastry top. Cover edges with aluminum foil to prevent excessive browning. Remove during the last 15 minutes of baking. Bake 40 to 50 minutes or until crust is brown and juice begins to bubble through the crust.


Wednesday, February 20, 2008

Hearty Bean Soup

Quite often an idea for a soup comes to me just out of the blue or it is triggered by opportunity. Out comes my kitchen journal so I can write down what I did as I develop the recipe. It's critical to taste along the way to get just the right flavour. Some of my best soup recipes have been created in this manner. We knew our recent beef purchase would put a huge strain on our freezers so before we picked up the meat, I pulled a few things out of the freezer to use up. One of the packages was two large pork hocks so I put them into the refrigerator to thaw with making soup in mind. The immediate problem with my plan was there were events scheduled for almost every day of the up coming week meaning a large pot of soup likely wouldn't get used up. I decided to work around our commitments so the soup was started on Monday and canned late last night (Tuesday).

Hearty Bean Soup

This hearty bean soup is packed full of flavour. No salt is added as it would prevent the beans from softening during the canning process. It is also low fat because the stock is defatted before making the soup. The soup was made in three stages before canning. The yield was 12 - 500 ml (pint) jars of soup and enough left over for a small bowl of soup for the cook.

Hearty Bean Soup

900 g (2 lb) navy beans
2 pork hocks, defatted with stock
1 bay leaf
1 medium onion, chopped
4 lg carrots, peeled and cubed
2 stalks celery, diced
1½ c niblet corn
¼ tsp liquid smoke

Step 1: Place pork hocks in large pot and pour enough water over to cover. Bring to a boil. Add one unpeeled onion quartered, 2 unpeeled carrots cut into large chunks, celery heart with leaves. Reduce to simmer and continue cooking until the pork is tender. Remove the pork hocks. Trim skin from meat. Remove meat from bone and pull into smaller pieces. Strain the stock. Cool completely and skim off any fat. Return meat to stock.

Step 2: Rinse the beans. Place in large stock pot. Cover with water to about 3 inches over beans. Bring the beans to a boil. Boil 15 minutes. Remove from heat and place lid on the pot. Let sit 4 to 5 hours. [This is called a quick soak and can be used to cook any beans. After the quick soak, cook the beans as normal.] Do not drain the remaining liquid.

Step 3: Prepare the vegetables. Bring the beans to a boil. Pour in the pork and stock. Add the vegetables. Boil about 10 minutes. Stir in the liquid smoke. Remove from heat. The soup is now ready for canning. Bring 1 quart of water to a boil and reserve. Extra liquid may be needed for canning. [If you do not intend on canning the soup reduce to a simmer and continue cooking until beans are soft and soup is slightly thickened.]

Canning: Ladle hot bean mixture into hot, sterilized jars until they are about half full*. Ladle the soup liquid over the bean mixture leaving 1 inch headspace. Remove air bubbles. Wipe rims. Adjust two piece lids. Pressure can at 10 lb pressure 90 minutes for quarts or 75 minutes for pints at altitudes to 1,000 feet above sea level. For higher altitudes follow the altitude adjust chart here.

*Note: It is important to only fill the jars half full with the bean mixture as the beans are not fully cooked. They will absorb liquid during the canning process and will expand so the jars will be full when finished. Filling the jars more than half full of the bean mixture may result in seal failure.

To Serve: Pour the soup into a sauce pan. The soup will be thick but still have some liquid. Add enough water to get desired consistency (optional). Heat and enjoy :)


Wednesday, August 15, 2007

On the Grill - Chicken with Grilled Vegetables

The nice thing about grilling is there is very little clean-up. Utilizing the grill to prepare an entire meal just makes good sense especially during the hot season when heating the kitchen is a concern. Grilled chicken with Herbs de Provence has become this summer's favourite so I decided to grill vegetables using a touch of this wonderful herb blend. Dinner was to serve three so I planned accordingly to have enough yet not have a lot of left-overs.

On the Grill

Timing is everything when cooking a complete meal on the grill. It takes a little more attention to using direct and indirect heat. We have a Fiesta Maximus 400 natural gas grill with four burners (rotisserie, left, right, side). I used the left and right burners for this meal adjusting the levels as needed and using positioning for heat control. The most important factor was the timing as when each item went onto the grill so everything would be cooked at the same time.

The potatoes went on the grill first on indirect heat on upper grate. These were simply roasted without seasoning but rather soaking up the flavours in the smoke from the other food cooking. About ten minutes later I put the marinated chicken legs with backs attached onto direct heat. Flare-ups were inevitable because of the natural fat in the chicken and additional olive oil in the marinade. These were controlled by spritzing with beer (never use water if you can use a liquid that will add flavour; this applies to all cooking), leaving the lid open and moving the chicken frequently. While the chicken and potatoes were cooking I prepared the vegetables (recipes follow). The zucchini went on the grill after the chicken had been grilling for about 35 minutes, followed about 5 minutes later for the onions and finally the tomatoes on indirect heat with the lid closed to melt the cheese. I decided to present this meal on a platter as explained below.

Grilled Zucchini with Herbs de Provence

1 medium sized zucchini
1 tbsp Herbs de Provence
1/2 c extra light olive oil


Wash and dry the zucchini. Slice on a diagonal in 3/4-inch slices. Place the zucchini, herbs and olive oil into a sealable container. Invert several times to mix then place in refrigerator until ready to grill. Grill on direct heat turning only when the first side is nicely grilled. Remove from grill and serve.

Grilled Tomatoes with Fontina Cheese

1 large organic heirloom tomato
1 tsp Herbs de Provence
1/4 tsp sea salt
1/4 tsp fresh ground pepper
1 quarter inch thick slice Swedish Fontina cheese, enough to cover each tomato slice
drizzle of olive oil
tin foil formed into shallow box

To form tin foil box: Fold one end of the tin foil over about 1/2 inch and repeat. Do the same thing with the opposite end then repeat with the remaining two ends. Gently lift up the corners forming a shallow box.

Method: Place the box onto a sturdy cooling rack. Drizzle a little olive oil onto the tin foil box. Place the sliced tomatoes onto the oil then turn. Lightly sprinkle each slice with the herbs, salt and pepper. Top each tomato slice with a piece of cheese. Carefully slide the box from the rack onto the upper grate of the grill. Cook on indirect heat with the lid down until cheese is melted.

Grilled Onions

1 large vidalia onion (or spanish)
olive oil

Cut the onion into 1/4-inch slices. Do not separate the rings. Lightly brush one side with olive oil. Place onto direct heat using a heat resistant flipper. Turn when the bottom side is nicely grilled with signs of carmelization by carefully slipping the flipper under and holding the slice steady with your other hand. Carefully move the slices to indirect heat when grilled until ready to serve.

Presentation

After taking a fair amount of effort to ensure all the meal components were ready at the same time, I decided to use a platter presentation. I would have liked fresh basil to use as a garnish but overall my husband and son were quite impressed. The meal got rave reviews from some of my most vocal critics! My husband even ate a tomato slice which is quite surprising as he only likes warm tomatoes in sauces. All in all I was quite pleased with the results. I will be doing a bit of tweaking but this meal will be a keeper.


Thursday, July 19, 2007

Kitchen Update, Grilled Chicken and Camp Style Potatoes

Recipes, pictures and method follow the kitchen update!

It took us little time to choose a complimentary paint colour to match the abundance of wood and our navy blue leather couch set in the family room. We also have a large fieldstone fireplace with gas fireplace insert so the colour had to tie that in as well. The kitchen opens into the family room with a breakfast bar separating the two. The bottom third of both rooms is tongue and groove wood as are both ceilings finished in a medium dark mahogany. The kitchen cabinets and all trim is the same medium dark mahogany. The wood finish is warm so we decided on cool overtones for the paint that would be replacing the wallpaper.

Paint & Countertop Colours

Our daughter helped me choose the colour and I couldn't be happier. She picked several samples to show me as I was shopping in another section of Home Depot. This chip sample appealed to me immediately. The scan is not the best but this will give you an idea. The only painted wall in the kitchen has a patio door and little area. It along with the family room walls have been painted in Country Mist. The kitchen window, patio door and family room window are about one foot deep and framed in wood. I painted the depth with Tide Pools to create a shadow box effect. The kitchen window and patio door have an additional trimming towards the outside. I am going to paint this trim in Marina Isle. The same three colours will be repeated in the guest bathroom off the family room but I haven't decided how yet.

At the same time, my daughter picked out several countertop samples. We have been contemplating these. My son took one look and pulled one sample that works wonderfully with the paint chip and cabinets. The back splash is tentatively to be tiled in a aqua glass tile that is in between Country Mist and Tide Pools. My kitchen will no longer be pink so watch for an updated look for my blog to reflect that once life slows down a bit.

Grilled Chicken Medallions

Chicken medallions are ideal for grilling. They can be bought pre-made or you can make them yourself using boneless, skinless chicken. Form them into a round, wrap with bacon and secure with a toothpick. The bacon adds flavour and keeps the chicken moist so seasoning is not needed. If desired add the seasoning of your choice but do so lightly. My suggestions for seasoning of chicken medallions is Old Bay Seasoning or a simple seasoning salt but herb combinations would work as well so experiment until you get one you like.

Prior to grilling the medallions will be about four inches in diameter. They shrink in diameter but plump up. Don't let the size fool you as these are quite filling. Grill the medallions on a medium hot until the juices from the chicken run clear and the bacon is cooked to medium with crispy spots on the edges.


Camp Style Potatoes

I served camp style potatoes with the chicken medallions. These potatoes are a family favourite from our camping days easily adapted to the home grill. This is more of a method of cooking the potatoes that can easily be adapted for more servings. Use a no salt seasoning for a low sodium side dish.

Camp Style Potatoes

4 - 6 large potatoes
1/2 Spanish or Vidalia onion
dash onion garlic seasoning
dash Montreal Steak seasoning (optional)
extra virgin olive oil
1-2 tsp butter
foil pan (optional)
tin foil

Wash potatoes and cut into bite size pieces. Chop potatoes. Continue in one of the two following methods:
(1) Drizzle olive oil into foil pan. Mix the vegetables and pour into foil pan. Sprinkle with seasoning. Cut butter into 1/4 tsp chunks. Put butter over the vegetables. Seal the foil pan tightly with tin foil. Continue with grilling instructions.
(2) Lay a sheet of tin foil about 18-24 inches long on the counter. Drizzle olive oil in the centre, keeping it away from all edges. Pour the vegetables into the centre, season and add butter. Pull the two short ends of the foil together and fold several times to form a tight seam but not enough to push the vegetables out of the newly formed short ends. Repeat the folds for both of the new short ends forming a tightly sealed foil packet.

To grill: Place the potato packet on the grill on indirect heat. Grill for approximately 35 minutes. Use caution when opening the packet to prevent steam burns.

Grilled Herbed Chicken

Grilled chicken is one of our summer favourites. Instead of marinating the boneless, skinless chicken breasts before grilling I use a mixture of butter and Herbs de Provence to brush on the chicken as it grilled. This reduced the prep time yet resulted in a moist, flavourful piece of chicken. I served the chicken with steamed spinach and Calrose rice cooked in homecanned chicken stock in the rice cooker. Calrose rice is a medium grain rice that cooks up nicely without being sticky. This meal is low sodium and low fat even if you are like me who likes just a little unsalted butter to enhance the flavour of most cooked vegetables and rice. Butter has 3 - 4 grams of fat per teaspoon depending on the brand so stay at one teaspoon or less.