My photo
Ontario, Canada
I am a wife, mother and grandma who enjoys the many aspects of homemaking. A variety of interests and hobbies combined with travel keep me active. They reflect the importance of family, friends, home and good food.
Cook ingredients that you are used to cooking by other techniques, such as fish, chicken, or hamburgers. In other words be comfortable with the ingredients you are using.
--Bobby Flay

For Your Information

Please watch this area for important information like updates, food recalls, polls, contests, coupons, and freebies.
  • [March 19, 2020] - Effective Mar 17, this blog will no longer accept advertising. The reason is very simple. If I like a product, I will promote it without compensation. If I don't like a product, I will have no problem saying so.
  • [March 17, 2020] - A return to blogging! Stay tuned for new tips, resources and all things food related.
  • [February 1, 2016] - An interesting report on why you should always choose organic tea verses non-organic: Toxic Tea (pdf format)
  • Sticky Post - Warning: 4ever Recap reusable canning lids. The reports are growing daily of these lids losing their seal during storage. Some have lost their entire season's worth of canning to these seal failures! [Update: 4ever Recap appears to be out of business.]

Popular Posts

Showing posts with label candy. Show all posts

Friday, December 06, 2013

ROLO Pretzel Delight

As promised, today is the first post of a series of posts featuring foodie related topics for the holidays.  Every parent has been there where their adorable little munchkin tells them at the last minute they need a treat for their class party the next morning.  It's nice to have an easy, no muss recipe to fall back on for just such times.  When I think of an easy, no muss recipe it usually means something I can put together quite quickly with few ingredients yet tasty results.

I was browsing through the Walgreens flyer a couple of days ago where I discovered this easy, peasy sure to please recipe for ROLO Pretzel Delight just perfect for the holiday season.  The recipe actually comes from Hershey's on the rolo chey caramels in milk chocolate package.  These delicious treats are made with only three ingredients and take about five minutes total to assemble.  The combination of sweet and salty is sure to please! 

The recipe is quite flexible as far as quantity.  I made 24 (some not pictured) so needed 24 each tiny pretzels, ROLO candies, and pecan halves.  I only use about half a 240 g (8.5 oz) bag of rolo caramels!  These treats are so easy to make and so tasty.  That earns them a spot on my quick, tried and true recipes.   

Rolo Pretzel Delight
source:  The Hersheys Company, Celebrate with Hershey , 2013

small pretzels
pecan halves
ROLO chewy caramels in milk chocolate

Heat oven to 350°F.  Line cookie sheet with parchment paper or silpat.   Place one pretzel for each pretzel treat desired on the prepared sheet.  Top each pretzel with one unwrapped ROLO chewy caramel in milk chocolate.  Bake 3 to 5 minutes or until caramel piece begins to soften*, but not melt.  Remove from the oven.   Top each softened ROLO with pecan half.  Cool completely**.

*I kept a very close eye on the caramels that really don't change drastically as they soften.  I removed from the oven just at the 3 minute mark.

**The treats stay sticky on the bottom so need to cool completely for serving.  I let them cool on the parchment paper that was carefully transferred from the baking sheet to a cooling rack.  Once the treats were fully cooled, I placed them on a serving plate.


Sunday, March 31, 2013

Easter Chocolate

Happy Easter!

Millions world wide are celebrating the Easter weekend.  Along with religious celebrations, certain practices have become widely accepted as Easter traditions.  These include Easter parades, Easter bonnets, Easter lilies, Easter eggs and of course, the Easter bunny.  The Easter weekend signifies the beginning of spring with new life in many areas.  The weather is usually warmer and spring-like.  Spring flower bulbs are poking their way through the ground which explains why some of the traditions like eggs (new life) were adopted.  Why chocolate came to be associated with Easter eggs is only speculation.  At any rate, chocolate eggs are a long standing Easter tradition.

Kinder Surprise chocolate egg
Children across Canada anxiously await Easter in the hopes of getting a Kinder Surprise milk chocolate egg in their Easter basket.  Kinder eggs began production by the Italian company, Ferrero in 1973.  The milk chocolate egg contains a plastic capsule which houses a small toy.  The plastic capsule is usually yellow to represent the yolk but is also manufactured in other colours.  Kinder Surprise are sold world wide with the exception of the United States.  The FDA will not allow the sale because the egg contains a non-nutritive component (the toy) but many say it is because the toy itself is viewed as a choking hazard.  At any rate, Kinder Surprise eggs are considered illegal countraband in the US subject to seizure and/or a fine of $300.  This is only one example of a particular food item not allowed to be brought into the US.  This is why it is important for anyone entering the US to know what foods they can and cannot bring into that country.

socially responsible organic chocolate
Food purchases more so today than years gone by have social and ethical responsibility components.  Consumers have the option to make a difference simply through their purchase choices.  This year I bought the little ones organic, fair trade milk chocolate Easter bunnies produced by Taste of Camino.  Proceeds from this milk chocolate contributes to the building of vibrant sustainable communities throughout the Caribbean, Central America and South America.  I bought our adult kids organic 70% cocoa dark chocolate bars.  Ten percent of the profit of those chocolate bars is donated to help support endangered species, habitat and humanity.  Dark chocolate is good for your heart too!

I have not seen organic chocolate in the grocery store or Walmart here but I shop regularly at the local health food store.  The price of the chocolate for 3 bunnies and 6 chocolate bars was $32 which sounds expensive on the surface.  However, I felt it was worth the price since both were organic with proceeds supporting good causes.  I discovered the chocolate bars a couple of months ago.  They are delicious!  Dark chocolate is something to savor, like a fine wine.  Let the chocolate slowly melt on your tongue while enjoying the heavenly taste and aroma.  One bar will last 8 days because you only enjoy a square a day.  I also keep a bar on hand to shave as a dessert topping or for adding a special touch to coffee. 


Tuesday, April 05, 2011

Old Fashioned Sponge Toffee

Each year just before Christmas my Mom made a batch of old fashioned pull toffee.  I was able to help with the pulling once the candy cooled enough for my small hands to handle.  It's the only candy my Mom ever made.  I recall she tried making fudge a few times but it never worked so she gave up.  I started candy making while still at home and have continued to make different candies over the years.  Most of the candy I make is for special occasions  and gift giving. 

Candy making is a lot of fun as you can easily make candies you can't buy in the grocery stores.  Homemade candies are inexpensive to make.  They are sure to delight!  Aside from working with hot sugar that can give a very nasty burn, the biggest problem in candy making is the weather.  It is best to make candy on a dry, low humidity day as high humidity will cause the candy to fail.  The reason being the sugar absorbs the moisture from the air which causes the candy to set up improperly.  Other than those two factors, candy making is quite easy to do.

old fashioned sponge toffee
When I was growing up we had two tiny variety stores in our very small town of less than 2,000 people.  My friends and I knew who made all the great homemade candy but the variety stores had candy that wasn't homemade.  One of my favourites was old fashioned sponge toffee.  This crispy delight was meant to be broke into uneven pieces to be enjoyed.  If I was careless and didn't wrap the left over chunk well, by next morning it would be nothing more than a thick, gooey syrup.

Old fashioned sponge toffee gets its name from its appearance that resembles a sponge.  The candy is hard and brittle yet melts in your mouth.  I have seen sponge toffee presented with melted chocolate for dipping but it is delightfully yummy without the chocolate!

Old Fashioned Sponge Toffee

1 c granulated sugar
1 c corn syrup
1 tbsp white vinegar
1 tbsp baking soda

Combine sugar, corn syrup and white vinegar in a large sauce pan.  Stir over medium heat until sugar is dissolved then continue to cook on medium to 300ºF (hard crack stage).  Remove from heat and quickly stir in the baking soda.  Pour the frothy mixture into a buttered pan.  Allow to cool then break into pieces.


Thursday, February 18, 2010

Kitchen Quick Tips - Candy Making Tip

kitchen quick tips

High humidity will cause hard candy to become sticky. Either avoid making candy during periods of high humidity or have the air conditioner on and/or a fan turned on over the cooking area.


Thursday, February 04, 2010

Kitchen Quick Tips - Candy Making Clean-up

kitchen quick tips

For easy clean-up after candy making, keep a wet cloth handy to wipe up any splatters as the happen. Soak pans and utensils in hot water. The hardened candy will melt away.


Thursday, May 28, 2009

Kitchen Quick Tips - Candy Making

kitchen quick tips
Don't try to make candy including fudge on a rainy day or during periods of high humidity. Extra moisture in the air will cause the candy to fail.


Saturday, April 26, 2008

Caramel Corn

Goodness, I had a few things I wanted to talk about today as I've been rather busy in the kitchen then I remembered that I promised to write about the absolute best ever caramel corn you have ever tasted. If you like Cracker Jacks you will absolutely love this tasty little snack. It is so very easy to make and considerably cheaper than store bought. Be sure to make extra as it will not last long! It does store well so you can easily make up you own homemade bags of treats.

Caramel Corn

Pictured is the caramel corn I made today, ready for snacking and packing into gallon bags. I make up a large batch using the Whirly popper. I've changed the original recipe so much that it is more my recipe than anything else. This comes out almost identical to store bought Cracker Jacks without the prize. I used to package this in small zipper style bags along with a small prize when my kids were younger. For best flavour use butter not margarine but you can reduce the salt by using unsalted peanuts. And be sure to use only pure vanilla. Sorry but artificial vanilla extract just won't work.

Caramel Corn

4 qt popped corn
1 c unsalted peanuts

2¼c brown sugar
½ c light corn syrup
½ c water
½ c butter
2 tsp sea salt
1 tbsp pure vanilla

Pop the corn (directions here). Stir in the peanuts. Put into oven at 300ºF to keep crisp. In a large saucepan, combine all remaining ingredients except vanilla. Cook over medium heat, stirring occasionally, until the syrup reaches soft-crack (290ºF) stage. Remove from heat. Stir in the vanilla. Remove the popcorn mixture from the oven. Working quickly stir in the syrup and mix will until kernels and peanuts are well coated. Continue stirring to break up. When cooled, package into vacuum bags the seal but do not vacuum or into vacuum cannisters.


Wednesday, December 19, 2007

Divinity aka Pink Clouds

Of all the holidays, cookies and candies seem to be in high demand. They are great for gift giving and holiday entertaining. It not like I don't make cookies though out the year but for Christmas, I tend to go all out with familiar family favourites as well as new recipes. However, the Christmas season is the main candy making time for me.

Pink Clouds

Divinity is a lovely, melt in your mouth treat. I've made it many times. This was the first time I used the KitchenAid® stand mixer to make divinity. I turned my attention away from the mixer for one second so ended up with a slightly thicker mixture but the candy still tastes great so I've named them pink clouds. One of our kids who is my official taste tester this season has given them the seal of approval.

Divinity (Pink Clouds)
source: Better Homes and Gardens Cookies and Candies, 1972. Pp. 79.
modified: by author

2½ c granulated sugar
½ c light corn syrup
½ c water
¼ tsp salt
2 egg whites
1 tsp pure white vanilla
1/2 c chopped nut (optional)
food colouring (optional)

Cook the sugar, corn syrup, water and salt to hard-ball stage (260ºF) stirring only until the sugar dissolves. When the temperature reaches 250ºF, beat 2 egg whites until stiff peaks form on setting 8 of KitchenAid® stand mixer. When the syrup reaches 260ºF, slowly pour the syrup into the egg whites in a thin stream. Continue whisking on setting 8 for 1 minute. Add vanilla and food colour. Reduce to setting 4 for 20 minutes (KitchenAid® manual) [my note: This is too long! It really only took about 5 minutes as per original recipe]. Stir in nuts if desired. Drop candy mixture onto wax paper. Swirl top.
Makes 40

My notes: Even though this candy works well if over beat, ideally you want to beat just to the point where the candy loses it's sheen not dry as the KitchenAid® manual indicates. Then work quickly to form the candy.


Saturday, December 15, 2007

Buttery Peanut Brittle and Eye of Round Roast

The Christmas season is always filled with a wonderful assortment of foods! The tantalizing aromas of cookies baking wafts through the house. Bowls of oranges and nuts join the never empty fruit bowl. Jars of homemade candies are added to the pantry ready to refill the candy bowl as needed.

Buttery Peanut Brittle

Homemade candy is perfect for gift giving. Buttery peanut brittle is a Christmas favourite. I seldom make it any other time of the year. The rich, buttery candy is sure to please. It's very easy to make too so be sure to make a lot.

Buttery Peanut Brittle
2 c granulated sugar
1 c light corn syrup
½ c water
1 c butter
2 c roasted peanuts
1 tsp baking soda

Combine sugar, corn syrup and water in a large sauce pan. Cook and stir until sugar dissolves. When the syrup boils, stir in the butter. Stir frequently after the mixture reaches 230ºF (110ºC). Stir in the nuts when the temperature reaches the soft crack stage (280ºF/138ºC). Stir constantly until the temperature reaches the hard crack stage (305ºF/152ºC). Remove from heat and quickly stir in the baking soda. Pour onto two cookie sheets. Allow to cool. Loosen from pans as soon as possible. Break into pieces. Store in an air tight container.
Yield: 2 ½ pounds.

Eye of Round Roast

Roast beef is the perfect cold weather meal! I slow roasted an eye of round roast topped with sliced onions, Worcestershire sauce and Diana sauce (original flavour) at 250ºF (120ºC) for 4 hours. I increased the temperature to 350ºF (177ºC) for the last 10 minutes of cooking. The result was a tender, medium rare, nicely browned roast (1). I served the roast with golden potatoes (2). Golden potatoes are rich and creamy while being low fat.

Method: Wash and peel potatoes. Cut into cubes. Wash and peel two large carrots. Cut into chunks. Combine potatoes, carrots, two cloves garlic and one half chopped onion. Bring to a boil and cook until vegetables are tender. Drain. Pour about 1 cup of defatted chicken stock. Mash to desired consistency.

The left-over roast beef was refrigerated over night then thinly sliced (3) and divided into three equal amounts. Two of the amounts were vacuum sealed for freezing (4) with the rest used for sandwiches.

Grilled Cheese & Roast Beef Sandwich
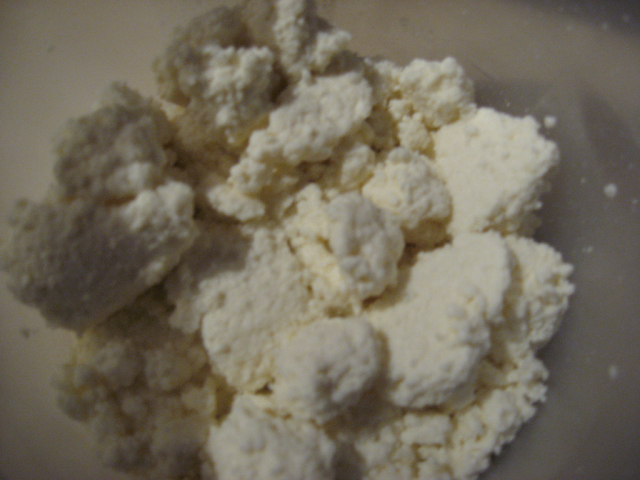
During the busy holiday season it is nice to rely on simpler meals as well. Roast beef slices between two slices of Ziggy's Internationale® medium cheddar cheese on 7 Grain bread then toasted makes for a tasty and quick meal. I don't actually grill these sandwiches. What I do is assemble them the butter the two outer sides then toast on each side on medium heat in a non-stick fry pan until golden brown and the cheese in melted. Actual cheese slices rather than American processed cheese gives a nicer result. Serve with a bowl of steamy, homemade tomato soup for a frugal, comforting winter meal.


Wednesday, November 29, 2006

A Bit of Everything: Two Homemade Cheeses, Crystal Cut Candy, and Roast Beef

I love experimenting and playing in the kitchen. This is the perfect time of the year to experiment just a little while relying on tried and true recipes for gift giving and meals. I've been doing a lot of canning for Christmas gift baskets and to restock my jellies. Yesterday I decided to take a bit of a break from canning to do a little dehydrating, freezing, cheese making and candy making. After a day spent doing a lot of genealogy and playing in the kitchen, a pot roast was the ideal meal!

(November 7, 2006 additions to this post. What was I thinking? I forgot to add the sourcing so have made those corrections. )

Ricotta Cheese

Ricotta cheese is a creamy white cheese with a rich mildly sweet taste and grainy texture. Homemade ricotta cheese is very easy to make. It is best made in small batches because ricotta does not keep long. So make it fresh in small amount and use up within a week. This is a cheese best used fresh as it does not freeze well. Ricotta cheese can be used in main dishes and desserts. Two notes when making ricotta cheese. Use a high fat milk. The higher the cream content the creamier the ricotta cheese will be. Low fat milks will not work well for this recipe. I prefer using pure cider vinegar as it give a slightly better flavour to the finished cheese.

Ricotta Cheese
Source: unknown

1 qt 3.25% MF Milk
1/8 c white or cider vinegar

Heat milk to 180ºF. Remove from heat and stir in the vinegar. The milk will separate into curds and whey. Let the mixture sit to develop curds. Line a strainer with cheesecloth. Pour the milk mixture into the strainer and allow to drain until curds are dry but moist. This will take two to four hours. Transfer the curds to a container and seal.

Yogurt Cheese Setup
Source: unknown and one handed down through the family, modified by me to use homemade yogurt

I make a lot of yogurt and the method can be found in an earlier blog entry. Not only do we eat a lot of plain yogurt since we eat it daily, I use plain yogurt for dips, cooking and making cheese. Yogurt cheese is very easy to make and it is quite versatile. It is a very creamy cream cheese that can be flavoured with fresh herbs or other seasonings. It is perfect for spreding on crackers as a base for appetizers.

The setup for making yogurt cheese is rather simple. Line a strainer with cheese cloth. Pour in about 2 cups of plain yogurt. The higher the fat content, the creamier the cheese will be. Homemade yogurt is perfect for this. Set the stainer and yogurt on top of a container then lightly cover the top of the yogurt with the cheese cloth. Put the entire setup into the refrigerator and let drain 18 to 36 hours. The long the cheese drains the firmer it will be.

Yogurt Cheese

Once the cheese it at the desired consistency you can stir in seasoning or leave as is. Transfer the cheese into a 8 oz (250 ml) wide mouth mason jar. Place a lid on then vacuum seal. Store in the refrigerator. Use as a spread for bagels or crackers. It makes a nice dip base too, simply use in place of cream cheese. This makes a lovely gift just be sure to keep it refrigerated.

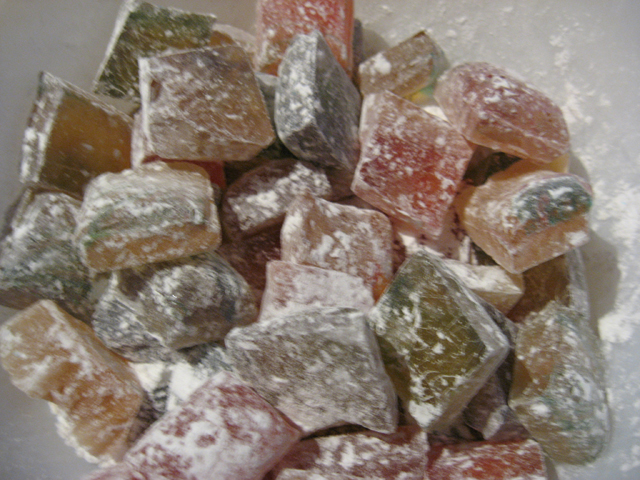
Old Fashioned Crystal Cut Candies
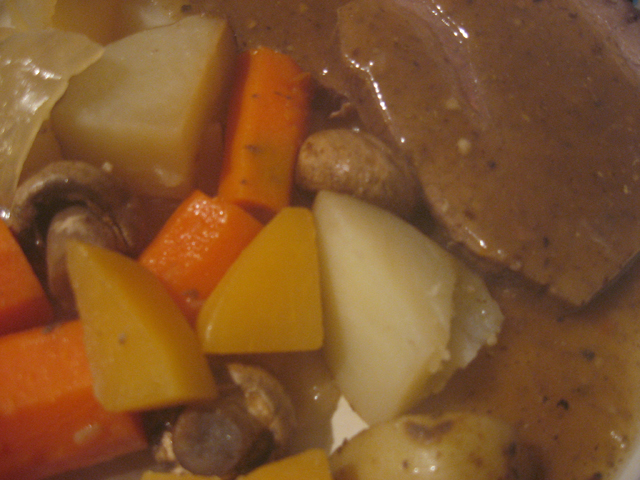
Crystal cut candies are an old fashioned candy with a lot of flexability. They are perfect for gift giving. Flavour and colour as desired. You can use candy molds or cut into square puffs the old fashioned way as described in the instructions.

Crystal Cut Candies
Source: Better Homre and Gardens®, Cookies and Candies, 1972. Meredith Corporation, 1966, New York. Pp. 82.

2 c granulated sugar
1/2 c light corn syrup
1/2 c water
dash of salt
food colouring
candy flavouring

Combine ingredients in large saucepan. Bring to a boil and cook to soft-crack stage (290ºF). Add desired food colouring and 4 to 6 drops of candy flavouring like oil of cinamon. Gently swirl the mixture to blend. A neat trick I use is to drop two or three colours of food colour on top of the candy after adding flavour. Then I use a toothpick to create multi-colour swirls for an interesting effect. Pour the candy into a 8"x8"x2" metal pan. Do not use glass and be very careful as the candy is hot enough to cause burning. Let stand a few minutes until a film forms over top. Mark the candy into 3/4" squares being very careful to not break through the film. The candy will cool from the edges first. Go over the markings pressing downward slightly but not breaking the film. Continue this procedure until the candy has cooled. Once cooled pop out of the pan and break into pieces. Sprinkle about 1/2 cup icing sugar over the candy for storage in an air tight container.

My Notes: Instructions for crystal cut candies have modified to get the results pictured.

Roast Beef Dinner

After a day full of genealogy and cooking a nice easy meal straight from the oven is a true delight. I put a small rib eye roast into a roasting pan, seasoned with Worchestershire sauce, Montreal steak seasoning, sliced onions and a little water. This cooked for about 2 hrs at 275ºF. I added potato, carrot and turnip pieces along with whole mushrooms and raised the temperature to 350ºF and let the roast and vegetables continue cooking until the vegetables were cooked. The roast was removed to rest before slicing and the vegetables were transferred to a serving bowl. I used the juices to make gravy by adding mushroom powder, salt, pepper and thickened with a corn starch slurry. The end result was a nice meal with very little effort.

Enjoy!