My photo
Ontario, Canada
I am a wife, mother and grandma who enjoys the many aspects of homemaking. A variety of interests and hobbies combined with travel keep me active. They reflect the importance of family, friends, home and good food.
Cook ingredients that you are used to cooking by other techniques, such as fish, chicken, or hamburgers. In other words be comfortable with the ingredients you are using.
--Bobby Flay

For Your Information

Please watch this area for important information like updates, food recalls, polls, contests, coupons, and freebies.
  • [March 19, 2020] - Effective Mar 17, this blog will no longer accept advertising. The reason is very simple. If I like a product, I will promote it without compensation. If I don't like a product, I will have no problem saying so.
  • [March 17, 2020] - A return to blogging! Stay tuned for new tips, resources and all things food related.
  • [February 1, 2016] - An interesting report on why you should always choose organic tea verses non-organic: Toxic Tea (pdf format)
  • Sticky Post - Warning: 4ever Recap reusable canning lids. The reports are growing daily of these lids losing their seal during storage. Some have lost their entire season's worth of canning to these seal failures! [Update: 4ever Recap appears to be out of business.]

Popular Posts

Wednesday, November 30, 2011

Baked Salmon with 7 Cheese Mac 'n Cheese

I grew up in a small town with a population just under 2,000.  We had one restaurant, a soft ice cream shop that was open only in July and August, a tavern,  a bakery and two very small and I do mean small grocery stores.   Oh, and we had a canning factory so the whole town smelled deliciously like tomato soup in the fall.  To this day, my favourite fall drink in the morning is not coffee but rather tomato soup.  My high school Home Economics teacher was adamant that using good quality food and easy recipes  was all that was necessary to prepare tasty home cooked meals.  Well, she would have to because she lived in the same small town where the choice of ingredients to cook with was rather limited.  Mind you back then there was not the variety of ingredients readily available like sea salt, organic sugar, fresh seafood, exotic seasonings and those types of things.  There was a lot less commercially prepared convenience foods (eg. cake mixes, etc.).   Even back then she taught us the value of food dollars and how to get the most for our food dollars.  I still use many of the recipes learned in that class!  One of the very first dishes she taught us was how to make macaroni and cheese.

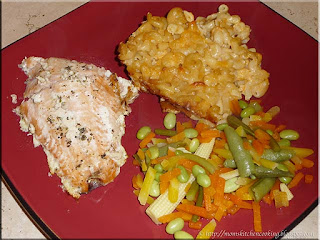
baked salmon with seven cheese mac and cheese

When I was growing up, the only fresh fish we had was smelt.  We had canned tuna, canned salmon and once they came to town, frozen fish sticks.  My Mom was not a huge fish fan.  I can remember my excitement the first time I saw fresh fish at the market!  Now I buy fresh fish at one of the grocery stores or nearby fisheries.  We also enjoy locally caught fresh fish like bass, perch and pickerel.  While I enjoy a wide variety of fish, salmon is one of my favourite.

I baked a salmon fillet for dinner a couple of nights ago.  The fillet was about 10 - inches long, enough for two people.  I served the salmon with homemade 7 Cheese Mac 'n Cheese (recipe below) and an Asian vegetable mix consisting of yellow and orange carrots, snap peas, shelled edamame, whole baby corn and garlic sprouts.  It was delicious, easy to prepare, and frugal meal!

Baked Salmon
recipe by:  Garden Gnome

1 salmon fillet
1 tbsp butter
1 tsp Herbes de Provence

Place the salmon fillet on Silpat or parchment paper lined baking sheet.  Divide the butter into four portions then put the portions along the centre of the fillet.  Sprinkle the herbs evenly over the fillet.  Bake at 350ºF until salmon is cooked through, about 15 minutes.

seven cheese mac and cheese
Our Home Ec teacher taught us to make macaroni and cheese from scratch using a simple cheese sauce consisting of milk, flour and cheddar cheese.  It is still a classic method but I love experimenting with macaroni and cheese.  There are so many wonderful cheeses available so I've developed several versions of macaroni and cheese. The cheese sauce in this version is rich and creamy.  The liquid smoke is a secret ingredient I discovered in the macaroni and cheese served at Mike's Smokehouse BBQ & Grill in Tampa Bay, Florida.  It adds a wonder note to macaroni and cheese!  The trick when using liquid smoke is to add one drop at a time until you get the desired aroma and flavour.

7 Cheese Mac 'n Cheese
recipe by: Garden Gnome

¼ c Asiago cheese
¼ c Parmesan cheese
¼ c sharp cheddar cheese
¼ c mozzarella cheese
¼ c colby cheese
¼ c cream cheese
1 tbsp Cheez Whiz
¾ c milk
7 cups cooked elbow macaroni
4 - 6 drops liquid smoke

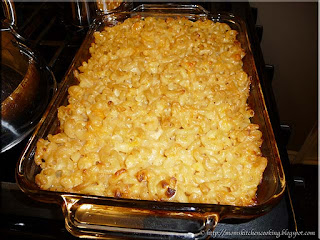
Grate the Asiago, Parmesan, cheddar, mozzarella and colby cheeses.  Stir the grated cheeses to mix.  Cook the elbow macaroni and drain.  Pour the hot pasta into a mixing bowl.  Stir in the cream cheese and Cheez Whiz.  Mix then stir in the grated cheeses.  Mix well then stir in 4 - 6 drops of liquid smoke.  Mix.  Pour the macaroni mixture into a 2 quart baking dish.  Pour the milk over the macaroni mixture.  Cover with foil and bake at 350ºF until cheese is bubbling.  Remove foil and bake until the top starts to brown slightly.  Remove from oven and serve.


Tuesday, November 29, 2011

Harvey's Revisited

During our recent move we ate out and had take-out a bit more because it was practical when living for fifteen days between two houses and during the settling in period.  Once we were back from our fall vacation the first week of October, we quickly got into the routine of cooking at home again.  We generally go for wings at Crabby Joes on Tuesday nights and to our favourite English fish & chip restaurant on Friday nights leaving five nights a week most weeks for home cooked meals.  The weather has been getting gradually nastier so we even skipped going out the last couple of Fridays in lieu of have a nice home cooked fish dinner.  My husband surprised me last week by bringing home Harvey's burger and fries.  He seldom does this because he knows I usually have dinner on but that particular night he had a couple of meetings so was running late for dinner.  It's a good thing I didn't have dinner on!

Harvey's original cheesburger with fries
I wrote about the Canadian restaurant chain, Harvey's before.  By far, Harvey's is one of the very few fast food restaurants I will eat at.  Their charbroiled on a flame grill burgers are very much like the burgers we make at home on the outdoor grill.  The burgers are deliciously unpretentious with custom toppings of your choice.  What is really nice is you can order a topping like pickles on the side.  They are quite generous if ordered this way. 

Pictured is the old fashioned cheese burger with fries and dill pickle slices on the side that my husband brought home for me.  He had a double original bacon burger and we shared the fries.  It was a delightful taste of summer on a cold, dreary, rainy evening.

We grill year round but during the months of November and March, the weather tends to be the nastiest.  Quite often it is raining or drizzling or sleeting or whatever else Mother Nature wants to toss at us making it not the nicest grilling weather.  It doesn't help that its dark by 5 PM in November either.  It's nice to have an alternative like Harvey's where the burgers are very close to homemade to enjoy should the craving for a grilled burger arise during those months.  Now the biggest difference between our homemade grilled burgers and Harvey's is the actual burger patty.  Our homemade burger patties are handmade, never flattened or frozen into a pattie so if you want to make one Harvey's style you need to flatten the patty using a burger press then freeze and grill from frozen without thawing.


Monday, November 28, 2011

Frugal Kitchens 101 - 'Tis the Season

Frugal Kitchens 101

Today is November 25 aka Black Monday which really ushers in the holiday season.  All the stores put on the best possible sales hoping to get you to part with your hard earned money in lieu of wonderful gifts to bless your family and friends with.  The Home Hardware and Canadian Tire sales flyers came out last week and oh my gosh, it is time to do a bit of power shopping for kitchen inspired gifts.  This week's Frugal Kitchens 101 discusses how to make frugal choices when buying kitchen gifts.

  • know the home cook's cooking style - If you don't know how a person cooks then don't buy a kitchen gadget or small appliance for them. Back when my husband brought me home a bread machine courtesy of the Christmas sales he knew I would use it.  Sadly many rather expensive bread machines ended up in the garbage or second had stores because their owners were gifted with an appliance the neither wanted or would use.
  • know the person - It is far easier to gift a person with the perfect gift if you know them.  Those who are elderly or who have health problems may need specialized kitchen equipment.  Ask to see what they need.  It can be something as simple as an ergonomically designed paring knife, easy lid remover, grip extender and even a kitchen step stool.  Seriously, if I were gifted with a bag of unbleached flour, I would be elated!  It's all about know who the gift is going to.
  • avoid the gimmicks - Most home cooks will not use a lot of the gimmick small appliances like cotton candy machines, chocolate fountains, individual pie makers and that type of thing.  My rule of thumb when buying someone a small kitchen appliance is to ask what they need.  I honestly have the fondue set that our kids were gifted with as a wedding present that I have yet to use but it has moved with us twice.  These types of things tend to add kitchen clutter.
  • don't buy knives - Knives are a very personal choice that are best left to the individual person rather than gifting unless you know that person well.  The knife must meet the hand feel for the user.  My husband and I both love cooking but the knives that work well for him are too bulky for me.  I particularly have a knife requirement that it must be one solid piece tip to handle end but that is because of a horrid family event.  
  • choose neutral - If buying kitchen textiles or serving ware go neutral so it will match if the person receiving the gift decides to change their kitchen decor.  Classic white or black always works with most decor as does clear glass.
  • collectables - I collect antique kitchenware, canning jars and glassware so I am alway very appreciative when someone gifts me with that.  The problem is if that person does not know what they are buying they can easily get burned.  This is the time to definitely ask.
  • gift certificates - These are my personal favourite.  Whenever I'm in doubt I give a kitchen/food gift certificate but only to a place where I know that person shops.  If someone gave me a gift certificate to the Bulk Barn I would be in seventh heaven!
  • culinary classes - One year for Christmas a couple of our kids were gifted with enrollment to culinary classes. 
  • brand name - Some including myself are very much brand name oriented when it comes to small kitchen appliances.  Be observant or ask.  If a person has all Hamilton-Beach small kitchen appliances that is a good sign you should buy them Hamilton-Beach if buying a small kitchen appliance.  If however, they have a hodge podge of brands for small kitchen appliances choose the best fitted appliance for their needs.
  • gifts from the kitchen - Homemade gifts from the kitchen (eg. jams, preserves, bread, mixes, cookies in a jar, cookies and etc.) are always welcomed.  I like to include the recipe as well in case the recipient would like to duplicate it.


Sunday, November 27, 2011

Venison Rib Eye with Creamy Mushroom Pilaf

I use a select few commercially prepared condensed soups to make sauces and dips but I always  substitute my home canned stocks and broths when a recipe calls for the commercially canned versions.  The reason being is home canned or simply home made stocks and broths are less expensive but have better flavour.  Stocks and broths add a wonderful flavour to rices so unless I need plain white rice for a particular dish, I always cook rices in stocks (eg. beef, chicken, vegetable, tomato).

creamy mushroom pilaf
The guys had a successful hunt camp which translates into me having a bit of venison in the freezer.  Venison is wild game that can have a gamey edge to it if not cooked properly.  This is mainly due to the meat being very low fat and the mouth feel of what fat there is.  For this reason, venison is usually cooked with pork or bacon fat.

We pan fried the venison rib eye steaks in a little bacon grease in one of our new ceramic coated non-stick EcoPans.  The pan was amazing to use to the point my restaurant grade Teflon coated have officially been retired.  I served the venison steaks with home canned green beans and a creamy mushroom pilaf.  The recipe called for using part of the Parmesan cheese and parsley as a garnish.  I omitted both as venison is a very rich meat so I wanted the pilaf to complement rather than compete with that richness.

Creamy Mushroom Pilaf
modified from: Campbell's, Simply Delicious Recipes (1992), Pp. 130

3 tbsp butter
1 small onion, chopped
1 c fresh sliced mushrooms
1 c uncooked long grain white rice
1¼ c homemade stock
¾ c water
¼ c dry white wine
¼ tsp pepper
¼ c sour cream
½ c fresh grated Parmesan cheese
1 tbsp chopped fresh parsley (optional)

Place the onion, mushrooms, rice and butter into a 2-quart saucepan.  Cook until rice is lightly browned on medium heat, stirring often.  Stir in broth, water, win and pepper.  Heat to boiling.  Reduce the heat to a low simmer.  Cover and cook 20 minutes.  Remove from heat.  Stir in the sour cream and half of the cheese.  Cover and let stand 5 minutes.  Stir.  Garnish with remaining cheese and parsley if desired.


Saturday, November 26, 2011

The Perfect Grilled Cheese Sandwich

My Mom (not biological) was 59 years old when I came to live with her.  She was a fabulous, home style Canadian cook with wonderful dishes all stored in her head.  Then she was diagnosed with diabetes so the cooking slowed to a crawl and Alzheimer's took away all her amazing recipes.  She never had kids of her own and never learned to drive.  Three times a year we took a bus to the nearest city where we always had lunch at the lunch counter at the Metropolitan.  I always ordered the grilled cheese sandwich with a chocolate milkshake with the very few exceptions I ordered my other favourite sandwich, the BLT. 
grilled cheese sandwich cooking in Paderno EcoPan
As a newlywed I was determined to make the perfect grilled cheese sandwich at home.  The thing is grilled cheese sandwiches aren't actually grilled, they are pan fried or cooked on a griddle.  Some use a panini press or electric sandwich maker but the very best, home style grilled cheese sandwiches are made in the fry pan.  It is the only way to get that delicious golden crust! 

Don't even think of using processed cheese slices to make grilled cheese sandwiches!  Always use good quality cheddar or cheese of your choice.  We prefer cheddar for plain grilled cheese sandwiches.  The sandwiches are assembled on a cutting board.  We light butter one side of the bread then put the butter side down, add slices of cheese from the block of cheese, then place another slice of bread on top and lightly butter the exposed side.  That's it.  We use a medium heat then cook until golden brown on both sides.  The Paderno EcoPan outperformed my restaurant grade Teflon non-stick fry pans.  I was extremely pleased!

the perfect grilled cheese sandwich
Just look at that golden, mouthwatering grilled cheese sandwich.  Isn't it gorgeous?  Served with home canned tomato soup, cuddled up on the couch watching Coronation Street together - well that is just the perfect end of a day on a cold autumn evening. 

Home cooking need not be expensive, time consuming or fancy.  It needs to be good, period.  It's those meals that feed the soul embellishing our memories forever.  I'm very blessed to have such wonderful memories of the great food I've shared with my Mom, my family and my extended family and friends.  That's what home cooking is all about!  I dearly hope I have passed that legacy on to our children and now grandchildren.  'Tis a true treasure, that it is!


Friday, November 25, 2011

Eggs

Even though the price of eggs has increased, they remain a frugal source of dietary protein.  They are quick and easy to cook as well as being quite versatile.  Eons ago when I was in high school it was mandatory for all female students to take two courses in Home Economics.  While I detested the teacher with a passion due to very inappropriate comments that would never be tolerated in any school system today, I learned a lot from those two courses.  To this day, my kitchen is very much organized the way the HomeEc kitchens were, into specific work zones.  This maximizes how a kitchen functions regardless of how small it is and believe me I have cooked in some not small but tiny kitchens!  One of the most valuable lessons learned was this teacher insisted that any time you crack open an egg it is to be done in a separate bowl.  If cracking more than one egg, she told us to use two bowls - one to crack the egg into then pour the cracked egg into another bowl and continue this way until all the eggs were cracked.

contaminated egg
I buy my eggs from a couple of farmers who have free range chickens whenever possible.  I also buy eggs at the grocery store when I have to.  Many home cooks are quite complacent when it comes to cracking eggs.  There is the fallacy that if it comes from a grocery store it is safe.  Wrong!  If it comes from a grocery store, any food has been handled a multitude of times, has been exposed to numerous contaminants including insects and rodents and possible unsafe temperatures during transportation to the store.  That is why all fruits and vegetables should be washed before consuming and all lids on commercially canned foods washed before opening.

I have seen many interesting sights when cracking eggs but never have seen contamination like I found in the pictured store bought egg.  Had I simply cracked the egg into the other ingredients I would not have seen the contamination until it was too late, thus wasting all the ingredients.  I don't know what the contamination was although I can make an educated speculation based on my scientific background.  Four more eggs in that dozen were contaminated as well so I ended up tossing the entire dozen.  I was ticked but it would have been worse had I boiled them for deviled eggs or egg salad! 

An egg is the biological unfertilized portion of what would become a baby chicken if fertilized.  When buying eggs from a farmer it is common to see blood spots (harmless), double yolks (lucky according to legend), and occasionally a fertilized egg with the embryo in some stage of development.  These artifacts are less likely to occur in store bought eggs as they are screened to remove these particular artifacts.  Egg shells protect the egg or developing embryo.  Despite their look, they are porous allowing oxygen to reach the developing embryo.  They have a natural antibiotic coating to help protect the developing embryo which helps to keep unfertilized eggs (the ones we eat) fresh.  This is why eggs should not be washed before storing in the refrigerator.  The egg shell can be compromised in many ways such as environmental exposure  of the laying hen to a damaging chemical, a genetic condition in the laying hen that results in a weaker egg shell, or it can be damaged during the grading a packaging process.  In addition to the egg shell being compromised, it can also be contaminated with Salmonella that can give you a nasty case of food born illness.  I do mean nasty!  I accidently contaminated myself with Salmonella in the lab; it was a horrid experience but valuable lesson.   This is why an egg should always be cracked into a separate bowl, checked for any problems then poured into another bowl or added to the other ingredients.  Never crack an egg directly into a fry pan or other ingredients!


Thursday, November 24, 2011

Kitchen Quick Tips - Ground Turkey Burgers

kitchen quick tips

Achieve a light texture in cooked turkey burgers by not overmixing the ground turkey when making the patties.  Stir the ingredients until just mixed then form the burgers with a spatula, not the hands as heat from your hands alters the texture of the burger.


Wednesday, November 23, 2011

Rustic Garlic and Herb Mashed Potatoes

The food industry is always coming up with something new to tantalize the taste buds in the hopes consumers with part with their hard earned money.  There have been three developments with respect to cream cheese.  The first development was making cream cheese spreadable.  This product while cream cheese based is marketed as a cream cheese spread.  Additives are added to keep the cream cheese spreadable.  The second development has been the introduction of flavoured,  spreadable cream cheeses.  These are mainly fruit or herb based.  The final development has been low fat cream cheese.

rustic garlic and herb mashed potatoes
I saw a low fat, garlic and herbs cream cheese spread in the grocery store.  I immediately thought this would be quite a lovely combination for rustic mashed potatoes using regular cream cheese for a richer flavour.  The only seasonings were garlic powder, dried onion flakes and dried parsley leaves so I decided to experiment rather than buy the pre-seasoned cream cheese.  I served homemade shake & bake chicken with  rustic garlic and herb mashed potatoes and mixed vegetables. 

Rustic Garlic and Herb Mashed Potatoes
recipe by:  Garden Gnome

5 - 6 medium sized potatoes
⅓ c sour cream
2 tbsp butter
¼ c milk
⅓ c cream cheese, softened
½ tsp garlic powder
½ tsp dried onion flakes
1 tsp dried parsley leaves

Wash potatoes, do not peel.  Cut into cubes.  Steam until tender.  Remove from heat.  Put the potatoes into stand mixer bowl.  Add remain ingredients except parsley.  Mix until mashed through but not over mixed.  Cover then place in oven to keep warm for 10 minutes.  Scoop potatoes into serving bowl.  Garnish with a generous pinch of parsley leaves per serving.


Tuesday, November 22, 2011

Weekend Food and Kitchen Finds

I love this time of year when various community groups and schools host bake and craft sales.  The stores put a variety of small kitchen appliances and equipment on sale with gift giving in mind.  Old fashioned ribbon and satin candies, nuts in the shells, and fruit cakes become available.  The stores carry a larger variety of baking supplies because they know many folks do a lot of baking over the holiday season.  Interesting and festive serving ware become available and then there are the food events.  So far, we have tickets to a community Christmas concert (cabaret style aka wine and cheese), a yellow perch fish fry, a dinner cruise, and two dinner concerts!

Paderno EcoPan Platinum
Home Hardware is a Canadian owned hardware chain.  It is one of my favourite places to shop because we know the owners and staff.  Shopping there supports the local economy.  They have a Paderno sale each year offering rather amazing deals on Paderno products.  Paderno is a Canadian company specializing in making and distributing high quality stainless steel cookware, utensils and housewares.  We stopped at Home Hardware on Saturday to check out the sale.  I absolutely love the quality of their nylon kitchen accessories so I picked up another set (reg. $34.99, sale $19.99) for our vacation home.  We bought the Paderno steak knives (reg. $49.99, sale $19.99) with 25 year warranty.  The steak knives are precision ground with serrated blades that will stand up to years of use.  What I really like about these knives is the one piece ergonomic design that eliminates any cracks or crevices for food and bacteria to accumulate.

I am not a fan on coated non-stick bakeware or cookware but for some foods non-stick is the best solution.  I became fed up with the non-stick coating flaking off even though my non-stick is always hand washed and I don't use metal in them.  Teflon non-stick coating has a few health concerns due to off gasing at higher temperatures so a couple of years ago I bought two  Baker's & Chefs fry pans from Sam's Club.  These are commercial grade fry pans with the Eclipse reinforced non-stick coating but the coating still has PTFF (polytetrafluoroethylene) that off gases at higher temperatures or if the coating has been compromised.  This has always been a concern for me because fumes from Teflon have killed birds (warning on Dupont's website) and I prefer to use products that do not reduce air quality in our home.  Studies have shown that C8 particles are in the blood of those who use Teflon non-stick.  This is not a naturally occuring chemical so what damage C8 does in the body is still questionable. 

I just bought two of the Paderno EcoPan Platinum fry pans - 10" (reg $129.99, sale $34.99) and 12" (reg. $149.99, sale $39.99).  These are eco-friendly fry pans with a 100% ceramic, non-stick coating that is six times stronger than traditional non-stick coatings.  The coating is completely free of PFOA (polytetrafluoroethylene aka C8) and PTFF so there is no concern over off gasing or C8 particles getting into your body making these pans the healthier choice in non-stick coatings.  The pans can be used on ceramic, gas or electic stovetops and in the oven to 450ºF.

We also stopped at a community group sponsored craft and bake sale.  There were six of those delicious butter tarts but I was lucky to even get one for the photo.  This truly Canadian desert makes an appearance at every bake sale!  Butter tarts are delicious.  Be sure to use a homemade pastry crust though.  That is a French Canadian sugar pie.  There was only one booth selling them so I bought one even though the crust was not homemade. The tea came from a booth set up by a new gourmet spice, coffee and tea shop that recently opened in our area.  I'll have to go check the shop out.  I bought Sleepy Me, a caffeine free loose tea blend of valerian root, anise seed, fennel seed, caraway seed, rosehip, peppermint, passion flower, lemon balm leaf and calendula petal.  It is a lovely, soothing tea!  The light blue packet is a fisherman's chowder mix from Victorian Epicure Inc., a gourmet Canadian company from North Saanich, British Columbia.  I have not seen their products before so bought a packet to try as well as picked up their newest catalogue.  Their products are sold mainly through home parties.  I may be interested in hosting a couple of these parties since food is involved.  The Sicilian Herb dip mix is from a booth selling Wind & Willow gourmet cheeseball, soups, dips and salsa mixes.  The dip sounded interesting so if we like the overall flavour I'll tinker to create a clone recipe from scratch.

I hope you enjoyed seeing a few of our weekend food and kitchen finds.  I bought a few items from the new bulk food store too.  It isn't a Bulk Barn and the slection is limited but overall it isn't too bad.  Saturday night we entertained for 18 plus ourselves so there was a lot of good food going out including moose meat chili, baked nachos with beef and cheese, homemade peanut butter cookies and several snacks.  Sunday was a lovely, laid back SOMA day watching football (hubby) and playing the 'villes on Facebook (me).  I made nacho and jerked pork with cheese nacho tray for a snack followed by roasted pork shoulder, baked potatoes and maple baked beans for dinner.  All in all it was a grand foodie weekend!


Monday, November 21, 2011

Frugal Kitchens 101 - The Brand Name Fallacy

Frugal Kitchens 101

Years ago when the commercial canning industry was born there were only a couple of brands.  Over the years grocery stores introduced their own brands.  The brand name fallacy has been perpetuated by the big brands.  They have convinced shoppers that the brand name is somehow better than store brands.  Well, in some cases it may be better but the reality is for most commercially prepared foods the store brand comes from the exact same processing plant as the brand name.  For example, when a wagon of tomatoes arrives at the processing plant it is washed then peeled and transferred to large vats.  The tomatoes move down a conveyor belt where they will be packed into tin cans, sealed, processed and on to labeling.  Half of that wagon load may be labeled as a brand name while the other half will be labeled as a store brand.  They are the exact same tomatoes just with different labels!  This week's Frugal Kitchens 101 discusses brand names, when to use them and when it really doesn't matter.  In general, propriety foods (eg. Kraft Dinner, Alpha-ghetti, Campbell's condensed soups) will differ from store brands simply because the recipe used will differ.  In some cases, you may find a store brand superior to brand name.  Here are a few food items where brand really doesn't matter:

  • canned fruits or vegetables - In most cases plain canned fruits or vegetables are the same whether they are brand name or store brand.  They have all come from the same food processing plants using the same fruit or vegetable and the same processing methods.  The only thing that differs is the label.  Save money by buying the store brand.
  • fresh fruits or vegetables - Many grocery stores are getting away from branding their fresh fruits and vegetables but some branding does still exist.  Aside of ethical and environmental practices, an Ontario potato is an Ontario potato regardless of the 'brand'.  The only difference is one may be organically grown and the other not but essentially they are the same potato.  Save money by buying according to cheapest per unit pricing.
  • dairy - Did you know that dairy products must meet a certain criteria to be labeled as such.  That means the store brand eggs are the same as brand name eggs, store brand cream cheese is the same as brand name and store brand butter is the same as brand name. Again, processed dairy such as butter and cream cheese often come from the same processing plant simply switching labels as needed.
  • frozen fruits or vegetables - There is no difference other than store brand being less expensive.  Read the label to be sure no additives have been used then go with the least expensive per unit price.
  • frozen meats/poultry/fish - Some brand names actually add water, brine, colourants or flavourings to their products.  Use whatever brand is the purest with the least amount of or no additives.  Do not buy farm raised salmon as it often contains colourants other than that brand name really doesn't matter.  Do check for any additives though and choose the brand with no additives.  Buy hormone free, locally raised meats and poultry through local butcher shops.


Sunday, November 20, 2011

Ten Dozen Peanut Butter Cookies

I don't make a lot of cookies and I don't make them often yet when I do I turn to my Betty Crocker's Cookbook (circa 1969) for easy recipes.  There is a lot of history behind that cookbook!  My Mom gave it to me as a wedding gift that has served me well over the years.  It is my most prized and cherished cookbook and while I have a smaller Betty Crocker's New Cookbook (1996) and the newest copy of the the big red Betty Crocker Cookbook (2011), I still turn to my cherished 1969 edition. 

peanut butter cookies in the oven
My husband's favourite cookie is peanut butter.  I make them a couple of times a year using my tried and trusted recipe for peanut butter cookies from Betty Crocker's Cookbook (circa 1969).  I have used this recipe since being a newlywed.  It has brought many a smile over the years. 

If you have been following this blog you will know we recently moved and I made the ultimate decision to switch to natural gas as a cooking fuel.  This was a hard decision as I seriously loved my Jenn-Air slide in range.  I was determined to switch to natural gas with this move due to the ever rising costs of hydro in Ontario, Canada as well as being able to accommodate the larger stock pots and pressure canners I use on a regular basis.

I made a large batch of peanut butter cookies a couple of days ago, ten dozen to be precise.  I have read a lot of complaints about natural gas ovens with respect to them having hot spots so was a bit nervous baking cookies for the first time.  Pictured is a tray of the peanut butter cookies in the oven.  Granted I have gone from three oven racks to two but other than that, the cookies baked nicely without a problem.

ten dozen peanut butter cookies
So what does ten doezen peanut butter cookies look like?  Voila!  The white tray was prepared for a larger event we were hosting last Saturday.  I apologize for the quality of the picture as the cookies were not over baked!  I'm getting used to the lighting in the new kitchen that is resulting in a few less than ideal pictures. 

Peanut butter cookies freeze nicely so I set the tray aside for the weekend, filled a container with cookies for my husband to take to the office then packaged the rest for freezing.  It was a very productive evening!  Oh my gosh did the house ever smell good and my husband was in seventh heaven seeing that many peanut butter cookies.  Next up, shortbread cookies!


Friday, November 18, 2011

Peperoncini Peppers

It is quite interesting to me that certain foods are very much regional.  The reason being the growing conditions and local food traditions but in this day and age of globalization, it is still surprising that some foods are only available in certain regions.  When I was growing up the closest I came to a hot pepper was the hot banana peppers the couple I baby sat for grew.  I begged my Mom one summer to help them harvest and she finally caved in even though she was against it.  I loved everything there was about that harvest!  To this day I firmly believe in order to truly love food, you need to get comfortable and knowledgeable to how it is produced.

homemade pizza with pickled peperoncini peppers
During our first visit to our vacation home in the sunny south we ordered a pizza from Papa John's.  It came with a wonderful pickled pepper that I did not recognize which is rather funny given I grow upwards of 30 pepper (5 varieties) plants each year.  When we arrived home in Canada I got curious so did a bit of inquiry.  The pickled peppers were peperoncini, a variety I had never heard of before.  To me they look almost like a cross between a habanero and a banana pepper.  They have a bit of heat mixed with a slight bitterness.  Oh my gosh, they kick pizza up a notch!

I finally found pickled peperoncini in the grocery store so I bought a jar.  That meant of course I had to bake homemade pizza, another excuse to test out my new natural gas oven.  My pizzas usually start out with my favourite pizza dough topped with home canned pizza sauce then the toppings get a bit interesting.  This pizza was topped with a 9 cheese shredded blend left over from making lasagne for hunt camp, tomatoes, broccoli, smoked turkey, pepperoni, and sautéd butter mushrooms.  I served the peperoncini on the side to cut and add to the pizza slices as desired.

Now if I could only find anchovies since I discovered them on a road trip.  I just loved the saltinest and flavour the anchovies imparted to the pizza slices so can't wait to try them at home.   Apparently they are hard to find here (aka none of the local grocery stores carry them) so perhaps I will find them our next trip to the city.  On the other hand you can bet your bottom dollar I will be hunting down peperoncini pepper plants for my new garden.  Jars of home pickled peperoncini peppers are already visions in my mind!


Thursday, November 17, 2011

Kitchen Quick Tips - Cooking Pasta

kitchen quick tips

Pasta should be cooked to al dente meaning with bite so there is a bit of resistance when bit.  Unless the pasta is being used for a cold salad, do not rinse it.  The residual starch helps to keep the sauce from slipping off of the pasta.


Wednesday, November 16, 2011

Easy Pizza Appetizers

Fresh baked bread does not keep long so it is best to make only what you can use within a day or two.  It can be wrapped tightly then froze if desired but I prefer to keep my freezer space for more expensive foods like meats and fish.  A few days ago I baked my first batch of homemade bread in my new natural gas oven.  I made the dough for a 1 lb loaf then divided into thirds.  If you look at the resulting loaves, there is purposely a size difference.  The reason being each sized loaf was destined for a different use. 

slicing French bread slightly diagonal
There wasn't a huge difference in size between the to larger loaves.  I used the mid-sized loaf to make easy pizza appetizers.  These are very similar to Bagel Bites without the high cost.  In fact, the homemade version comes in at under 5¢ per piece compared to the commercial version at 20¢ each.  The toppings can be a creative as desired but we like them rather simple. 

I cut the loaf into half inch slices on a slight diagonal.  This gives a bit more surface area for toppings.  Once the bread was sliced I arranged the slices on a Silpat lined baking sheet for topping. 

easy pizza appetizers ready for oven
I topped the fourteen French bread slices with homemade pizza sauce and a blend of four fresh grated cheeses.  I kept the toppings simply as this was a snack for my husband and a friend while they were watching Sunday afternoon football and a larger meal was planned for dinner.  Honestly, any topping is fair game so this is a great way to use up some those little bits of left-overs.  Other toppings that are good on these easy pizza appetizers include: homemade bacon bits, ham, green pepper, green onions, olives, ground beef and onion.  The nice thing is you don't need much of any one topping either.  For those who enjoy anchovies, one anchovies per appetizer would be delightful!

easy pizza appetizers ready to serve
I baked the pizza appetizers in a pre-heated 400ºF oven until the crust was light golden and the cheese was bubbly.  These were a quick, easy yet tasty afternoon snack.  

If you don't bake your own bread, the French baguettes in the bakery section of the grocery stores can be used for this same purpose.  In fact the baguettes are perfect as a base for garlic bread, cheese & bacon appetizers, and bruschetta.  It's easy to whip up a quick snack or appetizer simply by having homemade French bread or store bought baguettes on hand!


Tuesday, November 15, 2011

Slow-Cooker Tuscan Chili

I have enjoyed receiving Kraft Foods Canada's formerly free What's Cooking for several years.  I have kept every single copy!  It was with a bit of sadness to read that they will now be charging for a subscription.  The thing is every single recipe in What's Cooking uses one or more Kraft products so in essence the magazine is one big advertisement for Kraft products.  I pay enough for Kraft products as it is so will not be paying for a subscription just to find out how to use one of their products.  Instead I will be visiting their website for free recipes.

slow-cooker Tuscan chili
I browse though all the delicious dishes in the magazine, marking each one I want to try with a post-it.  As always the newest copy of What's Cooking (Festive 2011) had several interesting recipes.  Yesterday, I made the Slow-Cooker Tuscan Chili modifying it to use home canned diced tomatoes and home canned white kidney beans.    One problem in substituting home canned for commercially canned anything is the size difference.  The recipe called for 19 oz of diced tomatoes and the same amount of undrained white kidney beans but home canned sizes are 1L or about a quart (tomatoes) and 500 ml or about a pint for beans.  In order to make the chili according to the amounts in the recipe I ended up with part jars of tomatoes and beans left over.  The interesting aspect of this chili is there's no chili powder yet it is a rich and flavourable chili, sure to please.  I served the chili with fresh baked French bread (first bread baked in new natural gas oven) and extra virgin olive oil seasoned with basil for dipping.

Slow-Cooker Tuscan Chili
modified from:  Kraft Canada, What's Cooking (Festive 2011), Pp. 25

1 lb mild Italian sausage
1 onion, chopped
20 oz home canned diced tomatoes
20 oz home canned or fresh cooked white kidney beans
1 green bell pepper
1 yellow bell pepper
5½ oz tomato paste
½ tsp dried basil leaves
½ tsp dried oregano leaves
2 tbsp Italian shredded cheese mix per serving*

Carefully remove the casing from the sausage.  Break the sausage into pieces while browning.  Drain and spoon sausage into slow-cooker.  Chop peppers and onion.  Add vegetables, tomatoes and beans to the slow-cooker.  Stir well then stir in herbs.  Cover and cook on low for 4 hours.  Ladle into bowls.  Top with shredded cheese.  Serve with fresh baked bread and extra virgin olive oil for dipping.

*Shredded Italian cheese mix (brand name or store brand) can be found in the dairy section or you can make your own by combining shredded provolone, mozzarella, parmesan and emmental cheeses.


Monday, November 14, 2011

Frugal Kitchens 101 - Home Canning Year Round

Frugal Kitchens 101

There is a myth that home canning starts when the strawberries are ripe (about mid June) and ends with the tomato harvest (about mid September).  Furthermore, the manufactures would have you believe that the only foods for canning are jams, jellies, and pickles which really translates into a few select fruits (eg. strawberries, cherries, blueberries, raspberries, tomatoes) and cucumbers.  Home canning involves a lot more than fruits and cucumbers AND there is no set season for canning.  There are times that canning opportunities are more plentiful (May through September) but quite frankly the time period of October though April can be quite productive for canning.  I usually run the canners at least once a week during this time period.

I purposely let my pantry stock which relies heavily on home canned foods to diminish for the move.  I reasoned it was easier to move empty jars than filled jars where a bit of bumping could damage a seal.  It was also a good opportunity to use up home canned foods getting close to my 2 year comfort level for storage.  At any rate between using our home canned supplies and reduced canning while the house was on the market I'm in major canning mode!  What can I possibly be canning during the off-peak canning season?

  • nut syrups - Nut syrups are quite lovely on ice cream and baked brie.  I don't make a lot but a coupe of examples are praline syrup and maple-walnut syrup.
  • citrus fruits - This is the ideal time of year to can mandarin oranges and make marmalade.  Citrus fruit is plentiful and on sale this time of year.
  • soups/stews- There is no season for canning homemade soups or stews but when the weather is chilly making both warm the house and soul.  Consider that a can of commercially canned soups can cost as much as $1.79 but a 500 ml (pint) jar of home canned soup where you control the ingredients can cost as low as 20¢.  The only ingredients to avoid with home canned soups are dairy, barley, rice and noodles.  However, some home canners are having great success using very small amounts of barley, rice and pasta.  The biggest thing with these ingredients is using too much to make the home canned product too dense that prevents proper heat penetration for processing.  Pasta in particular is problematic in that the quality of the finished product suffers as well.   
  • sauces - Some sauces such as taco hot sauce is not made from raw ingredients so the perfect time to can them is during the off-peak season for canning.  
  • meats - Canning meats as soups, stews, as is (eg. ground, cubed) gives a convenient, ready to use product in your pantry.  Only buy meat for canning when on sale and preferably use organic, hormone free meats.
  • dried beans - Dried beans are cheaper than commercially canned beans but the down side is the soaking and cooking time.  Home canners can easily can dried beans by themselves or seasoned for about 10¢ per can, giving them a health, low cost convenient substitution for commercially canned beans.
  • jellies - Most jellies are made from fruit juice.  During the off-peak season for canning is the perfect time to make jellies from 100% pure, no preservatives added fruit juices. 


Sunday, November 13, 2011

First Batch of Bread in New Natural Gas Oven

My husband came home from hunt camp yesterday so I wanted the house warm and welcoming when he arrived.  I made a slow-cooker Tuscan chili (watch for the recipe next week) and my tried and tested, favourite French bread.  As planned the house smelled wonderful, filled with the tantalizing aroma promising a delicious evening meal.

French bread baked in my new natural gas oven
Our dining/living room has a beautiful large south facing window with a half circle window over it.  On sunny days this end of the house gets quite warm making it a perfect spot for proofing bread.  I made the dough, let it proof then shaped into three loaves. 

I did not anticipate any problems baking bread in the new natural gas oven as I've baked bread often in the outdoor grill.  The loaves baked as they normally would although a bit quicker than in the electric oven.  My experience has been bread cooks about 5 minutes faster using natural gas and 8 - 10 minutes faster using propane when compared to using hydro.  So far, I am enjoying my new gas range immensely, quite pleased with the results combined with lower cooking costs.  I'm no longer watching the clock to see when I can do a bit of cooking at the lower TOU hydro rates.  Initially I was concerned switching to a gas oven as I've heard they can be problematic for hot spots but this one seems to be quite good so far. 

There are many reasons why a home cook changes cooking fuel with the most common being relocating.  The cooking fuel they were used to using simply is not available at their new location.  My Mom had a horrible time adjusting from cooking with natural gas to electricity when she moved into an apartment.  Her solution was simple to do minimal cooking and more eating out.  Many find themselves in the same situation.  My recommendation is to use tried and tested recipes during the learning curve period of using a new cooking fuel.  Keep the various dishes simple to avoid frustration.  With a bit of practice and patience you will easily master cooking using a different cooking fuel than you were used to. 


Saturday, November 12, 2011

Busy Restocking the Pantry

My poor pantry is about as pathetic as you can get because I purposely did not restock many foods in preparation for our recent move.  My husband has been away at hunt camp (yeah! they were successful!)  so I have put the time to good use organizing the house and restocking the pantry.  This past week has been a very busy week in the kitchen, restocking a few items like homemade taco seasoning, taco hot sauce, homemade poultry seasoning, as well as canned jalapeño pepper rings, pineapple and mandarin oranges.  I restocked on gorgeous cod fillets from Elite Foods, bought a few items from the local grocery stores.  M&M's had coated, stuffed chicken breasts on for $1.99 so I bought twelve.  M&Ms is gourmet quality food which works nicely for those meals where you are pressed for time.  I made a full course, home cooked meal each night for the past week for myself as well.  I had a lot of fun experimenting with a few ingredients so there's been a lot going on in the kitchen!

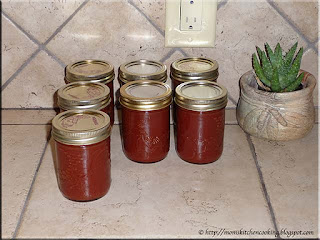
home canned taco hot sauce
Yesterday I canned taco hot sauce.  We were completely out and homemade is so much nicer than store bought.  Doesn't it just look gorgeous in the jars? 

Of note when you are following a canning recipe there are several ingredients that can be substituted without affecting the safety of the home canned product.  For example, this recipe calls for cider vinegar but any vinegar can be used providing it is 5% acetic acid by volume.  If the vinegar is 4% or 6%, the volume needs to be adjusted using the concentration equation.  The recipe calls for corn syrup but pure sugar cane syrup can be substituted and it also calls for hot pepper sauce giving a wide range of hot pepper sauces to choose from including homemade. 

One of the beauties of home canning is you can avoid all those additives, eliminate the problem ingredients like high fructose corn syrup while ending up with a safe, convenient substitute.  Tommorow I'm canning dried beans.  This is a convenience product for me but well worth doing even though I do cook dried beans from scratch.  Commercially canned beans often contain calcium chloride (acceptable for home canning use aka Pickle Crisp), disodium EDTA (a lysogenic agent I definitely do not want to consume), salt, and HFCS something that is quickly gainly a lot of disfavour in the culinary industry. 


Friday, November 11, 2011

Homemade Taco Seasoning

The love of good food runs deep in our family.  All of our kids including those marrying into the family a very accomplished home cooks with the same philosophy of cooking from scratch.  They are now teaching their love of food to the grandchildren who love to help in the kitchen.  Two of them have taken culinary courses in knife handling and one would dearly love to give up her current career in favour of becoming a chef.  She even took a part time position in a higher end restaurant that also does catering during the summer just for the experience. 

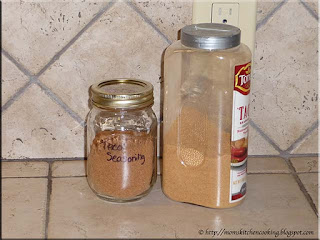
homemade taco seasoning
Cooking from scratch is not always about saving money.  That's just a pleasant bonus.  Cooking from scratch is about controlling the quality of the ingredients to get the best flavour possible while avoiding the unnecessary food additives.  The spice aisles are filled with a multitude of seasoning blends including taco seasoning.  The problem with many commercially prepared seasoning blends is they contain MSG, anti-caking agents, as well as other additives some artificial.  The best policy is to make your own seasoning blends tailored to your tastes.

Tone's taco seasoning doen't contain MSG but it does have flour, sugars, disodium inosinate (flavour enhancer), salts, and silicon dioxide (anti-caking agent).  A 23 oz containers costs about $4 at Sam's Club, considerably less expensive than the envelope packets at the grocery store.  Our daughter shared her recipe for taco seasoning that avoids the use of any additives.  I doubled the recipe.  Compared to Tone's the homemade taco seasoning is richly coloured with an amazing flavour.  I definitely will not be buying taco seasoning again!  Of note, you can easily make your own garlic, onion and cayenne powders by dehydrating then powdering much the same way I make tomato powder

taco salad made using homemade taco seasoning
I love tacos and taco salad!  Flavour is always the key so I tinker with the ingredients to get just the right blend.  This taco salad was made with extra lean ground beef seasoned with the homemade taco seasoning.  It was topped with homemade salsa (hot), organic hydroponically grown and still living Boston lettuce, black olives, organic locally grown tomatoes, onions, sour cream and a blend of shredded cheeses.  The salad was delicious with the meat seasoned to perfection!

Of note is the Boston lettuce, an herbicide/pesticide free product of Canada.  It comes in a plastic clam shell container with the roots still attached.  I watered it when I was unpacking the groceries.  It cost $1.97 for the head of lettuce which is comparable to other heads of lettuce at the moment.  The difference is it will stay fresh and green, continuing to flourish as long as it is watered.  Some fresh herbs come with the roots attached as well.  You can pot them up and with a little TLC you can enjoy fresh clippings year round from that one purchase.  Now this is the way to buy produce!   


Thursday, November 10, 2011

Kitchen Quick Tips - Coffee Grounds and Tea Leaves

kitchen quick tips


Don't discard coffee grounds or tea leaves as both can be used to amend garden and houseplant soil.  Coffee grounds also provide natural insecticide properties.  They can be used as is then simply worked into the soil a little or put them in the compost bin.


Wednesday, November 09, 2011

First Canning Session on My New Natural Gas Range

During the eighteen months that our house was on the market, I purposely slowed down my home canning.  The reasons were simple.  Canning sessions can take upwards of a good day depending on the prep and canning time as well as number of loads to process.  We told the real estate agent we'd show with very little notice so to keep the kitchen in show condition I canned between the hours of 9 PM and 7 AM, not an easy task when my husband was trying to sleep.  I was convinced it would be easier to move empty jars rather than filled ones so went about using up some of my pantry supplies.  The only exception was canning tomato products in September of 2010 where I canned extra.  It must have been a premonition as our original closing date was moved from November 1, 2011 to September 15, 2011 but we took possession on September 1.  I'm glad I canned extra tomato products the year before because this year I managed to only can two hampers, down from my normal ten hampers!

home canned mandarin oranges, jalapeno pepper rings, pineapple
A kitchen never truly feels like it is mine until I have canned in it.  That feeling even extended to our RV and vacation home.  I was anxious to do the first canning session in our new home.  Each kitchen has its own unique rhythm so I had to establish that first.  Yesterday I did my first canning session!  The kitchen is officially mine :)

I canned Chinese mandarin oranges, jalapeño pepper rings and pineapple pieces.  The mandarin oranges were on sale 5lb for $3.97, actually down 3¢ from what I paid for clementines two years ago!  I used the same method for canning the mandarin oranges as I did for clementine oranges except I peeled the segments.  That was a bit tedious but after a few segments I got the hang of it.  The pineapple was $2.47 with a yield of 4 - 250 ml jars at a cost of 65¢ per jar.  The nice thing is by using natural gas for canning I have reduced the cost of canning from 31¢ per hour to 10.3¢ per hour which adds up when doing the large scale canning that I do.  I used a light syrup for the pineapple and processed in a boiling water bath (BWB) for 10 minutes.

I modifed the recipe from the National Center for Home Food Preservation for pickled jalapeño rings to use Pickle Crisp (calcium chloride) rather than pickling lime.  Both are crisping agents but calcium chloride is considerably easier to use and eliminates the long, time consuming presoak process and rinses.  Pickle Crisp can be found in the canning section of many stores or you can buy calcium chloride in bulk online. Of note, jalapeño peppers turn red when ripe which is true of many peppers including the green sweet bell peppers although some peppers turn yellow, orange or purple when ripe.  In general if the pepper is green it is not fully ripened yet.  Ripened peppers lack the sharpness of unripened peppers.  I had a mixture of green and red jalapeño peppers so ended up with 2 - 500 ml jars of green rings, 1 - 500 ml jar of red rings and 1 - 500 ml jar of mixed.

Pickled Jalapeño Rings
source:  Garden Gnome

1½ lb jalapeño pepper rings
1/8 tsp Pickle Crisp (calcium chloride) per 500 ml (pint) jar
1 tsp celery seed per jar
3 tsp mustard seed per jar
¾ c filtered water
3¾ c white vinegar (5% acetic acid)

Wash and cut jalapeño peppers into ¼- inch rings.  Mix water and vinegar together then heat to boiling.  Fill each jar with pepper rings leaving ½- inch headspace.  Spoon calcium chloride, celery seed and mustard seed on top of pepper rings.  Ladle vinegar solution over the peppers leaving ½- inch headspace.  Wipe the rim.  Adjust two piece lids.  Process in boiling water bath for 10 minutes at altitudes up to 1,000 ft above sea level.  For higher altitudes refer to the altitude adjustment chart.


Tuesday, November 08, 2011

Pan Fried Smelt

I am an avid fisherman or should that be fisherwoman.  My husband does not fish and really doesn't like a fresh catch on the boat but a couple of times a year I persuade him with an AutoTrader and a couple of drinks/snacks so I can get to the bigger catch.  Other than that I have to resort to fishing from shore.  Now, I do not use a net unless trying to land a fish but when it comes to smelting, the only way to go is via a fishing net.   Smelt is a very small, about the size of your pointer finger, fresh water fish usually caught off the shores of Lake Erie here but can be found throughout any of the Great Lakes.   I have some rather unpleasant memories of smelt.  A very generous person gave my Mom a whole bushel full of smelt so we got to clean them and all I can say is YUK!  Don't get me wrong as I don't mind cleaning my catch but smelt are tedious at best to clean. 

cleaned fresh smelt
Smelt are seldom found in the grocery stores and when they are available the price is rather high.  Sobey's has them on occasion priced at about $15.50 per kilogram.  A better price can be found at the fisheries along Lake Erie and in Erieau, Ontario.  The price is lower if you clean them yourself. 

I bought a 0.288 kg package of cleaned smelt (pictured) for $4.44.  This was enough smelt for two with a little left over.  Towards the centre is the head of a smelt so you have an idea of what they look like.  Usually when you buy cleaned smelt there are no heads but one occasionally slips through.  Smelt is best lightly coated then pan fried.  Cleaned smelt should be rinsed then patted almost dry before coating.

pan fried smelt dinner
I made a simple coating of flour, cornstarch, paprika, salt and pepper to toss the smelt in.   Smelt cooks rather quickly because of it's small size making it ideal for those meals where shorter prep times are required.  Fry until the coating is a golden brown.   Avoid stirring but rather use a flipper to gently turn the smelt to prevent them from breaking up.  I served the smelt with mixed vegetables and roasted mini potatoes with garlic and shallots.  It was a simple, easy to prepare yet delicious home cooked meal.  This meal from start to finish took about 30 minutes but it could have been shorted by serving another side besides the roasted mini potatoes.  Plain or wild rice would go nicely as a side as a substitute for the potatoes.

smelt backbone
All fish have bones but some are more problematic than others.  Smelt have a small backbone that unlike canned salmon does not soften much with cooking.  The backbone is edible and a good source of calcium.  However, this backbone can be problematic for children causing a choking risk and some simply prefer not to eat it.  The backbone will pull away freely from the cooked smelt.  I recommend removing the backbone after the smelt is cooked before serving it to children.  Children can be quite curious so this presents a wonderful learning moment to see what the backbone looks like, touch it and understand why they shouldn't eat it until they are older.  The backbone is not as fragile as it looks so you can rinse it off, allow to air dry then your child could take it to school for show and tell.


Monday, November 07, 2011

Frugal Kitchens 101 - Cooking for One

Frugal Kitchens 101

My husband goes to hunt camp for a week each year which basically leaves me to my own devices with respect to cooking.  The reality is very little changes even though I am cooking for one.  Oh yes the temptation to eat out is there but instead I take this opportunity to experiment with food.  From time to time in any relationship there will be periods of where you are cooking for one or you may be a university student, bachelor,  bachelorette, widow or widower.   Many find the adjustment of reducing to cooking for one a challenge.  I don't and it really need not be.  All the principles of bulk cooking and pre-planned left overs apply.  This week's Frugal Kitchens 101discusses a few tips for cooking for one.

  • avoid the temptation for convenience - Convenience always comes with a price tag.  Yes you can buy a box of cookies for $3 but a batch of homemade cookies that will last the week and freeze well.  It only takes about a half hour if that and costs under $1 and you get to control the ingredients.  See where I'm going here?
  • avoid the temptation of eating out - Most meals eaten out are going to come into the $10 or more range although breakfast is less expensive.  Consider though that $10 will easily feed you one nice home cooked meal with two left in the freezer for later use.  When my husband is away for a week, I allow myself two meals out which is in keeping with our normal routine  but in reality because I choose to spend my time experimenting with food, I seldom take this opportunity to eat out.
  • look for inspiration - I'm always looking for cooking inspiration but when cooking for one, it is almost a must.  Check magazines, cookbooks and online.  If you have a digital camera go to your local library where you can browse a lot of resources without costing you a penny.  Take pictures of those recipes you would like to try.
  • invest in good freezer ware and a vacuum food sealer - Both will help you effectively store left-overs.  This is not a new concept just it will be used more when cooking for one.  So go ahead and make the recipe that gives a yield for 8 servings.  Eat one then freeze the remainder in convenient individual sized packages or containers for later use.
  • pare down the recipe - Many recipes can be adjusted from 8 or whatever servings by dividing the amount of each ingredient by the total number of servings to give you the amount for one serving.  Some online recipe sites do this for you as well.  I use this method a lot not only when I'm cooking for myself but also when I'm testing a recipe.
  • bulk cooking - In most cases bulk cooking is not thought of when cooking for one but it makes perfect sense.  Use the slow cooker to make a large batch of chili, eat one or two meal then freeze the rest in meal sized portions.


Sunday, November 06, 2011

Roasting Peeled Garlic

Roasted garlic is a must have staple in our home.  We use it in so many dishes to add an almost barely sweetness combined with a deep, rich garlic flavour.  It is nothing like fresh garlic!  I've roasted garlic in the oven, on the grill and in the countertop roaster will excellent results.  I've always just sliced the top of a head of garlic to barely expose the tops of the cloves then drizzled with olive oil and roasted as desired.  One of the grocery stores here is now selling 250 g packages of peeled garlic cloves for 97¢.  I bought another package yesterday then suddenly wondered if I could roast them.  I reasoned if it worked it would save considerable mess getting the roasted cloves out of the peeling later and there would be less of the delicious roasted garlic wasted.  The hopes were if it worked fine, I would do up a large batch of roasted garlic the first of the week.
 

peeled garlic cloves
The garlic cloves are peeled but I had to cut the root end.  I poured almost the entire contents of the package into a 7 c oven proof baking dish then drizzled with extra virgin olive oil.  I covered the dish with aluminum foil then set in the oven at 350ºF.  There was no need to pre-heat the oven.

I was quite hopeful this little experiment would work.  The peeled garlic was ultra simple to prepare, just snipping the stem end off of each clove.  I will be growing garlic in my new garden beds so this would be a great way to use them up.  I don't mind peeling garlic as that goes quick enough, it's the mess of getting the roasted garlic cloves out of the skins that would be nice to eliminate.

roasted peeled garlic cloves
Oh my gosh, did the house ever smell yummy!  I just love the smell of garlic roasting.  It is such a tantalizing smell.  I roasted covered for 40 minutes total, stirring once half way through the roasting process.

The cloves caramelized nicely.  There were a couple of the smaller ones that were what I would consider over roasted.  They were a bit harder but that happens with garlic roasted in the traditional manner as well.   This really doesn't affect the final product other than adding extra flavour and the harder bits soften once the product is allowed to sit for a short period of time.  I like to let my roasted garlic sit for an hour or so before preparing it for storage.

roasted garlic ready to use
Once the roasted garlic was ready, I spooned the garlic cloves into a smaller 2 cup bowl.  This left any extra oil in the baking bowl.  I mashed the cloves the set aside to cool before refrigerating.  The overall yield was about ¾ c of delicious roasted garlic with no muss or fuss.  It tasted just as good as garlic roasted the traditional way.

I'm very encouraged by this little experiment.  I am going shopping for garlic tomorrow to do a larger batch as well as canning a small batch of pickled garlic.  I would dearly love to can roasted garlic but can't because of the oil.  It does freeze nicely so after tomorrow my stocks will be replenished!


Saturday, November 05, 2011

Potted Herbs in the Kitchen

I love my fresh herbs, growing forty or more varieties in my outdoor garden.  My herb bed was nicely established in our last house but I decided not to bring any with me.  It's a long story but there was something amiss with that house especially with respect for growing anything indoors and it wasn't for lack of effort at keeping my continuous harvest going.  To me the house had bad karma, period.  I have been working quite diligently at re-establishing my lush houseplant collection that I'm used to.  Oh gosh, am I ever having fun with this!  Part of that includes growing herbs indoors.

potted herbs in the kitchen
Fresh herbs are the ultimate in cooking.  I will choose fresh over dried anytime!  During the winter months I grow as many herbs as possible indoors.  My new indoor herb garden (pictured) is rather small consisting of sage, oregano, parsley, chives and basil.  The plants are nestled into an antique wooden Pepsi case set just in front of the patio doors in the kitchen.  Once we return from our winter vacation I will be doing a lot of seed starting for herbs but there is little point doing it now.  In the meantime I will continue adding whatever potted herbs I can find.  'Tis late in the season so the selection is not the best.

I bought these potted herbs for less per pot than the price of a package of fresh herb in the produce section at the same store!  They are certified organic herbs in biodegradable pots so can be transplanted into my new gardens in the spring.  Most herbs are really quite easy to grow indoors.  They need nice light and enough water to wet through then allow to dry before watering again.  Keep in mind that some like basil are annuals so they need a bit more TLC to keep growing through the winter months and they will not survive the cold winters of Ontario outdoors.  The biggest tip with growing fresh herbs indoors is use them!  Herbs love to be trimmed and the more you trim the more they will reward you with lush growth.  The rule of thumb is to never cut more than a third of the plant in any clipping but for most kitchen use you will only use a sprig or two at a time so that shouldn't be a problem.  When you cut, leave at least one set of leaves on the stem.  Basils in particular should be regularly pinched to keep the plant bushy.  Don't let herbs go to flower

I toss fresh herbs into any dish that I can as well as using them for garnish.  Basil is a beautiful garnish, full of flavour.  Purple basil in particular is one of my favourites for salads.  Chives are just a must have herb and don't restrict yourself to just the regular chives as there are a lot of varieties to try, all very good.  Honestly, chives are like weeds.  They do well indoors and you can't kill them outdoors.  Mints can be invasive if planted with other herbs so keep them in their own pots.  Growing herbs indoors year round really enhances the culinary experience.  They take little effort but the rewards are more than worth it!


Friday, November 04, 2011

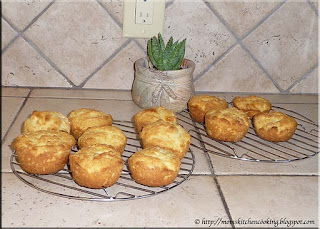
Corn Muffins

Well the good news is I'm back in the kitchen cooking up a storm.  My gosh that move really disrupted my cooking style but it was worth it.  I've been getting used to cooking with natural gas while my husband has been fine tuning his skills on the dual fuel (propane/charcoal) grill.  We are having a lot of fun and I must say I feel so much better just being able to do a bit of cooking!

corn muffins
I knew I would be making moose meat chili for my husband to take to hunt camp.  If you order chili here (Southern Ontario) it comes with crackers or nacho chips but in the southern states that we travel through it comes with corn bread.  I decided it would be nice to make a batch of corn muffins for the guys to enjoy with their chile which of course meant I had to make a test batch first.

Jean Paré is my favorite Canadian cookbook author.  I have quite a collection of her books.  The ingredients are simple and to the point so I know I don't have to go running out to the store for some exotic ingredient that given our area I wouldn't be able to find anyway.  So I turned to her for the corn muffins and was not disappointed.  The recipe is nice that it uses basic staples and the muffins are delicious!  I modified the recipe slightly but it is still her recipe.

Corn Muffins
recipe by: Jean Paré, Company's Coming Muffins & More, 1983. Pp. 21

1¼ c unbleached flour
1 c corn meal
¼c organic granulated sugar
4 tsp baking powder
½ tsp salt
1 egg
¼ c vegetable oil
1 c milk

Preheat oven to 400ºF (200ºC).  Whisk egg then stir in milk and oil, set aside.  Combine dry ingredients then make a well in the middle.  Pour the wet ingredients into the wll and mix just until moistened.  The batter will be lumpy.  Spoon into prepared muffin tin.  Bake for 20-25 minutes.  Serve hot or remove from pan for later use.*

*to warm - Cover the muffins and microwave 30 seconds on high.