There seems to be a fear of deviating from the recipe when it comes to baking breads. Yet yeast breads can be tweaked a fair amount while still resulting in a great loaf of bread. Essentially all you need to make a good loaf of bread is yeast or starter, flour, and salt. Practically all other ingredients can be substituted or altered somewhat. I routinely substitute liquids because why use water if I can add flavour and I like substituting sweeteners. But some of my best loaves of bread have come about from blatant mistakes. Two examples of this are my favourite white bread and herbed tomato bread.
Potato Bread
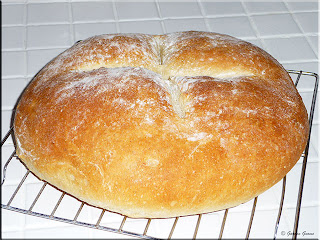
Potato bread is a great way to use up left over potatoes but I came across a recipe using potato flakes. I didn't have potato flakes so I looked around to see how I could make this bread using what I had on hand. From there I used the original recipe as a guide but modified a fair amount so this became a test loaf of bread. The resulting loaf was very moist, flavourful and nicely textured. It made an ideal sandwich bread but was also nice for toasting.
Potato Bread Using Instant Potatoes
recipe by: Garden Gnome
1 c buttermilk
⅓ c water
1 tbsp butter
1 tbsp organic sugar
1½ tsp sea salt
⅓ c instant mashed potatoes, complete mix
2½ c unbleached flour
1½ tsp instant yeast
Combine buttermilk, water and butter in large measuring cup. Warm slightly in microwave to just under room temperature. Place remaining ingredients in bowl of stand mixer. Mix on speed setting 1 to blend well. With mixer still on setting one slowly start pouring in liquids. Mix until dough cleans sides of bowl. Adjust with necessary with a little extra water if too dry or flour if too wet. Knead on setting 3 until dough is smooth and elastic. Remove dough ball from bowl. Wipe bowl with vegetable oil. Return dough ball to bowl. Cover with damp towel. Place in warm area and leave until dough is doubled. Punch down the down then form into a loaf and place in prepared baking pan. Let rise to double. Bake at 200ºC/400ºF until golden brown or loaf sounds hollow when tapped.
Welcome to our kitchen that truly is the heart of our home! One of life's greatest pleasures is enjoying good food with family and friends. Here you will find recipes, tips for frugal cooking, how-tos for food preservation especially canning and anything else food related. Tea is brewing and warm cookies are fresh from the oven. Please sit a spell and enjoy your stay.
- Garden Gnome
- Ontario, Canada
- I am a wife, mother and grandma who enjoys the many aspects of homemaking. A variety of interests and hobbies combined with travel keep me active. They reflect the importance of family, friends, home and good food.
--Bobby Flay
For Your Information
- [March 19, 2020] - Effective Mar 17, this blog will no longer accept advertising. The reason is very simple. If I like a product, I will promote it without compensation. If I don't like a product, I will have no problem saying so.
- [March 17, 2020] - A return to blogging! Stay tuned for new tips, resources and all things food related.
- [February 1, 2016] - An interesting report on why you should always choose organic tea verses non-organic: Toxic Tea (pdf format)
- Sticky Post - Warning: 4ever Recap reusable canning lids. The reports are growing daily of these lids losing their seal during storage. Some have lost their entire season's worth of canning to these seal failures! [Update: 4ever Recap appears to be out of business.]
Popular Posts
-
Food manufactures have so convinced us that home cooking is not possible without a ready-made mix that many of us actually believe that myth...
-
I am very much a scratch cooking most of the time. One thing that has always been a concern is coming across a recipe I want to try that ca...
-
I got my first job at A&W and only worked there the summer but that is where I met the love of my life. This sauce was made on site by...
Wednesday, March 31, 2010
Potato Bread Using Instant Potatoes
Tuesday, March 30, 2010
New York Style Cheesecake
Cheesecake is one of my husband's favourite desserts. Not being a huge dessert fan he doesn't get homemade cheesecake very often. Occasionally he gets my quick no bake cheesecake that while quite good it definitely is not New York Style cheesecake like The Cheesecake Factory sells. I've been on a quest to get that rich, creamy flavour of New York Style cheesecake.
Crust Prep
Traditionally baked cheesecake is made in a spring pan. Well the problem is I have 2 large spring pans but not a small one so I improvised using a 2-piece flan pan (top right). It was wider in diameter but shallower. The prepared crumbs were poured into the pan (top left) then formed using the bottom of a stainless steel measuring cup (bottom right) resulting in the prepared crust (bottom left).
New York Style Cheesecake
1¼c graham cracker crumbs
2 tbsp granulated sugar
3 tbsp butter
19 oz cream cheese, softened
1 c granulated sugar
1 tsp lemon zest
¼ tsp pure vanilla
3 eggs
Mix graham cracker crumbs with 2 tbsp granulated sugar. Melt butter then stir well into the graham cracker crumb mixture. Pour into baking paan and form into crust. Bake at 350ºF for 10 minutes. Remove from oven and let cool.
Reduce oven temperature to 300ºF. Beat cream cheese until uniform using stand mixer. Slowly add in sugar while continuing to beat. Beat until fluffy then add one egg at a time beating until smooth. Mix in vanilla and lemon zest. Pour into prepared crust. Bake for 1 hr or until centre is set. Remove from oven. Cool then refrigerate 3 hours before cutting.
New York Style Cheesecake
New York style cheesecake surprisingly does not have a high sugar content. It is rich and creamy but not all that sweet. A lot of the sweetness comes from what you top the cheesecake with. I topped the cheesecake slices with low sugar chocolate raspberry sauce that added a deep depth to the overall richness. Next time I will warm the sauce then do that really neat swizzle effect over the cheesecake slices but for this one, the taste test was most important. I'm still tweaking cheesecake recipes so the recipe is a combination of a few recipes with my own ideas tossed in. The texture is right up there so that's encouraging. The end result was a nicely flavoured and textured cheesecake.
Monday, March 29, 2010
Frugal Kitchens 101 - Convenience Foods for the Freezer
The freezer remains a very popular method for store foods for later use. Despite the fact that from the moment a food is placed in the freezer it costs you in terms of electricity until the food is used, the freezer continues a good frugal choice when used properly. A freezer will:
- help lessen the temptation to stop through a drive-through, pick up fast food or order take-out
- save trips to the grocery store
- increase the ability to take advantage of sales and bulk meat purchases
- enable the use of homemade frozen convenience meals, dishes and quick starts.
Quick meal starts I keep in our freezers include:
- pre-cooked seasoned/unseasoned meat cubes, slices and strips - good for wraps, sandwiches and salads as well as adding to soups, stews and casseroles
- pre-chopped vegetables - onions, sweet/hot peppers, celery for adding to soups, stews and casseroles
- pre-chopped fruits - fruit smoothies
- stocks - quick soup/stew starter
- small quantities of pre-made pie/bread/pizza doughs - quiches, pies, bread bowls, pizza
- lasagna
- quiche
- shepherd's pie
- cabbage rolls
- a few homemade casseroles
- waffles/pancakes
- burritos
- egg rolls
- omelet mix (uncooked)
- homemade stuffed pockets
Sunday, March 28, 2010
Perch Fried Two Ways - Dry Coated & Beer Battered
We eat a fair amount of fish with a good portion of that fish being fresh water from the Great Lakes. I love to fish and we have friends who generously gift us with some of their catch. Fish is one of those things that I really don't like heavily coated. In fact even though I love English style fish & chips I peel the coating off. The coating makes the fish moist and tender so I like that just not the coating.
Smaller fish such a small bass, perch, bluegill and pickerel lend themselves nicely to pan frying. In this case it is customary to use a light cornmeal based coating. The cornmeal gives a nice crunch without being overpowering. The best part is it is extremely easy to do. At the same time battered fish coating as in English style fish & chips offers an entirely different result. The smoother coating rises making the cooked fish look bigger. It is quite tasty as well.
Golden Dipt
We are trying to clone a specific fish batter my husband swears is the best. That means we've been trying a few in an attempt to make a clone. Now the nice thing about this is we get to eat most of the attempts. My husband brought home a couple of boxes of Golden Dipt Beer Batter to try. The real trick to making a good battered fish coating lies in the beer. It is important to use a preservative free, bottled (not canned) micro-brew although I suspect those perfecting English style beer batter likely used draft beer so perhaps a good substitute would be a homebrew. Canned beer and preservatives can result in off flavours.
Perch Dinner
Fresh water perch (lake or yellow perch) fillets are small with a pleasant mild taste. We catch them by line and hook from our dock or boat using minnows we also caught via a minnow net or worms we dug from the garden. We eat a lot of perch! As with all fish occasionally there can be bones depending on how well they were cleaned but normally this isn't a problem making them suitable for coating. They are quick cooking so pan frying is ideal.
Pictured is the perch we had for dinner cooked in about a half inch of oil in a hot fry pay using two different coatings. The thicker coating (larger pieces) was the Golden Dipt beer batter coating while the thinner pieces to the right was a dry coating. Just look at the difference between the two coatings yet the actual pieces of fish were pretty much about the same size. Both were quite tasty and while the battered fish was impressive looking we both agreed we liked the dry coated fillets more. The beer battered coating was good but still not quite what my husband is looking for in the clone recipe. So the experimenting continues :)
Saturday, March 27, 2010
Spring Salad
As spring approaches our meal tend to lighten up a little in anticipation of the new harvest to come. My thoughts are already turning to getting the garden in along with the first of the spring harvest of lettuces, rhubarb and asparagus. Fish just seems to pair so nicely with spring vegetables
Spring Salad
Earlier in March we took advantage of a good deal on cod fillets. Then late last week Russet potatoes were on for $2.99 for 20 lb. Well we just had to buy those! We made pan fried cod and home made French fries with fry dip for dinner a couple of nights ago. Rounding out the meal was a lovely spring salad.
Sweet peas are one of my favourite vegetables to grow but they seldom are preserved rather reserved for fresh eating raw as picked. During the winter months I have to rely on frozen peas for salads. While peas do find their way into a few casseroles and soups my favourite way to use them is raw as a salad topping.
Spring salad - iceberg lettuce, chopped onion, green pepper, tomato pieces, English cucumber slices, sunflower seeds, salad dressing of choice.
Friday, March 26, 2010
Layered Venison Casserole
Casseroles are one of those dishes that can be tweaked to your heart's content and they are still comfort meals. I think for me the only thing that remains consisent when I make a casserole is using a casserole baking dish. Like many of the dishes I make casseroles simply start with an idea rather than a recipe in mind. Sometimes the casserole is based on a meat that I want to use and other times it will be a vegetable that I want to build around. Casseroles are also a great way to use up a few left-overs. My experience has been that casseroles reheat nicely as well. That versatility is what makes casseroles the frugal home cook's friend.
Ready for Oven
Venison is a extra lean red, game meat that can be used in place of beef. It has a bit stronger, gamey flavour than beef and because it is so lean it should be served hot and paired with pork for a better mouth feel. Venison works nicely for any casserole that calls for ground beef. A couple of nights ago I made a layered venison casserole that came out nicely. It had a lot of flavour!
Layered Venison Casserole
recipe by Garden Gnome
1 lb ground venison
1 lb pork sausage without casing
¼ c bacon fat
1 c marinara sauce
2 lg potatoes
1 c frozen peas
1 c frozen niblet corn
¾ c milk
2 c (500 ml) jar home canned cream style corn
2 c (500 ml) jar home canned tomato soup
2 c shredded cheddar cheese
Microwave potatoes until just tender. Slice then set aside to cool. Melt bacon fat on medium high. Brown venison and sausage. Remove from heat and drain well. Pour browned meat into casserole dish spreading evenly. Pour marinara sauce over the meat. Place potato slices on top then sprinkle on corn and peas. Pour cream style corn then tomato soup over the layers. Pour over the milk over the layers. Place the shredded cheese over top, spreading evenly. Tent with tin foil. Bake at 350ºF until bubbly. Remove tin foil tent and continue baking for 15 minutes to allow cheese to brown slightly.
Layered Venison Casserole
Pictured is the layered venison casserole as served. Very few of my casserole will cut neatly into squares or wedges but that's fine. When it comes to casseroles it is all about the flavour but I like using colours that will give great contrast in the finished casserole. I especially like going for a rich, creamy background texture as well. I just love the gorgeous bright colours! I served the casserole with sourdough bread and a simple side salad for a complete meal. As meals go this was not a fancy meal but rather a comfort meal, rich and flavourful. We really enjoyed this casserole!
Thursday, March 25, 2010
Kitchen Quick Tips - Cold Drinks
Wednesday, March 24, 2010
Using Roasted Garlic
Quite often I write about how to make those little extras like roasted garlic but then forget to write about how I use them when I do. The reason for this is I'm so used to using certain homemade foods as ingredients so they don't jog my mind to write about them. A few days ago it was a gorgeous spring day so we decided to grill a T-bone steaks on the outdoor grill. Our traditional steak dinner consists of the steak, baked potato, vegetable and side salad. I wanted something extra to spark up the meal without moving to far from the traditional. Roasted garlic was just what I was looking for!
Roasted Garlic Accents
Garlic can be roasted in the oven, on the grill or in the countertop roaster. It is very easy to make. Once roasted, I put the garlic into ice cube trays then freeze. I pop the frozen cubes (about 2 oz) into a zipper style freezer bag then keep in the freezer to be used as needed.
Roasted garlic is one of the first ingredients I turn to when I want to brighten up the flavour of a cream soup or chowder. It also adds depth and flavour to sauces. For this meal I stirred in about 1 tsp of roasted garlic into 4 ounces of sour cream for the potato topping then let the mixture sit for a half hour before using to let the flavours meld. The topping was wonderful! It will be one I modify slightly to make a vegetable dip then further modify for a creamy salad dressing. My husband was sautéeing an onion and mushroom mixture. He thought the roasted garlic would make a nice addition to the mixture so stirred in about a teaspoon of roasted garlic. That really brighted up one of our favourite vegetable mixtures. The roasted garlic was just the thing this meal needed!
Tuesday, March 23, 2010
Oktoberfest Sausage
It would appear that spring is just around the corner. We have been experiencing above average temperatures combined with beautiful blue skies. A couple of nights ago we decided to enjoy a bit of the great outdoor weather to grill. While we do grill outdoors year round it is so much more pleasant without battling inclimate weather. Oktoberfest sausage.
Oktoberfest Sausage
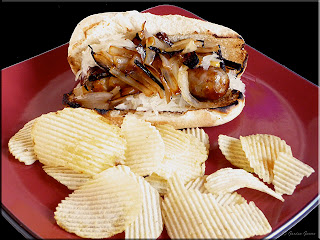
Wurst is a German sausage made using pork and sometimes beef or veal, spices and peppercorns. Each type of wurst has other ingredients that make the variety distinctive. There are more than a thousand varieties of wurst. Weisswurst is the traditional sausage served at Weisn (Oktoberfest) although other wursts are also served. This was a knockwurst (knackwurst) sausage made from lean ground pork by the butcher simply labled as Oktoberfest because according to him that's what everyone calls them. We put the grilled sausages on toasted sausage buns. Sausage buns are a bit larger than hot dog buns and have been dusted with cornmeal. They are sliced on the side while the top has cut mark where the dough was allowed to expand. We kept the toppings to honey mustard, caramelized onions and sauerkraut then served with a side of potato chips. It was an easy, mid-week, early spring meal that hinted of more outdoor grilling days ahead.
Monday, March 22, 2010
Frugal Kitchens 101 - Baking
According to the results of our latest poll: out of 41 votes 51% (21) baked less than 1 a week; 34% (14) baked 1 to 3 times a week; 4% baked 4 - 6 (2) times a week; 4% (2) baked daily; and 4% (2) did not know they had an oven. If the extremes are removed, then the average reader here baking somewhere in the 1 to 3 times a week. That is a fairly good number.
Home baking can save a considerable amount of money in comparison to store bought bakery products. Baking really falls under a couple of categories but the two main ones are baking entirely from scratch or baking using ready made doughs or mixes. Some use a combined method in which everything is scratch except a certain ingredient such as puff pastry, phyllo dough or pie crust. By far the cheapest for home baked products is entirely from scratch. The most expensive for home baking often coming in at close to the store bought price is baking entirely from mixes. In between these two is the happy medium of using a pre-made ingredient or two with the rest from scratch that often becomes the more frugal choice for home baking.
Let's face it some despite multiple attempts some just cannot make a good pie dough so rather than waste the ingredients and time, buying a pre-made pie dough is a reasonable alternative. At the same time both phyllo dough and puff pastry are time consuming and can be very frustrating to make. I follow the tip from some of the food channel chefs and use store bought. On the other hand most store bought cake mixes, bread mixes, refrigerator doughs, cookie doughs and those types of things really are not a good value for your dollar. For example, a package of refrigerator cinnamon buns will cost about $2.50 for 8 buns. The made from scratch ingredients will cost about 30¢ for 12 so clearly you are paying for the convience of the refrigerator buns. The same holds true to other mixes and doughs. If you want the convenience of mixes and pre-made doughs, take a few minutes to make your own.
Homemade refrigerator/freezer slice and bake cookie dough will take about 10 minutes total from measuring to freezer. Homemade cake, cookie and bread mixes can be made assembly line style in about 10 minutes for about 6 to 10 mason jars. Bread dough can be made in less than 5 minutes in a bread machine or stand mixer, remove just after the knead then package in zipper style freezer bags. When you want a fresh loaf of bread remove and let thaw and proof then bake. Just using the above examples you could have a considerable amount of homemade mixes in the pantry and bread dough in the freezer by investing about 25 minutes of time. The bonus to this is of course the substantial amount of money you save.
Sunday, March 21, 2010
President's Choice - Grown Close to Home - Ontario
Ontario is home to many farms like the one in the video owned by Phil Tregunno of Tregunno Farms from Niagara-on-the-Lake in Ontario. Phil is one of five growers featured in a national broadcast campaign with Galen G. Weston Jr. executive chairman and spokesperon for Loblaw Companies. Galen great grandson of George Weston, founder of George Weston Bakeries Limited. Loblaw Companies is the parent company to the following grocery store chains in Canada: no frills, Real Canadian SuperStore, Zehrs, President's Choice, President's Choice Financial, maxi & cie, maxi, independent, Fortino's, and Dominion®.
Loblaw Companies has started a campaign for grown close to home aka buying locally. Buying locally is less expensive and eco-friendly. It reduces the transportation costs by reducing the distance food has to travel from the farmer to the consumer. The produce is fresher, picked when ripe rather than underripe that happens when produce must travel a longer distance. Local produce is more nutritious. From the moment produce is picked it begins losing nutrition. The shorter travel distance ensures greater nutrition. Buying locally is socially responsible as well by supporting local growers in your community. It is nice to see larger corporations practicing eco-friendly, socially responsible practices like buying local produce. Here is one of the commercials Loblaw Companies have been running, encourganing buying locally.
Bon Appétit!
Garden Gnome
©2006-2010
Saturday, March 20, 2010
Pork Cracklings
I cannot recall a time that pork has been on sale at such low prices. Thanks to all the hype and misinformation over the H1N1 virus we have seen extremely low pork prices. Nice cuts of pork such as the loin, pork shoulder and butt have been going as low as $1 a pound. Recently the savings has expanded to include smoked, cured cuts of pork as well.
Smoked Pork Shoulder
One of the local grocery stores had smoked pork shoulders on for 97¢ per pound. At that price it was well worth picking one up. The total cost for this pork shoulder was $7.79. It was kryovac packaged so could have been frozen for later use. The meat had a mesh holding it together likely for the smoking process. There was a nice piece of skin on the meat. Most recipes with tell you to cross-hatch cut this skin which helps render out the fat but I had other plans for the meat. The skin portion is what I wanted to make a delicious snack called cracklings. I removed that before cooking at 300ºF, skin side up. Part way through the cooking process I glazed the pork shoulder with home canned apple jelly followed by the occasional basting with the glaze until the meat was cooked through.
Defatting Pork Skin
Leaving the meat without cross-hatching the skin resulted in an extremely moist and tender ham. Prior to serving I gently cut between the meat and fat pulling the skin with the fat in tact away from the meat (1). Laying the knife on its side between the fat and the skin then slowly moving on an angle to separate the two layers is the easiest method to use (2). This removes most of the fat. Holding the knife straight up with blade edge lightly resting on the skin then using a slight scraping motion is the best way to clean any remaining larger pieces of fat (3). It is important to not clean off all of the fat as it is needed to cook the cracklings. Once the skin is defatted I cut it into strips then across to form bite sized pieces (4).
Cracklings are called cracklings for two reasons. First they seriously do jump and crackle while they are cooking. It is imperative that you use a splatter screen to prevent possible burns from the jumping pieces. When the pieces pop, they are quite loud and capable of landing a distance from the pan. Here is a short video I made while cooking the cracklings.
The second reason cracklings are called cracklings is because the crackle when you eat them. The taste and texture is a true delight!
Pork Cracklings
Cracklings are cooked until just crispy on medium high heat. It is important to not over cook to the point of burning but not undercook to where the skin is gummy. The end result should be a crunchy texture that softens slightly when chewing yet holds somewhat together almost gum like. I know this is not a really good description of the texture but it's the best I can think of at the moment.
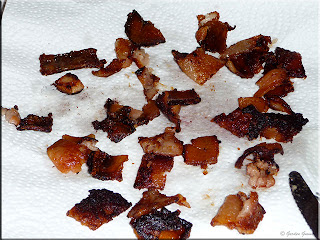
There is not a lot of shrinkage other than losing the fat. I drain the pork cracklings on paper towels to absorb any remaining fat. The pork cracklings are enjoyed as they are without any additional seasonings. They don't look like much but my gosh are they ever delicious!
Friday, March 19, 2010
Monte Cristo Sandwich
Sandwiches have to be one of the most popular meal and snack choices! There are several of our favourite sandwich recipes in the archives. For that reason alone there seems to be no end to the various ways to prepare two pieces of bread with meat in between aka the sandwich. While there are many great ways to make sandwiches that aren't warmed up, there are also endless ways make cooked sandwiches including but not limited to toasting, grilling and using a sandwich press.
Monte Cristo
Last Saturday we went out with friends of ours with stopping for dinner as part of the outing. One of our friends ordered a Monte Cristo sandwich (pictured). This sandwich contains turkey, ham and cheese then dipped in an egg mixture similar to French toast mixture then pan fried. A Monte Cristo is an easy to make sandwich at home.
You will need per sandwich:
note: Use store bought lunch meat or very thin sliced home cooked meat.
2 slices of bread
2 slices Black Forest ham
2 slices turkey breast
2 slices Swiss or Gruyere cheese
butter
egg mixture
egg mixture
3 eggs
⅓ c milk
dash of sea salt
For each sandwich butter one side of the bread. Cover one bread slice with 2 slices of cheese, 2 slices each of ham and turkey slices. Top with the other slice butter side facing the filling. Beat the eggs with milk and salt. Place 2 toothpicks diagonally to across width of sandwich to hold together. Dip the sandwich into the egg mixture. Fry in a pre-heated fry pan or griddle with a little butter until golden brown. Remove from fry pan or griddle. Cut in half. Remove toothpicks prior to serving.
Thursday, March 18, 2010
Kitchen Quick Tips - Left-over Coffee & Grounds
Wednesday, March 17, 2010
Irish Soda Bread (1)
Many in North America celebrate St. Patrick's Day where the two traditional meals are Irish Stew or corned beef with cabbage usually served with some type of bread and washed down with green beer. My husband and I tend to eat out that night savouring a bit of American Irish cuisine combining celebrating St. Patrick's Day with another social event.
Irish Soda Bread
It just seems natural to serve Irish Soda bread with the St. Patrick's Day meal. Irish Soda bread is an Irish staple with the traditional version made without yeast. The rise comes from the interaction of the buttermilk and baking soda. This recipe originally written for a bread machine uses yeast to ensure a good rise but still has all the flavour of a traditional Irish Soda bread. I've converted the recipe to use a stand mixer. While this bread does have sodium in the form of baking soda (sodium bicarbonate) it is considerably less than most loaves of bread pushing this bread into the low sodium category. The result is a lovely bread to serve with the meal as well as make corned beef sandwiches for the following day's lunch.
Irish Soda Bread
source: Garden Gnome
1 c buttermilk
1 tbsp butter
1 tbsp honey
¼ tsp baking soda
¼ c rolled oats
2¼c unbleached flour
1 tsp instant yeast
Place dry ingredients in stand mixer bowl. Mix to blend. Measure buttermilk in measuring cup then add in the butter and honey. With stand mixer on setting 1 (mix) slowly pour in the wet ingredients. Mix until dough cleans the side of the bowl. Set to setting 3 for kneading. Knead until smooth and elastic. Remove dough hook. Remove dough, lightly oil bowl then return dough to bowl for proofing until doubled. Punch down and form into loaf on Silpat lined baking sheet. Allow to rise until double in size. Cross-hatch if desired. Bake at 200ºC/400ºF until golden brown and loaf sounds hollow when tapped.
Tuesday, March 16, 2010
Dark Rye Bread
I usually make homemade bread a couple of times a week or more depending on how the week unfolds. By far the three types of bread I make the most are basic white, sourdough and French but any bread is fair game. I love experimenting with making specialty and whole grain breads. This really is where baking bread a home really pays off not only in flavour but in freshness.
Dark Rye Bread
Dark rye bread is a richly flavoured, specialty bread that we use for corned beef or beef sandwiches as well as enjoying topped with cream cheese. It is also a nice appetizer bread. This bread gets its deep, rich colour from black coffee which is a good way to use up left-over coffee from the morning pot of coffee. Molasses and the actual dark rye flour also add to colour as well as the flavour. I think it makes for a beautiful loaf of bread.
Dark Rye Bread
source: Garden Gnome
1½ c cold black coffee
3 tbsp butter
3 tbsp molasses
2 tbsp brown sugar
2 tsp salt
3½ c white flour
1¼c dark rye flour
3 tbsp gluten flour
1½tsp instant yeast
Place the dry ingredients into bowl of stand mixer. Mix on speed 1 until well mixed. Measure coffee, butter and molasses into measuring cup. On speed 1 slowly pour wet ingredients into the dry ingredients. Adjust moisture level if necessary with a little extra coffee. Mix well then increase speed to 3 and knead until smooth. Remove dough hook. Form into a ball and place back in the bowl. Cover with damp towel. Allow to proof until doubled in size. Punch down, form into desired shape, let rise until doubled then bake at 200ºC/400ºF until loaf sounds hollow when tapped.
Monday, March 15, 2010
Frugal Kitchens 101 - Grinding Your Own Meats
Ground meats especially beef have long held the reputation for a frugal meat choice. While it is true that ground meat is a good way to use cheaper, less tender cuts of meat, the idea that store bought pre-ground meat is a frugal meat choice is a myth. In my opinion a better frugal choice is to buy cheaper cuts of meat then grind them yourself. The reason for this is on any chunk of meat there can be a low level of bacteria, the worst being E. coli. If the meat is ground then left to sit for even a few hours this bacteria can multiple enough that if the meat is improperly cooked it can make you quite sick leaving long term residual effects or worse. The increased surface area greatly aids hiding spots for microbial growth and quicker spoilage times. Complicating this issue is if the commercial meat grinder is used to grind other meats besides beef such as pork or poultry then not proper cleaned cross contamination can occur. A final problem with buying ground meats especially turkey and pork is in smaller communities they simply may not be available on a regular basis. Today's Frugal Kitchens 101 gives a few tips on grinding your own meats.
Grinding your own meats can actually less espensive than buying store bought because you can take advantage of meat sales. The equipment is not expensive either ranging on the lower end about $25 to the higher end of $150. If you have a KitchenAid® stand mixer the grinder attachment will cost about $40. Here's a few tips for grinding meats and poultry:
- Plan on cooking the meat the day you grind it. If you want to grind extra for later meals, cook it then vacuum seal for quick meal starts. If you want to freeze the ground meat raw, grind then vacuum seal and freeze immediately.
- Trim any fat, ligment or silver covering and skin from the meat. The silver coating will clog the grinder.
- Cut the meat into strips that will easily feed through the hopper of the grinder.
- Place the strips in the freezer until they are very cold or just starting to freeze.
- Put the coarse grinder plate into the grinder and tighten.
- Feed the meat through the hopper one strip at a time, guiding with a food pusher but do not force.
- For best results feed the ground meat through the hopper again with the fine grinder plate. Do not do this with fatty meats; only grind these meats once.
- If you want to grind 2 kinds of meat such as beef followed by chicken the grinder should be thoroughly cleaned before switching to the next meat unless all the ground meat is to be used in the same dish (eg. 3 meat meatloaf).
Sunday, March 14, 2010
Three Blog Awards!!!!!!!!
What an honour! Thank-you so very much Polly of Angels in My Garden for awarding me not one but three awards! I gladly accept all three awards. Polly has a great homemaking blog that I'm sure you will enjoy as much as I do. Please take a moment to stop by Polly's blog to say hi.
The first award is You're going places, baby. Recipients of this award have to tell where you see yourself in 10 years.
- In 10 years time I see myself still enjoying my wonderful family and cooking up a storm.
To accept the Beautiful Blogger Award, the recipient must tell 7 things about myself. Here's 7 things about me:
- I'm continuously looking for ways to reach our goal of an eco-friendly lifestyle.
- I'm very much a private person who enjoys being a homebody rather than a social butterfly.
- I love cooking with good ingredients!
- I grow herbs, vegetables and fruit in raised beds using the square food gardening method combined with companion planting.
- One of my favourite fair weather activities is fishing.
- I am a shoe-aholic! I'm not kidding here having several pairs still with price tags an my collection numbers about 55 pairs.
- Photoshop® is my favourite photo editing software.
- Margie and Edna's Basement
- Dances of Dreams
- The Story of Parenting a Child With Autism
- Carterville
- Mimi's Kitchen
- Everyday Living
- Grandma's Pattern Book
- Heart to Heart
- Lanita's Life on the Farm
- Mommy's Kitchen
- Smoky Mountain Café
- The Ramblings of a Working Mom
Saturday, March 13, 2010
Shake & Bake Chicken Clone Recipe Revisited
I mentioned yesterday that we were relying on tried and true comfort food meals with our house being recently put on the market. What I'm looking for is good food without a lot of prep work. I'm also looking for meals that rely heavily on our pantry and freezer stores. I'm trying to use at least one food item from both the pantry and freezer for each dinner meal. This will help reduce what we have to move then I can spend a few weeks after moving restocking the pantry and freezer stores.
Shake & Bake Clone
One of our recent meals used up 2 packages of chicken from the freezer and a bit of homemade shake & bake chicken coating from the pantry. Sides included oven baked potatoes topped with cheddar cheese and bacon pieces, and steamed broccoli. It was a nice comfort meal that was easy to put together with little effort.
From time to time in life there are periods of time where it would be so tempting to pick-up take-out or eating out. The problem is a lot of these times the extra time spent getting take-out or eating out actually defeats the purpose by using up time that could be spent dealing with other pressing matters. While the meal was cooking I had time to work on the house so it was a frugal use of time. At the same time we ended up with a nice comfort meal without much effort.
Friday, March 12, 2010
Bacon, Bacon and More Bacon
With all the recent changes with our house being on the market I have been leaning on the old, tried and true comfort meals. This is great for us because we have awesome home cooked meals. It's not so good as an author of a cooking blog needing new blog fodder. So every once in awhile a cooking blogger has to add a bit of filler.
Bacon is one of the major food groups! Bacon makes everything taste better :) Today I will leave you with a short video clip I took of bacon frying to be used for twice baked potatoes. Now don't you just wish you had smell-o-vision?
Thursday, March 11, 2010
Kitchen Quick Tips - Potato Salad
Wednesday, March 10, 2010
Cod with Organic Vegetables (Low Fat)
I use organic growing methods for my gardens so when I buy produce out of season I like to buy certified organic if at all possible. Last weekend one of our kids picked up a basket of organic produce for us from Pfenning's Organic Farm in Baden, Ontario. The basket contained Jona Gold apples, blood oranges, rainbow carrots, blueberries, English cucumber, yellow onions, red leaf lettuce, red potatoes and button mushrooms. The cost for all this great organic produce was $17. In comparison to fruits and vegetables that are not grown using organic methods, this produce is more expensive. However, more grocery stores are now carrying organic produce so as the demand grows, the price will decrease somewhat. Why is buying organic produce important?
Organic Produce
Organic growers use no chemical fertilizers, herbicides or fumigants so there are none of these residues remaining in the food. The food is free of toxic chemical and growing organically keeps toxic chemicals out of the air, soil and water. In addition to this, growing organically provides a safer working environment for field workers. Growing and/or buying organic produce is:
- eco-friendly
- socially responsible
- healthiers, free of toxic chemicals
- supporting sustainable farming practices
Ingredients
Pictured are the organic vegeatables (top) and cod (bottom) used to make an easy, low fat meal. Rainbow carrots are carrots that have been selectively bred to red, purple, yellow and white. Each have their own unique characteristics and flavours. When used as a blend they have a nice eye appeal as well as interesting flavours, quite gourmet. Rainbow carrots can easily be grown in the home garden so this will be one of my new varieties to try growing this year. Red potatoes are always a delight! We love them steamed.
Our butchershop has Highliner brand cod fillets on sale for $5.99 per pound, a $4 per lb savings. We bought 10 fillets which is enough for 2 meals for 2 adults. Cod is a lean white fish with a mild flavour and firm texture that can be baked, steamed, poached, pan fried or coated English style in batter then deep fried. It can also be used in chowders. Cod has 105 calories per 3.5 ounce (about 1 pictured fillet) serving making it a health conscious choice. It is also an economical choice in terms of price. As with all fish, it is important not to over cook cod.
The Meal
We coated the cod fillets with Krusto Fish Batter mix then pan fried until just golden. This is a fish coating that can be used dry as we did here or can be made into a batter for deep frying. We steamed the red potatoes and rainbow carrots together. Notice the contrasting colours of the carrots. The bag we got only had yellow and 2 shades of orange carrots so I will be looking for one with both red and white carrots. Adding in a few regular carrots would give a bit more contrast as well. Rounding out the meal was a small spinach side salad making for a healthy, low fat meal.
Tuesday, March 09, 2010
Peanut Butter Rice Krispies
Easy snacks are always welcomed. Even though we don't eat a lot of them, squares always fit the bill. Squares are easy to make, low cost and they just fit that sweet tooth. They are ideal for parties, get togethers, birthday parties and school bake sales.
Peanut Butter Rice Krispie
Rice krispie squares are just one of those tried and true recipes. They are easy to make and everyone likes them. I came across this spin on rice krispie squares that paired peanut butter with chocolate. Now you can't get much better than chocolate with peanut butter so I just had to make a batch of these. These are definite keepers :)
Peanut Butter Rice Krispies
modified from: Jean Paré, Company's Coming 150 Delicious Squares, Edmonton, Alberta. 1981. Pp. 9.
⅔ c sweeetened condensed milk
¼ c peanut butter
¼ c light corn syrup
½ c brown sugar
4 c rice cereal
½ c chocolate chips
2 tbsp peanut butter
Place the rice cereal in a large mixing bowl. Combine the first 4 ingredients in saucepan. Cook until well mixed and thickened, stirring constantly. Remove from heat. Pour over the rice cereal and mix well. Pour the mixture into a greased 9" x 9" baking dish.
Melt the chocolate chips and peanut butter. Pour over the cereal mixture, spreading evenly. Place in refrigerator until well chilled. Cut into squares.
Monday, March 08, 2010
Frugal Kitchens 101 - Saving on Beverages
Whether or not you realize it a good portion of your food dollars go towards beverages. Purchased beverages range from the water coming from your tap and make no mistake you are paying for that water to juices, hot beverages and soft drinks. Not only are beverages consumed at meal time they are consumed several times throughout the day so they have the potential to have a substantial impact. This weeks Frugal Kitchens 101 focuses on ways to lower the costs of beverages.
- water - Water coming from the tap costs us so paying extra for bottled water is not only environmentally unfriendly but also a waste of money. Invest in a good water filter that filters out particulates, chlorine and fluoride along with refillable water bottles and use those. In the long run it is cheaper and an eco-friendly way to get clean water. Increase your water intake to 4 L or 1 gal per day which will be healthier and cheaper for you while reducing other beverages. Increased hydration helps clear colds, resolve upper respiratory infections, increase skin tone and helps rid the body of toxins.
- soda pop - Soda is fully of artificial sweetners, sugar and/or high fructose corn syrup. It has no nutritional value other than empty calories. What many people don't realize is both canned pop and soda fountain pop contains enough mold to cause allergic reactions and respiratory problems. Futher increasing the health concerns is canned pop in particular has trace amounts of BPA (bis-phenolA) from the can coating so in all respects soda pop is about one of the worst things you can drink. But it gets better since asparatame is a neurotoxin, one willing drank by millions on a daily basis. The best course of action is to eliminate soda pop from your diet in terms of heath and food dollars. If you can't or don't want to eliminate pop from your diet then you should at least greatly reduce it substituting another beverage.
- teas - In general teas are a great value for your dollar whether they be tea or herbal based. Save money by buying in bulk or loose tea with a tea ball. Always make your tea in a tea pot rather than a cup as you will get double the amount of tea from one tea bag or tea ball. Teas make lovely specialty drinks as well as iced drinks. Homemade ice tea is considerably cheaper than even ice tea mix and it doesn't have all the sugar, preservatives, artificial colours or flavours. Flavour homemade ice tea with a sprig or two of mint or lemon balm and lemon slices or come up with your favourite combinations by mixing herbal teas with green or black tea. Sweeten with a little honey.
- coffees - Coffee is another great value for your dollar if you make your own at home and that include specialty coffee drinks. Invest in a good coffee maker/purcolator, coffee grinder and espresso machine (if you are into specialty coffees). While has a larger initial outlay financially this equipment will pay for itself if you make your specialty coffees at home rather than buying at one of the coffee houses. Buy good quality coffee beans and grind them yourself in the quantity you will use for that pot of coffee. Grinding beans only takes a couple of seconds but the flavour is well worth it! Try reducing the amount of coffee you drink in a day as well especially if you are over 2 cups per day.
- fruit juices - Most commercially prepared fruit juices are laden with sugar. Did you know the average person consumes 66 pounds of sugar annually just from fruit juices? That is a horrendous amount of sugar! Invest in a steam juicer (about $40) or a powered steam juicer (about $30 and up) then make your own juices without all the sugar added. Can or freeze the juice for later use as well. Not only will this be cheaper for you but also healthier. If you don't want to make your own juices, then make sure you read that label. Always buy the no sugar added varieties. Avoid the tetra paks that are not environmentally friendly as well. Quite often juices go on sale just before school starts and March break so watch for those sales.
- milk - In Canada there are few ways to save on milk other than reducing the amount you drink. The reason for this is milk prices fall under the Dairy Board regulations so you won't see any great sales on milk. Many have expressed concerns that milk is not necessary for healthy adults so if you don't like milk and are otherwise healthy then don't worry about drinking milk. Concerns have also been expressed that even children do not need to drink milk if they are getting a good supply of calcium from other sources. Milk can be replaced nutritionally so if you want to reduce costs check out some of the ways of getting calcium through other foods.
Sunday, March 07, 2010
Happy 101 Blog Award
I would like to thank Chey from Chey Can Cook for awarding me with the Happy 101 Blog Award. Chey is a wonderful blogger and valuable contributor to this blog. Not only does she follow this blog she is a regular commentator for which I am very thankful. Please take a moment to stop by and say hi to Chey. I'm sure you will enjoy her blog as much as I do. Thanks so much Chey for passing this award on to me. It is greatly appreciated!
The rule for accepting this award is to list 10 things that make you happy, then pass it onto 10 other bloggers.
Oh gosh, listing only 10 things that makes me happy is really difficult because there are so many things to choose from. Here is my list of 10 things that make me happy.
- being with my husband who is my best friend
- being with my family and friends
- grandbaby hugs with butterfly kisses
- cooking with good ingredients
- quiet, reflective time
- watching wildlife
- sunsets or sunrises
- a full moon
- kodak colour dreams
- blogging
- Top Ten Blog Tips
- 3 Sides of Crazy
- Cannine Jars Etc.
- Crazy Lady's Cookbook
- Everyday Living
- A Year on the Grill
- Everything Plus the Kitchen Sink
- Lola's Victory Garden
- Smoky Mountain Café
- Whistlestop Cafe Cooking
Saturday, March 06, 2010
Coffee Cake Mini Muffins
Have you ever read through a recipe, knew what you were doing then somehow did it wrong? Well that does happen to me occasionally. Sometimes like the time I added a whole egg to a bread dough when it was supposed to be the wash, the results actually ended up being better than the original recipe. Being able to recognize you've made a mistake like forgot to put the yeast in the bread dough gives you time to correct it. Other times it ends up realizing you did something wrong then taking the let's hope this turns out ok attitude. Yesterday I found myself in that exact position!
Prep
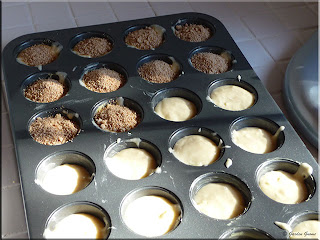
The last couple of weeks have been utter chaos with life changing events and a lot of stress. When I'm stressed I cook which is not always a good thing because sometimes I miss a little detail in a recipe that makes the end product come out as the recipe author intended. Despite that I decided to try a new muffin recipe for the grandkids. I read through the recipe then set to work making the batter and the spice mix then filled the mini muffin tins. THEN I read where the muffin tins were supposed to be filled half full, add the spice mix then fill the rest of the way. Well it was too late so I decided to improvise. After all I reasoned that the spice mixture was similar to a streusel topping and all the flavours would still be there. The worst I figured would happen if I spooned the mixture on top was the sugar would caramelize. So I proceeded to put a teaspoon of the spice mix on top of each muffing as pictured.
Coffee Cake Muffins
Surprisingly the spice mix didn't caramelize as much as I thought it would. The little muffins were a bit harder to get out of the pan but only because some of the sugar melted around the edges. Once cooled most of them popped right out using only a slight twist. A couple needed a gentle pop up but all came out in tact and looking good. For a blatant mistake I think they look pretty good. I'm sure the grandkids will love their kid sized treats!
Coffee Cake Muffins
source: modified from Jean Paré, Company's Coming Muffins & More, 1983. Edmonton, Alberta. Pp. 15
1½ c unbleached flour
2 tsp baking powder
½ tsp sea salt
¼ c butter
½ c organic sugar
1 egg
¾ c milk
½ tsp pure vanilla
spice mix
½ c brown sugar
2 tbsp unbleached flour
1 tsp cinnamon
Stir the flour, baking powder and salt together in a large bowl. Combine spice mix ingredients in a small bowl. Place the butter, sugar and egg in the bowl of a stand mixer and beat until well mixed Mix in the milk and vanilla. Pour into dry ingredients and mix until moistened. Spoon batter into greased mini muffin tins. Pour 1 tsp of the spice mix over each. Bake ate 200ºC/400ºF for 20 minutes or until a toothpick inserted comes out clean.
Yield: 24 mini muffins
Friday, March 05, 2010
Fond Kitchen Memories
I close my eyes and can recall in vivid detail every kitchen we have had since being newlyweds. That's no small feat considering including this kitchen and not including the RV kitchen the count is 15. I can easily tell stories about each kitchen as well. Our first kitchen was a very small kitchenette suitable for boiling water and making toast. Our second kitchen was a small eat in with my signature dish being a hamburg based casserole. I discovered my new husband did not like peas as he picked out every pea from that casserole. Our third kitchen, a small U-shape apartment kitchen, was where I learned to make chili and almost gave up after a small flash fire. It's where I perfected our Sunday dinner of shake & bake chicken, mashed potatoes and frozen corn. An elderly neighbour gave us cherries so I learned to make cherry pies aka cherry soup. Our first baby survived my adventures in making baby food in that kitchen where I learned that babies turn into green volcanos if fed blended up brussel sprouts. Our fourth kitchen was a small apartment kitchen with cream walls that we added two huge racing stripes in bright orange and brown. It was a rather daring look, quite uncharacteristic for us and something we have never attempted again. A lot of good food came out of that kitchen. The fifth kitchen was a big farm kitchen with little counter space, crooked floor and my very own wringer washer that seemed to go all the time for diapers. Our sixth kitchen signified our coming of age with a spiffy new microwave oven. The kitchen was a pale green somewhat fitting to how we felt after eating my first attempt at duck al orange.
Then we made the big move across a few provinces to the seventh kitchen. It was the official cookie kitchen with a seemingly endless plate of cookies always on the counter. Our kids played with the neighbour kids in the adjoining dining area while the neighbourhood women and I enjoyed endless pots of coffee during the morning. Our eighth kitchen was a small apartment kitchen for only a couple of months. I was expecting so we did a lot of home cooking and a fair amount of entertaining. The kitchen was always busy.
Making our way back to our home province our nineth kitchen was a small apartment kitchen, a temporary one of one month until our tenth kitchen. It was a small eat in kitchen with buit-in appliance and our very first purchased refrigerator. My husband's aunt gave us dozens of ears of corn so we sat on the front porch husking them then my MIL came over to show us how to freeze them. That same year she taught me how to can relish, make spaghetti sauce from scratch and several more of my husband's family favourites. We finially made the leap into home ownership with our eleventh kichen. Joining our very own fridge was a gorgeous circa 1950 about 40-inch stove with warming oven. It was a real beauty! We welcomed our youngest and last child to our family there. The signature dish from that kitchen was quiche and it has remained a family favourite. That kitchen saw a dramatic increase in canning and freezing. We bought an old chest freezer to store our first quarter of cow and have been buying meat that way ever since. We also bought our first dishwasher, a used portable that cost us $50 but with a houseful of kids it was very much appreciated. Our twelveth kitchen was a real beauty. It was a large eat-in kitchen in a turn of the century home we renovated. By renovating I mean renovating - all new electricial, new plumbing, new kitchen, siding, roofing and so much more. That kitchen was the hub of the house. We kept our fridge, replaced the stove with a brand new stove (actually brand new!), added a second freezer and replaced our old freezer with one generously given to us. The kitchen was always filled with our kids and their friends. Opening onto a deck to the pool it was our entertainment area always overflowing with people. During the summer when the pool was open our friends gathered so the kitchen was always busy. During the winter we put in an ice rink and our friend gathered. Shortly after moving into that home we bought a large travel trailer. I discovered the cooking shows which brought about a lot of interesting cooking. The kids did their homework at the kitchen table and after they went to bed I spent many and hour doing my homework. Home cooking was a daily activity and canning as often as possible even though I was a full time student. Between the two kitchens there was a lot of good food, good times and some not so good times but all of them very precious memories. After several years we tired of the turn of the century home aka virtual money pit so moved onto our thirteenth kitchen. It was a smaller L-shaped kitchen where we splurged on ceramic tile flooring. I painted the cupboards white with matching white walls trimmed with a muted pink, blue and silver border. The floor was a mottled blue ceramic and pulled from that was the matching blue for the countertop. It was that house we learned you can indeed paint laminate countertops. That kitchen saw us become empty nesters as well. We began experimenting with more gourmet foods but the staple of the kitchen was always homestyle cooking. Moving to our fourteenth in a cottage turned into year round living on the water allowed us to be whimsical in decor. We painted the kitchen pink! It was during this time that this blog came to be hence the pink that remains part of this blog's design. Onto this our fifteenth kitchen where we have enjoyed doing a small renovation while watching the amazing water view. Despite the small size of this kitchen it is a real workhorse. The focus remains on home style cooking combined with a touch of gourmet experimenting. Such memories are a testimony as to how our kitchen regardless where it has been is the centre and heart of our home. It will be interesting to see what lies ahead for the sixteenth and seventeeth kitchens.
Thursday, March 04, 2010
Kitchen Quick Tips - Smooth Pancake Batter
Wednesday, March 03, 2010
Parsnips & Beef Stew
Stews are the perfect winter comfort food. Much like soups and chowders, there is a basic method to making stews but the ingredients can vary greatly. Stews generally use a cheaper cut of meat so stewing over long, slow heat in a liquid is meant to tenderize the meat. The addition of vegetables adds flavour, colour, nutrition turning and thickening the liquid to form a gravy makes for a comforting, budget stretching meal. I previously posted recipes for beef stew, crockpot chicken stew, and French Canadian braised beef so today will present another beef stew that has a bit of a different flavour due to including parsnips as an ingredient.
Parsnips
Parsnips are a root vegetable that is often overlooked by many home cooks. While the resemble carrots they have a creamy white flesh and a stronger flavour than carrots. Parsnips can be cooked in many of the same ways as carrots but unlike carrots they are seldom eaten raw. They are richer in vitamins and minerals than carrots. Parsnips are rich in potassium with 600 mg per 100 g and a good source of dietary fiber.
Parsnips in particular is an ideal ingredient when making soups, stews and stocks. They add a depth and roundness in flavour.
Beef Stew
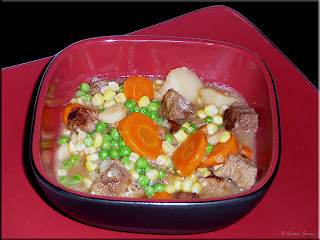
As with all of the stews I make this beef stew made use of what I had on hand. The end result was a lovely, chunky stew packed full of flavour and nutrition. I like browning meat before using it for stew as this adds more flavour. Once the meat was browned I put it into the crockpot then added carrots, parsnips, onions, bayleaf, potatoes and stock. When the potatoes were fork tender I added the corn and flour slurry to thicken continuing to cook for about 20 minutes. I added the frozen peas last letting them cook just enough to brighten. Pea are one of those vegetables that are best put into soups or stews last as they can easily over cook.
Tuesday, March 02, 2010
Ham Chowder
Chowders have become my current favourite frugal meal. These potato based dishes are thinner than a stew, thicker than a soup yet are so easy to make. They quickly become winter comfort meals with their rich, . I recently wrote a Frugal Kitchen 101 on soups, stews and chowders. I've also posted on a few chowders: cheesburger chowder; pea meal bacon chowder; and corn chowder. As with soups, left-over chowder can be reinvented into a new meal for the following night's dinner.
Ham Chowder
One of the grocery store chains has shank or butt hams on for $1 per pound which is an excellent price. My husband picked up one for $10.48 so we had ham for dinner Saturday night (4 adults, 1 toddler) and sent ham home with the kids. Sunday I cut the rest of the meat from the bone then made ham stock. Ham stock is made the same as any other stock, using the bone with small bits of meat, onion, carrots, celery, a bay leaf then water to cover well. Once the stock was made I removed the bone and added peeled cubed potatoes then brought to a boil to cook the potatoes. When the potatoes were tender I stirred in pieces of ham, the reserved carrots slightly mashed and frozen corn. A bit of Worchestershire sauce and garlic pepper added the finishing touches. It was a quick, easy yet frugal meal.
Monday, March 01, 2010
Frugal Kitchens 101 - Snack Attack
Snacking is a normal part of daily life for most people. The problem with many snacks is they tend to be calorie rich, nutritionally poor and expensive. Essentially some snacks are not a good value for your food dollar or your health. However, snacking is not going to go away so there are a few ways to make better snacking choices. This week's Frugal Kitchens 101 focuses on snacking.
Snacking tends to fall into a couple of categories. Snacks can be crunchy/salt (potato chips, pretzels), soft/sweet (cookies, squares) to everything in between. The important thing to realize is many snacks can be purchased in bulk cheaper or made from scratch cheaper than store bought packages. To put it into perspective a bag of potato chips could cost as much as $2.79, more than a bag of potatoes that can give a yield of more than 4 bags of potato chips. When you make your own snacks you control the ingredients and omit a lot of food additives. Here's a few ideas:
- chocolate - Chocolate is actually good for you if you eat dark chocolate. Omit milk chocolate and replace it with a high percentage cocoa. It will cost you more than milk chocolate but you will eat less of it so dark chocolate is the frugal choice. Oh and did I mention it is good for you?
- popcorn - Replace chemically laden microwave popcorn with old fashioned popping corn. It is cheaper, contains no additives, is high in fiber and low in calories. Add flavour to your fresh popped corn with melted butter, sea salt, fresh grated parmesan cheese or you can even turn it into candy corn (also for a fraction of what you would pay store bought).
- trail mixes - Make your own. Buy in bulk any nuts, raisins and foods you don't make supplemented with those foods you dry yourself. In most cases it is cheaper to make your own than buy a prepared mix and drying fruits is not difficult or expensive.
- potato chips - Make your own and for a healthier version make baked chips rather than deep fried. These are ever so easy to make either fried or baked. Try other vegetable chips as well. Zucchini chips are very, very inexpensive to make especially if you grow the zucchini. They are healthier and yet just as satisfying as potato chips.
- fruits/vegetables - A lot of people don't consider fruits and vegetables as snacks but they can be quite healthy snacks. Aside of grabbing an apple, orange or banana keep a container of prepared, ready to use vegetables in your fridge. Ten minutes of prep can give you almost a week's worth of celery sticks, carrot sticks and green pepper wedges to snack on
- crunchy snacks - I can't remember when I discovered this little trick but you can cut wong tong wrappers in half corner to corner then deep fry them. After draining sprinkle with sugar cinnamon or other desired flavouring for a great crunchy snack. Pork cracklings while not exactly the healthiest thing are easy to make at home. Rice noodles are another great snack if fried. Just heat a bit of oil in a fry pan then break the noodles and toss them in where they will puff taking on interesting shapes in about 2 seconds. Drain and serve as is or season lightly.
- cookies/squares - By far the the cheapest and healtiest is to make your own. Focus on the easy to make, no bake versions so you can whip up a batch with little effort.
- candies - It is surprising how easy it is to make candy at home and the best part is you can use natural flavourings and no high fructose corn syrup. Homemade candies can range from hard to fudge to marshmallows to toffee and so much more. They are extremely inexpensive to make. Homemade will give you a slightly healthier product and definitely a less expensive product.
- by bulk - One of the best ways to save on snacks like nuts is to buy in bulk in quatities you can control.