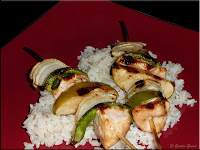
It's been a steadier, do something daily kind of a main preserving season this year. The kitchen has been a whirl wind of activity for much of September. The main focus has been on preserving foods to restock the pantry, using garden produce and rather simple, homestyle meals. At the same time we have still been able to get away for a meal out or a couple of days away.
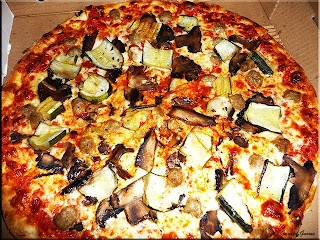
Gourmet Pizza
Last weekend we decided to take a couple of days off to visit the grandbabies and their parents in the GTA. We decided to keep the travel time to a minimum by not stopping to eat on the road. The first night at the home of oldest and youngest grandbabies we enjoyed homemade French fries and deep fried chicken wings. It was a lovely, homestyle meal. The following day after a hot breakfast we were on the road again to visit middle grandbaby and parents. They took us to Home Depot® in the afternoon then we ordered delivered gourmet style pizzas and chicken wings for dinner.
We very seldom order in pizza at home because we are out in the boonies with the cheapest delivery charge in the $10 range. However, we make homemade pizzas from scratch quite often. What I love about ordering pizza in the GTA is the choice of toppings. I always get great ideas for our homemade pizzas! You can even choose from several cheeses rather than the regular mozzarella cheese! Pictured is one of the pizzas we ordered. It has Asiago cheese, Portabello, zucchini and hamburg on it. This really was a nice tasting pizza one that could easily be duplicated at home.
New Blind
We have been in this house a little over two years now and despite a lot of work that we have accomplished, window treatment has until now been pushed to the back burner. Our house is such that window treatment is not needed for privacy and for some windows hinders the massive water view so we've basically just left it. In the interests of energy efficiency though we are now dealing with this issue. We want window coverings that can help minimize heat loss during the winter nights yet be opened completely during the day to enjoy the water. At the same time we want something that reflects the flavour of the house.
We decided on California 2-inch wide wood blinds for the kitchen window. My husband spent a good portion of the afternoon hanging the blinds which were a bit more complicated than expected. I think they look rather spiffy! The next set of blinds to go up will be on the patio door in the kitchen. They will match but we aren't sure whether they will be the same style or vertical. Following that the window in the family room in front of the dining table is next that will be wood 2-inch wide blinds to match the woodwork. I'm looking forward to even lower heating costs this year!
Pot Roast
Doing a trip to the kids spending only one night is extremely tiring. We arrived home about 11 pm Saturday night to find that the router was acting up when powered up. So it was after 1 am before we went to bed frustrated with the whole situation. The following morning was spent trying to fix that problem then in the afternoon hanging the blind. Ee were both exhausted!
Honestly the weather has turned cold enough here that it really feels like winter. It is quite cool in the house so I put a sirloin tip roast into the countertop roaster for dinner. I kept it quite simple by pouring a little Diana Sauce® over the roast and topping with onion slices. An hour before dinner I added small, whole white potatoes and niblet corn. It was a simple yet homestyle meal that took very little effort yet gave that cozy, comfort effect with enough leftovers for lunch and dinner on Monday.
Welcome to our kitchen that truly is the heart of our home! One of life's greatest pleasures is enjoying good food with family and friends. Here you will find recipes, tips for frugal cooking, how-tos for food preservation especially canning and anything else food related. Tea is brewing and warm cookies are fresh from the oven. Please sit a spell and enjoy your stay.
- Garden Gnome
- Ontario, Canada
- I am a wife, mother and grandma who enjoys the many aspects of homemaking. A variety of interests and hobbies combined with travel keep me active. They reflect the importance of family, friends, home and good food.
--Bobby Flay
For Your Information
- [March 19, 2020] - Effective Mar 17, this blog will no longer accept advertising. The reason is very simple. If I like a product, I will promote it without compensation. If I don't like a product, I will have no problem saying so.
- [March 17, 2020] - A return to blogging! Stay tuned for new tips, resources and all things food related.
- [February 1, 2016] - An interesting report on why you should always choose organic tea verses non-organic: Toxic Tea (pdf format)
- Sticky Post - Warning: 4ever Recap reusable canning lids. The reports are growing daily of these lids losing their seal during storage. Some have lost their entire season's worth of canning to these seal failures! [Update: 4ever Recap appears to be out of business.]
Popular Posts
-
Food manufactures have so convinced us that home cooking is not possible without a ready-made mix that many of us actually believe that myth...
-
I am very much a scratch cooking most of the time. One thing that has always been a concern is coming across a recipe I want to try that ca...
-
Pork is the remains a popular meat of choice for curing with bacon and ham being the most popular. What many don't realize is curing me...
Wednesday, September 30, 2009
A Bit of Kitchen Chit Chat
Tuesday, September 29, 2009
Habanero Gold Jelly
My garden is starting to slow down a bit. Rather the unseasonably cool, wet weather is forcing the slow down. I'm doing clean picks weather permitting. The hot peppers are still producing nicely so I'm working on putting them up in various forms. I will be bringing in a couple of the hot pepper plants for the winter for a ready fresh supply during the winter.
Habanero Gold Jelly
It's nice to have a few varieties of hot pepper jellies in your pantry. Hot pepper jellies are wonderful for making quick appetizers or using as a condiment for meats. They can also be used as a glaze for meats. This particular hot pepper jelly pairs Habanero peppers with apricots for a uniquely pleasant flavour that will pair nicely with cream cheese as an appetizer. This hot pepper jelly like most of my jams and jellies has been converted to use Pomona's universal pectin. With regular pectins to prevent floating fruit the recommendation is to stir for 5 minutes before putting into jars. Pomona's continues to gel as it cools so the work around is occasionally shaking gently from side to side as the jelly cools. The alternative is to stir the jelly just after you open it before serving. The yield was 3 - 250 ml jars processed and almost a full jar for fresh use. I think the jelly is quite pretty in the jars.
Habanero Gold Jelly
modified from: Bernardin® canning jar insert Taste the Harvest, 2006.
⅓ c (75 ml) finely sliced dried apricots
¾ c (175 ml) white vinegar (5% acidity)
⅓ c (75 ml) finely chopped onion
⅓ c (75 ml) finely chopped sweet red pepper
2 finely seeded, chopped Habanero peppers
1 finely seeded, chopped Jalapeno pepper
3 c (750 ml) granulated sugar
1 tsp Pomona's universal pectin
1¼ tsp calcium water
Prepare the dried apricots and place in medium covered glass bowl. Pour the vinegar over the apricots and let sit 4 hours. Prepare onions and peppers. Stir pectin into the sugar. Pour the apricot mixture into large saucepan. Stir in onion and pepper mixture. Stir in the calcium water. Bring to a boil. Stir in sugar/pectin mixture. Bring to a boil stirring to dissolve the sugar. Ladle into prepared 250 ml jars leaving ½-inch head space. Wipe rims and adjust 2 piece lids. Process in BWB for 10 minutes at altitudes below 1,000 feet above sea level. For higher altitudes adjust processing according to altitude chart (here).
Monday, September 28, 2009
Frugal Kitchens 101 - Debunking 10 Canning Myths
This time of year so many are doing whatever they can to preserve foods for the coming winter months. Over the past few weeks I have made several posts about stocking the pantry. One cost effective, frugal way to stock the pantry is home canning. This week's Frugal Kitchens 101 will debunk 10 canning myths.
- Only grandmothers and little old ladies home can foods. - During the Great Depression anyone who could can did so. It was a way to preserve the harvest in rural communities and the excesses from Victory gardens in urban communities. It remains a popular rural community activity however with the y2K scare home canning saw a renewal. Anyone interested in self-sufficiency and realizing economic savings are turning to home canning. On the forums it is quite apparent that the trend is heading towards younger adults now home canning.
- Canning is expensive. - Home canning is in many ways no more expensive than normal cooking. True you do need a pressure canner for canning low acid foods but for as low as $150 you can easily buy all the equipment needed new including a few new jars. Cut that cost by buying used if possible. From there it is a matter of finding used mason jars and rings then buying new lids. Cheap/free sources are yard sales, estate sales, Craig's list, freecycle and word of mouth.
- Canning is time consuming. - Home canning is no more time consuming than normal cooking even when it comes to prep work. Some foods are more labour intensive but there are several inexpenisve specialized appliances to help you with this. Many of these can be picked up rather inexpensively at yard sales and resale stores. Once the food is in the jars and in the canner the only time involved is the processing time during which time you can be doing something else.
- Canning is complicated. - Canning is not complicated! If you can follow a recipe you can easily home can. There is a learning curve of course mainly to get comfortable with the process and get your rhythm but once you've canned a couple of loads it is no more complicated than baking a cake from scratch using a recipe.
- Canning is seasonal. - Some stores perpetuate the myth that canning is seasonal beginning when strawberries come into season and ending with tomatoes. Canning is not seasonal. It is a frugal, money saving activity that can be done year round. For many home canners there is the busy canning season then there is the off season with the only difference being the number of times the canner runs in a week. Off season you can take advantage of meat and poultry sales, wild game/fish catches, produce discounts and canning things like beans (kidney, Great Navy, baked), soups, stews, stocks and broths.
- Only jams, jellies, fruits and pickles can be home canned. - This myth is perpetuated by those who do not understand about canning low acid foods that require a pressure canner. The list of foods that should not be home canned is significantly lower than the list of foods that can be home canned.
- Pressure canners are dangerous. - Floating around in the vast space known as the internet are all kinds of stories about a pressure canner or cooker (2 different things) blowing up on someone, usually a friend of a friend's grandmother. Modern pressure canners have safety devices built in to prevent any problems from over pressurizing the vessel. With proper use a pressure canner is no more dangerous than a fry pan!
- Home canned foods cause food poisoning. - This is one area where home canning gets a bad rap because it is easy to blame food poisoning on improperly home canned foods. The last case of food born illness due to botulism in Canada was improperly home canned whale meat in 1994. By far the majority of food borne illness occurs in the commercial sector (food plants, restaurants) is E.coli, Samonella and Listeria. There have been several recent notices by both the USDA and CFIA of various contaminated commercially prepared foods that have even resulted in death. The CFIA continues to remind Canadians of practicing food safety when home canning.
- You need a lot of storage space for home canned products. - Ideally home canned foods should be stored in a cool, dark place. While a large walk-in-pantry like mine or a spot in a basement is likely the best storage for home canned foods, home canners living in urban areas have become quite creative with finding storage solutions. Some have turned small linen closets into pantries while others have taken to storing home canned foods under beds and couches. Some have stacked the cases then covered with a small round tabletop and tablecloth creating an accent table using the stacked cases as a base. Think vertical with sturdy shelving as well to maximize what storage space you do have.
- Canning products are only for humans. - Many home canners concerned about the quality of their own food are taking that philosophy a step further by canning their own pet foods. There are several online sources for homemade pet foods. This really does make good sense as the homemade versions are not only cheaper but higher quality. At the same time it is using up organ meats and cheaper cuts of meats that may otherwise not be used.
Sunday, September 27, 2009
Lemon Boy Crushed Tomatoes
When it comes to tomatoes most people are familiar with a few red varieties. However, tomatoes are available in many colours ranging from orangy reds to pinkish reds to yellows, oranges and even deep purplish black. The important thing to remember about tomatoes is different varieties have different uses. Slicing tomatoes (brandywine, beefsteak, etc) really are better used for that purpose, paste tomatoes (romas, etc) make better canning tomatoes while cherry varieties are great for salads. Contrary to popular belief there is no such thing as a low acid tomato either. Some varieties have a higher sugar content giving the taste of being less acidic but in general most tomatoes have a pH of about 4.3 to 4.6 which is why they need to be acidified when home canned. The home gardener is presented with the problem of preserving any abundance of tomatoes which means that even though paste tomatoes are better for canning any tomato is fair game for the canning pot or freezer!
Lemon Boy
I grow Lemon Boy tomatoes each year. They tend to be a bit more problematic for me having a lower yield and always the first to develop late blight. I think they are worth the extra problems due to their sunny bright colour and lovely flavour. They are a nice size tomato too usually about the size of a tennis ball or a bit bigger.
We planned on being away for a couple of days which presents a problem this time of year. I had extra Lemon Boy tomatoes that I knew I would not be able to use up before we left so I decided to can them as crushed. This really was small batch canning as I ended up with 2 - 500 ml jars of beautiful sunny yellow crushed tomatoes. These will be used in a sauce or soup later.
Bernardin (Canadian canning expert) has begun changing the popular gold canning lids with a shiny silver lid. There have been a few reports of Kerr's shiny silver lids having an increased seal failure rate but I have not experienced this using Bernardin's new lids. In the past the USDA (US) and Ball Blue Book (US) recommended removing the canning jar rings, washing and drying then storing them seperately. Bernardin is now recommending removing the rings then washing and drying both the jar and rings while checking for seal. Once this is done Bernardin says the rings can be replaced on the jars loosely for storage. I really like this idea! Washing and drying the rings will prevent any future rusting or sticking issues while replacing the rings on the jars will solve the storage issue. So it is the best solution yet.
Friday, September 25, 2009
Moose Eye of Round Steak
As foodies I feel very lucky that most of our family and many of our friends are also foodies. A lot of good times, laughter and sometimes tears are shared whenever we get together but one thing that remains constant is an abundance of good food!
Garden Vegetables
There are a lot of great foods coming out of the garden right now. We are really enjoying vegetable trays as something a bit different from salads. My absolute favourite dip of the day is made using a garlic, onion mix from Windermere Farms. It has a nice, clean and refreshing taste. I make the dip with mayonnaise, sour cream and the dried seasonings using the mason jar method. The flavour is perfect with fresh vegetables. It's light yet tasty and flavourful. Pictured is the vegetable tray I made for the two of us. It isn't very big but it is all garden fresh.
Moose Eye of Round Steak
One of our friends does not eat any domestic meats. He brought us some moose meat in the form of steaks and sausage. Pictured is an eye of round moose steak. Don't let the size fool you as that is all very lean meat! Unlike venison which tends to have a gamey flavour, moose meat tastes almost identical to beef except a little goes a long way. Honestly you really can't tell the difference other than the moose meat is leaner. The moose eye of round was grilled then served with niblet corn, steamed potatoes and a side of cucumbers with garden fresh tomatoes topped with a little of the Windermer dip.
Thursday, September 24, 2009
Kitchen Quick Tips - Plastic Containers
Wednesday, September 23, 2009
Tomato Wafers and Tomato Stock
We think of tomatoes as a vegetable even though botanically they are a fruit. They are one of the most versatile foods there is. Those who love tomatoes know that the anemic tomatoes sold in the grocery stores during the winter months do not compare with the full bodied flavour of vine ripe tomatoes! I am very fortunate in that I am able to grow tomatoes as well as having a free source for all the canning tomatoes I can use. Still I try to make sure nothing goes to waste.
A few days ago I posted about canning pizza sauce along with drying the tomato waste consisting of seeds and skin for tomato powder. Tomato powder is a wonderful product to have in your pantry. It ads nutrition, colour and flavour to soups, stews and meatloaf. This post is about two more tomato products that are must haves in your pantry.
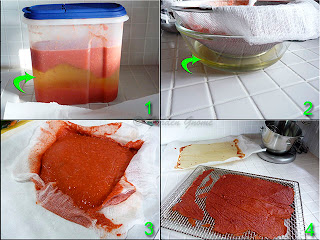
When tomatoes are plentiful in the garden there is no choice but to either preserve what you can't eat or they will go to waste. I ran two varieties of tomatoes through the food mill then poured the resulting purée into a plastic container to be stored in the refrigerator until processing. The tomato purée separated into 3 layers (1). Note the yellowish layer as that is what I wanted for the tomato stock. If you use 1 variety you will end up with 2 layers. Removing this layer removes a lot of water from the tomato purée shortening the drying time which is a frugal energy reduction method. If you don't have cheesecloth then the top layer can be carefully removed for drying reserving the yellow layer for canning.
My preferred method is to use a cheesecloth lined strainer. As you can see in (2) the results is a much clearer juice. This raw tomato juice makes a lovely, refreshing summer drink! It does take awhile for the purée (3) to drain the juice. Once the purée stops dripping it is spread onto a parchment line baking sheet and dehydrated at 145ºF until it can easily pull from the paper. The semi-dried purée is then transferred to a drying rack and place back in the oven to continue drying until brittle. The fully dried purée is then broken into wafters about 2-inch pieces and vacuum sealed. The wafers have a deep, intense tomato flavour. They are used much the same way as tomato paste.
I highly recommend sealing any dried foods in glass jars to protect them from moisture, rodents and insects. The canister method can be used for sealing small jars or other jars with 1-piece lids that have a button indicator in the middle. Place the filled jar in the canister. Put the lid on the canister then attach to FoodSaver®. Vacuum on canister setting. When the appliance stops, release the vacuum on the canister at which time you will notice the lid on the jar become concave indicating it is vacuum sealed. Mason jars and any jar that will fit a mason jar lid either widemouth or standard can be sealed with the lid sealer attachment available in both sizes.
Tomato Wafers & Stock
I love experimenting to see how many different and unique tomato products I can get in my pantry. These two extremely useful products certainly fit the bill! Both add nutrition, flavour and colour but in very different ways. The tomato wafers are used much the same way you would use tomato paste mainly in soups, stews and chili. I find it best to add a piece or two then mix well then taste adding more if necessary. The wafers can be rehydrated with a little boiling water to form a paste for use in meatloaves if desired. The tomato stock can also be poured into soups and stews to enhance the flavour. One of my favourite ways to use is as the liquid when cooking rice. It makes a nice liquid to cook pasta or meats in. It can also be thickened with a cornstarch or tapioca flour slurry to use as a glaze. So this is a very versatile tomato product to have in the pantry.
Enjoy!
Tuesday, September 22, 2009
Drying Peppers
I have taken a few days off of canning but that doesn't mean things have come to a stand still in the kitchen. The weather is cooler and without the additional humidity of canning it is a perfect time to do a bit of dehydrating. Ideally when preserving foods each food will be processed as canned, dried and frozen. If for some reason you lose your frozen stores then you have your canned and dried stores to fall back on. At the same time if possible add curing and smoking to your food preserving methods. I have to admit to not dehydrating as much as I should. I tend to focus on vegetable flakes, vegetable powders, apple slices and jerky.
Drying foods is desirable because once dried they are light weight and take up a lot less room than other forms of food preservation. Properly stored dried foods have very long shelf life as well. Dried foods should be stored in a dark, cool place preferably in vacuum sealed containers.
Sweet Peppers
The garden is producing an abundance of tomatoes and peppers. I decided to dehydrate a couple of trays of peppers, one sweet and the other hot. Dried peppers can be added to soups, stews and chili. They are nice sprinkled on a garden salad as well. The dried peppers can be powdered if desired. The prep work could not be easier!
Method: Wash and dry peppers. Cut in half. Remove core and seeds. Cut into thin strips then across the strips to form small pieces. Place on an unlined baking sheet if dehydrating in the oven or on dehydrator sheet if using a dehydrator. Dry at 52ÂşC (125ÂşF) until crisp. Allow to cool then package into air tight containers and vacuum seal.
Dried Peppers
It is surprising how much volume is lost when you dehydrate foods! This explains why you can store a fair amount of dehydrated foods in a small amount of space. I was able to package the two trays of dried peppers into 2 - 125 ml (4 oz) baby food jars. Pictured are the jars before vacuum sealing using the canister method. The peppers dried nicely retaining a lot of their rich colour.
Method: Place a filled jar in a small vacuum sealer canister. Set the vacuum sealer to vacuum. It will shut off when then canister and jar are sealed. Remove the vacuum off the canister and remove the sealed jar. Label and store.
Monday, September 21, 2009
Frugal Kitchens 101 - Does Canning Save Money?
As the fall harvest begins and the weather begins cooling many households across Canada and northern states in the USA turn their attention to preserving the harvest. The past few Frugal Kitchens 101 posts have focused on the pantry. One of the best ways to help stock the pantry is home canning. The first question that always comes up when talking about home canning is 'Does canning save you money?'. I recently did a post on saving on home canning equipment so this post will focus on how canning saves you money.
There is no doubt about it, home canning saves money! It is likely one of the most frugal activities you can incorporate into your kitchen. Any home gardener knows that there are always a couple of crops that do exceeding well resulting in an excess. Traditionally this excess is either preserved (canned, frozen, dried), traded for a crop the gardener doesn't grow or given away but in some cases ends up going to waste. Preserving the excess whether from your garden or acquired from another gardener can put a lot of unique products on your pantry shelves for little more than the cost of the electricity and lid needed for canning. If you don't garden you can still realize savings buy buying produce in bulk in season, meats on sale or putting-up wild game and fish you caught. Once canned the product does not cost any further for storage unlike freezing that costs the moment the food goes into the freezer until it is used. It is also protected against power outages which eliminates any possible food losses that even if the insurance company covers you still incur the deductible cost.
Home canning allows you to make good use of things like fruit and vegetable peels and bones to make delicious, low cost stocks, soups and broths. These waste products are usually thrown out or in the cases of peels may be composted. Essentially the cost of these waste products are part of the cost of the meat or produce so you have paid for them. Putting peels into the compost gives back to the garden so the cost is not wasted. Bones, fat and skin from poultry and meats can't be put into the compost and throwing them out is wasteful. So make stocks and broths then can then for convenient use later at a fraction of the cost of store bought stocks and broths.
Home canning allows you to put a high quality product on your pantry shelves at a fraction of the cost of store bought. In most cases the cost per jar will be as low as 31¢ for the canning plus 8¢ to 10¢ per lid so a full canner load of 19 pints costs on the higher end $2.21 or 12¢ per 500 ml (pint) jar considerably less than most store bought products. Of course if you add sugar, pectins or other ingredients the cost per jar will increase but in general many home canned products can be made for under 20¢ per 500 ml jar. There are very few commercially canned products you can buy for that price. Even home canning dried beans (kidney, Great Northern, baked, etc) work out cheaper than store bought. With some basic equipment you can save a substantial amount of your food dollars by home canning. Next week I will be debunking 10 canning myths.
Sunday, September 20, 2009
Caesar (cocktail)
As a Canadian I like sharing aspects about Canada that are unique, especially Canadian cuisine. The Caesar cocktail is a good example of a uniquely Canadian drink. Born in Canada it has remained widely popular in Canada to earn the well deserved title of Canada's National Cocktail.
Caesar (cocktail)
The Caesar cocktail was created by Walter Chell at the Owl's Nest Bar in the Calgary Inn (now Calgary Westin Hotel) in Calgary, Alberta in 1969. It was to celebrate the opening of the new Marco's restaurant. The original cocktail contained tomato juice and mashed clams. The same year with the help of Chell the Mott's company began producing Clamato which is now used to make the cocktail. In the 2000's Mott's began printing the recipe on the Clamato labels including those sold in the USA however the cocktail never caught on so remains mainly a Canadian cocktail. Like so many popular Canadian foods (poutine, peameal bacon, Diana® sauce, white vinegar on fries, ketchup chips and etc) there may be very limited availability in US towns directly on the USA- Canada border but for the most part unless an ex-patriot living outside of Canada makes them they remain as only part of Canadian cuisine.
Pictured is a Caesar I enjoyed at one of out favourite boating haunts. I ordered it extra spicy meaning extra Tobasco® and pepper were added. This drink can also be ordered as a virgin cocktail meaning the vodka is omitted. Either way, the Caesar is an excellent cocktail!
Caesar (cocktail)
6 oz. Clamato juice
1½ oz. Vodka
2 dashes Tobasco® hot pepper sauce
2 dashes Worcestershire sauce
celery salt
freshly ground pepper
lime/lemon wedge
1 crisp celery stalk
3 large stuffed olives (optional)
1 quarter dill pickle spear (optional)
Rim a highball glass with the lime wedge. Turn the glass upside down into a saucer with celery salt to coat well. Fill the glass to about the ¾ mark with ice cubes. Pour in the vodka then Clamato juice. Add the hot pepper sauce, Worcestershire sauce and freshly ground pepper. Place the celery stalk or dill pickle spear and straw in the glass. Thread 3 large stuffed olives onto a bar pick and place across the rim of the glass. Serve.
Saturday, September 19, 2009
Garden Goodies
One of the best ways to get excellent quality, organic produce is to grow it yourself. This is a wonderful time in the outdoor garden! Despite the late start getting the beds in this year they have been quite productive. Our ADFF (average day of first frost) is quickly approaching so there is a lot to be done in the garden.
Vine Ripe Tomatoes
I only put in 13 tomato plants this year, down considerably from my normal numbers. Despite all of the canning I do, I grow very few tomatoes specifically for canning purposes. The majority of the tomatoes I grow are those that are either unavailable in the stores or those that tend to be expensive.
The tomatoes are coming in heavy right now. Pictured is yesterday's harvest consisting of beefsteaks, Lemon Boy, slicing and cherry tomatoes. I ran the cherry and slicing tomatoes through the food mill for purée because there were too many for the two of us to use in a reasonable amount of time given that more will be picked today.
Picking tomatoes and preserving tomato products is only part of this time of year. I've also been busy saving seeds for next year's garden as well as taking a lot of clippings (16 so far) for growing tomatoes indoor through the winter months. This is part of my continuous harvest plan for year round gardening. I will be writing more about that on my gardening blog if you would like to follow my year round gardening efforts.
Hot Peppers
I planted one variety of sweet peppers and three variety of hot peppers this year, also down from my normal amount. The peppers have done well so we are enjoying a nice daily harvest now.
Pictured is yesterday's pepper harvest. Most of the hot peppers find their way into various home canned products. I also like freezing and drying prepared hot pepper pieces.
Peppers grow nicely indoors during the winter months then can be replanted outdoors. They will fruit indoors by manually pollinating. Closer towards the end of the month I will be potting some of the pepper plants for growing indoors.
Garden Gifts
Gardeners by nature tend to be rather generous with their excess produce. Most families in our area put in some type of vegetable garden. I was gifted 3 nice cucumbers by one of our elderly neighbours. She is well into her 70's yet still gardens and cans so we have a fair amount in common. Another neighbour has a pear tree but doesn't like pears. They heard I did a lot of canning so generously offered whatever I could use. I have also been gifted with all the corn (not pictured) I can use so will be working on that shortly along with more hampers of tomatoes. I will be making extra goodies this year to give as thank-you baskets for these wonderful garden gifts.
Thursday, September 17, 2009
Kitchen Quick Tips - Pasta
Add ¼ tsp garlic powder or 2 cloves of garlic to pasta water when cooking for a wonderfully flavoured pasta. Alternatively cook your pasta in stock rather than water for a nice flavour.
Wednesday, September 16, 2009
Continuing Preserving Tomatoes & Pizza Sauce
We are in the midst of processing tomatoes which will likely continue to at least the end of the weekend. It is a lot of work so I won't kid you by saying it isn't. I think one of the worst things about the tomato season are the fruit flies (Drosophila melanogaster). While these tend to be one of my favourite critters for scientific reasons I prefer them not flitting around my house! Oh well a few more days and the pantry will be filled will all kinds of great tomato products so they will be on their way.
Freezing Tomatoes
There was about 6 quarts of prepared tomatoes left over from canning the salsa and chili sauce so I decided to freeze them. By far freezing tomatoes is my least favourite method for preserving tomatoes. In my case tomatoes are home grown or free. They take up too much valuable room in the freezer that can be best used for meats and other produce that doesn't can well. Canning tomatoes makes the anti-oxidant lycopene more accessible to the body so they are a healthier product than frozen tomatoes. At any rate, I froze two 1 large zipper style bags of the left over peeled and chopped tomatoes. I like zipper style freezer bags for shorter term storage usually under 1 month. For storage longer than than my choice is vacuum sealing.
Tomato Purée
There was a half hamper of tomatoes remaining so I decided to make pizza sauce. Many sauces start out using a tomato purée. The quickest and easiest way to make a tomato purée is to use a food mill or strainer. Pictured is my manual food strainer. Tomatoes are fed through the hopper at the top. Turning the handle (lower right) forces the tomatoes through a screen that removes the skins and seeds that are discarded through a tube while the purée falls through the shoot. The tomato purée is then ready for freezing as is or turning into sauces for canning or freezing.
Pictured in the background is my treasured pie keeper. Years ago my husband and I did a lot of ceramics including this pie keeper. It will hold a deep homemade pie. This beloved piece was made by my husband as a gift to me. It is signed Merry Christmas 1985 with from him to me with both of our names and a lot of XO's. I think the glaze used was called oatmeal meant to accent the set of homemade dishes I made that are lighter in colour in a glaze called eggnog. Both glazes are speckled. I'll have to share pictures of those as well. I still do the occasional piece of ceramics when I want something unique and personal.
Drying Prep
A side product from making tomato purée is the waste that some will throw out. Throwing out is extremely wasteful so should be avoided if at all possible. The waste can be added to your compost pile where it will give back in the form of compost. However, the waste can also be dried then powdered for tomato powder.
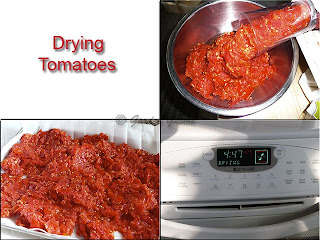
The tomato waste consists of skin, seeds and sometimes a bit of pulp. It is a good idea to run the tomato waste through the food strainer again to remove any pulp you can. The remaining tomato waste is then spreadin a thin layer on a parchment lined baking sheet for oven drying or onto dehydrator sheets if using a dehydrator. The tomato waste is then dried at 145ÂşF until completely dry. Once the tomato waste is dried break it into pieces, place in a food processor or blender to powder the dried tomato. Vacuum seal your jars of tomato powder. Use the powder to enhance the flavour of soups, stews, meatloafs, breads and ground beef dishes. It is also good sprinkled on salads or used s a garnish.
Pizza Sauce
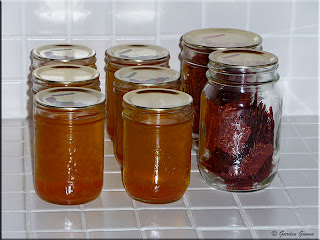
Homemade pizza sauce is one product that is a must have on your pantry shelves. I made a batch of homemade pizza sauce for canning with a yield of 10 - 250 ml jars. At our consumption rate I will need to made 2 more batches which amounts to about 1½ hampers of tomatoes. The 250 ml size (about 1 cup) is the perfect amount for 2 homemade pizzas. Pictured are the processed and cooled jars ready for labeling and storage. I think it looks lovely in the jars but then I'm a bit biased.
Canning seems like a lot of works and some days it is but I can't describe what it feels like to see the filled jars cooling on the counter. I honestly can't think of any home canned food that doesn't look wonderful in the jars, feeding your eyes and tantalizing your tastebuds before even opening the jars. That eye appeal just stimulates and inspires me not only to can but also to use all the great home canned food we make.
Tuesday, September 15, 2009
Canning Tomatoes
September is always a busy canning month in our household. During a short period of about 14 days an average of 10 hampers of tomatoes are processed. Each hamper is ⅝ of a bushel. If I'm making any tomato product that can be run through the food strainer such as soup or smooth sauces I can comfortably process 2 hampers myself in a somewhat long day. Any tomato product that takes more prep work means fewer tomatoes are processed in a day. On salsa and chili sauce days my husband helps with both the prep work and canning. It is easier to do both of these labour intensive products on the same day.
Chili Sauce & Salsas
Chili sauce and salsas are labour intensive products because all of the tomatoes are peeled and all vegetables added are hand chopped. This results in a nice, chunky product quite unlike store bought. Pictured are the total jars of tomato products my husband and I canned Sunday. We started with 2 hampers of tomatoes and used 1½ hampers. The yield was 11 - 500 ml jars of old fashioned chili sauce, 19 - 500ml jars of hot salsa, 13 - 500 ml jars of medium salsa and 12 - 250 ml jars of medium salsa for a grand total of 55 jars of yummy food for gift giving and the pantry. All the jars sealed. I have removed the rings and washed the jars so the final step before storage is to label the jars. I use a fine tip Sharpie to write the contents and date on the lid. The jars are then loaded back into the original cases and transfered to the pantry for storage.
Monday, September 14, 2009
Frugal Kitchens 101 - Protecting Your Pantry Stores
When it comes to pantry stores at any given time you should have a one year supply. Take a good look at your pantry contents and do a quick calculate of the food replacement value if for some reason you lost it all. In terms of dollars this can easily amount to a couple of thousand dollars worth of food if not more depending on the size of your pantry. So it makes good sense to protect your investment as much as possible.
In general your pantry stores should be protected from excessive temperature fluctuations, light, rodents, insects, humidity and flooding. Ideally if you have things properly stored in your pantry none of these factors will influence your pantry stores. It is also a good idea to have some type of air circulation especially in larger walk-in pantries. Here's a few tips I use.
- excessive temperature fluctuations - Your pantry items are best stored in a location where they will not overheat or freeze. Excessive heat can cause commercially canned foods to spoil quicker and home canned food to lose their seal. Freezing of either can cause the quality of the food to deteriorate. You want the storage temperature lower than room temperature but well above freezing. My pantry is maintained at an average 16ÂşC (62ÂşF) year round.
- light - Light can be one of the most destructive factors for food storage. It will cause any food stored in glass to lose colour as well as deteriorate in both flavour and nutrition. Ideally storing foods in no light conditions is the best policy. However, a small amount of light will hit the food when you enter a walk-in pantry or turn on a light in the pantry or open the door on smaller pantries. Minimize this light exposure as much as possible. My pantry does not have a natural light source. If your pantry has a natural light exposure such as a window, black it out. You may need to consider air circulation so don't cover it to the point you can't open the window but make sure no natural light get into your pantry. If using additional lighting as I do, use the lowest lumins possible and only have the light(s) on when in the pantry. I use CFL bulbs for energy savings.
- air circulation - Your pantry needs air circulation especially if it is in an area where mold/mildew could be a problem. There are several way to deal with this issue. In most cases simply opening the door to your pantry on average one a day should provide enough air circulation to the pantry. If you have a window keep it open just a crack enough for extra air as long as no light is allowed to enter. A small solar operated fan can easily be set up in your pantry or you could add an electric vent or HVAC duct vent into the pantry. At any rate keep the air circulation going.
- rodents - Unless you live in very ideal conditions at some point rodents can and will be a problem in your pantry. If there is any sign of a rodent ever being in your house take immediate action to cut off its food supply. Don't leave so much as a packaged candy unprotected! Nip this problem in the bud before it ever happens. Every food item in your pantry should be in rodent proof containers. That means glass, metal or heavy plastic. Any food that comes into contact with the container should be in food grade plastic (5 gal pails, food containers). Check donut shops and restaurants for a free supply of food grade plastic pails and 2 gallon glass jars. Any food that you would like to keep in the original packaging should be stored in lidded plastic containers. Check the dollar stores for plastic shoe boxes which work really nice because they are stackable or Rubbermaid® style bins for packaged foods. Any fresh produce in your pantry should be stored in mesh lined containers that rodents cannot chew through.
- insects - Insects that get into home food stores can be naturally occurring or introduced. The general rule for controlling introduced insects in things like rices, grains and flour is to freeze them before storing. Now this trick only works if you have the freezer space to begin with. I like freezing when possible and isolating these types of products in vacuum sealed jars so if there are any insects the infestation remains confined. This means dealing with any new products as they come in not letting them sit unprotected for even a hour but this method has kept my pantry insect free with respect to actual product. Depending where your pantry is located you will end up dealing with insects such as spiders, centipedes, millipedes, pill bugs, earwigs, ants and crickets. Do not be tempted to use an insecticide! Instead watch where the spider webs are and mark that location. Suck them up with the vacuum cleaner. Now go back and seal any crack you find as spiders always spin webs where there is a crack to cool their eggs. You have effectively removed one food source for the centipedes and millipedes. Go back and continue calking any and every crack you can find. You now have hopefully sealed them out.
- humidity - Humidity issues can certain damage your pantry stores and that applies even to factory sealed items. Any of these types of food products should be stored in vacuum sealed glass jars. You can also add oxygen absorber packs for dry storage to prevent humidity problems. In many cases if humidity is a problem us a moisture absorber like Damp Trap in your pantry to help control moisture.
- flooding - Foods stored in sealed glass jars should not be bothered by flooding other than having to wash the outsides of the containers. All food regardless should be stored in such a fashion that it is at least 3-inches off the floor. In addition to this you can place all foods in large plastic bins that will protect you for up to a good 2-feet of protection. Hanging some foods from rafters and on the walls will also serve for a bit of flood control
Sunday, September 13, 2009
Starting Tomatoes
[The poll results for the recipes my husband used for the He Said/She Said contest are posted. His winning recipe was the Texas Style Barbeque Chicken Legs. Please take a moment to vote for your favourite recipe in the She Said entries.]
The tomato season is a bit late here by about a week with respect to the hampers of tomatoes I use for canning. My husband brought home 2 hampers of tomatoes Wednesday night for me to process on Thursday. It marked the beginning of tomato processing season for me. However the weather is already threatening to turn much colder At the same time the garden is producing nicely so I've been picking tomatoes daily especially the Sweet Millions cherry tomatoes.
I have mentioned roasted tomato sauce on this blog quite often. It is one of our favourites. There is no recipe only a method and that is to roast the tomatoes on an outdoor grill (1). I add a little fresh garlic, fresh basil, green pepper, onion and drizzle of olive oil. Then the mixture is slow roasted adding more as it cooks down. The tomato mixture is ready when there is a good indication of caramelization (2). This is a must! It is the caramelization process resulting from this slow outdoor grilling that cannot be duplicated in an oven.
Once the caramelization process is completed I use a stick blender to smooth the mixture. Then the sauce is ladled into hot jars and processed in a pressure canner at 10 lb pressure for 20 minutes. When the jars are cooled the rings are removed and the jars washed. The jars are then ready for storage (3). This roasted tomato batch gave a yield of 10 - 500 ml jars.
Crushed Tomatoes
Crushed tomatoes are always a useful product on the pantry shelf. Plain and unseasoned, these tomatoes are very versatile for many dishes. I slipped the skins using the boiling water method, cut the tomatoes into quarters then across the strips forming larger chunks. The chunks were raw packed into hot jars. To raw pack simply put the tomatoes into the jars, packing as tightly as possible leaving 1-inch headspace. The tomatoes are then pressure canned at 10 lb pressure for 25 minutes. Pictured are the 13 L of tomatoes as they came from the canner (4). Initially there were 14 L but one of the jars broke (5).
Jar breakage is something every home canner will encounter at one time or another. There is always the chance of breakage due to dropping a jar but dreaded type of jar breakage is in the canner. The primary reason for jar breakage in the canner is themal shock. This happens when a cold jar is placed into the hot water of the canner stressing the glass to the point it breaks. This is why it is important to pack food into hot jars then place in the canner and bring the canner to temperature. This is also why it is important to use mason jars for canning not recycled mayonnaise and similar jars. Mason jars are thicker and tempered to prevent breakage especially under pressure. Another cause of breakage is old age. Glass gets brittle as it ages making it more susceptible to breakage. Using metal utensils in glass jars can cause scratches on the interior surface of the canning jar. This causes a weak spot that may cause the jar to break. Finally some jars have minor flaws such as bubbles that occur during the manufacturing process. If you fail to notice one of these bubbles the jar could break especially if pressure canning. In this case the jar that broke was a Canadian Mason so likely about 30 years old. Breakage was likely due to age and/or interior scratches. It was a clean break yet still a mess to clean-up.
Velveeta Dinner
The month of September always means long canning days. This particular day 2 hampers of tomatoes were cleaned. One was peeled and chopped so that's a fair amount of prep time while the other was turned into a sauce so there was a fair amount of prep work. The canner ran 3 times with one run spanning the dinner hour. These are the days that something quick and easy to prepare for dinner is very much appreciated.
I like to keep Velveeta cheese on hand as part of my pantry stores. Velveeta cheese is a shelf stable, processed cheddar cheese that requires no refrigeration until it has been opened. It won't keep as long as powdered cheeses in the pantry but cuts and looks more like a block of cheese. It also is rather versatile. While the canner was running we made a quick Velveeta dinner. It was nothing fancy but it was easy, tasty and frugal. I used homemade salsa and home canned jalapeno peppers for this dish.
Velveeta Dinner
1 lb extra lean ground beef
2 c elbow macarroni
¾ c Velveeta cheese
½ c chopped onion
½ c salsa
canned jalapeno peppers
Bring water to a boil then add pasta and cook to al dente. While the pasta is cooking, brown the ground beef. Drain beef and pasta. Return pasta to sauce pot. Stir in ground beef and Velveeta cheese. Place lid on pot and let sit 5 minutes until cheese is fully melted. Stir and plate. Top with salsa, onion and jalapeno peppers.
Saturday, September 12, 2009
Cheeseburger Pasta
I think everyone can always use another easy to make yet tasty pasta recipe. A few days ago one of my kids told me about a great pasta dish they had discovered so of course I just had to check it out. At the same time the question arose regarding dill pickle relish so I will be making a batch of that later this week. So I was off to explore.
Cheeseburger Pasta
The original family-favourite cheeseburger pasta recipe can be found here. I made a few changes to the recipe. The original recipe used ¾ lb lean ground beef but I used 1 lb. I exchanged the relish and eliminated the salt. I also used Swiss cheese instead of cheddar. Well you get the idea. I basically changed the recipe.
The Cheesburger Pasta dish has a lot of room to tweak to your own tastes. My husband does not like dill so I used a homemade sweet pickle relish that he does like and garnish mine with dill. Think about all the toppings you can have on a burger then go with that. I would recommend keeping the relish, mustard and ketchup proportions the same. Your favourite steak sauce could easily be substituted for the ketchup and I do think garnishing with homemade bacon bites would be nice. The next time I make this I will also add a bit of shredded lettuce as a garnish. Overall this was a lovely dish that can easily be customized to your taste.
Cheeseburger Pasta
2 c penne pasta
1 lb extra lean ground beef
½ medium onion, chopped
2 c diced tomatoes
2 tbsp sweet pickle relish
2 tbsp prepared yellow mustard
2 tbsp ketchup
1 tsp Montreal steak seasoning
¾ c shredded Swiss cheese
Bring about 1 quart of salted water to a boil. Stir in pasta and let cook until al dente. Drain and set aside. In the meantime, brown ground beef and the onions until beef is no longer pink. Drain. Stir in remaining ingredients. Bring to a simmer. Stir in the pasta. Remove from heat. Stir in the cheese. Cover and let sit 5 minutes then stir again. Serve as desired. Garnish with fresh tomato wedges, raw onions and a dill pickle slice (if desired).
Friday, September 11, 2009
Buying Locally
I've been running the Frugal Kitchens 101 each Monday since the first of 2009. I seriously cannot stress enough how important it is that if you want to save money on your food costs to eat locally. The closer to home you can buy any produce, meats or dairy the more you are going to save money. Now, buying locally doesn't mean you buy at the local grocery store. Buying locally means that particular food was grown and/or processed within a 160 km (100 mile) of your home. The shorter the distance the better it is. Anything you can grow yourself is within a few feet or yards of your house. There are no transportation or environmental costs providing you grow organically. Buying locally supports your neighbours, makes your community stronger while providing you with the freshest food products possible. This is a great video by Hellman's highlights buying locally.
We have had the good fortune to live in an area where produce, meats, poultry, eggs and fish are abundant within less than the 162 km range of our house. Sugar beets are grown and processed into sugar just under that 162 km range. Even salt including curing salt is produced within that range. I am seriously amazed at what I can buy that is grown within that range. There are even a couple of domestic cheese factories, breweries and wineries with online stores that will deliver right to our door! We try to eat as much as possible within the 162 km range. Unfortunately some foods like oils, olives, tropical fruits, teas, vinegars, coffees, sea salts, rices except for wild rice and some seasonings are not grown locally. Obviously there are a lot of other foods we eat that have their origins outside the 162 km range but for the most part the vast majority of the foods we eat are within that range.
We live in a world where global trade is the norm. We are used to all of the lovely food extras that are produced throughout the world. How wonderful it is to be able to enjoy them! I don't know a magical percentage for purchasing them but if you aim to keep these foods at 20% or less of your total food budget you will be saving money and the environment as well as supporting local growers.
Thursday, September 10, 2009
Kitchen Quick Tips - Kitchen Wraps
Wednesday, September 09, 2009
Left Over Steak Dinner
Last Wednesday we hosted a dinner party and social for about 15. Steak and corn-on-the-cob was on the menu. The steaks were large so both of us cut our steaks in half to make a meal the following night. There was more than half of the husked, uncooked corn-on-the-cob left over and several baked potatoes. Left over steak bones went home with one of the guests as a treat for his dog. The next day I froze the remaining corn reserving just enough for dinner. Spotting the left-over potatoes and steak gave me an idea for dinner.
Steak Mixture
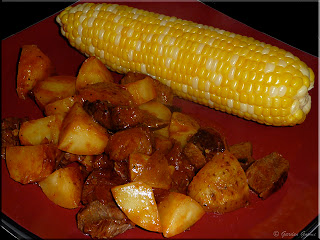
If you have been following this blog you will know my husband and I just finished up a recipe contest. As part of one of his contest recipes I made a bourbon grilling sauce that was so good I even canned two jars. The sauce got rave reviews at the dinner party so I used some of the left over sauce for the steak mixture. The mixture consisted of Vadelia onion slices sautéed in butter until translucent with baked potato and steak cubes. The bourbon grilling sauce was added to the mixture and allowed to come to a simmer then the mixture was removed from the heat and plated. The prep and cooking time for the steak mixture was under 15 minutes, ready for serving with boiled corn-on-the-cob for a quick, easy to assemble meal.
Left Over Steak Dinner
Larger gatherings by default generate left overs. It is very important to use whatever possible within the next day or two. If that is not possible any left overs should be preserved either the day of or the day after the event. It is also important that you do not try to preserve or use any food item that has been in the food danger zone (41ÂşF to 140ÂşF) during the event. If in doubt throw it out! This rule applies to all dairy foods or foods made with mayonnaise. Bones and left over meats can be given to dogs. Salad green and other vegetables that have been in the food danger zone can be given to chickens, pigs or composted.
Any time you can use up left overs you are in most cases making a frugal meal. In this case the only ingredients used in the meal that were not left overs were the butter and onion. Varying the presentation resulted in a different meal than the night before. It really was a tasty meal!
Tuesday, September 08, 2009
Sweet Pickle Relish
Every year during the busy canning season I always manage to try a few new recipies. What I'm looking for is a canning recipe that becomes a family favourite or at the very least a tried and true recipe that I will use over and over. If I'm lucky I will discover one or two great recipes each year this way. If I'm not lucky I end up with a dud which is why I only do small test batches for new recipes.
Natural
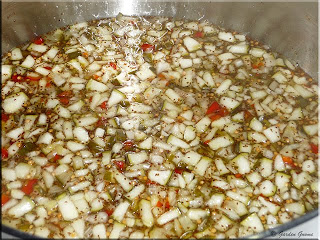
I have a couple of tried and true recipes for sweet pickle relish so I really wanted to try the recipe in the Ball Blue Book to compare to those I know are good. I had serious reservations about the recipe when it said to 'chop' the cucumbers instead of the standard 'run them through the grinder' method but decided to go ahead. The recipe said nothing about seeding the cucumbers either. I made a half batch giving me a yield of 3 - 250 ml jars. Pictured is the sweet pickled relish cooking before any food colouring has been added.
Sweet Pickle Relish
source: Allrista Corporation, Ball Blue Book, 2001. Pp. 50
2 medium cucumbers
1 c chopped onions
½ c sweet green pepper
½ c sweet red pepper
2 tbsp salt
1¾ c sugar
½ tbsp celery seed
½ tbsp mustard seed
1 c cider vinegar
Chop cucumbers, onions and peppers. Combine in large bowl and sprinkle with salt. Cover with water. Let stand 2 hours. Drain, rinse and drain thoroughly. Combine remaining ingredients in large saucepan. Bring to a boil. Add drained vegetables. Simmer 10 minutes. Pack into hot jars leaving ¼-inch headspace. Wipe the rims. Adjust two piece lids. Process 10 minutes in boiling water bath canner.
Yield: 4 half pints.
Food Colour Added
I took one look at the relish and realized it needed food colouring. Now this is not something I like to add to any of my homecanned products but in this case it was necessary. What many don't realize is the relish you buy in the stores gets that lovely green from added food colouring that has first been injected into the cucumbers then added again during processing. That means duplicating this process at home is a bit more difficult.
The work around is to add a few drops of food colouring to make the homemade version look a bit more like the commercial version. I use an all natural vegetable food colouring for this type of application. Notice the difference in the colour!
Sweet Pickle Relish
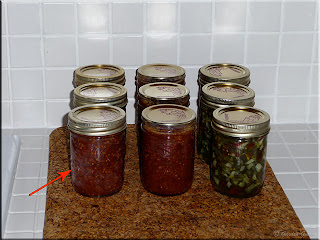
This time of year it is quite common for me to put up two or more products the same day. On Friday I also made another batch of plum sauce. Pictured are 6 jars of plum sauce and 3 jars of the sweet pickle relish. If you have followed this blog you will have seen most pictures of home canned foods with the rings on as in the far left. Also pictured in the far left is the thin white film from water deposits that can occur on jars during canning. This can be prevented by adding white vinegar to the canner water or washing the jars down with white vinegar after canning. Once the rings are removed and the jars cleaned they are ready for storage (centre). Don't store the canned jars with rings on as this can hide false seals.
The far right shows the 3 jars of sweet pickle relish. There aren't many times I will really diss a recipe but this is one of them. I followed this recipe to the "T" shaking my head as I did. The fundamental step of seeding then grinding the cucumbers was left out giving a far less than satisfactory result. The recipe tastes good but it is certainly not what you would expect of a relish. There was no indication that food colouring should be added either so if you didn't know about doing that step visually you would have been a bit unhappy with the results. Overall I am disappointed in this recipe. Yes I have a product on my pantry shelf but it really isn't the 'relish' recipe I anticipated. I would suggest seeding the cucumber then grating or grinding them and definitely add a bit of green vegetable based food colouring!
Monday, September 07, 2009
Frugal Kitchens 101 - Using Your Pantry Stores
The past few Frugal Kitchens 101 have focused on stocking your pantry. This is the time of year when many of us are re-stocking the pantry with as much as a year's supply of fruits and vegetables to get us to the next growing season. At the same time we may be trying to use up some of last year's canning goods while taking advantage from the odd excellent sale. Continuing with the pantry theme this week's Frugal Kitchens 101 will discuss using your pantry stores.
The purpose of your pantry is to keep you prepared, keep you out of the grocery stores, greatly reduce eating out and is aimed at saving you money. One big mistake that some make is to continuously add to their pantry stores without using them. In extreme cases this is known as hoarding. What happens is the food doesn't get used within a 2 year period and quite often you hear about these cases when family or friends are forced to clean out a relative's home through illness or death. The sad thing is hundreds of dollars of stocked up food ends up being tossed if this happens. Don't get into this trap. Think of your pantry as constantly evolving to meet your current needs. Foods should constantly be revolving using the oldest foods first with no one food item being older that a year to 18 months old. Once your pantry is stocked it becomes a matter of constantly revolving the food. Armed with your pantry inventory list and personal use list you are now ready to use your pantry stores. Here are a few of my tips.
- plan to use - If you menu plan and even if you don't plan to use a certain portion of your pantry stocks each week. If you menu plan it is quite easy to know that you are going to use for example 2 jars (cans) of green beans, 2 packages of pasta, 2 tins of tuna as part of that particular week's menu plan. Obviously this is not a full menu but you get the idea. I am not a huge menu planner aside of special events and that is because when I walk into my pantry I'll spot something that ends up being the focus of that night's meal.
- use what you have - In general if you have stocked to allow for example 1 jar (can) of green beans per week you should be averaging that amount. Don't worry about restocking that particular item until you are down to the quarter mark. So if you started with 52 jars (cans) of green beans when you get down to 13 jars then start watching the sales if buying commercially canned green beans. If you are using home canned green beans this will be the time to assess whether or not you need to put up more jars the following year. If you are home canning and have reached the half year mark without reaching the halfway mark that is likely a good indication you could reduce the amount you put up the following year.
- be flexible - Your food preferences and consumption changes over time so that may result in you finding you having an excess of a particular pantry item. If you know this is an item you will not consume donate it to a food bank or give it to someone who will use it.
- be creative - Open your pantry and quickly pick one item. Use that item as the inspiration for that meal. It's surprising how effective this method can be. Use your pantry inventory list as the basis for planning your weekly menu as well.
Sunday, September 06, 2009
Looking Back on the He Said/She Said Contest
One of the easiest ways to discover new recipes is to pick a cookbook then go through it marking recipes that sound appealing to you. That's exactly what my husband and I did then to make it a bit more challenging we turned it into a contest identified here as He Said/She Said. Both of us are accomplished home style, cooking from scratch cooks so this became one more aspect of being able to share of love of food. At the same time we each learned something about each other's cooking style along with discovering a few new ingredients.
When I originally came up with the idea for this contest the premise was each would do 6 different recipes of their choosing without assuming any help from the other. Well that idea fell by the wayside with the very first recipe, Texas Style Barbecue Chicken. As we browsed through the recipes questions arose over certain ingredients so one of us would rush off to do an online search. The curiosity of what was happening in the kitchen quickly turned into me acting as hubby's sous-chef and he in turn acted as mine. In the end the entire contest became less of a competition and more of a team work effort. We seriously had a lot of fun with this so already have plans for our next joint venture in cooking coming soon so watch for that coming as October's feature.
Saturday, September 05, 2009
He Said/She Said Contest Summary
For the past 6 weeks my husband and I had a contest with each of us making a recipe from Better Homes and Gardens® New Grilling Book to create a meal. The primary goals for this contest was to discover new recipes while learning a bit more about our cooking styles in a fun yet slightly competitive contest. In total there were 12 recipes, each choosing 6. The contest ended August 31 with all dishes completed by that date. Originally I was going to post one large poll so you the reader could vote for your favourite dish of the 12 recipes. Instead I will post one poll for the best of he said and one poll for the best of she said followed by a final polling with the first poll to go live tomorrow and running one week. Tomorrow's blog post will give some of the highlights we discovered from the contest.
He Said
She Said