An easy way to decorate a cake is with two paper doilies. Place the cake on a cutting board. Place a small doily to fit the surface on the cake. Sprinkle icing sugar, sugar cinnamon or cocoa powder over the doily covering all open spaces. Lightly brush off excess on the doily. Carefully remove the doily to reveal a beautiful lacy pattern on the cake. Place a large doily on a cake plate then place the decorated cake on top of the doily for presentation.
Welcome to our kitchen that truly is the heart of our home! One of life's greatest pleasures is enjoying good food with family and friends. Here you will find recipes, tips for frugal cooking, how-tos for food preservation especially canning and anything else food related. Tea is brewing and warm cookies are fresh from the oven. Please sit a spell and enjoy your stay.
- Garden Gnome
- Ontario, Canada
- I am a wife, mother and grandma who enjoys the many aspects of homemaking. A variety of interests and hobbies combined with travel keep me active. They reflect the importance of family, friends, home and good food.
--Bobby Flay
For Your Information
- [March 19, 2020] - Effective Mar 17, this blog will no longer accept advertising. The reason is very simple. If I like a product, I will promote it without compensation. If I don't like a product, I will have no problem saying so.
- [March 17, 2020] - A return to blogging! Stay tuned for new tips, resources and all things food related.
- [February 1, 2016] - An interesting report on why you should always choose organic tea verses non-organic: Toxic Tea (pdf format)
- Sticky Post - Warning: 4ever Recap reusable canning lids. The reports are growing daily of these lids losing their seal during storage. Some have lost their entire season's worth of canning to these seal failures! [Update: 4ever Recap appears to be out of business.]
Popular Posts
-
Food manufactures have so convinced us that home cooking is not possible without a ready-made mix that many of us actually believe that myth...
-
I am very much a scratch cooking most of the time. One thing that has always been a concern is coming across a recipe I want to try that ca...
-
I got my first job at A&W and only worked there the summer but that is where I met the love of my life. This sauce was made on site by...
Thursday, February 28, 2013
Kitchen Quick Tips - Easy Cake Decorating
Wednesday, February 27, 2013
The New Fox & Hounds Restaurant & Tavern in Hubertus, Wisconsin
My husband and I do a fair amount of traveling which always involves food in some fashion. We traveled by train a couple of weekend ago to visit our kids in Wisconsin. Now that was a wonderful way to avoid a long and tedious drive when roads tend to be rather nasty especially at the bottom of Lake Michigan during the winter months. Finding great restaurants when traveling is usually by word of mouth for us combined with a little good luck. Our kids made 4:00 PM reservations at The New Fox & Hounds Restaurant & Tavern because she had fond memories of going their as a child with her parents. It had been years since she had been there but the restaurant still had a good reputation so they thought we would enjoy it.
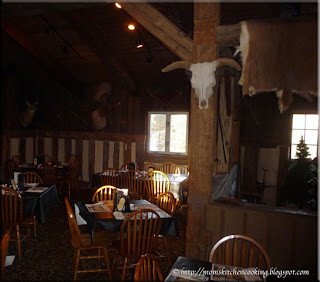
There is a sign hanging in the foyer of The New Fox & Hounds Restaurant and Tavern proudly announcing that the location has been home to a restaurant since 1933. The first thing that you notice aside of the sign is the abundance of wood, only a small hint of what's inside. The maitre d greets you just inside the restaurant where your dining party is shown to your table.
There is a lower dining area divided in several sections (some as almost private rooms and named) along with the tavern. Then upstairs dining area divided into sections as well but a bit more open. Be warned, the stairs leading to the upper level are rather steep!
The pub located on the lower level is warm and cosy, featuring live music on Saturday evenings. Despite the small size, the ambiance is delightful. A real open wood fire in the stove at the end of the tavern creates a beckoning welcome while imparting just a hint of smokey aroma to the air while the warming glow dances. To the left of the fireplace is a small hallway that leads to the restrooms. Further to the left of the fireplace is the narrow aisle leading to the staircase.
When we arrived the tavern was almost empty. When we left, it was beyond packed and the only way out for those dining upstairs is through the tavern. It was wall to wall, packed tight with people. So, it is best to make reservations for an earlier dining time as the restaurant does fill up rather quickly for reasons that will become apparent below.
It is quite apparent from the inside the building is quite old. Despite newer windows, there were drafts coming from around the windows and log chinking. Yet the upper dining area where we sat was quite comfortable. There is a lot of rustic touches throughout the entire restaurant. To the right is the top of the staircase. There was a very impressive lit chandelier that had been constucted from empty wine glasses placed on an angle in a round metal frame. I counted 16 rows of wine bottles in the picture I took but it didn't get the very top. The entire chandelier had to have been 8 feet long or more, reaching over the bar and aisle area just before the stairwell.
This restaurant offers BOGO deals! Monday through Thursday after 4 PM, Saturdays and Sundays after 3 PM all entrees are buy one get one free of the same or lesser value. It excludes their Super Surf & Turf (8 oz filet, 8 oz lobster tail as well as the lobster tail entree BUT they do have a special Surf & Turf (6 oz filet, 5 oz lobster tail) as part of the buy one get one free entrees. Along with the BOGO free entrees, desserts from the dessert tray are also BOGO as are some bar drinks. This explains why it gets so buy there!
Reading through their impressive menu, I wasn't surprised to see the price range for entrees in the $20 and above range with many options averaging $26. I thought that the BOGO deal would not include extras but I was wrong. Dinner entrees include homemade soup or fresh house salad, choice of potatoes (garlic mashed, baked or savory fries). A loaf of fresh baked bread with maple tarragon butter.
Appetizers and drinks are extra. Appetizers average $9 with the exception of the Fox Feast which is an appetizer platter priced at $18.99. We ordered the stuffed portobella mushroom caps stuffed with cab, topped with Bearnaise sauce and shredded Parmesan cheese to share. It was scrumptious!
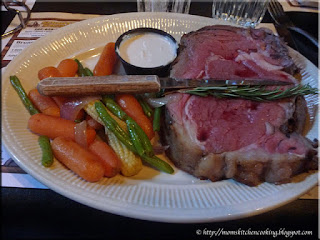
My husband ordered the 18 oz prime rib entree with broccoli cheddar soup, baked potato and steamed vegetables (baby carrots, baby corn, red onions and green beans). There was a creamy horseradish sauce for the prime rib. As you can see he likes his prime rib rare, pretty much blue and just barely not mooing! It was a very generous portion of prime rib, more than he could finish in the meal. He declared the meat cooked to perfection!
We had ordered baked potatoes with our entrees. They were a nice size served in a small baking dish aside of the main plate. I really did like their presentation including the way they served the baked potatoes. It was simple, unpretentious and kept the focus on the food where it should be.
The kids and I ordered the surf & turf special that came with a 6 oz steak, 5 oz lobster tail, whole browned mushrooms, and steamed vegetables (baby carrots, green beans, cauliflower). Hot drawn butter and a lemon wedge was included for the lobster. This was a beyond delicious entree, very much full of flavour. The lobster tail was cooked perfectly and nicely presented. The juicy steak had nice hash marks with a nice flavour. I normally ask for steak sauce with my eat out steaks but didn't this time
The entree portions were quite generous. I couldn't finish my steak nor could the kids or my husband his prime rib. We asked for take-out boxes just for the meat that we reheated for brunch the next day. We sliced the meat into strips then made a light stir fry to serve with fried eggs and home fries. The meat remained tender and juicy, a sign the meat had not been originally over cooked.
We had never heard of The New Fox & Hounds Restaurant & Tavern prior to this visit so I was rather surprised to read some of the reviews on Trip Advisor. While I do have some reservations about the reviewers on Trip Advisor, we had no complaints at all with this restaurant! The atmosphere was wonderful, the waitstaff were friendly and efficient, and the food was good. We enjoyed four well prepared, nicely presented entrees for the price of two so you certainly cannot complain about this. The only thing I would recommend is to make reservations and go a bit earlier to avoid the crowd. This restaurant is on our must go to list when we are in that area again.
Tuesday, February 26, 2013
Freshly Extracted Orange Juice
I recently wrote about using my new Bella High Power Juice Extractor for the first time. I really liked the results and quickly saw that I could create unique juices that are unavailable in the grocery stores. Unless you have a free source of fruits and vegetables for juice or you can find them at a good sale price, you won't realize a savings on the basic juices (eg. orange, grapefruit, cranberry, grape). However, like jams and jellies, juices can be a blend made by stretching the more expensive fruit or vegetable with less expensive or free ones. It is possible to make the new fruit and vegetable juices that are now popular for less money than store bought plus you can custom the blend to your tastes.
Store bought orange juice is made from concentrate as are most commercially prepared juices. Once the oranges are juiced, the juice is stored in holding tanks that have had the oxygen removed for up to a year. During that time the juice loses flavour. Many of the popular brands of orange juice use a chemical process (flavour packs) to make the juice taste and smell like oranges. Pulp and/or sugar may be added to the juice as well. So, the orange juice you buy in the grocery stores is anything but fresh!
Freshly squeezed orange juice is delightful! It can vary in flavour from sweet to sour depending on the variety of orange used. I bought 7 medium sized oranges to test out the juicer. The skins may be left on all produce for juicing except oranges, grapefruit and tangerines as the oils in these citrus fruits is bitter and hard to digest. I cut each orange into quarters then removed the peel. The peel need not be discarded if the oranges are organic. It can be dried and powdered for culinary purposes as well as a natural source of Vitamin C medicinally. It can also be candied. There is no need to seed the orange wedges for juicing unless you want to try growing orange trees. Don't laugh! I have three small lemon trees started from lemon seeds in a lemon I cut up for Caesar salad.
The seven oranges were quickly juiced on low power.. It actually takes longer to disassemble the juice extractor for clean (less than 5 minutes) than it does to extract the juice. At this point the juice is ready to be enjoyed!
When the juice is first made there is a layer of foam on top of it because the stainless steel blade basket revolves at a high speed. The juice quickly fills the pitcher which cause the foaming similar to what would happen if you shook a jar of juice. This foam settles down rather quickly and has no effect on the flavour of the juice.
The seven oranges gave a yield of almost 750 ml (3 cups). I paid $2.50 for the oranges so the freshly extracted juice is definitely more expensive. The taste is definitely worth the extra price! It is also fresher than juice commercially made from concentrate. It still is not 'picked that day fresh' as oranges as well as other citrus fruits are shipped to Ontario from Florida or California. Clementines are an exception as they are usually imported from Morocco.
I'm only making the fresh extracted juices in the amount we will use within 3 or 4 days. store homemade juices in mason jars in the beverage chiller of the refrigerator. It's an easy and inexpensive solution as I have so many mason jars. It also means I have taken one more step of reducing kitchen waste by eliminating a large portion of frozen juice concentrate containers (not recyclable) and juice bottles. I usually use a Bernardin storage lid in the refrigerator by my supply is low so a recycled snap lid and ring was substituted.
Even though the freshly extracted orange juice is more expensive and the price will fluctuate more than juice made from concentrate, I am confident is a healthier choice for us. I can't wait to buy some oranges from the Indian River trucks from Florida. They come up each spring with about as fresh of oranges as you can get here. There are two drivers so the make the trip from Florida to Ontario within a day. These oranges are so good, they sell out their truck with a day or two! In the meantime, I have to use store bought oranges.
I'm also planning on buying a juice extractor for our vacation home in Florida where I can get inexpensive citrus. During the orange season, finding free fresh oranges is very easy. In our resort, residents not wanting oranges from their trees put them in a box free for the taking. I just found out we can bring oranges back from Florida so will bring some the next time we drive.
Monday, February 25, 2013
Frugal Kitchens 101 - Homemade vs Store Bought
If you have followed this blog, you will know that I put a strong emphasis on homemade and cooking from scratch. The reason is not quite as simple as saving money. True I save a substantial amount of money by home canning, making homemade convenience foods and cooking from scratch but one primary reason for doing so is healthier food not laden with excess salt, sugar, HFCS, as well as artificial food additives and preservatives. I like being able to put unique foods (eg. vegetable powders, fire roasted sauces, jams, chutneys, and etc) on the table that can't be bought in the grocery stores. There's also that sense of pride at becoming more self-sufficient with less dependence on the grocery stores. So the big question is, 'Do you save money by doing all of this?' because most folks are seeking to reduce their foods costs. The second big question is, 'Doesn't it take a lot of time?' because the food industry has so engrained the concept that cooking from scratch takes a lot of time in order to push their instant, heat & serve and convenience foods on consumers.
The Economics:
I'm a numbers cruncher so I do know what our home canned, homemade convenience foods and cooking from scratch costs. The costs include everything that went into making that product for the pantry or freezer as well as the cost per serving for meals. For example, a 4 L bag of corn for the freezer costs: the gas to drive to the farm, the zipper style bag, the cooking fuel for blanching and the water for blanching and cooling PLUS the hydro from the moment that bag of corn goes into the freezer until it is used to keep the corn frozen. This is one reason why I prefer home canned foods over home frozen because once canned, there is no hydro used for storage. Actually, there is a cost for storage that most do not consider. If you convert a bedroom into a pantry and that bedroom is one eighth the size of your house, then one eighth of all expenses related to running your house (eg. heating, utilities, maintenance, taxes, mortgage, etc) are being used to maintain that space for storage. The same applies if all you are using is a closet.
The main way to save on preserving and stocking a pantry is to get the raw ingredients for the least amount of money possible. There are ways to save on the produce, meats, poultry and fish being put up for the pantry and freezers as well as for fresh cooking from scratch. Home grown produce will save you money. If you garden, consider trading your excess with friends or neighbours for something you need. I trade produce from my garden for perch from a friend who loves to fish. He doesn't garden and I don't always get as much fishing in as I would like to so it is a win:win for both of us. Another of my friends makes amazing banana cake that is sure to come our way for a jar of my home canned salsa. If you know a farmer who raises livestock, they may consider raising a cow or pig for you if you pay for the feed. Many municipalities are now allowing backyard chickens that when producing will lay an egg about ever 14 hours so four chickens can give you a lot of eggs! If you have access to a water supply, locally caught fish is yours for the time it takes to fish. Wild game can be another money saver if you have access. Beef and pork are best bought in bulk where the price over all cuts of meat per pound is greatly reduced. It is also wise to take advantage of good sales on produce and meats. Produce in particular should be bought locally and in season. I put up enough to get from one growing season to the next and then some just in case the next growing season isn't very good. Supporting ingredients like flours, pastas, sugars, rices and beans are best bought in bulk as they have long shelf lives. Other ingredients like pectins and ClearGel are best bought online if there is no local source. I always watch for free shipping!
Many food suppliers are making their products available online as well. I can order Digby scallops delivered to my door, next day service at half the price they are going for in the grocery stores. Cheeses and spices can also be found cheaper when ordered online. Now, some specify that you have to order a certain amount to get free shipping so if I don't want to spend that much, I go in with someone else just to be able to get free shipping. Just as in brick and mortar stores, online stores offer customer loyalty discounts and promotions so I always watch for those as well. If ordering fresh foods like scallops, they do want you home for the delivery to protect against spoilage but it can be a real cost savings ordering foods this way.
Bulk food stores can save you a lot of money as long as you stick to the basics and avoid impulse buying. We have two bulk food stores in our area that I only shop at once I have a list of needed ingredients. These stores save considerably on basic spices, salts, sugars, teas, coffee and so much more. The reason being, is you can buy just what you want so you don't have to pay $4 for a spice that you only need a teaspoon of. Just buy a couple of teaspoons of it knowing you can always buy more if it is something you end up liking.
When it comes to cooking from scratch, there are many ways to keep the costs down to $1 to $2 per serving which is well within the range of frugal eating. Cooking from scratch even if you don't do any home food preservation is the number one way to save your food dollars. You don't need expensive ingredients to cook low cost, healthy and tasty meals. If you are really trying to save on your food dollars focus on homemade soups, stews and casseroles. Waffles, pancakes and eggs are great money savers as well especially if using a basic batter. Sandwiches and salads are usually inexpensive as well.
Timing:
Cooking from scratch is not as time consuming as the food industry would have us believe. A basic cake made from scratch or a homemade cake mix takes no more time than one made using a store bought mix. Cookies from homemade refrigerator dough take the same time to bake and are just as easy as store bought but they are considerably less expensive. A homemade version of any of the 'Helper' boxed store bought versions is just as quick to make as the store bought. For the most part, many meals can easily be made at home without consuming a lot of time. In addition to that, there are time saving appliances (eg. slow cooker, microwave) and cookware (eg. pressure cooker) to reduce the time needed for cooking. Some foods by default take more time to prepare than others. These include fermented foods (eg. sauerkraut, fermented pickles), yogurt, cured and/or smoked meats, dehydrated foods (eg. fruit roll-ups, dried fruit snacks, jerky) but the cost and flavour savings more than offset the timing of which you can be doing something else while the food is in process.
A surprising number of meals can easily be made in 15 to 30 minutes, completely from scratch simply from ingredients from your pantry and/or freezer. Longer cook methods can still take low prep then cooking in the oven or stove top but quite often you can be doing something else while the meal is cooking. Consider, if you order a pizza that takes 40 minutes for delivery, you can actually make homemade pizza using homemade frozen pizza dough in about 20 minutes. Going through the drive-tru can tie up 20 to 30 minutes of your time plus the extra driving and you still have to set the meal up at home but in that total time of an hour or less, you can easily put a healthy, homemade, cooked from scratch meal on the table.
Friday, February 22, 2013
Scalloped Potatoes
We live in beautiful Ontario, Canada where the winter days can be somewhat blustery, grey and cold. On the flip side, there can be a blanket of snow on the ground, an amazing clear blue sky and bright sunshine that makes the snow sparkle like a million diamonds. That means we need comfort meals especially on the cold, dreary days. And, for those not familiar with Canadian winters a bit of extra fat is always welcomed in the diet during the winter months because we have to shovel snow, walk through snow, and get outdoors to get our bodies to make Vitamin D. We have been focusing on making winter comfort foods at home. Some dishes are just beyond comfort food. Now if that dish happens to be a creamy casserole, well you have it made!
Method: I use a food processor to slice the washed potatoes uniformly. A mandolin can also be used. I place an even layer of potatoes on the bottom of a lightly buttered oven proof baking dish. Then I sprinkle the surface of the layer of potatoes with flour, salt, pepper,2 - 3 dabs of soft butter and chopped onions. I continue layering in this fashion ending with a flour layer. Sometimes I add chopped chives to the top layer as well. I then pour scalded milk over the potato layers until the milk reaches just under the top layer. I find it is best to place a shallow baking sheet with water on the rack under the casserole dish in the oven as scallop potatoes are famous for boiling over. I bake at 350°F until the top is golden and sauce is bubbling.
Scallop potatoes baked this way are rich and creamy just perfect for pairing with home cured pea meal bacon and home canned green beans. On a cold winter's night this is the perfect easy to make comfort meal! Aside of the potatoes, the meat and beans take only about 15 minutes making the meal a rather low prep one.
These scallop potatoes will cut nicely into squares. They reheat well and can be frozen for later use. They are just a bit creamier if you peel them. The nice thing is they are just about a fool proof to make as possible. Paired with home cured pea meal bacon, the entire meal is low fat. Don't be tempted to omit the butter as that does add flavour but the entire casserole dish has less than 2 tbsp of butter if that. I use 2% milk. Whole milk (4%) or heavy cream will give extra creaminess but I find the 2% milk works nicely without adding extra fat. Skim milk works as well but I have not tried them using soy milk. However, soy milk can be substituted for cow's milk in many recipes so I don't see why it wouldn't work in this recipe.
Thursday, February 21, 2013
Kitchen Quick Tips - Dealing With Greasy Build-up
Wednesday, February 20, 2013
Train Fare Food
Yesterday, I shared our foodie purchases on our recent visit to Wisconsin. We opted to travel by train to avoid nasty road conditions. Having traveled that route a few times in the winter, we know just how treaterous it can be. Seriously, the one year we hit the bad area at the bottom of Lake Michigan to see several car accidents, a few jack-knifed trucks and we were at 20 miles an hour for about 60 miles. We drove from Ontario, Canada to Port Huron, Michigan where we caught the 6 AM train heading to Milwaukee, Wisconsin. There was a stop over in Chicago, Illinois. The train between Port Huron and Michigan has a dining car as it is almost a 6 hour ride but the train between Chicago and Milwaukee has a dining cart that the conductor goes from car to car as it is only about a 2 hour ride.
The layover between the train from Milwaukee to Chicago and the one from Chicago to Port Huron is 1 hour and 15 minutes if the train is on time. There is no dilly dallying or time for a quick meal as there is at the airport. Train seats are unassigned so if you want to sit together, you need to get in line quickly.
The dining car on a train is the same size as a regular car. You do have to walk to it and be aware that the train is moving. The car is divided into about three quarters of table seating if you wish to sit there. There are plugs available for electronic devices not only in the dining car but at each seat. While personal food and beverages are allowed on the train they are not allowed to be brought into the dining car. The remaining quarter of the car is the cooking and serving area. Be warned that this space is small so if you want to use the dining car, try to time it away from the prime meal times.
My husband is a former classed engineer (CN rail) and conductor (VIA rail) so we have had plenty of train experience. At one time, all food served on the trains was prepared on the trains. I think about the only food actually made on board the short distance trains now is coffee. The menu is rather limited and the prices are higher but not so high as to be gouging customers. Tips are not mandatory but it's nice to leave one. Unlike the plane service, the trains will take old fashioned cash but credit cards and debit are also accepted. Food and drink including alcoholic drinks can be brought from the dining car to your seat if you choose.
We are looking at doing a train adventure that would take us 3 days on the train each way. A berth, (private sleeping/riding quarters) is definitely recommended for this type of trip and meals are included. Long distance trains still have on board meals and a dining car. You do have to RSVP as seating is in 15 to 30 minute intervals so as to not over crowd the dining car.
Dining on the short distance trains is not fine dining but with no time to stop between trains, it is better than nothing. I actually walked to the dining car to bring back a few goodies for our dinner (perfect excuse to get some pictures!).
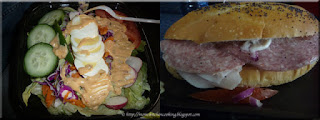
I got my husband a peperoni pizza. It came in a half pizza box with the pizza on a microwave safe foil tray that ensured the crust didn't get soggy. I can remember years ago, these pizzas being sold in vending machines at the university cafferterias but haven't seen them for ages. I don't know if they are still available to the general public or just for the food service industry. Surprisingly, these pizzas are rather tasty.
All heated food on the short distance trains is prepared ahead, vacuum sealed then reheated in the microwave oven. Now, this is not as bad as it sounds. I've done countless quick starts then vacuum sealed them and froze to be reheated in the microwave or a boiling pot of water. In fact, a lot of the top chefs are now using the boil-in-a-bag method because it retains flavour and nutrients while decreasing cooking time.
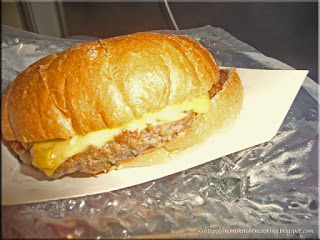
I bought two Angus cheese burgers. It was sealed in a pouch for easy reheating. Condiments were available including and the first I've ever seen it a condiment packet of chopped onions.
The cheeseburger was a good size and it was quite tasty. I was not fond of the texture of the bun but then I could say that about any bread coming out of the microwave. The bun was more steamed due to the packaging so on the borderline soggy, chewy side. Other than that it was a good burger.
I paid $19.95 plus a tip for the pizza, two burgers and bottled water which in perspective is not that bad of a price for a meal for two when traveling. Had we had a long enough layover, we likely could not have eaten for that price at Union Station in Chicago to begin with so eating on the train for a hot meal, wasn't such a bad deal.
When traveling, there are only so many food items you can carry with you. At some point, you will need to buy a meal or extra drinks. If you are on a train from 6 AM to 3 PM, at some point you will need to buy food or refreshments. I found the food rather reasona bly priced for what you got although the selection was rather limited. Bottled water was $2.50 which was rather high and alcoholic drinks were $7. We filled our water bottles at the kids then again at the train station during the layover and my husband brought a couple of cans of pop so we avoided that cost. He doesn't drink much pop. So over all, we spent about $40 for the day for food for two people which really isn't bad. Heck, we have spent that much in air terminal food in one sitting!
Tuesday, February 19, 2013
A Foodie Train Ride Road Trip
My husband and I have itchy feet or what some refer to as wander lust. Honestly, had we not had kids, I doubt we ever would have settled down. Not that settling down and establishing roots is a bad thing it's just there are so many places to see, so many adventures and my gosh the food possibilities are endless. We are beyond pleased to have become established, creating firm roots for our kids and grandkids, but we still have a bit of wander lust yet to expore.
We seriously have coolers and insulated food bags at home, on the boat, at the vacation home and in both vehicles. Well, we arrived at the train station for our early morning 6 AM departure, opened the trunk and all we had was the large insulated food bag. I'm sure it would have worked fine but my husband insisted we would buy another cooler in Wisconsin with the size depending on the amount of cheese being brought home. He felt the insulated bag would not keep the cheese cool enough for the over 8 hour trip.
Only foodies would buy a cooler to bring home their stash of goodies :) We stopped at Cedar Valley Cheese Store where we delighted in stocking up on cheeses. Then we stopped to buy a cooler to fit our purchases. He bought the 28 quart Igloo Island Breeze cooler which just fit all of the cheese leaving just enough room for the light lunch and yogurt we purchased at the grocery store for our lunch on the train before the switch-over. Now, we were travelling rather light with two back packs (one almost empty for other purchases), the computer case (computer, iPad) and we had a spare cloth shopping bag just in case. The nice thing about traveling by train is there's no liquid restrictions and coolers are allowed (50 lb or under with size restrictions) plus we only had to get the cooler from the rental car to the train then to the next train on switching then to our car and finally in the house but it was considerably less complicated than flying. If traveling by train, I highly recommend not getting a cooler larger than this as when filled, this cooler just comes under the size restrictions.
I have blogged several times about Cedar Valley Cheese Store in Wisconsin. The store has expanded and now offers gift boxes, wines and imported cheeses along with their own cheeses. You can order online with shipping via UPS or USPS. You really cannot appreciate this cheese without visiting the store though. It does have some of the best cheese in Wisconsin although I may be just a tad biased.
Pictured is our Cedar Valley Cheese Store purchase of just over $140. The only cheese I bought that was not from Cedar Valley was the English Blue Stilton. We bought a total of about 30 lb of cheese: 6.3 lb whole milk mozzarella cheese, 3.57 lb sharp cheddar, 3.64 lb white mild cheddar, 3.84 lb medium chedar, 3.26 lb colby jack, 3 lb low fat cheese strings, 2.23 lb cheese curds, 1.21 lb cheddar garlic and dill, . 90 lb swiss premium grade and .19 lb of the Stilton.
Our kitchen refrigerator is stuffed with cheese but make no never mind, I will put it to good use! It's a toss up what will be first - poutine using those beautiful cheese curds or a cheddar beer soup. Of course, lasagna is a given as is homemade mac & cheese. Stay tuned ...
Sunday, February 17, 2013
My Kitchen Dreams if I Ever Won $50,000
As a food blogger I get a lot of perks because of my blog. These include free products, gift cards, recipe books, higher value coupons and of course, monetary compensation through allowing affiliate advertising on my blog. I don't write paid posts so any opinion I express on this blog are my own. I have been affiliated with Mom Central Canada for a little over three years now. They treat me very good! I was offered a chance to be one of 40 Canadian bloggers to participate in the Royale Golden Kittens Blog Tour. I like Royale products. The potential to win $50,000 in the Royale Golden Kitten Contest. Each golden ticket you find gives you an opportunity to win the grand prize along with instant prizes. Golden tickets are available on specially marked packages and through the Royal Kittens Facebook Page.
The big question is, "If I win the $50,000 what would I do?". I'm a very frugal person so the temptation would be to share with our kids, invest some and pay down our mortgage. However, I dared to dream what I would do with all that money!
We bought this house with a closing date of September 15, 2011 although we arranged to take possession on September 1. The house was built in the 1990's. It is a large, spacious home (five bedrooms) with a lot of nice upgrades, and ample room. We are currently working on doing more upgrades.
The kitchen is small but has marble floor, ceramic tile counter top and back splash. It was originally painted taupe so we brightened it up with a deep red, closed in the bulkhead, added custom trim, new dishwasher and natural gas range, and the custom shelf over the sink. I blogged earlier about a few kitchen upgrades in our new home purchased in 2011. We still need to replace the microwave, fume hood, faucet and sink. But I have big dreams!
The patio doors lead to a nice sized deck with two dining areas and the outdoor dual fuel grill. It over looks the pool and smaller detached deck. Last summer was our first summer there and we quickly discovered the kitchen deck gets too hot, so my husband erected a very nice, but temporary covered gazebo. What we want to do is expand that deck over by 3 feet, create a new entrance to the downside entrance, move the garage door to the side of the garage, then tie into the pool decking so basically 80% of our back yard would be under deck (aka maintenance free). It would involve replacing the fence and building a pool change room. We want to put the kitchen deck entirely enclosed for year round use, basically an expansion of the kitchen.
We are very blessed in that we are avid DIYers who more than capable of doing fencing, decking, roofing and siding thanks to over eleven years renovating a turn of the century home. We have friends who knows how to tie the addition into the house as it would involve cutting into the roof and side of the house. The biggest expense for all these plans come from materials but while I am dreaming I would like my husband to work in an outdoor cooking area complete with counter. I would also be elated if he could work in a wood fired oven! With all these great plans, I really hope I do win that $50,000 :)
What would you do if you won $50,000? Be sure to enter the Royal Golden Kitten Contest for your chance to win!
Saturday, February 16, 2013
Slow Cooker Chicken Cacciatore
Meals do not have to be fancy or complicated to be both frugal and delicious. Simpler meals save on the cost of additional ingredients, they take less prep work and often less clean-up. They are the perfect go to meals that often become family favourites!
I really don't like buying any meat in this type of packaging as none of it can be recycled. The foam trays cannot be cleaned well enough to prevent an risk of contamination from the raw meat they held. I wash the trays well, dry then spray with rubbing alcohol to kill off contaminants. I reuse these types for applications that will not come into anything edible.
Most meats cooked in the slow cooker need to be browned first. This seals in some of the juices while adding flavour. I used organic coconut oil to lightly brown the chicken. Normally, I would use olive oil as the sauce was tomato based but I'm experimenting with coconut oil. Coconut oil is very heat stable making it suitable for searing or browning meats. It adds a light nutty sweetness.
Coconut oil is one of the healthiest oils you can use for both culinary and home made beauty products. It contains lauric acids that aid in digestion while protecting the body from bacterial and fungal infections. It is a solid at room temperature. It can be used as a moisturizer on hair and skin as well. I highly recommend using it on your hair to keep it healthy and shiny.
Home canned tomato sauces are our number one homemade convenience food. I make several different, gourmet tomato based sauces each tomato harvest. They range from plain and smooth to rich and meaty with everything in between. One of my specialty tomato sauces started off as a roasted tomato sauce that quickly evolved to several versions of fire roasted sauces. Fire roasting gives a rich depth to the sauces that can't be achieved by simply roasting.
I placed the browned chicken breasts in the slow cooker then poured a 1 L (quart) jar of fire roasted Italian tomato sauce with mushrooms over the chicken. I set the slow cooker on low for 2 hrs than increased to high for an hour. This is a newer slow cooker that does operate at higher temperatures than the old one it replaced.
I served the chicken breast on a bed of extra broad egg noodles then ladled with sauce, topped with fresh grated Parmesan cheese and garnished with fresh parsley from my indoor garden. It was a simple, low cost meal that was easy to prepare.
My home canned tomato sauces cost me nothing more than the canning lid, cooking fuel (fire roasting, processing) and extra ingredients if necessary. A 1 L jar of sauce without meat or mushrooms averages about 30¢ but I can reduce that cost using a reusable canning lid (glass insert, Tattler, 4ever recap) by 13¢. Store bought broad egg noodles are quite inexpensive and homemade even less expensive so the only real cost for me with this type of simple slow cooker meal is the meat. In this case using store bought chicken at the sale price brought the cost per serving to just under $1.80 which is rather frugal.
Monday, February 11, 2013
Frugal Kitchens 101 - K-Cup Coffee Shops
Single-brew coffee systems have become quite popular because they are convenient and save money. Like many, I saw the immediate benefits of the single-brew systems especially for entertaining. We bought a Melitta One:One single brew system that use pods quite similar to round tea bags only coffee. We were quite happy with it even though it was difficult to find the pods in town but since we were in the US on a fairly regular basis, that wasn't a concern. Then in early 2011 the Melitta started leaking sporadically gradually getting worse. Compounding the problem, the pods for the Melitta were getting hard to find in the US as well, or at least where we shopped. Finally, I had enough and replaced the Melitta with a Keurig single-brew coffee system. Unlike the propriety pods for the Melitta with no option for using your own coffee, the Keurig had the My K-cup reusable filter system which would allow us to brew coffee using any ground coffee we wanted not just their K-cups. In the event K-cups were no longer available, the system would still work until the appliance itself died.
I immediately started the cost analysis of the K-cups. Each K-cup makes one 5.25 oz, 7.25 oz or 9.25 oz cup of coffee, tea, hot chocolate or other speciality drinks. Depending on where you buy them, K-cups range in price from 35¢ to 79¢ which is a savings on $1.25 for a small take-out coffee and a considerable savings on speciality or gourmet coffees at coffee shops. There's less waste produced with a K-cup and a lower carbon footprint as you don't have to drive to the coffee shop. It's an added bonus to grab a favourite gourmet coffee and have it brewed into a travel mug just in time for heading out the door. By far at 8¢ per cup, the My K-Cup filter with regular ground coffee bought on sale is the cheapest but it doesn't hurt to enjoy a favourite gourmet brew either. The problem with some of the flavoured and gourmet coffees is you might not like them which has led to K-cup coffee shops which are becoming very popular because you get to sample the flavour of choice before buying a full package.
I just discovered one close enough to stop in when in that community. The premise is you can pick a K-cup of your choice then have it brewed while sitting and enjoying the coffee shop or you can buy 6 or 30 mix-and-match K-cups or you can buy full boxes of one flavour of K-cups. The one I went to charges $1.50 for a brewed coffee of your choice, $5 for a mix-and-match 6 K-cups (73¢ each), $22 for 30 mix-and match (73¢ each) and $16 for single flavour K-cups (66 ¢). Be warned that they don't carry all variety of K-cups as the one we went to did not have any Folger's K-cups but they did have Starbucks. Of note, if it is important to you, there was one K-cup (pink blend) with proceeds going to breast cancer research and several varieties that were Fair Trade.
Now, clearly the K-cup coffee shops are not cheaper per cup of coffee than Country Style or Tim Hortons BUT they are offering you a chance to taste test before buying a full box of that K-cup and they are giving you an opportunity to buy a wide variety of K-cups to taste test at home at a slightly lower price than you would pay for a full box of K-cups, single flavour, regular price. The one we went to had sample K-cups of three of the brands that Sam's Club sells. Sam's Club K-cups range in price from 43¢ to 56¢ but you have to buy a 80 pk which would really be annoying if you found you didn't like the taste of the coffee. So if you have a chance to test out the coffee first, pay the extra at a K-cup coffee shop then if you like it buy it by the package on sale or at Sam's Club.
Saturday, February 09, 2013
Pork Loin Chops in Mushroom Sauce
Here it is the end of the first week of February and we are in the midst of a rather nasty winter storm with freezing rain, heavy snow fall, and high winds creating white out conditions. These are the days meant for staying indoors, catching up with a few indoor activities and enjoying warm, comfort foods. One of our long time favourite comfort foods has been pork paired with mushroom sauce. While the sauce uses commercially condensed cream of mushroom soup, the rest is magic! The lactic acid in the milk tenderizes the meat while the soup adds a rich creamy and comforting sauce.
I use boneless pork loin cut into about half-inch slices. Browning the pork chops adds extra flavour and colour. Sometimes I add in browned sliced mushrooms. I normally add either cubed or sliced potatoes to the mixture. From there I only need add a side, a salad and bred for a complete meal.
Here's how to do this dish using each method:
You will need: browned boneless pork loin chops, 3 - 4 tins of condensed mushroom soup, 1 to tins of milk, 1 c browned sliced mushrooms (optional), 4 medium sized potatoes (chopped or sliced)
Methods:
- skillet - Brown the meat then drain. Return meat to skillet. Prepare the potatoes as desired and add to the skillet. Mix the mushroom soup with the milk and pour over the pork chop and potato mixture. Cover the skillet with tented foil then cook on medium heat, stirring often until sauce caramelizes and the meat is tender. Remove from skillet and ladle extra sauce over the pork chops and potatoes for serving.
- oven - Brown the meat and drain. Prepare the potatoes as desired. Pour the potato and pork chop into an oven proof baking dish. Mix the mushroom soup with the milk and pour over the pork chop and potato mixture. Tent the baking dish with aluminium foil. Bake at 350°F until meat is cooked through, potatoes are tender and sauce is bubbly. Remove the foil tent. Continue baking 15 minutes to develop a bit of caramelization. Remove from oven. Plate using the extra sauce as a gravy.
- slow cooker - Brown the meat and drain. Place the meat and soup mixture into the slow cooker. Set on low and cook for about 4 hours. Prepare the potatoes as desired and mix into the meat and sauce. Turn the temperature setting to high. Continue cooking until potato are tender. Plate using the extra sauce as gravy.
Thursday, February 07, 2013
Kitchen Quick Tips - Egg Freshness
Wednesday, February 06, 2013
Concession Stand Style Nachos
We hosted a Superbowl party last Sunday and while I would love to tell you everything offered was healthy, it wasn't. The bottom line is we eat healthy 95% of the time so we can not feel guilty eating unhealthy 5% of the time. Now hosting an event is very much different than eating in that you want to offer your guests some of the things they enjoy, especially for special events like the Superbowl. These are the popular pub grub and concession stand foods. Don't worry though, as there were plenty of healthy choices offered and this year instead of chili I baked a ham for ham buns complete with lettuce and the fixings along with baked beans, and a friend brought a lovely hot potato salad. I also had vegetable, fruit and pickle trays. Anyway, we had a lot of fun!
The best price I have found for the ingredients for concession style nachos is Sam's Club. Medellion original round 2-3 lb bags ($7.92). They used to always be just under $5 but that's inflation. The Baker's & Chefs nacho cheese sauce, 6 lb at $5.82 is the best tasting nacho cheese sauce we have found. This is a commercial grade sauce that is what a lot of concession stands use. It can be diluted with 2 cups of water or 3 cups of whole milk to increase the yield. I don't dilute it. The clear plastic nacho trays are for presentation. A 125 ct bag costs $4.98 and while I know they are not eco-friendly they are a huge crowd pleaser and for home use can be re-used. I use home canned jalapeño peppers but Sam's Club sells them for $3.24 for 64 oz. I also add home canned salsa which you may or may not want to do.
Self-serve works well for several applications when entertaining. I set up the self-serve nacho station on the snack cart under one of the televisions in the games room. Of note is how I present it. I use the small squatty mason jars as serving bowls for the salsa, sour cream and peppers. That means at any given time I only have at max a cup of each out. When a refill is needed the jar is replaced with a fresh jar along with the refill. It does make for a bit more dishes to wash but it is a lot safer than adding fresh to a serving bowl that has been sitting out for a over an hour or more. I also only use half the can of cheese and about a quarter of a bag of the tortilla chips at a time, replenishing as necessary. Once I notice the interest in the nacho bar is waning, I just simply clear it out replacing it with the next snack.
Concession stand nachos are usually served in plastic, two compartment trays. Usually they are simple round tortilla chips laden with warm, spicy, gooey nacho cheese sauce . Extra cheese sauce or peppers is placed in the smaller compartment. I've never seen sour cream or salsa at concession stands for the nachos. Not that some don't offer it just I've never run across it. I added sour cream and salsa just to kick the snack up a notch. These nachos get rave reviews!
If you want to make authentic concession stand style style nachos, get your food supplies at Sam's Club or a restaurant supply. Presentation adds to the snack so be sure to use nacho trays. The nacho trays will be available at either or you can find them at party stores. The most important thing is have fun with this type of dish. There really isn't any way you can mess it up so enjoy!
Monday, February 04, 2013
Frugal Kitchens 101 - Small Kitchen Appliances
Like many modern homemakers, I have a plethora of small kitchen appliances. Unlike some, I tend not to get small kitchen appliances that are single purpose. This is actually interesting as I was gifted with a waffle maker for Christmas and just bought a high power juice extractor, both single purpose small kitchen appliances. However, these are specialized single use appliances for specific tasks that I know of no other way to get the same results without the appliance. Ok, I do know how to make juice manually with a reamer but that is limited to juicing citrus fruits. At some point I would love to buy a steam juicer for home canning juices but for the most part, the only way to make a wide varieties of juices at home is using a juicer. There are manual waffle makers available, closer to what you would use for camping although they could be used on a regular stove top, I think. At any rate, small kitchen appliances come at a cost.
Small kitchen appliance use electricity and while it might not be much because they are seldom in use for more than a few minutes, they still use electricity. The second problem is small kitchen appliances take space, either on the counter or in storage. I now have 20 small kitchen appliances of which only two have earned their place on the counter. Surprisingly, I do not have a breadmaker, cotton candy machine, chocolate fountain or any of the other gimmicky small kitchen appliances. Most of them help immensely with entertaining and bulk cooking. They are not fancy but they are high quality. Of those 20 small kitchen appliances, only three would be an immediate, not even blink an eyelash, this minute replacement. All are invaluable small kitchen appliances that save me both time and money while giving me consistent good results. They are:
- Kitchen Aid stand mixer - We raised four kids and I can't tell you how many times I wished for a Kitchen Aid stand mixer but funds were tight when the kids were young. I splurged on a KA stand mixer about 10 years ago. It is my kitchen work-horse! I use the KA pretty much daily, often multiple times in a day. Additional KA attachments let me use the KA for grinding meats, making pasta, shredding, slicing and straining foods. This save us a considerable amount of money by not having purchase pre-made, store bought versions and it also us to avoid the food additives in store bought versions.
- Keurig single brew system - This is one small kitchen appliance that earns its keep on our counter. It is used daily and often multiple times. It is a God send when entertaining! The Keurig K-cups range in price from 35¢ to 79¢ depending on where they are bought. While this sounds expensive, we can easily offer our guests gourmet coffee without having to slip to the coffee shop where the price of a cup of coffee ranges between $1.25 to $3.50 but I've been told some specialty coffee shops charge more. We have the re-usable My K-cup filtering system so can use regular ground coffee at a current cost of 8¢ per cup. This is a nice extra that insulates you from not being able to find K-cups as what happened with the Melitta One:One single brew system. Since we bought the Keurig, we don't get take-out coffee on a regular basis so we are saving right there. We are further saving because we only brew what we need so there is less brewed coffee wasted. It is especially convenient being able to make only one cup without having to make a whole pot of coffee.
- FoodSaver vacuum sealer - This appliance, despite the low cost, saves me so much money I wouldn't think twice about replacing it! It has saved us countless dollars by eliminating freezer burn as well as keeping home dried foods at their peak of flavour without moisture or insect damage. It protects our valuables and important documents from possible water damage when boating and I use it to seal original genealogy documents in acid-free holders. I've used it to make home made ice packs, protect skeins of wool from silver worms, make boil-in-the-bag ready meals, as well as in many crafting projects.
Sunday, February 03, 2013
My New Bella High Power Juicer Extractor
There are a multitude of small kitchen appliances on the market. Some are fluff, single purpose appliances that may or may not save you money. In general, if the small kitchen appliance is not gimmicky, at some level it will save you money along with time while enhancing what you can cook in some fashion. Sam's Club has a limited selection of small kitchen appliances. By limited, I mean there really are only a very few to choose from and not the common ones like toasters what some consider daily use small kitchen appliances. You will definitely save on the purchase price, likely ending up with a higher end appliance than you could find elsewhere but at a lower cost. I bought my Kitchen Aid Professional HD stand mixer there with a savings of almost $200.
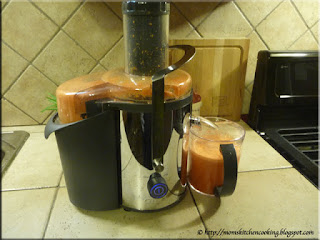
The Bella high power juice extractor has a 1,000 W motor for juicing hard vegetables fast. It has a wide feed tube for quick and easy juicing with easy to clean dishwasher safe parts. The 1 L juice pitcher has a splash free lid and there are two speeds for hard or soft fruits and vegetables.
The juice extractor is extremely easy to use. Simply set up as per instructions then wash the fruit or vegetable you want to juice. Fruits with pits (eg. mangos, peaches, cherries) should be pitted. Fruits other than citrus do not need to be peeled. Fruits containing starch (eg. banana, papayas, avocados, figs and mangoes are not suitable for the juice extractor as the will not yield a clear juice. Bananas will also clog the micro-mesh screen.
The juice goes into the pitcher or if making a smaller amount you can use any glass that will fit under the spout. The pulp goes into the pulp basket. Do not throw this pulp out as it can be dried then used to make fruit or vegetable powder helping you increase your cooking diversity.
For the most part, a juicer is a single use small appliance with the sole purpose of making juice. While the waste pulp can be frozen or dried for other uses, the goal is making juice. That is one reason I did not buy a juicer earlier. At the same time, a juicer makes small quantities of juice at a time while being a fair amount of work to clean. For those with small kitchens, a juicer will take up more room than a stand mixer on the counter.
A juice extractor does not save you money unless you grow your own or have access to a free source of some fruits or vegetables. A juicer does result in a healthier product that has not been subjected to heat for preserving. Nor has it had salt, sugar, artificial flavourings or colours, or harmful preservatives like sodium benzoate. The enzymes are still active in freshly extracted juice (aka better for you). You can juice just about any fruit or vegetable, even herbs so you can make something at home that you can't buy. I've have recipes that called for cucumber juice. The only way you can make that quickly is with a juicer although you could set up an old fashioned strainer if desired but it will take several hours to collect the juice.
Juicing allows you collect the juices then use them in cooking, baking and jelly making. If I wanted to make a juice for jelly it could take a half of a day or more to collect the jelly but a juice extractor reduces that to just a few minutes. You can easily make home-made versions of the new and popular fruit and vegetable combination juices.
Pictured are carrot, celery and pineapple juice. Now, I did save money on the carrot juice because 3 lb of carrots that were on sale for 97¢ gave a yield of 1 L carrot juice (less than the cost of store bough) and carrot pulp for drying to be made into powder, a win:win deal. The celery juice is really a speciality juice you would be hard pressed to find in grocery stores. It can be used in baking, cooking, drank as is, blended with other fruit juices or froze into ice cubes to flavour drinks later. The celery was $1.49 but I got a unique product that I would either make off season when celery is on sale or use in season local or home grown celery. Pineapple juice is not a cost savings it is a quality savings. I paid $1.99 for the pineapple so I know store bought pineapple juice is cheaper but it has been subjected to heat for preserving meaning enzymes have been killed and there is a flavour change. The freshly extracted pineapple juice is far superior in flavour to store bought canned pineapple juice. Use it in baking for a wonderful punch of flavour that can't be beat!
Saturday, February 02, 2013
An Easy Dinner - Home Canned Condensed Tomato Soup
The Gnome family continues to battle a very bad strain of cold. That means we are relying on a lot of healthy, home made comfort foods. One of those foods of course is soups because you can pack in a lot of nutrition to help heal the body. At the same time, a lot of the ingredients not only help clear mucous but are just down right comforting. Home canned condensed tomato soup is the perfect substitute for the store bought condensed soup and it doesn't have BPA, preservatives or anything artificial in it.
A couple of days ago, I opened two jars of the condensed soup then added about a cup of milk and warmed it up. More milk could have been added but I like the deeper flavour using less milk. I garnished the soup with a bit of fresh Parmesan cheese along with plain crackers for my husband and crackers with cream cheese for me. The entire comfort meal cost under $1 for two people with left-overs. That is not bad on the frugal side but more importantly it scored big time on the comfort level!
Friday, February 01, 2013
Mom's Surprise (Mix & Match) Casserole
I can't believe it is February already! Much of January has seen us dealing with one of the nastiest cold strains either of us has ever had. My husband's started just before New Year's and he still has a cough. Mine has been a bit more problematic with complications so I'm still under the weather. While good, healthy and nutritious food is important any time it is especially important when you are sick to help your body heal. That is the time you want to pack in as much extra nutrition as possible. We have been relying heavily on casseroles, home-made/home canned soups, and salads to get us though.
Of note, everyone knows to avoid dairy if the illness includes a gastrointestinal upset. However, leafy green salads should also be avoided in this case as they make digestive system work harder. The alternative way to get your leafy greens if you have a gastrointestinal upset is through juicing once you are well enough to be off of clear fluids.
Have you seen those charts in the women's magazine's that give you a choice of meat, vegetable, starch and extras to make different versions of the same dish? Well, Mom's Surprise Casserole is exactly the same except I've never taken the time to make a chart. Here's a bit of an idea of what I mean for choices:
- ground meat - beef, chicken, turkey, venison, pork
- vegetables - corn, potatoes, carrots, peas, green beans or whatever vegetable strikes your fancy
- soup - any kind of condensed soup (I prefer using my home canned soups), vegetable soup, smooth soups
- topping - cooked macaroni, cooked rice, mashed potatoes
- cheeses - your choice of any cheese you like; I like to add a soft cheese (eg. cream cheese, yogurt cheese or Cheez Whiz) stirred into the pasta until melted before topping then adding shredded hard cheese after topping. This is a great way to use up those little bits of left-over cheese!