I started home canning peaches a couple of weeks ago with beautiful, large peaches from the Niagara region. At $45 per bushel which works to a price of $28.13 per hamper (5/8 of a bushel) or $8 more than the price per hamper of pickling cucumbers, the peaches were not cheap. Tomatoes and cucumbers are usually available by the hamper; apples, pears and peaches by the bushel, and other produce by the quart (1.1 L) or lb for home canning or freezing purposes.
Welcome to our kitchen that truly is the heart of our home! One of life's greatest pleasures is enjoying good food with family and friends. Here you will find recipes, tips for frugal cooking, how-tos for food preservation especially canning and anything else food related. Tea is brewing and warm cookies are fresh from the oven. Please sit a spell and enjoy your stay.
- Garden Gnome
- Ontario, Canada
- I am a wife, mother and grandma who enjoys the many aspects of homemaking. A variety of interests and hobbies combined with travel keep me active. They reflect the importance of family, friends, home and good food.
--Bobby Flay
For Your Information
- [March 19, 2020] - Effective Mar 17, this blog will no longer accept advertising. The reason is very simple. If I like a product, I will promote it without compensation. If I don't like a product, I will have no problem saying so.
- [March 17, 2020] - A return to blogging! Stay tuned for new tips, resources and all things food related.
- [February 1, 2016] - An interesting report on why you should always choose organic tea verses non-organic: Toxic Tea (pdf format)
- Sticky Post - Warning: 4ever Recap reusable canning lids. The reports are growing daily of these lids losing their seal during storage. Some have lost their entire season's worth of canning to these seal failures! [Update: 4ever Recap appears to be out of business.]
Popular Posts
-
Food manufactures have so convinced us that home cooking is not possible without a ready-made mix that many of us actually believe that myth...
-
I am very much a scratch cooking most of the time. One thing that has always been a concern is coming across a recipe I want to try that ca...
-
I got my first job at A&W and only worked there the summer but that is where I met the love of my life. This sauce was made on site by...
Tuesday, August 28, 2012
Peachy Delights
Monday, August 27, 2012
Frugal Kitchens 101 - A Few Harmless Home Canning Anomalies
We are in the midst of the busiest canning for the year. This means the canners are running as much as four times a day. New home canners often panic when they see a colour change in their home canned product. Now, the rule of thumb is always if in doubt, throw it out but some colour changes are completely harmless. Fruits and vegetables contain pigments giving them their gorgeous colours. These pigments are sensitive to pH, minerals or metals in water, heat, light, oxygen and food additives (eg. anti-caking agents) in other ingredients.
- garlic - Garlic can turn blue or green when used in a pickling solution (eg. dill pickles) due to the anthocyanins it contains. These are water soluble pigments that turn blue, green or purple in an acid solution (eg. pickle brine). The flavour remains unchanged and it is safe to eat.
- green beans - The ends of green bans can turn brown after processing due to an enzymatic reaction that changes the chlorophyll from green to brown. This is a common occurrence with raw packed green beans and it can cause the water in the jar to look brownish as well. To avoid this problem, use the hot pack method. This will destroy the enzyme.
- corn - Sweet corn can darken or turn brown when home canned. Sweet corn contains sugar that caramelizes under the heat of processing causing both a flavour and colour change. The amount of sugar in sweet corn is determined by the variety. In general yellow sweet corn can's better than bi-colour sweet corn with less browning. It is very important to not over process corn.
- cucumbers - Two anomalies occur with pickles that do not affect their safety. If table salt is used rather than pickling salt, the brine will become cloudy. Table salt contains iodine and anti-caking agents that interact with the vinegar. Avoid this by using pickling or kosher salt only. Tap water contains minerals and additives (chlorine, fluoride) that can cause the brine to become cloudy. Prevent this by using filtered water. Cucumbers contain an enzyme in the blossom end that cause them to become soft. When pickling, always cut a thin slice from the blossom end to remove the enzyme for crispier pickles.
- tomatoes - The pulp and juice in home canned tomatoes may separate during storage. This is caused by the enzyme, Pectase, that is activated when tomatoes are cut. Separation can be reduced by heating tomatoes quickly over high heat to 180ºF (82ºC) to destroy the enzyme as soon as they are cut. Tomatoes will darken if cooked in aluminum cookware. Avoid this by using stainless steel or enamel coated cookware. Hard, white calcium nitrate deposits can occur mainly in home canned ketchup. This is a result of mashing or pureeing. They are safe to eat but if throughout the product, the texture may be undesirable.
- cauliflower - Cauliflower will remain white in acidic solutions but sometimes pickling liquid can cause pigments in cauliflower to change to pink. There is do preventative measure. Pink cauliflower is still safe to eat.
- pears - Pears can turn pink due to over processing or enzymatic reactions. They are safe to eat. Pears should be treated with ascorbic acid or lemon juice to prevent browning due to oxidation.
- beets - The pigments in beets are pH sensitive. They are red in acids and blue in alkalis so pickled beets should be red or a deep burgundy. If they are blue, the solution was not acidic enough to be processed in a BWB canner and should be discarded. They are not safe to consume. Beets can turn white, yellow or pale red when home canned. The anthocyanins (pigments) are sensitive to high temperatures causing the colour change. The beets are safe to consume.
Sunday, August 26, 2012
Mini Taco Shell Bowls for Serving Presentation
Two weekend we met up with the kids for dinner at Moxie's Grill & Bar in London located at 441 Richmond Street. This is a premium casual restaurant that was founded in Calgary in 1986, now operating 63 restaurants in seven provinces. The atmosphere is delightful, their wait-staff are very friendly, the food is delicious but their presentations are outstanding! The children's ice cream came served in a bowl surrounded by a cloud of fog (caused by dry ice) that was quite impressive especially for our little grandkid (age 4). I really wanted to share that picture but my policy has always been to not post pictures with my family in them.
Method: Make or buy corn (or wheat) tortillas that are about 6 - inches in diameter. Gently fold each tortilla into quarters without creasing. Put each folded tortilla into a non-stick muffin tin. Open the tortilla pressing lightly but firmly against the bottom and sides of the muffin tin. Bake at 350ºF until just lightly browned. Remove from oven and cool. Fill as desired.
Friday, August 24, 2012
Canning Peaches
I am in high gear doing a lot of home canning. The produce is coming in fast, back to back right now. I just finished up doing cucumbers just in time to start peaches. I'm a bit disappointed this year in that we have two peach trees and a pear tree at our new home but due to a very abnormal heat wave back in March followed by heavy frosts, we won't see much in the way of fruit. Local peaches are very small because of the adverse weather.
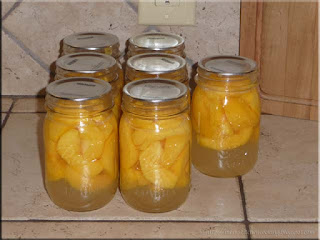
Quite often when I am switching produce for home canning I start with something simple. That is because I tend to work from the easiest to most complex when home canning. I started the peaches by canning 7 - 500 ml jars of sliced peaches in a light syrup. Don't they look gorgeous? Now, when canning plain peaches there is a very low margin of cost savings over store bought but again you end up with a superior product. Watch for all the nice home canned peach products I made coming up this week. It's a peachy time...
Tuesday, August 21, 2012
Nesco Dehydrator
We started camping in tents when our youngest was still in diapers on the Labour Day weekend with good friends of ours. In October of the same year, we packed up our kids and gear in the pouring rain to head to Pinery Provincial Park. It rained the entire time we were there but as a family we were hooked on camping. The following spring we bought a pop-up tent trailer and less than a year later bought a 28' Prowler. Our kids were fanatics about homemade trail mix and beef jerky as snacks so I splurged and bought a Mr. Coffee 5 tray dehydrator (135 W). When we bought our Jenn-Aire range in 2005, I switched to using the dehydrating cycle on it as the Mr. Coffee had burned out. When we moved here, the Jenn-Aire went to one of our kids because I wanted natural gas for home canning. Since last September, I have been unable to do much in the way of dehydrating as my new gas range does not go low enough in temperature. It wasn't much of a problem until this spring when I wanted to start replenishing our dried food supplies.
I decided to make a batch of beef jerky to test out my new dehydrator. This is the golden standard in dehydrating for our family. I use a lean cut of beef (eg. flank or round steak) either thin sliced from the butchershop or hand cut at home from a piece of meat from our bulk beef purchase or venison from my husband's hunt camp score. The meat is marinated for 4 to 8 hours in the refrigerator. The beauty of the marinate is it can be a very simple to complex homemade marinade or your favourite bbq sauce. A curing spice that contains sodium nitrate and salt (eg. Morton's Tender Quick) should be added to the marinade in a ratio of 1 tsp per pound of meat.
I marinated the beef in Sweet Baby Ray's BBQ Sauce. I dried the beef jerky at 165ºF (74ºC) setting until it was tough but not brittle. I wrapped the finished jerky in paper towels to absorb any excess fat before packaging. Jerky is shelf stable for about 3 weeks or if vacuum sealed longer. To extend the storage life, I store beef jerky in the refrigerator. It will keep nicely for 6 months in the freezer, not that a batch of beef jerky would ever last that long around here!
The jerky was delicious. I do think there was a bit of a borderline sweetness that while quite pleasant needed toning down. Yet no one complained so it might have been just my tastebuds off a bit. The next batch I make will be using Blazin BBQ's Blazin' Nitro BBQ Sauce. This is an award winning, specialty bbq from Canadian ribbers. The sauce is only available through their restaurant or at ribfests they are participating in. I think the sauce will make an amazing beef jerky!
Monday, August 20, 2012
Frugal Kitchens 101 - Grocery Stores
Friends of ours own a large chain grocery store franchise. They have often told us even though we support their store by shopping there that we are horrible customers. They said if everyone shopped the way we do, they would have been out of business a long time ago. Why? We don't fall into the grocery store fallacy of shopping every week and having to buy the latest gimmick the food manufacturers are promoting. We shop the outer aisle focusing on Canadian produce spending very little on imported produce, not much in the lines of breads or meats or poultry, a little dairy and occasionally a couple of frozen food items. We buy raw products like flour, sugars, vinegars, oils, dried beans and dried pastas. We buy very, very little in the way of commercially preserved anything. We don't shop weekly but rather pick up the odd item here or there if absolutely needed or cherry pick the sales. On average, very little of our food dollar is spent in a grocery store. I'd be surprised if we spent as much of an eighth of of food budget in a grocery store! Yet we put high quality, nutritious food on the table without spending an astronomical amount of money. In fact, we spend about a third of the amount on food that a normal couple spends which I think is impressive giving the amount of entertaining and hosting family events that we do. How do we do this? Here are a few things we do to basically avoid grocery stores.
- buy in bulk - Most of our meats are bought directly from the farmer and bought in bulk. Staples like flours and sugars are bought in the largest size possible at the cheapest unit price or bought at the bulk food store. I use a lot of citric acid for canning tomato products. Even at the bulk food store a small bottle is almost $4 but I found going through a local wine making store I could get a 1 kg bag for $9.
- grow our own - We grow whatever we can. Even a small space (eg. patio, balcony) using nothing more than containers can yield a fair amount of produce. We use edible plants in place of ornamentals wherever possible. We also grow as much as possible indoors in our continuous garden. Several vegetables grow nicely indoors including tomatoes, herbs, potatoes, lettuces, chards and celery.
- buy in season locally - We support our local growers so buy in season and as close to home as possible. This means shopping at roadside stands, local orchards, farms, fisheries, and wineries. Even if buying produce at the grocery store our first choice is Ontario grown followed by grown in Canada. I was seriously shocked the other day to see sweet corn imported from the US when locally grown sweet corn is available now but the worst thing is folks were actually buying it over locally grown. For shame!
- buy foods produced locally - We try to adhere as close as possible in buying our food needs grown or produced with locally grown foods within a 100 mile radius of our home. We shop the local mushroom farms, farmer's markets, local abattoirs, cheese factories and occasionally bakeries. We use Ontario salt, sugar, milk, eggs, chicken, beer, and wine. If it is a choice between Ontario grown and an import, we choose Ontario grown.
- home food preservation - We are very active in keeping a well stocked pantry based on home canned, home dried and home frozen foods. Our pantry is our grocery store. We cure some of our meats as well which saves us considerably on the price per pound. For example, peameal bacon is usually priced at about $6 per lb but I can buy pork loin on sale for $1 to $1.50 per lb, cure it myself and save at minimum $4.50 per pound. Home canning results in a significant reduction in our annual food costs.
- from scratch - The number one way to save on the food dollars is to cook from scratch. It eliminates having to go to the grocery store for convenience products. If I/we can make it ourselves, it isn't being bought at a grocery store which ultimately saves us a bundle. Oh sure, we might still have to buy the raw ingredients at the grocery store but it is still a huge savings. For example, a homemade version of Hamburg Helper costs me about 1/4 of the price in raw ingredients as the store bought version but I get almost three times the amount and it freezes well so I also end up with a homemade convenient meal in the freezer. That little 99¢ packet of taco seasoning costs me all of about 4¢ to make and it takes only a couple of minutes. Cooking from scratch does not mean giving up convenience foods only giving up store bought convenience foods in favour of homemade convenience foods.
- shop online - We live in a rather small town which means some ingredients are simply not available locally. I buy cost saving necessities like ClearGel and Pomona's pectin online. If I want a certain variety of seeds for the garden that I can't find locally, I buy online.
Sunday, August 19, 2012
Freezing Corn and Corn Stock
I picked up another five dozen ears of corn from the only local farmer close to use selling yellow corn. Despite the adverse weather conditions and price of peaches and cream corn in town ($6/doz), his price is quite good at $3 per dozen. He's only about a mile out of town so that is a nice bonus. Yellow corn is a sweet corn with a lower sugar content than bi-colour corn so it is better for freezing and canning.
Whole kernel corn is sometimes called niblet corn. It is very easy to freeze for later use. The corn is blanched on the cob then quickly cooled and cut from the cob. The cobs are reserved from other corn products (eg. corn syrup, corn stock, corn jelly) while the whole kernels are packaged into freezer bags, labeled and froze. I ended up with 4 gallon freezer bags and a quart freezer bag of whole kernel corn. This will not be enough to get us through to the following growing season but it was a good start.
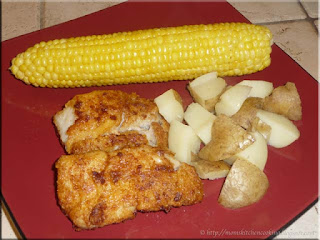
We had pan fried cod, steamed potatoes and corn on the cob for dinner that night. Just look at that gorgeous, mouthwatering cob of corn! Corn on the cob can be prepared in the husk on the grill, steamed or boiled. By far, we prefer grilling or steaming the corn for a tender, juicer cob that is higher in nutrients than corn that has been boiled. The nice thing about grilling corn on the cob is there's minimal clean-up. A little butter and sea salt topping the corn on the cob had our lips smacking! We only enjoy corn on the cob in season as it takes up too much room in the freezers when left on the cob. After enjoying our simple yet delicious easy summer dinner it was time to make corn stock.
Corn cobs are traditionally a waste product from home food preservation or a meal. However, if the corn has been cut from the cob for canning, drying or freezing, the cobs can be used to make corn syrup, corn stock and corn jelly. In essence a lovely edible product is made from what otherwise would go to waste. Think about it, 5 dozen ears of corn is 60 cobs which is more than enough to make those three products free from something you would normally throw out before throwing out the spent cobs.
Corn stock is one of those must have vegetable stocks to have on hand. It adds a rich flavour to soups, stews and vegetables. I made corn stock from one dozen ears of the spent corn cobs. This was very easy to do. I simply covered them with water in a large stock pot, brought to a boil then simmered for a little over an hour. Then I strained the stock, ladled into hot jars and processed in a pressure canner for 35 minutes at 10 lb of pressure. I didn't have enough of the corn stock to fill the final jar so used a Bernardin storage cap and popped it into the freezer.
Friday, August 17, 2012
Home Canned Vegetable Beef Soup
Many perceive home canning to be making strawberry jam, canning peaches, making dill pickles and applesauce but in reality home canning is so much more than that. With the exception of a few commercially canned foods like pickled eggs and canned pastas pretty much anything can be home canned and more. Now, it is not recommended to home can pasta, rice and barley but I have had good success with all used in low amounts. Home canning is an excellent way to put convenience foods on your table for a fraction of the cost of store bought.
I made a layered beef soup to home can. Really this is just a name because the ingredients are added in layers but they don't quite stay in layers afterwards. I had five 1 - L jars with one seal failure (right) that just happened to be testing a new homemade stock with. Still, I put four jars in the pantry and enjoyed the other for dinner.
Home Canned Vegetable Beef Soup
recipe by: Garden Gnome
2 lb lean stew beef
3 stalks celery
3 lg carrots
1 med onion
12 small potatoes
2½ L beef stock
1 tbsp Montreal steak spice
1 tbsp Worcestershire sauce
½ tsp herbes de provence per jar
Brown the stew beef and cut into bite sized pieces. Stir in Montreal steak spice and Worcestershire sauce. Let simmer 2 minutes. Remove from heat. Place each vegetable into a separate bowl. Cut the celery into thin slice. Cut the washed carrots into coins Chop the onions. Cut the potatoes into chunks. Cut corn from the cob. Slice carrots. Chop celery and onions. Heat stock. Layer the ingredients to fill the hot, prepared jars half full. Add herbes de provence. Pour hot stock over the solids leaving a ½ inch headspace. Wipe rims. Adjust two piece metal snap lids (or Tattler reusable lids or glass inserts). Screw bands on jars (adjust accordingly if not using metal snap lids). Process for 500 ml for 75 minutes [90 minutes for L] at 10 lb pressure in pressure canner at altitudes up to 1,000 feet above sea level. At higher altitudes refer to altitude adjustment chart on Canning FYI page. Remove from canner. Adjust bands if using Tattler or glass inserts. Allow to cool 24 hours. Remove bands and test for seal. Wash and dry bands and jars. Label and store.
Tuesday, August 14, 2012
Black Bean and Corn Salsa
Salsas have become extremely popular. Contrary to some beliefs and salsa does not always have to be tomato based although some of the most popular salsas are. One of the ways I save money when canning is to always make one or more products in addition to my standard products for that produce that only uses a small portion of the product. Quite often this is an experimental recipe I am working on but not always.
I really like the looks of the black bean and corn salsa in the jars. The salsa tested at pH 3.8 so technically it could have been processed in a BWB canner. I prefer using a pressure canner for this type of product simply for the added level of safety. Once the salsa has sat for a couple of weeks, I will open a jar then start tweaking more from there so the recipe is still in the experiment mode.
Monday, August 13, 2012
Frugal Kitchens 101 - Maximizing Your Home Canning Dollar
I talk a lot about home canning on this blog because it is one of the most frugal activities to do if you want to save on your food costs. While I home can year round, this is the busiest time of the year for canning. It's the time of year that my garden is producing well and local produce is available. Everything has been about two weeks ahead of normal this year but because of adverse weather conditions spanning back into last winter, the price of local produce has increased. I only buy the produce that I don't grow but even then still realize a savings in the products I make with purchased local produce over the cost to buy commercially canned in the grocery stores. However, it is sometimes hard to envision that cost savings when shelling out $15 for 5 dozen ears of corn, $20 for a hamper of cucumbers or $45 for a bushel of peaches. Dill pickles, whole kernel corn and canned peaches are fairly inexpensive in the grocery store which is not to say don't can them but rather divide the amount of the produce purchased into making a few products that are considerably lower cost than store bought. Here's a few things I do to maximize my home canning dollar:
- pre-planning - When I buy produce, I am always calculating how I can recoup the cost plus some. For example, the peaches I just bought will be made into peach salsa, spiced island peach chutney, peach jam, peach fruit leather, peach powder and plain peaches. I won't save much on the plain peaches but will save significantly on the other products to more than warrant the cost of the fresh peaches.
- think convenience - It is wonderful to have jars and jars upon jars of whole or crushed tomatoes but it is even nicer to have convenient ready to use tomato based sauces, salsas, soups and other tomato products. While I do can whole tomatoes, I can a considerable larger number of jars in other tomato products. Convenience foods are always higher priced in the grocery store but if you make them as part of your home canning, you can save a significant amount of money!
- think gourmet - Gourmet jams and jellies can be as high priced as $7 per 250 ml jar and yet you can make a batch of homemade gourmet jam or jelly for about $7 with a yield of 7 - 250 ml jars or a cost of $1 per jar. Gourmet style tomato sauces (eg. tomato basil) are about $4 in the grocery store yet cost me the price of lid (12¢) and natural gas to process (about 10¢) so for 22¢ I have gourmet tomato sauce in 500 ml jars. Now my tomatoes are free but even if I had to buy them at $8 per hamper I would still be well ahead in cost savings.
- rethink waste - Some products that are home canned create a fair amount of waste (eg. corn, tomatoes) but that waste can be used for other products. For years, I honestly tossed the liquid from cutting tomatoes for salsa and old fashion chili sauce. Michael Smith, one of my favourite Canadian chefs showed how to use this golden liquid as a drink. Well, now anytime I cut tomatoes, I let them rest to get that golden liquid to can as tomato stock. It has an amazing flavour! Tomato skins can be dried for tomato powder rather than tossing them as can most vegetable and fruit peels. Vegetable waste can also be turned into stock. Corn cobs can be boiled for about an hour to make a delicious corn stock, corn cob jelly or corn syrup giving three free products from what would have been tossed.
Saturday, August 11, 2012
Loaded Potato Skins
Appetizers are great meal starters that don't necessarily have to reflect what the meal is about. They are fun and tempting but in most restaurants are over priced for what you are getting. Appetizers range in price from $5 to $12 in restaurants and yet many can easily be made at home for a fraction of that cost. One of the easiest and least expensive appetizers to make at home is loaded potato skins.
To make restaurant style loaded potato skins at home: Shred cheddar and Asiago cheese. Cut bacon across the strips then fry until crispy for bacon pieces. Drain well. Bake the desired number of medium sized potatoes until tender. Remove from oven. Cut in half lengthwise. Carefully scoop out the inside flesh leaving about a quarter inch of flesh on the skin. Reserve the scooped out flesh for potato soup or a side. Put a good amount of shredded cheese and bacon into each potato shell. Place on a baking sheet. Bake at 350ºF until cheese is bubbling. Remove from oven. Top with sour cream, fresh chives and/or thinly sliced green onions.
Friday, August 10, 2012
Fresh Pack Dill Pickles
Continuing with dill pickles, I made a batch of fresh pack dill pickles. These take a bit more planning as they require and overnight icing in a brine. Icing is one method of crisping pickles. This particular method involved also using a brine (salt solution) that helps draw moisture out of the cucumbers to give crisper results as well. After their overnight icing, the pickles were ready for draining and jarring.
Fresh Pack Dill Pickles
modified from: Bernardin Ltd., Bernardin Guide to Home Preserving, Pp. 72
Overnight Icing:
8 lb pickling cucumbers
16 c ice
4 c water
½ c pickling salt
Wash the cucumbers and rinse well. Cut a thin slice from the blossom end of each cucumber and discard. Layer the cucumbers and ice in a large stainless steel container. Dissolve the pickling salt in water then pour over cucumbers. Add enough cold water to cover the cucumbers. Weigh the cucumbers down to stay in the water with a plastic bag filled with water. Refrigerate overnight for a minimum of 12 hours.
Pickling Liquid:
8 c water
6 c white vinegar (5% acetic acid)
¾ c pickling salt
¼ c granulated organic sugar
2 tbsp whole pickling spice
Per 500 ml jar (double for L):
1 tsp whole mustard seed
1 tbsp dill seed
1 peeled garlic
¾ tsp Pickle Crisp (calcium chloride)
Place the pickling spice in a large square of cheesecloth then tie to make a spice bag. Combine ingredients for pickling liquid in large saucepan including the spice bag. Bring to a boil and boil gently for 15 minutes. Remove from heat. Drain cucumbers, discarding soaking solution. Pack one jar at a time. Place the per jar ingredients in hot prepared jars. Pack in cucumbers leaving ¾ - inch headspace. Ladle hot pickling ladle over the cucumbers leaving ½ - inch headspace. Wipe rim. Place lid (metal snap lids, Tattler reusable lids, glass inserts), secure screw band according to manufacturer's instructions. Repeat of remaining jars, one at a time placing each jar into prepared BWB canner as the jar is prepared. Process 500 ml jars 10 minutes, L jars 15 minutes in BWB canner at altitudes up to 1,000 ft above sea level. At higher altitudes adjust timing according to altitude adjustment chart on Canning FYI page. Remove jars from canner, adjust bands (Tattler, glass inserts). Do not adjust bands for metal snap lids. Allow to cool 24 hours. Check for seal. Remove bands. Wash and dry jars and bands. Bands can be stored separately or replaced loosely on jars if desired. Label and store jars in a cool, dark place.
Thursday, August 09, 2012
Kitchen Quick Tips - Storing Home Dried Foods
Vacuum seal home dried foods and store at 15ºC (60ºF) or less in a dry, dark storage area to extend the shelf life and nutritive value.
Wednesday, August 08, 2012
Dill Slices and Best Bread-And-Butter Pickles
Quite often I work with hampers of produce when home canning. A hamper is 5/8 of a bushel so eight hampers is the equivalent of 5 bushels. My comfort level tends to be 1 to 3 hampers depending on the produce and the complexity of the products being made. This is the amount of that produce I can comfortably process within usually a day but sometimes it spreads into the following morning. I have four of the cheery yellow hampers, courtesy of a relative who is a commercial grower. The vast majority of the hampers of produce I process are not purchased produce. When I buying produce, I take a couple of hampers with me as many vendors are reluctant to part with their own hampers and rightly so as they are expensive. Vendors will transfer the produce into plastic bags or cardboard boxes but I'd rather use my own hampers. Plastic bags can cause produce to sweat and over heat on the journey home and wet produce causes the bottom of cardboard boxes to give way spilling produce everywhere.
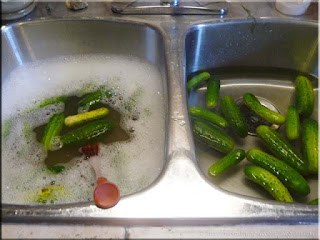
Some produce purchased from roadside stands is not nice and clean like that found in the grocery stores. As you can see, the pickling cucumbers were rather dirty.
Washing the cucumbers is not difficult, just time consuming. It is important to use a vegetable brush when washing them to get dirt out of the crevices. I use the two sink method. I put cold soapy water in one sink then add the cucumbers to be washed in small batches. When washing cucumbers always use cold water to keep them crisp. Once the cucumbers are washed, I rinse under the faucet then transfer to a sink of cold water with a little vinegar in it to soak for 10 minutes. The vinegar removes any residue and surface bacteria. After the rinse, I transfer the cucumbers to a large stainless steel bowl for processing. Of note, the water in both sinks is changed after washing a batch of the cucumbers.
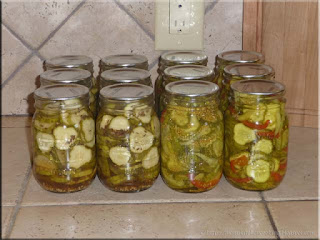
I used 8 lb of the pickling cucumbers to make dill slices and Best Bread-and Butter Pickles. Although a food processor can make quick work of slicing cucumbers, I found I had better results slicing the cucumbers by hand. I had a yield of 6 - 500 ml jars for each kind of pickles. Both pickles looked gorgeous in the jars. The recipes are written as I modified them.
Dill Slices
modified from: Bernardin Ltd., Bernardin Home Guide to Preserving, 2006, Pp.73
4 lb medium pickling cucumbers
4 c pure apple cider vinegar
4 c water
¾ c granulated organic sugar
½ c pickling salt
3 tbsp pickling spice
6 bay leaves
6 garlic cloves
3 tsp mustard seed
6 tsp dried dill seed
1/8 tsp Pickle Crisp (calcium chloride) per jar
Cut a thin slice from each end of the cucumber and discard. Slice into ¼ - inch slices. Set aside. Tie pickling spices into a cheese cloth bag. Combine vinegar, water, sugar and salt in large stainless steel saucepan. Add the spice bag to the vinegar mixture. Bring to a boil and simmer 15 minutes. Remove from heat. Packing one jar at a time: put a bay leaf, 1 garlic clove, ½ tsp mustard seed and 1 tsp of dried dill seed into hot jar. Pack cucumber slices into jar leaving ¾ inch headspace. Add 1/8 tsp Pickle Crisp. Cover vegetables with hot brine leaving ½ inch headspace. Wipe rim. Adjust two piece metal snap lids (or Tattler reusable lids or glass inserts). Screw bands on jars (adjust accordingly if not using metal snap lids). Process for 10 minutes in BWB canner at altitudes up to 1,000 feet above sea level. At higher altitudes refer to altitude adjustment chart on Canning FYI page. Remove from canner. Adjust bands if using Tattler or glass inserts. Allow to cool 24 hours. Remove bands and test for seal. Wash and dry bands and jars. Label and store.
Best Bread-And-Butter Pickles
modified from: Ellie Topp and Margaret Howard, Small-Batch Preserving, 2001, Pp. 143.
4 lb small pickling cucumbers
2 medium onions, thinly sliced
1 sweet green pepper, cut in thin strips
1 sweet red pepper, cut in thin strips
2 tbsp pickling salt
4 c white vinegar
3 c granulated organic sugar
2 tbsp mustard seeds
1 tsp celery seeds
½ tsp turmeric
½ tsp ground cloves
Cut a thin slice from the ends of each cucumber and discard. Slice into ¼ - inch slices. Slice the onions and peppers. Place cucumbers, onions and peppers in a stainless steel bowl. Sprinkle with salt. Cover and let stand 3 hours. Rinse twice and drain thoroughly.
Combine remaining ingredients in large stainless steel saucepan. Bring to a boil over high heat. Add vegetables. Return to a boil and boil 30 seconds or just until cucumbers are no longer bright green. Pack vegetables into jar leaving ¾ inch headspace. Cover vegetables with hot brine leaving ½ inch headspace. Wipe rim. Adjust two piece metal snap lids (or Tattler reusable lids or glass inserts). Screw bands on jars (adjust accordingly if not using metal snap lids). Process for 500 ml for 10 minutes [15 minutes for L] in BWB canner at altitudes up to 1,000 feet above sea level. At higher altitudes refer to altitude adjustment chart on Canning FYI page. Remove from canner. Adjust bands if using Tattler or glass inserts. Allow to cool 24 hours. Remove bands and test for seal. Wash and dry bands and jars. Label and store.
Tuesday, August 07, 2012
Fast Favorite Garlic Dill Pickles (Kosher-syle Dill Pickles)
Continuing on my pickle making quest to find a good dill pickle recipe and after doing a couple of batches of bread and butter pickles, I made my first batch of dill pickles. Now I have a very long history of dill pickle failures. The pickles have always come out limp and that just isn't acceptable in a dill pickle! I even tried adding alum (potassium aluminum sulfate) which is an old fashioned crisping agent but that can give a bitter flavour to the pickles and may cause digestive upsets. I am armed for success this year. I have pickling lime (calcium hydroxide), Pickle Crisp (calcium chloride) and copious amounts of ice for soaking.
Pickling lime is a crisping agent that requires soaking the prepared cucumbers in a solution of pickling lime and water for at minimum 2 hrs to overnight, The pickles must then be rinsed at least three times to remove all traces of the pickling lime. Pickle Crisp can be added to any jar of fresh packed (not cooked) pickles like the Fast Favorite Garlic Dill Pickles I made. It's easy to use with no extra timing to worry about. Icing is used in many dill pickle recipes to firm the pickles. Salt is usually added to draw a bit of moisture out of the cucumbers then they are covered with ice and allowed to sit overnight.
Fast Favorite Garlic Dill Pickles
modified from: Ellie Topp and Margaret Howard, Small-Batch Preserving, 2001, Pp. 138
6 lb small pickling cucumbers
4 c white vinegar (5% acetic acid)
4 c water
4 tbsp pickling salt
1 large garlic clove per jar
2 tsp dill seed per jar
¼ tsp Pickle Crisp (calcium chloride) per jar
Cut a thin slice from each end of the cucumbers and discard. Combine vinegar, water and salt into a saucepan. Packing one jar at a time, add 1 garlic clove, 2 tsp dill seed and ¼ tsp Pickle Crisp (calcium chloride) per jar. Pack in the prepared cucumbers, whole or spears tightly leaving ½ - inch headspace. Ladle the hot brine over the cucumbers leaving ½ - inch headspace. Wipe rims. Place lids of choice (metal snap lids, glass inserts, Tattler reusable lids) on the jars. Apply band according to the lid of your choice. Process 10 minutes for 500 ml (pint) jars and 15 minutes for L (quart) jars at altitudes below 1,000 feet above sea level. For altitudes above 1,000 feet above sea level adjust timing according to the altitude chart on the Canning FYI page. Remove from canner. Tighten bands if using glass inserts or Tattler reusable lids; do not tighten bands if using metal snap lids. Allow to cool 24 hours. Test for seal. Remove bands. Wash jars and bands. Bands can be stored separately or replaced loosely on the jars. Label and store.
Bon Appétit!
Garden Gnome
©2006-2012
Monday, August 06, 2012
Frugal Kitchens 101 - Buying a Dehydrator
The ability to dehydrate foods is a fundamental component of home food preservation. Ideally, any food preservation you do should be in the form of home canned, frozen and dried for any given food. What this means is, for example, if you are preserving tomatoes - a portion will be froze, a portion will be home canned and a portion will be dried. The preference as to which is the larger portion will depend on a few factors. I personally preserve tomatoes in many forms as home canned (about 80%) with drying and freezing at about 10% each. However the reverse is true with respect to meats where the bulk of preservation is freezing. Still, I dry and can meats as well because you never want to put your food storage into one basket.
Food dehydrators come in three forms:
- homemade sun trays
- part of some ovens
- stand alone dehydrators
- homemade sun trays - Homemade sun trays consist of a frame with a screen at their simplest form. The food is prepared, placed on the screen then the screen set in a sunny spot for drying. The method is very much at the weather's mercy and does not work well in humid areas where the food will mold before drying. Drying using this method requires extended periods of time exposing the food to any contaminants in the outdoor air as well as bugs, insects, rodents and marauding pests like squirrels, raccoons and skunks. Some have put their sun trays in parked cars to take advantage of the heat but it is still not an ideal solution especially if you need to use the car. The main pro is sun trays are free to operate but the cons by far outweigh this.
- oven dehydrators - Some ovens are capable of dehydrating and some even have actual dehydrator settings. In order to use an oven as a dehydrator it must be able to be set as low as 95ºF/35ºC to a high of 160ºF/71ºF. Many newer ovens can only be set as low as 170ºF/77ºC which is too hot for dehydrating.
- stand alone dehydrators - A stand alone dehydrator ranges in price from $40 to $500. The cheaper models have no thermostat and round trays. These should be avoided because different temperatures are required for drying different foods. For example, herbs are dried at 95ºF/35ºC but meats, fish and jerky are dried at 160ºF/71ºC. Models without an adjustable thermostat likely dry about 115ºF/46ºC resulting in burning of herbs and under drying of meats. A mid-range dehydrator with a thermostat, round trays and expandability will cost about $80 but with extras can quickly add up to the $200 range. The nice thing is you don't have to expand if you don't want to nor do you have to put out all this money at once, just expand as required so the cost is spread out over a few years based on need. The alternative is to buy a high end model then use it enough to recoup your costs. Wattage does matter. Some of the cheap models are 135 W meaning a longer drying time. Mid-range models are 400 to 500 W so the drying time is greatly reduced. Higher end models are 830 W - 1,600 W or more meaning even faster drying. Unless you are drying foods for commercial use, a 500 W to 830 W model is more than sufficient for normal household usage.
Sunday, August 05, 2012
Zesty Bread 'N Butter Pickles
Locally grown pickling cucumbers became available about mid July. I bought 2 quarts to start on my quest to find at least one good dill pickle recipe. That was quickly followed by another 4 quarts of cucumbers an finally a hamper. I spent a total of $30 on pickling cucumbers. In perspective that would have bought me 6 - 1 gallon (3.8 L) jars of kosher dill pickles but store bought dills have sodium benzoate (a preservative) and yellow dye 5 (allergen), two ingredients we are avoiding wherever possible. To break even on pickles I needed to have a total yield of 22.8 L of homemade pickles but only if I made all dill pickles. Other store bought pickles, like sweet bread and butter pickles are as high as $3.89 for a 500 ml jar. I decided to make a variety of cucumber based pickles to ensure I realized a savings. Over the next few days I will share what I made with you.
The Zesty Bread 'N Butter Pickles was a new recipe I decided to try this year from Bernardin Guide to Home Preserving, the Canadian equivalent to the Ball Blue Book. I did a half batch rather than the full batch that would have given a yield of 7 - 500 ml jars. I was quite pleased with the initial flavour of the pickles. They looked quite nice in the jars as well. There were no seal failures with the Tattlers so that was rather nice as well.
When making pickles, it is important to use a kitchen scale. Most of the recipes are in pounds or kilograms with respect to the cucumbers and some additional vegetables. Be sure to tare the scale with the bowl or container before weighing the produce. To tare the scale, place the empty bowl on the scale and set to zero. Now add the produce a little at the time until you reach the correct weight called for in the recipe. Remove the filled bowl and prepare as called for in the recipe. The scale should be tared each time you use it with a bowl or container.
Zesty Bread 'N Butter Pickles
source: modified from Bernardin Guide to Home Preserving, 2006, Pp. 73.
3¼ lb pickling cucumbers
½ lb onions
8 tsp pickling salt
2½ c white vinegar (5% acetic acid)
⅔ c granulated sugar
¼ c pickling spice
1 tbsp celery seed
1 tsp ground ginger
½ tsp ground turmeric
Wash cucumbers. Cut a thin slice from each end of the cucumbers and discard. Slice cucumbers and onions ¼ inch thick. Layer the cucumbers and onins in a large glass or stainless steel container, sprinkling each layer lightly with salt. Cover and let stand 15 minutes. Combine remaining ingredients in large stainless steel saucepan. Cover and bring to a boil. Reduce the heat and boil gently 15 minutes. Drain the vegetables. Add to pickling liquid. Mix well. Return mixture to a boil. Remove from heat. Ladle into hot jars leaving ¾ inch headspace. Wipe rim. Place two piece metal snap lids (or Tattler reusable lids or glass inserts) on jars. Apply screw band according to type of lid being used. Process 10 minutes in BWB at altitudes up to 1,000 feet above sea level. At higher altitudes refer to altitude adjustment chart on Canning FYI page. Remove from canner. If using Tattler reusable lids or glass inserts, immediately tighten bands. Do not tighten bands if using metal snap lids. Allow to cool 24 hours. Remove bands and check for seal. Wash jars and bands. Bands can be stored separately or replaced loosely on jars as desired.
Saturday, August 04, 2012
Low Sugar Gooseberry Jam
When we first looked at our new property back in September of 2011, I noticed the fruit trees and over grown gardens. Tucked into one side garden in the backyard is a gooseberry bush but I didn't know that is what it was until this spring when I noticed a robin frequenting the bush. Upon closer inspection, I discovered it was a gooseberry bush so officially declared war on the robin. I wanted those berries for jam! Well, the robin didn't quite see it that way. He would sit on the fence yelling at me every time I got close to the bush. He rounded up other birds in the neighbourhood to pull the sheets off the bush. Finally, I broke down and bought three packages of bird netting at the dollar store, sewed them together and fastened them securely to the bush. He was none to pleased at this turn of events but I did manage to get enough gooseberries to make a small batch of low sugar gooseberry jam.
Low Sugar Gooseberry Jam
recipe by: Garden Gnome
3 c chopped gooseberries
2 tsp lemon juice
1½ c granulated sugar
3 tsp calcium water
1½ tsp Pomona's Universal Pectin
Wash the gooseberries then rough chop using a food processor. Measure 3 c of the prepared gooseberries into a large sauce pan. Stir in lemon juice and calcium water. Mix the pectin with the sugar. Bring the fruit mixture to a boil. Stir in the sugar pectin mixture. Return to boil and boil 1 minute. Remove from heat. Stir for 5 minutes. Ladle into hot jars. Wipe rim. Cap with metal snap lids, Tattler reusable lids or glass inserts. Process in BWB for 10 minutes at altitudes up to 1,000 feet above sea level. If above that altitude refer to the altitude adjustment chart.
Friday, August 03, 2012
Five Dozen Ears of Corn
'Tis the midst of the busier home canning season with the busiest tomato season just around the corner. Last week, the canners ran a couple of times a day. I was very fortunate to find a local farmer about a mile out of town who is selling old fashion yellow corn. All of the vegetable stands in town are selling peaches and cream corn (bi-colour) which simple is not a good corn for canning or freezing.
A dozen ears of corn gives an average yield of 5 to 6 cups of kernels. All of this corn was processed in one form or another as kernels. I canned whole kernel corn, cream style corn, black bean & corn salsa (to follow next week), home canned beef soup (ditto), froze a gallon of charcoal grilled corn, and 4 cobs went to the chef/sous chef.
Corn has a high sugar content with some varieties higher than others. The sugar will caramelize during the processing causing the corn to darken or even turn brown. This is one reason yellow corn with a lower sugar content gives nicer results. I had a yield of 8 - 500 ml jars of whole kernel corn (left two rows) and 8 - 500 ml jars of cream style corn (right two rows). I paid $3 per dozen for the corn for a total price of $15. I basically covered that cost in these two products that would cost $1.49 to $1.89 per 398 ml (14 oz) can in the grocery store. I only used 2 dozen ears of the corn ($6) to make the sixteen jars so was well ahead of the game. Everything I made with the remaining 3 dozen ears of corn simply lowered my overall costs for putting up a few corn products.
I will be putting up more corn products this coming week. The price of $3 per dozen is not the best I've seen it but it is a lot better than the price of the bi-colour corn in town at $6 per dozen. We have had very adverse weather conditions that have had a large impact on local produce. Corn is one vegetable I don't grow because it takes up to much space for the yield. I'm more than happy to support a local farmer while putting delicious foods in my pantry and freezer as well as saving a bit of money in the process.
Thursday, August 02, 2012
Kitchen Quick Tips - Dehydrating Vegetables
Most vegetables must be blanched before dehydrating to slow the enzyme action that promotes spoiling during drying and storage. The exceptions are onions, garlic, peppers and mushrooms.