Cook ingredients that you are used to cooking by other techniques, such as fish, chicken, or hamburgers. In other words be comfortable with the ingredients you are using.
--Bobby Flay
For Your Information
Please watch this area for important information like updates, food recalls, polls, contests, coupons, and freebies.- [March 19, 2020] - Effective Mar 17, this blog will no longer accept advertising. The reason is very simple. If I like a product, I will promote it without compensation. If I don't like a product, I will have no problem saying so.
- [March 17, 2020] - A return to blogging! Stay tuned for new tips, resources and all things food related.
- [February 1, 2016] - An interesting report on why you should always choose organic tea verses non-organic: Toxic Tea (pdf format)
- Sticky Post - Warning: 4ever Recap reusable canning lids. The reports are growing daily of these lids losing their seal during storage. Some have lost their entire season's worth of canning to these seal failures! [Update: 4ever Recap appears to be out of business.]
Popular Posts
-
Yesterday I wrote briefly about our recent road/camping trip that took us from southwestern Ontario through the thumb of Michigan, across L...
-
As a result of milder fall temperatures the pepper plants were still producing nicely through the mid portion of last week. The plants were...
-
Things have been a little hectic here as we move into the busier canning season. Fresh, local produce is trickling in. After two years of ...
I intended to make an entry about roasting beef on the grill but I have had a request for my tomato soup recipe so decided to do that entry first. Tomatoes will soon be upon us. I've been picking Tiny Tims, Grape and today picked my first Lemon Boy and Ultra Sweet. For this recipe, I recommend a meaty tomato and a food mill for a smoother soup.
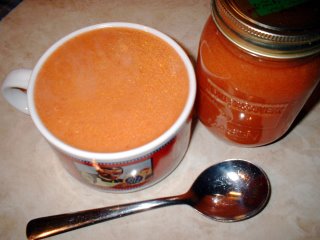 Garden Tomato Soup
This recipe is from Bernardin's Tomatoes Canning & Speciality Recipes. It must be pressure canned. You may safely double the recipe but I would leave the amount of bay leaves the same. For those on sodium restricted diets the salt may be omitted. Instructions are paraphrased and my notes follow.
Garden Tomato Soup
16 c chopped tomatoes (about 8 lb)
3 1/2 c chopped onion
2 1/2 c chopped celery
2 c chopped red pepper
1 c carrots
7 bay leaves
1 tbsp whole cloves
1 clove garlic, minced
1/2 c lightly packed brown sugar
2 tsp salt
Prepare jars and lids as per BBB instructions. Wash, blanch, core and chop tomatoes. Measure 16 cups. Combine tomatoes, onions, celery, pepper, carrot, bay leaves and garlic in large stainless steel saucepan. Simmer uncovered until soft. Press through a sieve or food mill. Return mixture to saucepan. Add sugar and salt. Cook over medium heat for 15 minutes. Ladle soup into hot jars leaving 1 inch headspace. Use a nonmetallic utensil to remove air bubbles. Wipe rim and place snap lid on jar. Apply screw band and secure until finger tight. Process 20 minutes 10 lbs pressure or adjust pressure for your altitude.
Makes 4-500 ml jars
My notes: This is a nice fresh tasting soup! To re-heat, pour the contents into a saucepan. Add 1/2 tsp butter if desired and a little milk if you want a creamed soup. Otherwise just heat the soup and enjoy.

I was going to write about my mini bulk cooking session but haven't uploaded the pictures yet. Instead I decided to write about cherries! Unfortunately I do not have any cherry trees so I have to buy cherries. By far the best prices are the orchards and U-picks.
 Sweet Cherries
Sweet cherries are now available here in Ontario. They sure are beauties this year! Not only are they good for eating, they make a deep, rich coloured jam full of flavour. Steeped in either whiskey or brandy they make a wonder liqueur. They make a tasty snack when dried and are just perfect over ice cream.
 Sour Cherries
The local orchard sells sour cherries in 5 kg (11 lb) plastic buckets. The cherries are pitted and ready to use or you can buy them already frozen. I like buying them unfrozen so I can divide into smaller amounts. If I'm really busy with other produce, I will freeze then make jam later but normally I make the jam as soon as I get the bucket. The bucket is never wasted either. I use them in the gardens and greenhouse for several tasks.
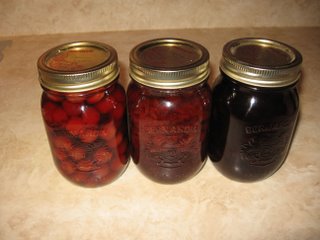 Canned Cherries, Sour Cherry Jam, Sweet Cherry Jam
I think the cherries look nice whether canned whole, as pie filling or as jam. Cherries canned whole can be used for syrups, as an ingredient, or thickened for pie filling. They also make wonderful jams to tickle your tongue. Cherry jam is not just for sandwiches either. We seldom use jams of any kind for sandwiches. Cherry jam makes a wonderful cake filling, quick mini tart filling, stirred into plain yogurt and ice cream topping. I like to keep canned whole, pie filling and jams on hand.
I use the recipe included with CERTO liquid pectin for Cherry Jam along with my notes. If you want a recipe using powdered pectin use the Ball Blue Book recipe or the recipe included with your pectin package.
Sweet or Sour Cherry Jam
4 cups prepared cherries
2 pouches CERTO liquid pectin
7 cups granulated sugar
1/4 cup lemon juice (sweet cherry only)
Stem, pit and finely chop or pulse in cherries in food processor. For Sweet Cherry, reduce fruit to 3 3/4 and add 1/4 c lemon juice. In large saucepan stir together prepared fruit, sugar and lemon if using. Bring to a boil over high heat. Boil hard 1 minute. Remove from heat. Stir in CERTO liquid pectin. Stir and skim for 5 minutes to prevent floating fruit. Ladle hot jam into hot jars, leaving 1/4-inch headspace. Adjust two-piece caps. Process 10 minutes in a boiling-water canner.
Yield: about 6 half-pints
My notes: For a special sweet cherry jam add a little whiskey or brandy.
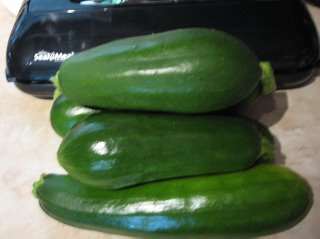
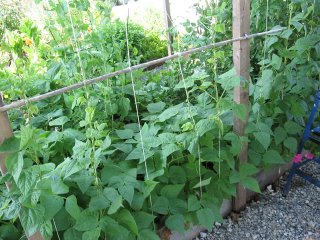
My zucchini plants are threating to take over the garden. I posted to my garden blogspot blog about the zucchini plants under the entry "Attack of the Zucchini"
 Zucchini Plants
I have five zucchini plants. Despite some negative comments regarding zucchini, I love growing them. They perform well with few problems. Yes, some neighbours have reportedly started locking their doors and cars but I think that is just a rumour. The zucchini plants in bed #5 are smaller. The ones in bed#7 as pictured are huge and are producing three to four six to eight inch zucchini daily. I'm not complaining! We eat a lot of zucchini through the growing season. I freeze zucchini for later use. I have a few uses for zucchini this year so keep an eye on this blog to see what I make. Bed #7 is bordered with yellow marigolds. The bed is a 4'x4' planted in the square foot gardening method. The front four squares are planted with cucumber plants.
 Zucchini
The zucchini are very nice this year! I discovered zucchini chips on a Yahoo group I read so thought I would try them. They are quite good when seasoned slightly then used with your favourite chip dip. I like them as is with no dip. I must say they are good with herbed dip too. Zucchini chips are a healthy alternative to potato chips as they aren't deep fried. For those concerned with sodium content, use a low sodium or herbed seasoning that doesn't contain salt. Whatever seasoning you use, keep it light as the flavour will intensify when the chips are dried. I don't make a lot of these chips, perhaps the equivalent of five gourmet size bags of regular potato chips. They are a big hit with everyone!
 Mandolin
By far, the quickest way to prepare the zucchini for chips is a mandolin. It gave nice, uniform thickness slices with very little effort perfect for drying. All the pieces of the mandolin are dishwasher safe so that's an added bonus. A mandolin will also make quick work of julienne style zucchini sticks for stir fries. You can use a food processor if you choose. The problem is you will have to cut the zucchini at least in half giving half moon shaped chips. That is still ok depending on your desires. What is most important when drying foods is to get a uniform thickness. This aids in drying and helps to ensure most of the vegetables are dried in the same amount of time.
 Zucchini Slices
I loaded the zucchini slices onto two drying trays. The trays were sprayed lightly with olive oil first and the slices were sprinkled lightly with seasoning salt before drying. The oil prevents any sticking to the trays once dried. The seasoning salt is optional. They were dried in my oven set to the drying setting at 125 F and convection fan on. Despite a higher moisture content, the zucchini dried relatively fast without any problems.
This is my first year using only my oven for dehydrating since my trusted dehydrator gave up the ghost. My oven has a "drying" setting that works along with the convection setting. I'm still figuring out the best way to utilize both settings. Dehydrating has never been a huge part of my home preserving. I do a fair amount of beef jerky and a few fruits but little in the way of vegetables. So far I haven't tried beef jerky using my oven yet but will shortly. We really need a cooler period as the temperatures have been in the mid nineties for the past few days!
 Zucchini Chips
Once the zucchini chips are dried, they are removed from the trays then ready for vacuum sealing. I like to use a large plastic container to collect the chips as they dry. When the container is full, I pour into a vaccum bag then seal. Vacuum sealing keeps out moisture and keep the chips crisp. The chips could be sealed in zip loc bags with as much air removed as possible.
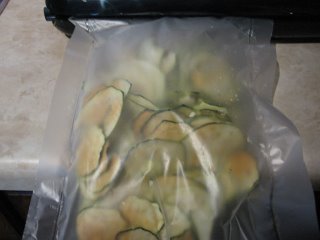 Vacuum Sealed Zucchini Chips
This method left a cushion of air to protect the chips. I vacuum seal a lot of foods including the foods I dry. This protects the dried foods from humidity. I used my new Rival Seal-a-Meal VS120 to soft vacuum seal the zucchini chips. I just bought this vacuum sealer so am figuring it out. My other vacuum sealer is a DCI. It works well but doesn't seal mason jars. I specifically bought this foodsaver so I could finally start vacuum sealing mason jars. I store a lot of dried foods in mason jars because they are rodent proof.
 Quick Lunch
While the chips were drying I took the opportunity to make a quick lunch using left-over steak and potatoes. The extra zucchini slices that didn't fit on my drying trays were tossed into the fry pan along with the steak and potatoes. They coooked fast and gave a nice addition to the quick lunch. Sauteed zucchini of any kind is always a favourite here.
A very kind friend gave us a huge bag of fresh caught perch. This is a real treat! I gave him zucchini in return. Tonight's dinner was pan fried perch and our favourite zucchini saute mix. I'll post about that tomorrow.
Cucumbers are just beginning here although my vines don't have any yet. I make a small batch of freezer pickles each year. These are a bread and butter style of pickle.
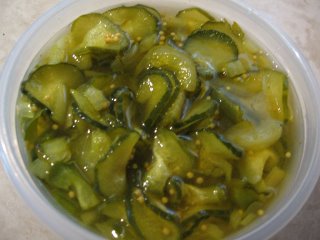 Freezer Pickles
The recipe is rather easy. The pickles have an excellent flavour without the work of canning. The result is a tasty, crisp pickle. Unlike other pickle recipes "no" cooking is necessary. The recipe can be halved or doubled if desired. I like to freeze in the 14 oz (414 ml) zip loc containers. This is a nice size that tends to get used up within a meal or two. To use, simply defrost the container in the fridge and serve. Here's the recipe. I've included a note at the end of the recipe since I prefer to do the pickles that way.
Freezer Pickles
7 c pickling cucumbers
2 c diced onions
2 c green peppers
1 tbsp coarse salt
1 tbsp celery salt
1 tbsp mustard seed
1 1/2 c white vinegar
1 1/2 tsp tumeric
3 1/2 c white sugar
1/2 tsp alumn
Slice cucumbers into containers*. Mix together the rest of ingredients. Pour over cucumbers. Let sit for 3 hours. Freeze.
* Note: My preferred method is to mix everything in a large plastic bowl. Do not use metal. After the waiting period, I stir well then divide into the freezer containers. I find this is a lot easier.
As anyone who has read this blog or my gardening blog knows, I garden in raised beds using the square foot garden and companion planting methods. I tend to plant a lot of heritage varieties but also plant some hybrids. Some of what I grow is preserved to be enjoyed during our long winter months. I've been picking and preserving peas for a few days.
 Peas & Beans
Beans and peas are grown in bed #3. I am elated at my pea yield this year! This has been the first time I've really had success growing peas. Other years they would grow just enough to tease then given almost nothing. This year I changed a couple of methods and varieties so I'm in the peas! In my opinion they are very nice looking peas, if I don't say so myself. I'm growing a few varieties as explained in my gardening blog, Garden Gnome Wanderings
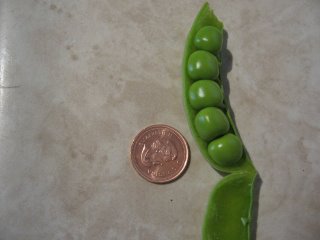 Little Marvel Peas
Little Marvel Peas are a heritage variety pea. The pods are about 3" long, almost round and tightly packed with 7-8 very tender and very sweet peas. This is a very good freezing variety. The peas are a very nice size too! After the peas have been shelled, I'm getting about a quart a day. So now the next question is how to preserve these lovely little green pearls? Personally I refuse to either can or dry peas! I find I get the best results freezing peas.
Freezing Peas:
Shell the peas and wash. This is the time consuming part but not really difficult. Once the peas are shelled, put a pot of water on to boil. Once the pot is boiling add the peas and blanch 2 minutes. Drain and cool. Pack into container of choice. I prefer zip loc bags so I can use as needed. Label and freeze.


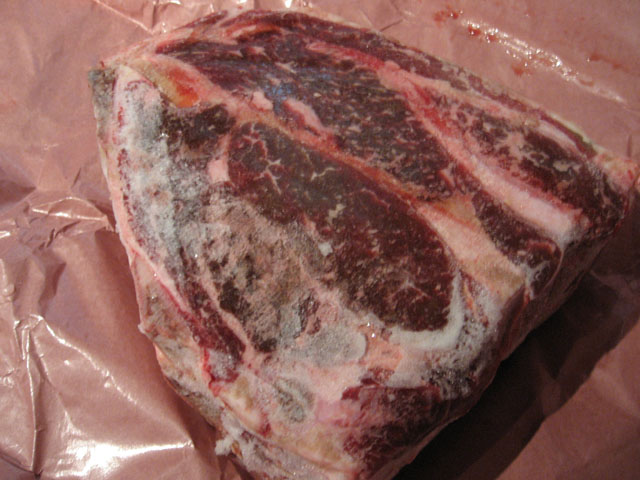 Frozen Blade Roast
 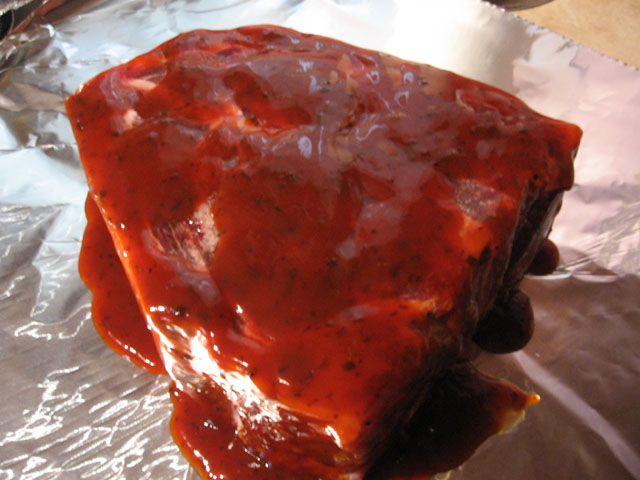 Roast with Sauce
 Foil Wrapped
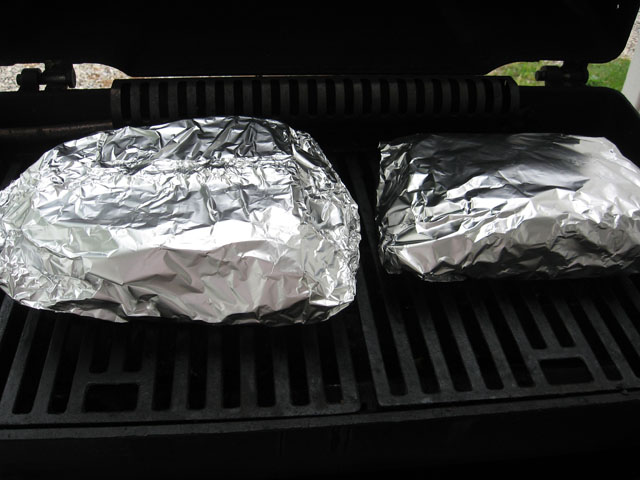 On the Grill
 Shredded Grilled Roast Beef
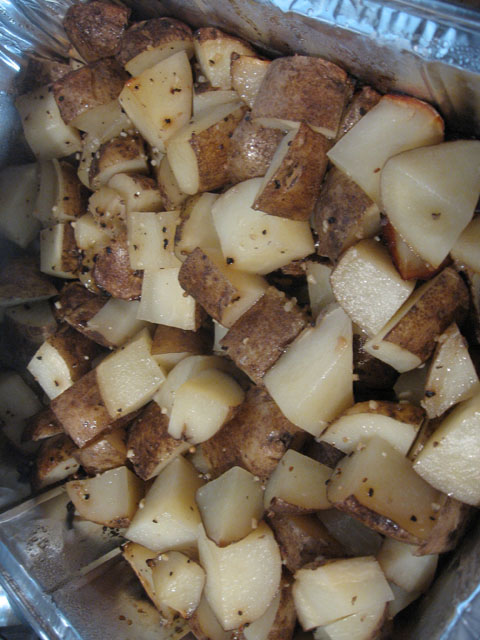 Campstyle Potatoes
 Garden Tomato Soup
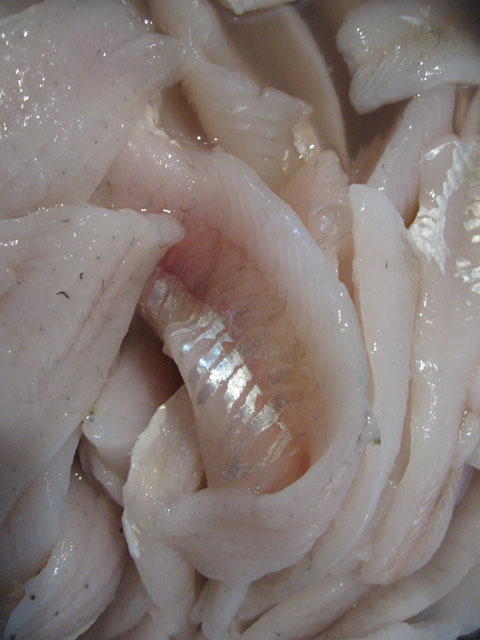 Fresh Perch
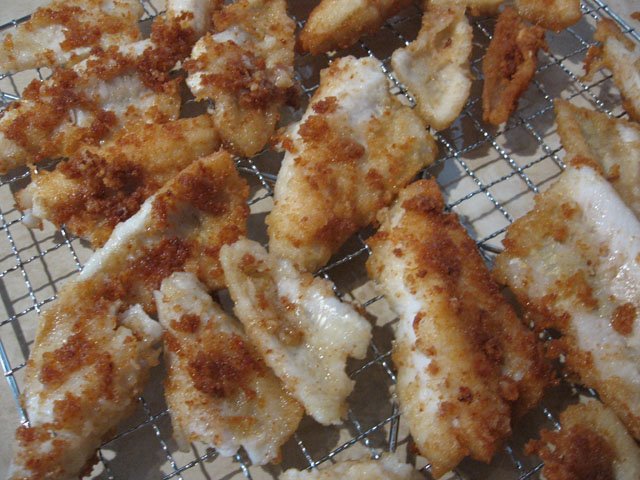 Pan Fried Perch
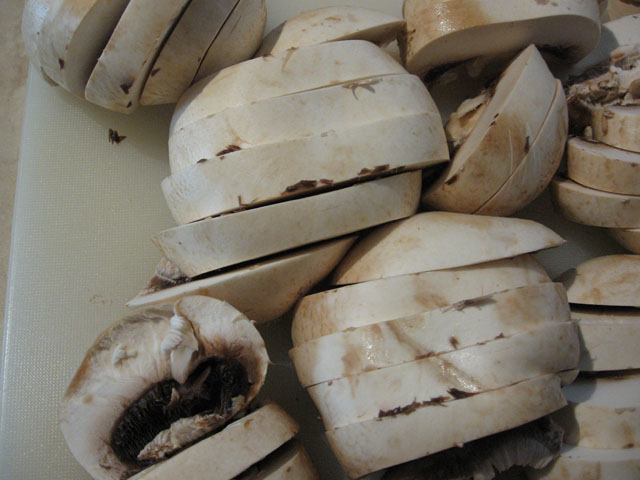 Mushrooms
 Mushroom Zucchini Mix
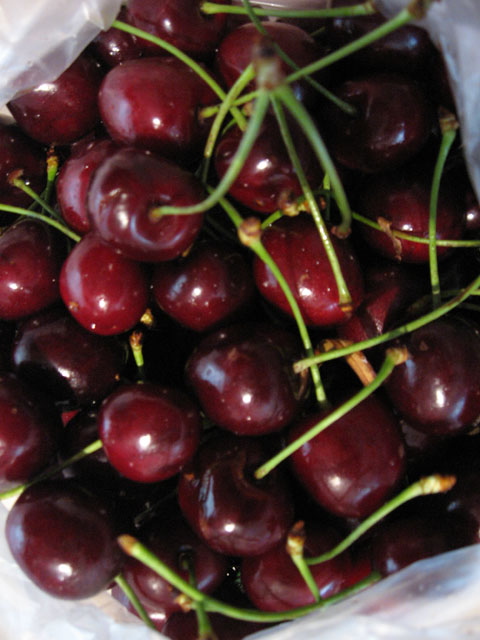 Sweet Cherries
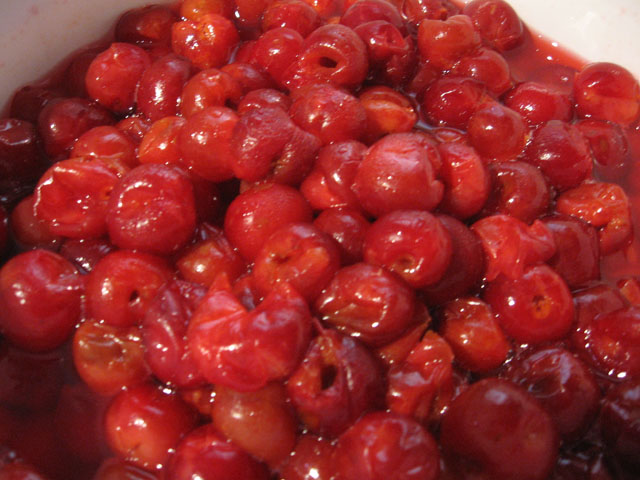 Sour Cherries
 Canned Cherries, Sour Cherry Jam, Sweet Cherry Jam
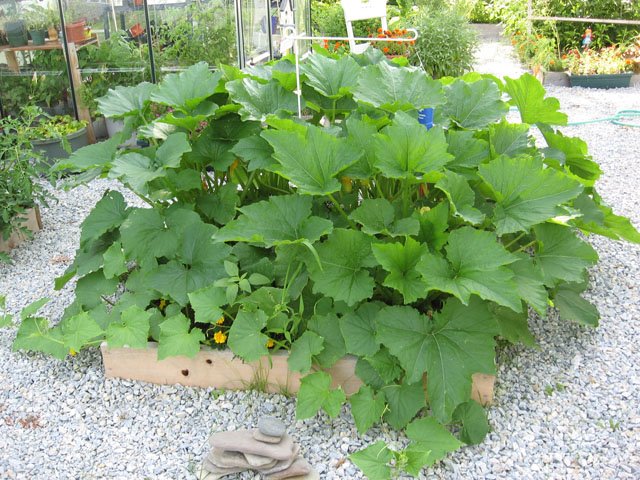 Zucchini Plants
 Zucchini
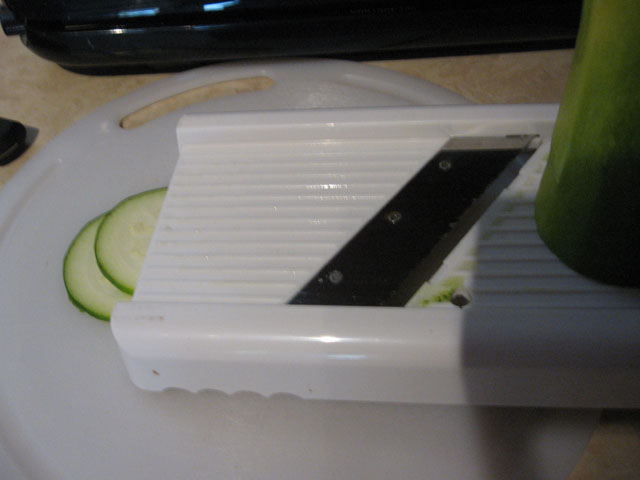 Mandolin
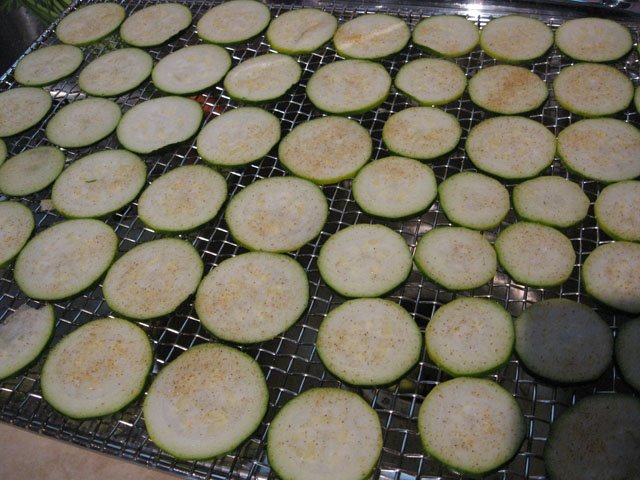 Zucchini Slices
 Zucchini Chips
 Vacuum Sealed Zucchini Chips
 Quick Lunch
 Freezer Pickles
 Peas & Beans
 Little Marvel Peas