ghosts and goblins come out to play.


Welcome to our kitchen that truly is the heart of our home! One of life's greatest pleasures is enjoying good food with family and friends. Here you will find recipes, tips for frugal cooking, how-tos for food preservation especially canning and anything else food related. Tea is brewing and warm cookies are fresh from the oven. Please sit a spell and enjoy your stay.

I've had a few emails requesting budget stretching meals. The past week has been extremely busy and my new fridge still has not arrived. I'm trying to keep the refrigerator contents to a minimum. All of the freezer contents have been moved to the larger freezers. This bit of disruption would be an ideal time to order out but I decided to use up some cheese, eggs, and milk in two dishes along with a couple of pre-prepared foods from the freezer. Spanish onions are inexpensive right now so they are also ideal as an inexpensive ingredient. Good food need not be expensive! Mac & Cheese
Homemade Mac & Cheese is a true comfort food and taste so much better than the boxed kind! It is extremely easy to make and quite inexpensive depending on the amount and kinds of cheese you use. It can be a full meal in itself or served as a side dish and it does reheat well. I like using different cheeses especially extra sharp cheddar. Good quality cheese is essential but need not be expensive either. Experiment with the cheeses to get the combinations you like. You can freeze it homemade mac & cheese in trays for convenience if you choose. Here's how I make homemade mac & cheese. Please note, the measurements are only approximates as I don't really measure for this type of dish.
Method: The first prep was the cheese. For this particular mac & cheese I shredded extra sharp, colby, and mozzarella cheeses for a total amount of about three cups. Then I cooked elbow noodles until el dente and drained. A 13" x 9" glass baking dish was greased and enough noodles were poured in to form about an inch layer. Half of the shredded cheese was distrubuted evenly over the noodles. Another layer of noodles was added along with the remaining cheese. Then about three cups of bechemel (white sauce) was poured over the noodles. A bechemel sauce is simply milk thicken with flour. For this application, the sauce should be of a thinner consistency like a thin gravy. A light sprinkling of bread crumbs was the final layer. I baked the mac & cheese at 350 degrees farenheit until the top was lightly browned and the cheese was bubbling.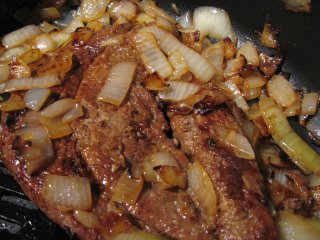 Liver & Onions
Liver and onions is a favourite dish here. It is very inexpensive! Serve the meal simply with the addition of potatoes and a vegetable. Bread and salad are optional. Many are turned off of liver because of they way they experienced, dry and like leather, but that is not the way it should be. The first trick is to use calf liver as it is more tender. The second trick is to never overcook liver. H
Method: You will need a sautee pan and fry pan for this method. Timing is important so be sure to use mis en place. Cut two large spanish onions in half then into slices against the layers. Melt about 2 tbsp butter in the sautee pan then add onions. Stir occasionally and if need be add a little extra butter. While the onions are sauteeing, dredge the liver in flour seasoned with a little salt and pepper or garlic salt if you prefer. Lightly brown on both sides in heated fry pan on medium heat. Remove from heat. When the onions begin carmelizing, transfer the liver to the sautee pan. Continue cooking until the onions are carmelized, stirring often. 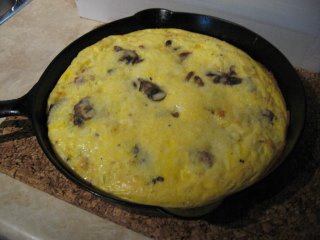 Frittata
Frittata is one of the easiest, inexpensive meals you can make. They are ideal for using up left-overs. Imagination is really the only limiting factor when making frittatas. Even though they are egg based, frittatas can be enjoyed for lunch or dinner. A frittata is basically an open faced omelet that is started on the stovetop then baked in the oven. Be warned, a slice of frittata is quite filling. While I have not tried freezing frittata, left-overs do reheat nicely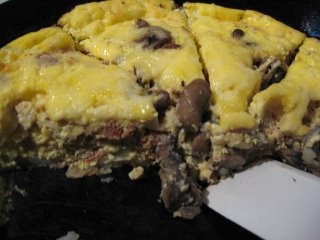 Frittata cut
Like an omelet, a frittata starts with eggs, about 8 to 10. To do your mis en place assemble the ingredients you are adding. Frozen hash browns can be used as they are but if using fresh potatoes, microwave until almost soft.
Method: Slice the potatoes. Assemble other ingredients like bacon pieces, mushrooms and shredded cheese. Wisk the eggs then stir in about 1/3 c of milk and seasonings. For a nice seasoning try adding tomatoe powder (previous entry). Now, pour a little olive oil into a cast iron fry pan and heat. Add a layer of potatoes followed by other ingredients. Allow to cooke on medium-high for about 5 to 7 minutes. Pre-heat oven to 350 degrees farenheit. Pour egg mixture over the other ingredients, reduce heat to medium then cook just until the egg mixture around the sides starts to cook. minutes. Transfer the pan to the pre-heated oven. Bake until puffy and lightly browned on top and a toothpick inserted into the centre comes out clean. Remove from oven. Cut into wedge shaped pieces.
I keep bits and pieces of left-overs in the freezers all vacuum sealed for just these types of meals. However, I always have sauteed mushrooms and homemade bacon pieces in the freezer in meal sized portions. This frittata was made this past Saturday for brunch when the kids were here and I simply didn't feel like spending a lot of time in the kitchen. Our new grandbaby is due soon so I wanted to spend more family time with them instead of cooking. So I pulled a package of bacon bits and sauteed mushrooms from the freezer. After the potatoes were almost cooked, I defrosted the bacon and mushrooms and got my mis en place ready: chopped onion, shredded extra sharp cheddar and wisked eggs. From there is was basically dumping everything into the pan, cooking on the stovetop then transferring to the oven. Everything came together nicely, very quickly freeing up the time I wanted.
Enjoy!

Soon it will be hunting season and every hunter hopes to lucky enough to bag a deer. Preserving the meat is important but the real fun comes in cooking the venison. I thought I would make a few entries on some of the ways I preserve and cook venison. Watch for other venison methods and recipes to be published over the next week or so.
Venison roast is a nice change from pork or beef roasts. Here is how I make venison roast.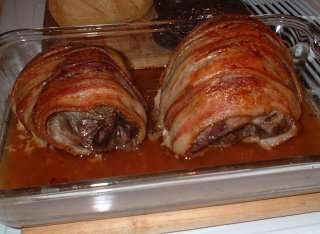 Venison Roasted
There are a few important things to know when cooking venison. Venison is very lean so a fat needs to be added when cooking. Usually the fat is ground pork if cooking ground venison or bacon for roasts. Do not over cook venison or it will be too dry. When I was first looking for recipes for cooking venison, one source indicated to soak in salt water but most sources say to avoid salting the meat prior to cooking. If there is any connective tissue on the roast, remove that as it will give an unpleasant taste.
I started with two frozen venison roasts, one was sirloin tip and the other rump. The roasts were thawed in the refrigerator overnight. Any connective tissue was cut away. Each roast was wrapped with bacon strips and placed in a glass baking dish. Wrapping the roast is easy. Just start at one end wrapping around the roast then move slice by slice until the entire roast is wrapped.
I cooked the uncovered roasts at 300 degrees farenheit on convection oven setting until the interal temperature was 140 degrees farenheit.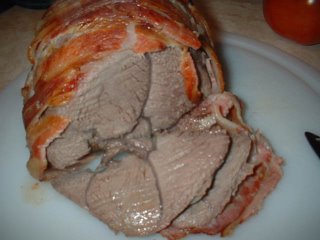 Venison Cut
The roasts where carefully removed from the baking pan and allowed to rest before cutting. There was enough juices for gravy but they needed to be put through a gravy separator to remove the fat first. Then I placed the juices in a sauce pan, added a little Worchestershire sauce and brought to a light boil. I used an arrowroot flour slurry to make a thin gravy. When the gravy was finished it was time to cut the meat.
Each slice of meat has an outer layer of bacon that looks nice when plated especially with a little gravy. I like to keep roasted venison meals more like old fashioned country cooking. This venison was served with baked potatoes, carrot coins and homemade sour dough bread.
Enjoy!
Garden Gnome

It's that time of year for baking cookies. One of my family's all time favourite is peanut butter cookies so I'm sure to include them in the holiday baking.  Peanut Butter Cookies
The recipe I use comes from the old Betty Crocker's Cookbook given to me by my late mother-in-law the first Christmas after we were married. The pages have yellowed and some have spills along with the first 5 pages missing so I don't have a publication date but I know the book is a least over thirty years. This cookbook got me out of many a near cooking disaster when I was first married. It is still the first cookbook I turn to despite having a lot of other cookbooks.
These cookies are so popular with family and friends that I multiple the recipe by four and often have to make a second batch. Some of the dough balls always find their way into my husband's mouth with his feeble attempt to convince me he is just taste testing. Then he calmly pours himself a huge glass of milk and hovers in the kitchen waiting for the first hot cookies. Once he has loaded his plate and wandered off to enjoy his snitched treats I can get on with the rest of the cookies.
Be sure to check my notes at the end of the recipe.
Peanut Butter Cookies
1/2 c shortening (half butter or margarine, softened)
1/2 c peanut butter
1/2 c granulated sugar
1/2 c brown sugar (packed)
1 egg
1 1/4 c all-purpose flour
3/4 tsp baking soda
1/2 tsp baking powder
1/4 tsp salt
Mix thoroughly shorening, peanut butter, granulated sugar, brown sugar and egg. Blend in flour, baking soda, baking powder, and salt. Cover and chill.
Heat oven to 375 degrees farenheit. Shape dough into 1-inch balls. Place 3 inches apart on lightly greased baking sheet. With fork dippen in flour, flatten in crisscross pattern to 2 inches. Bake 10 to 12 mintes or until set but not hard.
About 3 dozen cookies.
My Notes: I use half butter and half shortening as it gives a better flavour. The original recipe just said "soda" so I have corrected that to "baking soda". The original recipe indicates to bake at 375 degrees farenheit. This temperature works fine for regular baking pans and ovens. I had to adjust the temperature by lowering 25 degrees farenheit for baking with convection. I found the timing is slightly lowered because of convection and using insulated cookie sheets. Oh and the orginal recipe did not indicate whether to grease the cookie sheet. With these cookies greasing in unnecessary.
Enjoy!

We are cheese lovers so I've been experimenting. What I have found is those blocks of supermarket cheese all taste the same. I want more! So we have been having a lot of fun.
I'd say the vast majority of the cheeses I use are always vacuumed sealed after opening. I do this to prevent the cheese from picking up other fridge odours as well as keeping the flavour as fresh as possible. At the same time it keeps the cheese from spoiling extending the shelf life of the cheese.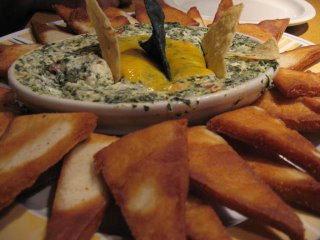 Kelsey's Four Cheese Spinach Dip
Last weekend, we took a road trip to purchase the new to us car and visit our kids. Along the way we stopped at Kelsey's to meet with friends Friday night. Their four cheese spinach dip is really nice! It has a nice rich flavour and is well presented. It is served warm with a melba toast type of triangles. This is one dish I would like to duplicate at home. I have checked online for copycat recipes. I think I can make a suitable but not identical dish using fresh spinach. 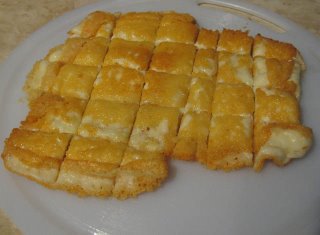 Saganaki
This is a ripened firm cheese served fried. We were introduced to it so decided to try it at home without the flaming brandy extract. It really is more of an appetizer. The cheese is sliced about 1/4 to 1/2 inch thick then fried on both sides until golden brown. I like to drain a little to remove the extra fat. Then we use a pizza cutter to cut into bite sized squares. I like adding a toothpick to each square when serving to guests and a little garnish looks nice as well.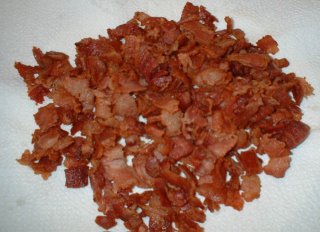 Homemade Bacon Bits
There are two ways to preserve bacon, raw and cooked. I like to cook bacon strips then vacuum seal them for those times I'm in a hurry. I prefer re-heating the bag in a pan of boiling water to prevent any further cooking from the microwave. The easiest way to do pre-cooked bacon is to cook the strips, drain and cool. Then simply vacuum seal in meal sized portions. I also like making my own bacon bits.
Homemade bacon bits are just so easy to make and I think they taste a lot better than store bought. Cut across the strips to form small pieces. Fry the pieces, drain and cool. I freeze these using two methods. A ziploc container is perfect for bacon bits that will be used up within a couple of months in the freezer. A small container is nice to have on hand just to sprinkle on salads or baked potatoes especially for individual servings. Vacuum sealing is my preferred for bacon bites for family sized meals. I divide into meal sized portions and vacuum seal. If you read through my cooking blog, you will quickly realize vacuum sealing is a must for anyone serious about food saving. Sorry to sound like a broken record but I feel this is a must have kitchen tool!
Enjoy!

Wow! Things are just happening way too fast here. I've finished up canning the vegetables so am now onto canning meat products. So that's where it is in the kitchen.
On the exciting front, we bought a new car and ordered in our new fridge, both not by choice. The car was tired period but we really wanted to make it last the winter. No dice! Apparently cold air blowing out the fridge is not a real good thing either. Why both decided to go at once is beyond me but they did. Like it is not as if having the money sitting in the bank would have been a better idea in my book.
Our soon to be born grandbaby is still doing well despite the problems so we took a road trip to visit as well as power shop. We stayed the weekend so that was very nice. Food plays an important role in our family so we managed to find just the right food to keep everyone happy. Nino D'Aversa Bakery
Saturday in the late morning we sealed the deal on the new car. Beside the car lot was a wonderful little Italian eatery and bakery. We left the new car at the dealership while they finished the final details while we went for lunch. Our kid and kid-in-law were with us. Our senses were bombarded with the most delicious aromas as soon as we entered. To the left there was a large dining area backed by an open kitchen for wood baked pizza. I just had to take pictures of that! The oven was magnicifant! Directly in line with the front door was a very large island with buffet style Italian foods, and delectable smelling coffees. This island wrapped around to the right to include three huge pastry coolers. But the right side of the building was just amazing!
This picture shows just a very small idea of the sight! The owner was thrilled I was taking pictures, something I always wonder about so normally ask permission. The bakery portion aside of pastries was huge! Three walls were covered with stainless steel racks all overflowing with various breads and rolls. Between the two long walls there were two shorter height rows of stainless steel racks also over flowing with various buns and rolls. Oh the smell! What an absolute delight! I just had to buy a loaf of Vienna Style bread, buns and pastries. After lunch we waddled over to pick-up our new car. We left the dealership with a box of pastries, waved good-bye to our old car then made our way to one of our kid's house. Aberfoyle Model Train Show
On the way to their house, we stopped in Aberfoyle to see the model train show. This is not a business but rather a personal hobby comprising some 1500 square foot of model railroad built in "O" scale. The show opens to the public two weekends in the spring and three weekends after the Canadian Thanksgiving in the fall.
Here's a link if you would like to find out more information about this absolutely outstanding and impressive display by folks who just love what they are doing and want to share - http://www.aberfoylejunction.com/tframe.htm Aberfoyle Model Train Show
I took several mini video clips of the trains. Unfortunately video.google.com just doesn't seem to like dial-up so keeps booting me off. That's what I really wanted to share. That aside, the attention to detail is absolutely amazing. I think I snapped somewhere close to seventy pictures while we were there. The detail, that what really gets to you. They even have people eating in the little dining cars complete with very detailed place settings. It was very, very impressive!
There is nothing better than being with family, sharing great food and seeing soming interesting. The day wasn't over even though we were getting a little tired.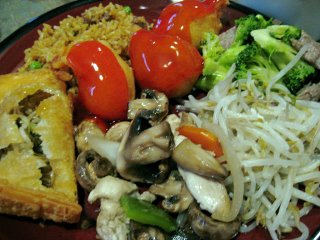 Chinese Take-Out
On the way to our kids' house we stopped at a Matag store. Wow! Talk about nice appliances. I thought my new JennAir was slick but holy mackinolies! Unfortunately we did not find a fridge that would fit our space. Once we arrived at our kids' house, we decided we had had enough excitement for one day so changed into comfort clothes to relax, watch football and order in Chinese food.
It is a real treat for us to get good Chinese food and this was good!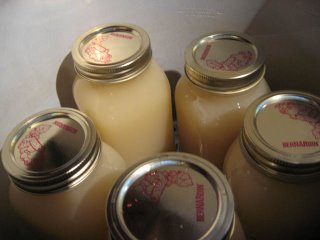 Turkey Stock
I usually make turkey stock whenever we have turkey. It is a two day process. My turkey stock is not clear. The reason for this is I still stuff the turkey so there is always bits of left-over stuffing in the carcass. What I do is debone the turkey and place all the bones in a large stock pot. Then I add an unpeeled onion cut into quarters. Not peeling the onion adds a nice, natural colour to the stock. I also add about 2 large carrots, cleaned, not peeled and cut in half along with celery sticks. The stock is cooked low and long, cooled then defatted. The next morning the stock is strained then raised to boiling for canning.

I processed six 250 ml jars of pickled beets and six pints of plain canned beets last Friday. Beets are messy to process but the rewards are worth it. There a few essetials when processing beets. The first of these is an incentive so I cracked open the last jar of pickled beets. There's nothing like the taste of these to provide ample incentive. Next I put on old clothes and pulled out latex gloves. I prefer the latex gloves as they fit better. I find a stiff brush is a must for cleaning the beets. A few cloths to wipe up spashes and drops as I worked were added to the counter top. This will help minimize beet stains and is the trick to not having to do a big clean-up after canning. This was important on Friday as this was the start of our Thanksgiving weekend and I knew we would be having a housefull as early as dinner time that night. Another trick I use is during food prep, I leave the dishwasher open to load as I use each item. Next I set up my mis en place. I find this type of organization streamlines the canning process.
Mis en place means having all your ingredients prepared and ready to go before starting to cook. Translated it means "to put in place". I use this method whenever I cook. While no special bowls are necessary, I like using little glass bowls and custard cups for ingredients like spices and liquids under 4 oz. Larger bowls are necessary for ingredients in high quantity. There are a few reasons I think mis en place is important. This is a sure fire way of knowing you have all the ingredients and not at the last moment realize you are out of something while the dish has already started cooking. My kitchen work surface is small so having a lot of jars and larger containers on the counter is not practical. The most important reason is to streamline the cooking process so it goes smoothly and efficently. Pickled Beets, Canned Beets
Beets are washed then cooked before processing. When cooking the beets for processing, a nice deep purplish red juice is produced. Do not discard this juice. Either pressure can or freeze for use as a natural dye. Be sure to label well I processed plain beets in 500 ml jars in a pressure canner for 30 minutes. This is necessary because beets are a low acid food.
Pickled beets are a must have in our home. I make a double batch of Jean Pare's recipe, a simple but tried and true recipe. The pickled beets look beautiful in the jars but then I might be a little biased. Please be sure to read My Notes after the recipe as the original recipe does not have the processing times.
BEET PICKLES
There are no spices added to this pickle. They have a nice tang.
3 lbs Beets with 1 inch (2.5 em) tops intact Water to cover
Water to cover
BRINE
2 c White vinegar
2 c Water
1 c Granulated sugar
1 tsp Table salt
Cook beetsin water in large pot until tender. Cool in cooking water until you can put your hands in comfortably. Slide off beet skins. Leave tiny beets whole. Cut larger beets into chunks. Pack into hot sterilized jars to wlthin 1 inch (2.5 cm) of top.
Brine:While cooking water is cooling, combine vinegar, wager, sugar and salt in saucepan. Heat on medium and stir often until it reaches a boil. Pour over beets in jars to within 1/4 inch (6mm) of top. Seal.
Makes 3 pints.
source: Jean Pare, Preserves, 1994. Pp. 91
My notes: These pickled beets are simply delightful and so easy to make! No processing time was given in the original recipe. I process in a boiling water bath 30 minutes for pints or quarts and 20 minutes for half pints.
Enjoy!

We've been married long enough that coming up with a new family favourite is rather difficult sometimes. I was watching the food channel the other night and Michael Smith showed a bacon wrapped potato dish. My immediate thought was I could do that and I could take it beyond what he did. His dish was only bacon and potatoes. So I set about experimenting and this is what I came up with. Make sure you read my notes as I do think this can still be improved on.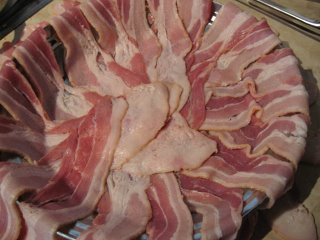 Lined Pie Pan
I honestly had a lot of problems with this step even though Michael Smith made it look so easy. The bacon just would not co-operate! Once I got the bacon somewhat in a radiated fashion I decided to squish the centre as it seemed too thick. So I really just used my fist and pounded the centre a little to flatten. Then I used my fingers to kind of mush the flatten bacon out a bit towards the edges. This is kind of messy as the bacon strips drape over the outside of the pan but that is for a reason as explained later. Potatoes with Spices
The potatoes were cut with a mandolin to ensure even slices. This worked very nicely. However, on Michael Smith's segment he showed only bacon and potatoes. Now, we just couldn't have only bacon and potatoes! So I sprinkled on a little Old Bay Seasoning then got the idea to add extra sharp cheddar cheese as a layer. I used three layers of cut potatoes for the filling. Wrapped
Once the potato and cheese filling was in place it was time to draw the draped over pices of bacon strips to seal the top. Again I had a few problems with this so resorted to brute force. I again used my fist to pound the centre part of the bacon and fingers to mush the bacon towards the sides. This created a top bacon crust for the dish. The dish was baked at 350 degrees farenheit until the top bacon was slightly crispy. Baked
Baked
The result at first was a lot of bacon grease so I used a couple of large egg flippers to remove the finished dish from the baking pan to drain. I think this was a necessity even though I did not see Michael Smith do this. He likely did because if you see the amount of grease that is your first instinct. I let the baked dish drain for about five minutes then it was ready for cutting. Cut
Cut
I cut the dish into wedge pie like shapes. The resulting wedges were served along with other vegetables for the main course. This dish still needs a little tweaking. My husband commented that it was almost too much bacon. I noticed that the Old Bay Seasoning and even cheese flavours were not noticeable. Not that you want a distinct seasoning or cheese flavour for this type of dish but there wasn't even a hint of either.
I think peppering the bacon would help with the overall flavour. I also think that this dish would lend itself well to adding spinach as one of the layers. So this will be a dish I play around with a few more times. I'm thinking instead of using a round pie pan to use a square baking dish and half the bacon. That would solve the problem of radiating the bacon. But I have a few other ideas where I would like to take this dish so will post more later. I think this dish will freeze well so froze a wedge as a test. Sure enough, no problems.
I'm still developing this recipe so am making notes in my kitchen journal. It is a good way to keep track of what you did to a recipe or how you create a recipe. A kitchen jounal can be a valuable asset later when trying to recreate a modified recipe or a new one and only just created recipe.
Enjoy!

Yesterday I canned tomatoes. I normally have a schedule planned for canning during the heavy season and by the time I get to salsa, I know the long canning days are drawing to an end. Salsa is definitely more work than some home canned goods. Despite the work involved with the salsa, I also decided to make another batch of bruschetta in a jar (recipe in earlier entry). I'm now at the point where a batch of red tomato ketchup and tomato paste should end the tomato canning season.
 Some of the Salsa Ingredients
To me, the variety of the vegables used is the secret to excellent salsa and I am very picky as to what I will put into my salsa. That is the trick to excellent salsa. I either grow or buy the varieties I insist on and if they are not available, the salsa just doesn't get made. The produce must be very fresh preferrably picked that day. Any purchased produce is through a well trusted farmer's market that knows how picky I can be. They always treat me well! I start with a hamper of tomatoes of a specific variety and very fresh peppers both sweet and varying degrees of heat. This photo shows only a few of the ingredients. From there, the salsa is assembled, cooked, then canned.
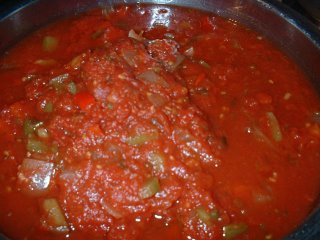 Salsa
Salsa
While I will not reveal the recipe as my family thinks this salsa is good enough to market, I will share my method. Maybe so, but they may be just a little biased and besides I have other things on the go right now but it might be a possibility. I make salsa in three strengths: hot, medium and mild. Three strengths are necessary depending on how the salsa will later be used. Some goes to relatives and friends who prefer one strength over another so that is always taken into consideration. All are full bodied, chunky salsas I average 48 - 60 jars of salsa each year. The batch I made yesterday was hot.
After the ingredients were combined, the salsa was cooked for 15 minutes. Then the remaining ingredients were added and the salsa was cooked for another 10 minutes. After that, it was time for taste testing followed by adjustments then onto the canning process.
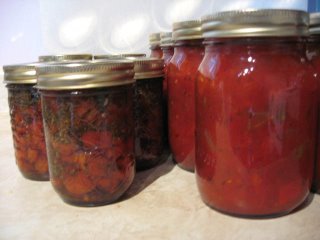 Bottled Salsa
The salsa was ladled into hot, sterilized pint jars. I use pint jars because I find that is just a perfect size to not leave a lot of left-overs. Lids and bands were placed on the jars then the jars were processed using a boiling water bath for 15 minutes. The yield was 13 - 500 ml jars.
The salsa always looks wonderful in the jars, tantalizing the taste buds before the jar is even opened. I've been making salsa long enough that labelling really isn't necessary as one look at the jar, I can tell you the strength. For those getting the salsa as gifts or my family members, I do label only because I feel all home canned foods should be labeled with the contents and date made.
Shown in the photo along with the salsa are seven half pint jars of Bruschetta in a Jar. The recipe is in a previous entry. I added this to the canning goodies gift basket last year and it got rave reviews. Two tricks to this recipe are be sure to use high quality white wine vinegar. I like using an aged white wine vinegar imported from Italy. It costs more but is well worth the price! Never use a wine that you would not drink. Just because the recipe says to use a dry white wine, if you don't like dry white wine, use a white wine you do like. A tip for those who may want to make the recipe without wine, I would suggest organic apple juice. The flavour will differ but the results should be fine. Again, make sure you use "quality" ingredients.
 Green Tomato Ketchup
When frost threatens, I pick all the green tomatoes. Some are processed into salsa verde or green ketchup. The salsa verde recipe is in an earlier blog entry. When using green tomatoes for processing, choose tomatoes that are pale green. Dark green tomatoes have higher levels of solanine, which can be toxic in large amounts.
I make two versions of green ketchup. The one pictured is the Southern Cuisine recipe from about.com. The second is a Quebec Style green ketchup. Both are good ketchups and a nice change from red tomato ketchup. We use more of the Quebec style than the Southern style. Please be sure to read my notes for each recipe as I have made changes to both and only use specific ingredients. I prefer to can in either pint or half pint jars.
Green Tomato Ketchup
Source: Diana Rattray,Your Guide to Southern U.S. Cuisine, http://southernfood.about.com/od/greentomatoes/r/bl30322v.htm
A green tomato ketchup recipe. More green tomato recipes below.
INGREDIENTS:
* 6 pounds green tomatoes
* 3 pounds onions
* 1 tablespoon black pepper
* 1 tablespoon mustard
* 1 teaspoon Worcestershire sauce
* 4 cups vinegar
* 1 cup honey
PREPARATION:
Slice green tomatoes and onions; place in a large pot with pepper, mustard, and Worcestershire sauce. Pour vinegar over all and cook for 4 hours over very low heat, stirring occasionally. Carefully puree mixture in a blender; strain through a mesh strainer. Return to pot and bring to boil; add honey. Immediately fill 6 sterilized pint jars, leaving 1/4-inch head space. Wipe the jar tops and threads clean with clean damp towels. Place hot sealing lids on the jars and apply the screw on rings loosely. Process in boiling water bath in a deep canning pot for 5 minutes. Remove the jars and cool completely. Tighten the jar screw rings to complete the sealing process. After jars cool, check seals by pressing middle of lid with finger. (If lid springs back, it is not sealed and must be refrigerated. Let jars of green tomato ketchup stand at room temperature 24 hours. Store unopened product in a cool dry place up to one year. Refrigerate green tomato ketchup after opening.
Makes 6 pints of green tomato ketchup.
My Notes: This is a nice change from red tomato ketchup and a great way to use up green tomatoes. I followed the processing time of 15 minutes for ketchup as per Bernardin's Tomatoes, Canning & Specialty Recipes, 2000. Pp. 43. Once opened, refrigerate.
Ketchup Vert (Green Tomato Ketchup)--Quebec Style
source: A Taste of Quebec, Julian Armstrong, 1990.
24 Medium green Tomatoes (6 Lbs Or 2.5 Kg), chopped
15 Medium Onions (3 Lbs Or 1.5 Kg), chopped
1/2 cup coarse Salt (125 Ml)
3 cups white vinegar (750 Ml)
2 cups granulated sugar (500 Ml)
6 tbsps mixed pickling spices, tied in cheesecloth
In a large bowl, alternative layers of tomatoes and onions, sprinkling each layer with salt. Let stand for at least 8 hours or overnight. Rinse and drain well. Combine tomatoes and onions with vinegar, sugar and spice bag.
In a large saucepan or stock pot, bring mixture to a boil, then simmer, uncovered, for about 30 to 45 minutes, stirring frequently until slightly thickened. Pour into hot sterilized jars and seal.
Yield: Approximately 12 cups ( 3 L)
My Notes: This must be processed. I use the processing time of 15 minutes boiling water bath for ketchup from Bernardin's Tomatoes, Canning & Specialty Recipes, 2000. Pp. 43. Once opened, refrigerate.
Enjoy!

We took a spur of the moment road trip on the weekend and ended up at a lovely Chinese restaurant as the meeting spot for our kids. The dinner was amazing! A fun time was had by all. Barbeque Pig
I always have my camera with me whenever we eat out and quite often take pictures of some of the more interesting foods. I've never had restaurant staff tell me not to take pictures. At best, they are elated and most ask about it. At worst, we seriously look like tourists!
When I saw this barbequed pig, I just had to have a picture. The food at this restaurant was excellent. As a group we spent a few hours there enjoying not only the food but family bonding, something very important to my husband and myself. My husband said we likely waddled away from there but every one was happy and we had a wonderful time with lots of pictures.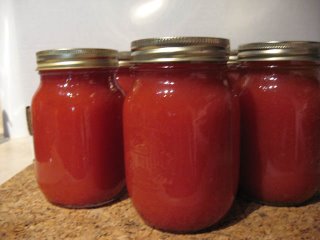 Tomato Juice
On Thursday we decided to start winterizing the garden which meant clearing out the raised beds. used the excess ripe tomatoes to make tomato juice. Now I know tomato juice is cheap in the stores. To me, they always taste tinny. Home made tomato juice does not have this taste and you can eliminate the salt if you want. What I like about recipes/methods like this is you can use up as many tomatoes as you need to. Tomato juice is easy to prepare as there is little more to do than wash the tomatoes then follow the guidelines.
Method: This year I decided to can the tomato juice in 500 ml jars simply because we are a two member household most days. What I did was follow the guidelines at http://www.uga.edu/nchfp/how/can_03/tomato_juice.html so my size jars I used 1 tbsp lemon juice and 1/4 tsp Kosher salt as opposed to 1/2 tsp salt. Then I followed the guidelines in Bernardin's Tomatoes, Canning & Speciality Recipes to prevent separation during storage. Essentially what you have to do is bring part of the cut tomatoes to a boil to destroy the enzyme Pectase then continually add fresh cut tomatoes while keeping the pot at a full boil. Once all the tomatoes have been boiled, they are passed through a food strainer to remove skins and seeds. The juice is returned to boil for 5 minutes then bottled. Processing for 500 ml is 35 minutes boiling water bath.
Enjoy,
