My photo
Ontario, Canada
I am a wife, mother and grandma who enjoys the many aspects of homemaking. A variety of interests and hobbies combined with travel keep me active. They reflect the importance of family, friends, home and good food.
Cook ingredients that you are used to cooking by other techniques, such as fish, chicken, or hamburgers. In other words be comfortable with the ingredients you are using.
--Bobby Flay

For Your Information

Please watch this area for important information like updates, food recalls, polls, contests, coupons, and freebies.
  • [March 19, 2020] - Effective Mar 17, this blog will no longer accept advertising. The reason is very simple. If I like a product, I will promote it without compensation. If I don't like a product, I will have no problem saying so.
  • [March 17, 2020] - A return to blogging! Stay tuned for new tips, resources and all things food related.
  • [February 1, 2016] - An interesting report on why you should always choose organic tea verses non-organic: Toxic Tea (pdf format)
  • Sticky Post - Warning: 4ever Recap reusable canning lids. The reports are growing daily of these lids losing their seal during storage. Some have lost their entire season's worth of canning to these seal failures! [Update: 4ever Recap appears to be out of business.]

Popular Posts

Showing posts with label recipes. Show all posts

Wednesday, March 31, 2021

The Issue With Recipes

Back when I first started blogging, including a recipe was very important.  That has changed.  Why?  Despite a plethora of recipe books, you can never duplicate that recipe unless you have the exact same ingredients, environmental conditions and methods AND even then you might not be able to because everyone has their own little shortcuts, tricks and methods that are not always disclosed in the recipe.

Case in point, I shared a clone recipe with a friend for a particular dish.  One of the items is no longer available and another is no where near what it was 30 years ago when I created the recipe.  So even I could not make that recipe with the ingredients available now.  Another problem is variety of fruit or vegetable used and the fact those from even 20 years ago are not the same as today's varieties.   Adding to that is for many of my recipes I use homemade versions of store bought ingredients like mayonnaise, ketchup, mustard and so much more.  Then there are the regional differences like flours and differences from country to country.  From experience, dairy products in our corner of Ontario taste very different than those in Florida.  Adding to that, if you use commercially produced ingredients even something as simple as shortening changes usually in favour of the company making more money.  I do a a lot of soap making.  Back in 1998 one of the favourite ingredients was Crisco.  The formula has changed to the point the SAP values have changed.  The new Crisco formula uses palm oil whereas the old did not.  I don't use Crisco for soap making but that is important to know if you do.  Oh and right now Canada has an issue with butter staying hard at room temperature.  There's theories as to why but nothing confirmed.  So if you want room temperature butter for a dish, you just might be out of luck.All of this adds to the final product.

So at best, we as home cooks must come up with substitutions and tweaking based on personal experience and knowledge.  This is what keeps cooking interesting and sharpens your skills.  Like a willow tree, you have to be strong enough to bend.   Recipes are simply a starting point, they are not carved in stone!  This is what goes into what I made but your dish will not not should it be exactly the same.  I urge everyone to keep a cooking journal and honestly, do not get too attached to any one particular ingredient.  Know that ingredients change or become unavailable.  Be flexible!


Friday, March 21, 2014

Old Fashion Banana Cake

Bananas have had a lot of negative publicity recently in the weight loss industry.  The premise is that bananas will prevent you from losing belly fat.  This is a myth!  I have lost 19 lb since November by enjoying a banana in one form or another almost daily.  Bananas are a nutritional powerhouse full of micronutrients like potassium that helps lower blood pressure.  A medium banana has 105 calories, perfect for a healthy snack.  They have a low glycemic index but high satiety level and they come in their own convenient packaging!

frozen banana
Bananas freeze well.  One of my friends shared her secret for freezing bananas.  Simply pop the banana skin and all in the freezer.  When ready to use, remove from the freezer.  Let thaw just enough to peel off the skin.  Mash while still partially froze.  Pieces of frozen banana can be added to fruit smoothies if desired.

I ran out of fresh bananas (top right) so used one of my frozen bananas.  The banana looked a bit lighter than fresh and the texture was slightly thicker because it was still froze.  This has no effect when the banana is used for smoothies or baking.

baked banana cake
I have a confession...this is the first time I have made a banana cake.  It's not as if I couldn't it's just that my friend sends a banana cake in exchange for a jar of my home canned salsa, much to my husband's delight.  I turned to my trusty Big Red Betty Crocker's Cookbook (circa 1969) to make an old fashion banana cake.

I used my Nami coated baking dish for this cake.  Older cookbooks are my favourite for frugal recipes.  They tend to use simpler and fewer ingredients that can easily be modified for healthier versions.  I used unbleached white flour, sea salt and butter.  I omitted the nuts as my husband does not like nuts in most baked goods.

banana cake with cream cheese frosting
My friend always frosts the banana cakes she sends over so I decided to do the same.  It has always been a cream cheese frosting but she has since changed that.  I chose an easy, deliciously creamy cream cheese frosting.  This frosting is a real keeper, one that can easily be used to frost a wide variety of cakes and cupcakes.  It is very easy to make but when first started it looks like it will be too dry.  It won't be.  A bit of blending is all it takes to get a beautiful, versatile frosting sure to please that pairs nicely with banana bread!


cut banana cake crumb structure
My husband was quite pleased when he spotted the freshly frosted cake sitting on the counter.  We we have a special dinner that night that included the cake for dessert.  It is easy to see why this cake has stood the test of time.  The old fashion banana cake is simply delicious!  The cake is moist and tender with a nice body.  The flavour is wonderful, not too sweet, just perfect and the cream cheese frosting compliments the cake nicely.   The cake is cut into serving sizes directly in the pan.  This makes it a very easy cake for after school snacking.  The unfrosted banana cake, like most cakes, should freeze nicely.  The batter could also be used to make cupcakes.  Hands down this banana cake and frosting combination is a sure winner! 


Monday, November 11, 2013

Home Canned Picante Sauce

I am constantly looking for as well as developing new, safe home canning recipes.  This fall I added home canned picante sauce to my ever growing list of must make recipes.  Picante means hot but the recipe I used was mildly pungent and stimulating.  The results were delicious!  I will do a bit of tweaking for the next batch but overall, I am quite pleased with the sauce.  This one is a keeper!

home canned picante sauce
I decided to try the picante recipe in Bernardin's Tomatoes Canning & Specialty Recipes.  This easy sauce has the texture of a chunky salsa but different flavour notes.  Parsley can be substituted for the coriander if desired.  It can be served with a rice or meat dish, or used as a dipping sauce for chips and seafood.  This sauce can be puréed for use as an enchilada sauce.  It can be home canned chunky or puréed so be sure to make a batch or two of each!

Picante Sauce
source: Bernardin Ltd., Tomatoes Canning & Speciality Recipes (2000), Pp. 64

7 c coarsely chopped tomatoes
1½ c coarsely chopped Spanish onion
½ c finely chopped jalapeño pepper
2 cloves garlic, minced
1 c malt vinegar
1 can (5½ oz) tomato paste
1 tbsp pickling salt
1 tsp red pepper flakes
1 tbsp finely chopped coriander
1 tsp cumin

Prepare vegetables.  Leave ingredients as is for picante sauce or purée mixture if making enchilada sauce.  Place all ingredients except coriander and cumin into large saucepan.  Bring to a boil over medium heat.  Boil gently for 45 minutes.  Stir in the coriander and cumin.  Continue boiling for 15 minutes for picante sauce or 30 minutes for enchilada sauce.  Ladle sauce into hot 250 ml (half pint) jars.  Wipe rims and cap with metal snap lids, Tattler reusable canning lids or glass inserts as per instructions for type of lid used.    Process in boiling water bath for 20 minutes.  Remove from canner.  Tighten bands fully if using Tattler lids or glass inserts.  Allow to cool undisturbed for 24 hours.  Remove bands and test for seal.  Wash jars and label for storage.

Yield: about 8 - 250 ml (half pint jars), 7 enchilada sauce


Wednesday, September 25, 2013

Kitchen Memories Two A Collection of Recipes by The Little Schoolhouse and Museum in Tehkummah Township on Minitoulin Island, Ontario

During our great road trip/camping adventure we stayed overnight in South Baymouth, Ontario where we would board the Chi-Cheemaun ferry that would take us across Lake Huron to Tobermory.  The weather was cold and damp but we still took a walk-about before settling into our room for the night.  Across the main road from our motel we had a lovely view of the Chi-Cheemaun dock.  Scattered across Ontario there are a multitude of small, one room schoolhouses that have been converted into homes.  A few have been rescued and preserved as museums.  Such was the case with the was The Little Schoolhouse and Museum beside the motel to the north.  Unfortunately, we could only peer in the the windows for a glimpse of the past as the museum was closed.

Kitchen Memories Two a recipe collection by The Little Schoolhouse and Museum in Tehkummah Township on Manitoulin Island
We wandered from the museum around the motel pool ending up in the motel gift shop.  I always delight in finding community fundraiser cookbooks.  These types of cookbooks are comprised of a collection of recipes submitted by members of the community or organization then assembled into a booklet format to be sold as a fund raiser.  I was quite happy to find Kitchen Memories Two (June 2013), a collection of recipes by The Little Schoolhouse and Museum in Tehkummah Township on Minitoulin Island, Ontario.  This recipe book was compiled by residents of Tehkummah Township in support of the museum.  This really is a nice recipe book that I will be making a few recipes from!

These types of recipe books are a treasure not only from a cooking perspective but also are of interest to family historians and genealogists.  For example, several recipes in this book have the contributor's name  followed by 'sister' of so and so, giving valuable relationship connections useful in family history research.  Quite often recipes are contributed in honour of a loved one no longer living.  From a culinary perspective, these are very much home style cooking recipes.  Recipes contributed tend to be family favourites and family signature recipes, some handed down from generation to generation.  One thing I have found too, is the recipes submitted tend to use easily accessible ingredients. 

canning secting in the Kitchenen Memories Two recipe book
It is common for fundraiser recipe books to have one or more home canning recipes.  This can be problematic.  All home canned foods must be properly processed to ensure a safe product.  These types of recipe books seldom give the safe canning processing methods of boiling water bath (high acid foods) and pressure canning (low acid foods).  Some as in this recipe book may include instructions for unsafe canning methods such as oven or open kettle canning.  Someone following the instructions for canning meat in this recipe book could find themselves with a product that could make them very ill or possibly worse!  Another problem is ingredient omissions that would not be a problem when cooking but can be critical when home canning. 

I shudder when I see this type of thing.  Improperly home canned food is nothing to fool around with.  It really is like playing Russian roulette with your's or your loved ones' lives.  This recipe book was published in June of 2013 so there really is no excuse not to use current safe canning methods.  Honestly, I wish they would just refrain from publishing home canning recipes in these types of publications.  That being said, an experienced home canner can convert most of these recipes into safe-to- can simply by comparing them to tested home canning recipes, making the necessary adjustments then processing using the appropriate method. 


Sunday, April 14, 2013

Garlic Roast Beef with Roasted Garlic Mashed Potatoes and Home Canned Green Beans

Garlic has been richly entrenched in folklore for warding off vampires.  This likely stemmed from the practice of wearing garlic around the neck in days long ago.  Garlic is a tasty culinary herb but it also has medicinal properties.  It has antibiotic properties (contains the sulfur compound allicin), lowers blood pressure, is good for the circulatory system, promotes heart health, promotes a healthy immune system, increases bile production, decreases liver fat and reduces cholesterol.  Furthermore, ingesting garlic offers protection against mosquitoes which in turn protects you from contracting diseases via mosquito bites (eg. West Nile Disease).  Chewing on a raw clove of garlic releases allicin which kills the strep throat bacteria.  Other medicinal uses include relieving the pain of insect bites; treating sprains, toothache, tonsillitis, bruising, ringworm and clearing sinuses.  While you can buy garlic capsules, incorporating an abundance of fresh garlic into your diet works better and is less expensive.

searing the cross cut rib roast in Dutch oven
We are nearing that time of year again when our beef on the hoof will be ready.  This year the estimated time we will be getting it is the first week of June which gives me a bit more time to pare down our freezer contents.  Still, we are in high gear eating from the pantry and freezers!

I thawed a cross cut rib roast to cook for garlic roast beef  in my new enamel coated Dutch oven.  I often cook roasts without thawing so this was a bit different.  I let the roast thaw for a little over 24 hours in the refrigerator.  The roast was tied, very close to rectangular shaped.  I heated extra virgin olive oil in the Dutch oven then quickly seared the roast on all four sides.   Normally I don't sear roasts unless cooking is a slow cooking but this time I wanted to cook at a low temperature so seared for flavour.

seared cross cut rib roast seasoned
I pre-heated the oven to 200°F.  I seasoned the cross cut rib roast with Worcestershire sauce and garlic pepper then topped with whole cloves of garlic and slices of onion.  This gave me two elements of garlic, fresh and powdered for flavour.  The fresh garlic would roast as it cooked but not to the degree of plain roasted garlic that has a deeper caramelized note mingling with a hint of sweetness.  I added about a three quarter cup of water to the bottom of the Dutch oven.  The lid of the Dutch oven is designed to be self basting so reasoned that there would be just enough gravy for that night's dinner.  Once the roast was prepared, I covered it and place the hot Dutch oven into the pre-heated oven.  I cooked the covered  roast at 200°F for 1½ hr  then raised the temperature to 275°F for ½ hr. 

garlic roast beef
While the roast was cooking, I prepared the roasted garlic mashed potatoes (recipe below).   These would be reheated during the last ½ hr of the roast cooking.  The garlic mashed potatoes can actually be made ahead of time and refrigerated until you want to warm them for a meal. 

I was rather pleased with the results!  The roast was nicely browned for nice eye appeal with a rich looking au jus that could have been strained then used without thickening.  The aroma was divine!  I removed the roast to rest.  I lightly strained the au jus, mashing in the roasted garlic then thickened with a lightly seasoned corn starch slurry.  Really, there is nothing wrong with leaving the onion slices and garlic pieces in the au jus for serving.  Mashing the garlic just adds more flavour to the au jus.

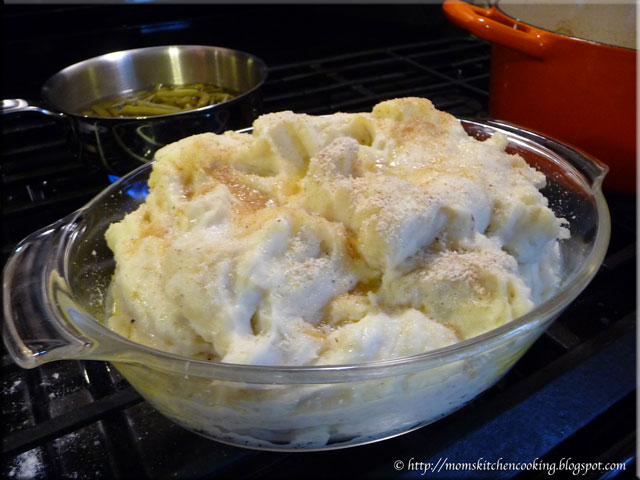
roasted garlic potatoes
Swedish potatoes have been a long time family favourite with their rich, creamy texture and just a bit of tang in the flavour.  I originally learned to make them from my Mother-in-Law and while I still make the original, I have developed several potato dishes based on the original.  The original Swedish potato dish is heavy on sour cream, cream cheese, butter and heavy cream all of which make this dish higher in fat content.  My roasted garlic mashed potatoes cut that fat significantly.  The potatoes are not as creamy as I purposely leave in smaller chunks of potatoes but the flavour is a sure winner!  These potatoes freeze and reheat well.

Roasted Garlic Mashed Potatoes
recipe by: Garden Gnome

8 - 10 medium sized potatoes
½ c sour cream
½ c cream cheese
½ small onion
2 cloves garlic
1 tbsp roasted garlic
½ tsp fresh cracked pepper
1 tbsp butter
½ c 2% milk

topping:
dry bread crumbs
1 tsp butter
garlic chives (optional)

Wash and peel the potatoes.  Cut into chunks.  Peel garlic cloves.  Thinly slice the onion.  Place potatoes, onion slices and garlic cloves into steamer basket.  Steam until the potatoes are fork tender.  Pour the potatoes, garlic and onion mix into stand mixer bowl.  Add the remainder of the ingredients.  Mix until semi-smooth (mainly smooth with some small chunks).  Spoon the mixture into an oven proof casserole dish.  Divide the topping butting into small dabs and scatter over top of the potatoes.  Sprinkle a light coating of dry bread crumbs on top.  Sprinkle chopped garlic chives on top.  Heat in oven until top is lightly golden.

garlic roast beef with roasted garlic mashed potatoes and home canned green beans
I served the garlic roast beef with the roasted garlic mashed potatoes, home canned green beans, and a side salad with homemade creamy garlic dressing.  Home canned green beans are one of our favourite side dishes so I can a lot of them.  I'm very much looking forward to the upcoming growing season as there are only 4 - 500ml jars of green beans left!

This was a sure to please, easy to prepare dinner packed full of garlic goodness!  Each of the layers of garlic (fresh, roasted, dry) added their own distinctive notes yet were not over powering.  Garnishing the potatoes with garlic chives will add another subtle garlic note.  The end result was delightfully delicious!  And no we did not have garlic breath :)


Wednesday, August 08, 2012

Dill Slices and Best Bread-And-Butter Pickles

Quite often I work with hampers of produce when home canning.  A hamper is 5/8 of a bushel so eight hampers is the equivalent of 5 bushels.  My comfort level tends to be 1 to 3 hampers depending on the produce and the complexity of the products being made.  This is the amount of that produce I can comfortably process within usually a day but sometimes it spreads into the following morning.  I have four of the cheery yellow hampers, courtesy of a relative who is a commercial grower.  The vast majority of the hampers of produce I process are not purchased produce.  When I buying produce, I take a couple of hampers with me as many vendors are reluctant to part with their own hampers and rightly so as they are expensive.  Vendors will transfer the produce into plastic bags or cardboard boxes but I'd rather use my own hampers.  Plastic bags can cause produce to sweat and over heat on the journey home and wet produce causes the bottom of cardboard boxes to give way spilling produce everywhere.

hamper of pickling cucumbers
Pictured is the hamper of pickling cucumbers I purchased for $20.  It was full but I already had put some in the sink for washing before I remembered to take a picture.  A pickling cucumber is a variety of small cucumber that at maturity reaches a length of about 4 to 6 - inches.  If left longer on the vine, they will thicken in diameter somewhat but not get much longer.  They are easy to grow in the home garden but if you want to make a lot of pickles at once, buying them is a option.

Some produce purchased from roadside stands is not nice and clean like that found in the grocery stores.  As you can see, the pickling cucumbers were rather dirty. 

washing pickling cucumbers
Washing the cucumbers is not difficult, just time consuming.  It is important to use a vegetable brush when washing them to get dirt out of the crevices.  I use the two sink method.  I put cold soapy water in one sink then add the cucumbers to be washed in small batches.  When washing cucumbers always use cold water to keep them crisp.  Once the cucumbers are washed, I rinse under the faucet then transfer to a sink of cold water with a little vinegar in it to soak for 10 minutes.  The vinegar removes any residue and surface bacteria.  After the rinse, I transfer the cucumbers to a large stainless steel bowl for processing.  Of note, the water in both sinks is changed after washing a batch of the cucumbers.

dill slices and best bread-and-butter pickles
I used 8 lb of the pickling cucumbers to make dill slices and Best Bread-and Butter Pickles.  Although a food processor can make quick work of slicing cucumbers, I found I had better results slicing the cucumbers by hand.  I had a yield of 6 - 500 ml jars for each kind of pickles.  Both pickles looked gorgeous in the jars.  The recipes are written as I modified them.

Dill Slices
modified from: Bernardin Ltd., Bernardin Home Guide to Preserving, 2006, Pp.73

4 lb medium pickling cucumbers
4 c pure apple cider vinegar
4 c water
¾ c granulated organic sugar
½ c pickling salt
3 tbsp pickling spice
6 bay leaves
6 garlic cloves
3 tsp mustard seed
6 tsp dried dill seed
1/8 tsp Pickle Crisp (calcium chloride) per jar

Cut a thin slice from each end of the cucumber and discard.  Slice into ¼ - inch slices.  Set aside.  Tie pickling spices into a cheese cloth bag.  Combine vinegar, water, sugar and salt in large stainless steel saucepan.  Add the spice bag to the vinegar mixture.  Bring to a boil and simmer 15 minutes.  Remove from heat.  Packing one jar at a time: put a bay leaf, 1 garlic clove, ½ tsp mustard seed and 1 tsp of dried dill seed into hot jar.  Pack cucumber slices into jar leaving ¾ inch headspace.  Add 1/8 tsp Pickle Crisp.  Cover vegetables with hot brine leaving ½ inch headspace.  Wipe rim.  Adjust two piece metal snap lids (or Tattler reusable lids or glass inserts).  Screw bands on jars (adjust accordingly if not using metal snap lids).  Process for 10 minutes in BWB canner at altitudes up to 1,000 feet above sea level.  At higher altitudes refer to altitude adjustment chart on Canning FYI page.  Remove from canner.  Adjust bands if using Tattler or glass inserts.  Allow to cool 24 hours.  Remove bands and test for seal.  Wash and dry bands and jars.  Label and store.

Best Bread-And-Butter Pickles
modified from: Ellie Topp and Margaret Howard, Small-Batch Preserving, 2001, Pp. 143.

4 lb small pickling cucumbers
2 medium onions, thinly sliced
1 sweet green pepper, cut in thin strips
1 sweet red pepper, cut in thin strips
2 tbsp pickling salt
4 c white vinegar
3 c granulated organic sugar
2 tbsp mustard seeds
1 tsp celery seeds
½ tsp turmeric
½ tsp ground cloves

Cut a thin slice from the ends of each cucumber and discard.  Slice into ¼ - inch slices. Slice the onions and peppers.  Place cucumbers, onions and peppers in a stainless steel bowl.  Sprinkle with salt.  Cover and let stand 3 hours.  Rinse twice and drain thoroughly.

Combine remaining ingredients in large stainless steel saucepan.  Bring to a boil over high heat.  Add vegetables.  Return to a boil and boil 30 seconds or just until cucumbers are no longer bright green.   Pack vegetables into jar leaving ¾ inch headspace.  Cover vegetables with hot brine leaving ½ inch headspace.  Wipe rim.  Adjust two piece metal snap lids (or Tattler reusable lids or glass inserts).  Screw bands on jars (adjust accordingly if not using metal snap lids).  Process for 500 ml for 10 minutes [15 minutes for L] in BWB canner at altitudes up to 1,000 feet above sea level.  At higher altitudes refer to altitude adjustment chart on Canning FYI page.  Remove from canner.  Adjust bands if using Tattler or glass inserts.  Allow to cool 24 hours.  Remove bands and test for seal.  Wash and dry bands and jars.  Label and store.


Tuesday, August 07, 2012

Fast Favorite Garlic Dill Pickles (Kosher-syle Dill Pickles)

Continuing on my pickle making quest to find a good dill pickle recipe and after doing a couple of batches of bread and butter pickles, I made my first batch of dill pickles.  Now I have a very long history of dill pickle failures.  The pickles have always come out limp and that just isn't acceptable in a dill pickle!  I even tried adding alum (potassium aluminum sulfate) which is an old fashioned crisping agent but that can give a bitter flavour to the pickles and may cause digestive upsets.  I am armed for success this year.  I have pickling lime (calcium hydroxide), Pickle Crisp (calcium chloride) and copious amounts of ice for soaking.

Pickling lime is a crisping agent that requires soaking the prepared cucumbers in a solution of pickling lime and water for at minimum 2 hrs to overnight,  The pickles must then be rinsed at least three times to remove all traces of the pickling lime.  Pickle Crisp can be added to any jar of fresh packed (not cooked) pickles like the Fast Favorite Garlic Dill Pickles I made.  It's easy to use with no extra timing to worry about.  Icing is used in many dill pickle recipes to firm the pickles.  Salt is usually added to draw a bit of moisture out of the cucumbers then they are covered with ice and allowed to sit overnight.

fast favourite garlic dill pickles
I made a doubled batch of the Fast Favorite Garlic Dill Pickles in Small-Batch Preserving.   The recipe gave a yield of 4 - 500 ml jars; doubling gave me a total yield of 4 - L jars.  Two jars were whole and the other two spears.  Fresh dill is very difficult to find here this year.  Neither grocery store or the vegetable stands had it and my small plant is barely hanging in so I substituted dried dill seed.  The recipe is written as I modified it. 

Fast Favorite Garlic Dill Pickles
modified from:  Ellie Topp and Margaret Howard, Small-Batch Preserving, 2001, Pp. 138

6 lb  small pickling cucumbers
4 c white vinegar (5% acetic acid)
4 c water
4 tbsp pickling salt

1 large garlic clove per jar 
2 tsp dill seed per jar
¼ tsp Pickle Crisp (calcium chloride) per jar

Cut a thin slice from each end of the cucumbers and discard.  Combine vinegar, water and salt into a saucepan.  Packing one jar at a time, add 1 garlic clove, 2 tsp dill seed and ¼ tsp Pickle Crisp (calcium chloride) per jar.  Pack in the prepared cucumbers, whole or spears tightly leaving ½ - inch headspace.  Ladle the hot brine over the cucumbers leaving ½ - inch headspace.  Wipe rims.  Place lids of choice (metal snap lids, glass inserts, Tattler reusable lids) on the jars.  Apply band according to the lid of your choice.  Process 10 minutes for 500 ml (pint) jars and 15 minutes for L (quart) jars at altitudes below 1,000 feet above sea level.  For altitudes above 1,000 feet above sea level adjust timing according to the altitude chart on the Canning FYI page.   Remove from canner.  Tighten bands if using glass inserts or Tattler reusable lids; do not tighten bands if using metal snap lids.  Allow to cool 24 hours.  Test for seal.  Remove bands.  Wash jars and bands.  Bands can be stored separately or replaced loosely on the jars.  Label and store.

Bon Appétit!  

Garden Gnome
©2006-2012


Saturday, August 04, 2012

Low Sugar Gooseberry Jam

When we first looked at our new property back in September of 2011, I noticed the fruit trees and over grown gardens.  Tucked into one side garden in the backyard is a gooseberry bush but I didn't know that is what it was until this spring when I noticed a robin frequenting the bush.  Upon closer inspection, I discovered it was a gooseberry bush so officially declared war on the robin.  I wanted those berries for jam!  Well, the robin didn't quite see it that way.  He would sit on the fence yelling at me every time I got close to the bush.  He rounded up other birds in the neighbourhood to pull the sheets off the bush.  Finally, I broke down and bought three packages of bird netting at the dollar store, sewed them together and fastened them securely to the bush.  He was none to pleased at this turn of events but I did manage to get enough gooseberries to make a small batch of low sugar gooseberry jam.

low sugar gooseberry jam
Gooseberries are slightly tart berries and rather small.  Gooseberries grow on a low bush with long, sharp thorns so harvesting them is no easy feat.  I found picking slowly minimized scratches on my arms.  I had to pick over a period of a few days to get enough gooseberries for a batch of jam.   I used reusable glass inserts on the jars of jam for sealing.  I really love using the glass inserts!

Low Sugar Gooseberry Jam
recipe by:  Garden Gnome

3 c chopped gooseberries
2 tsp lemon juice
1½ c granulated sugar
3 tsp calcium water
1½ tsp Pomona's Universal Pectin

Wash the gooseberries then rough chop using a food processor.  Measure 3 c of the prepared gooseberries into a large sauce pan.  Stir in lemon juice and calcium water.  Mix the pectin with the sugar.  Bring the fruit mixture to a boil.  Stir in the sugar pectin mixture.  Return to boil and boil 1 minute.  Remove from heat.  Stir for 5 minutes.  Ladle into hot jars.  Wipe rim.  Cap with metal snap lids, Tattler reusable lids or glass inserts.  Process in BWB for 10 minutes at altitudes up to 1,000 feet above sea level.  If above that altitude refer to the altitude adjustment chart.


Saturday, July 07, 2012

The Coconut Man

Aruba is a beautiful Caribbean island with a multitude of sightseeing opportunities.  The climate varies little from the annual average of a sunny 81ºF/27ºC tempered by the northeasterly trade winds.  It is out of range of the Caribbean hurricanes.  During our recent spring vacation, we took advantage of the sightseeing opportunities there with a side sightseeing trip made almost daily.  We visited the California Lighthouse, named after the steamship California (wrecked September 23, 1891) located just off of Arashi Beach on the northwest tip of the island.  The lighthouse sand coloured lighthouse on an octagonal base is quite impressive!  While it is no longer open to the public, the lighthouse is well worth visiting.  Adjacent to the lighthouse is La Trattoria el Faro Blanco, a small restaurant featuring Italian cuisine.  Closer to the lighthouse there is a little refreshment stand featuring frozen drinks and sodas.

the roadside coconut stand
The refreshment stand was really quite small, offering little shade to those working there or visiting.  Small tables were set up to hold additional beverage coolers. .  Bins of coconuts were set along one small table waiting to be opened for use in the frozen drinks.  Both the coconut meat and juice are used in these delicious, refreshing concoctions.

Coconut palms are abundant on the island which means coconut is an ingredient in many dishes and drinks.  Coconuts sell for $3 to $5 from street vendors but depending on where you stay in Aruba, you may be allowed to gather them for free.  Be sure to ask though before gathering coconuts.

the coconut man preparing coconuts
Coconuts have a hard outer shell (green) that protects the inner shell (brown) surrounding the meat and juice.  A fresh coconut should have juice in it.  When you buy coconuts in North America, the green shell is usually removed.  The brown shell is then wrapped in plastic to prevent the meat and juice from drying out.  Always shake a coconut to be sure there is juice inside before buying it.  Of note, the actual coconut juice can act as a strong laxative so do use caution in that respect.  It is quite easy to become dehydrated in Aruba as it is a desert island.  It is also important to not drink coconut juice from a coconut tree that has been infected with the red palm weevil as an injected toxin taints the juice.

I was amazed watching the vendor opening the coconuts with a machete!  He was a very friendly bloke but then most are in Aruba, known for it's catering to tourism and being One Happy Island!  Here's a short video I took of him preparing the coconut while a gecko tickled my toes.


The only tools the vendor used were a machete and piece of the broken shell to scoop out the coconut meat.  It was quite impressive to say the least!

Coconut milk is available in the grocery stores in North America.  Here, in beautiful southwestern Ontario I pay about $2.19 for a 398 ml/13.5 oz can of coconut milk.  It doesn't go on sale because coconut milk is a specialty item.  However, a large coconut can often be bought for $1.79 or less.  It gives a yield of 4 to 6 c (L to 1.5 L) of coconut milk.  Here is the recipe for making your own coconut milk that tastes so much nicer and less expensive than the store bought, canned version.

Coconut Milk
source: This is the Way We Cook!, compiled by Jewell Fenzi, ProGraphics Inc, Aruba. Pp. 42

1 c grated coconut*
3 c boiling water

Place the coconut meat in a saucepan.  Pour the boiling water over it and cover tightly.  Let stand for 30 minutes.  Pour the liquid through a fine sieve while pressing all the moisture from the coconut.  Discard the coconut and reserve the coconut milk for cooking.

*Fresh coconut gives a more delicate flavour but desiccated meat may also be used.


Friday, April 13, 2012

Homemade Fettuccine

Just before Easter I wrote about my new KitchenAid® pasta sheet roller and fettuccine cutter attachments.  Easter Monday, I decided to take a bit of time to play with the attachments.  I've made pasta manually so had an idea of what to expect.  Fresh homemade pasta just has such a lovely flavour!  It is more expensive than dried pasta (not bought on sale) and while I initially calculated it to be more expensive than store bought fresh pasta, it actually comes in less expensive.  If you raise your own chickens, the cost of homemade fresh pasta is considerably less expensive than store bought dried.  Homemade pasta can be easily tweaked to make vegetable or herb pastas as well and you can be sure you are using free range eggs if that is important to you, as it is to us.

first pass of pasta dough through the pasta sheet roller
Pasta dough should be firm and leathery to the touch but also pliable.  It should not be sticky or crumbly.  External factors like humidity or brand of flour can affect the dough consistency so small amounts of additional flour or water may be necessary to get the dough to the right  consistency.

I used the basic egg pasta recipe in the KitchenAid® manual.  I will be honest in that I had serious doubts about the dough.  It did not come together in a smooth ball and did not look like it would hold together well at all.  It was a very stiff dough!  I was almost ready to give up and try another recipe after the first pass through the pasta sheet roller on setting 1.  However, the dough actually came together quite nicely upon further passes through the roller.
 

Basic Egg Pasta
source:  KitchenAid®, KitchenAid® Pasta Sheet Roller and Pasta Cutter Attachments Manual, Pp. 9.

4 large eggs
1 tbsp water
3½ unbleached flour
½ tsp sea salt

Mix ingredients together using the flat beater.  Change to dough hook and knead 2 minutes on setting 2.  Remove dough from blow and hand knead 1 to 2 minutes.  Let rest 20 minutes.  Divide dough into quarters then flatten for processing with the pasta roller.

folding pasta sheet for next pass through the pasta sheet roller
The pasta sheet roller has 8 settings.  The first time through is on setting 1 which is the folding and kneading.   Each time you roll the pasta sheet, fold the ends in as pictured or fold the entire sheet in half then roll again.  If you use the half fold method, alternate how you feed the dough into the roller so you end up with two relatively straight ends.  Repeat the folding and rolling until you reach setting 2.  After that the dough does not need to be folded, simply passed through the roller until you reach the desired consistency.  Fettuccine can be rolled to setting 4/5 or if you want a thinner fettuccine it can be rolled to setting 6 or 7.   Within a couple of passes through the roller the dough took on a very smooth, uniform appearance.  

pasta sheet as it is being made
I was absolutely amazed at how quickly the dough was formed into smooth sheets of pasta.  It was beyond impressive!  Just look how gorgeous that sheet of pasta looks.  I can easily use these sheets as is to make lasagna noodles and ravioli as well as using the fettuccine cutter.

I had no problems passing the sheets of pasta through the various settings on the roller.   I folded the pasta sheets then stacked ready for cutting (bottom left).  By the time I got to the last couple of sheets, they had started drying a bit more than I would have liked so next time will cover them with a damp towel until ready to cut. 

cutting the pasta sheet
I cut each pasta sheet in half to pass them through the fettuccine cutter simply to make the resulting strands easier to handle.  Cutting the pasta was every bit as easy as rolling the pasta.  Each pasta sheet fed through the cutter, easily cutting the sheet into fettuccine. 

For just learning how to use the roller and cutter, the problems were minimal as was the time it took to get the fresh made pasta onto a drying rack.   I dried the pasta (see below) because I wasn't sure how much we would use for dinner and I wanted to try the drying process.  In all honesty, without the drying, rolling and cutting the dough took me about the same time as spooning batter into muffin tins.  With the drying time, it took less time than getting bread ready for baking.  So, in terms of time, homemade pasta takes very little time.

drying the pasta
I used my brand new (when we moved here) clothes drying rack to dry the pasta.  The thing is too flimsy to dry clothes on anyway.  I found the best way to load the rungs was to catch the pasta half-way through the cutter using my hand turned sideways, thumb up so the pasta draped over my hand.  I then transferred it to the rungs and separated any strands that stuck together.  I let the pasta dry about 45 minutes before transferring it ready for cooking and storage.  KitchenAid® warns that foods containing perishable ingredients like eggs should not be un-refrigerated for more than one hour as this is a food poisoning rick that could cause sickness.  While homemade pastas are not suitable for drying as a shelf stable product, they will keep in the refrigerator and can be frozen for longer term storage.  The only thing I would do differently using this rack would be to place a clean towel under it to catch any pasta pieces that break off.

freshly made pasta ready for cooking and storage
Once the pasta had dried, I set out enough for that night's dinner and the rest was vacuum sealed for the refrigerator.  This is where I had to adjust my calculations.  The recipe basically made the equivalent of four packages of store bought fresh pasta.  That would have cost me about $14 but the homemade only cost me $1.44 which really works out to less than the cost of store bought dried pasta.  I won't eliminate dried pastas from my pantry storage but I will stock less.  Dried pastas will become more of what dried milk and cheese are, part of our emergency preparedness.  What the pasta attachments will do is eliminate buying store bought fresh pastas. 

I am very excited!  Tomorrow I will post about the dinner I made with the homemade fettuccine noodles because after all, taste is everything.  I will be experimenting with whole wheat and a variety of vegetable pastas as well as a few herbed pastas.  So watch for that coming in the near future.  I definitely will be buying the attachments to make spaghetti and thick noodles and I am looking into a pasta extruder to make shapes like elbow noodles. 


Wednesday, November 30, 2011

Baked Salmon with 7 Cheese Mac 'n Cheese

I grew up in a small town with a population just under 2,000.  We had one restaurant, a soft ice cream shop that was open only in July and August, a tavern,  a bakery and two very small and I do mean small grocery stores.   Oh, and we had a canning factory so the whole town smelled deliciously like tomato soup in the fall.  To this day, my favourite fall drink in the morning is not coffee but rather tomato soup.  My high school Home Economics teacher was adamant that using good quality food and easy recipes  was all that was necessary to prepare tasty home cooked meals.  Well, she would have to because she lived in the same small town where the choice of ingredients to cook with was rather limited.  Mind you back then there was not the variety of ingredients readily available like sea salt, organic sugar, fresh seafood, exotic seasonings and those types of things.  There was a lot less commercially prepared convenience foods (eg. cake mixes, etc.).   Even back then she taught us the value of food dollars and how to get the most for our food dollars.  I still use many of the recipes learned in that class!  One of the very first dishes she taught us was how to make macaroni and cheese.

baked salmon with seven cheese mac and cheese

When I was growing up, the only fresh fish we had was smelt.  We had canned tuna, canned salmon and once they came to town, frozen fish sticks.  My Mom was not a huge fish fan.  I can remember my excitement the first time I saw fresh fish at the market!  Now I buy fresh fish at one of the grocery stores or nearby fisheries.  We also enjoy locally caught fresh fish like bass, perch and pickerel.  While I enjoy a wide variety of fish, salmon is one of my favourite.

I baked a salmon fillet for dinner a couple of nights ago.  The fillet was about 10 - inches long, enough for two people.  I served the salmon with homemade 7 Cheese Mac 'n Cheese (recipe below) and an Asian vegetable mix consisting of yellow and orange carrots, snap peas, shelled edamame, whole baby corn and garlic sprouts.  It was delicious, easy to prepare, and frugal meal!

Baked Salmon
recipe by:  Garden Gnome

1 salmon fillet
1 tbsp butter
1 tsp Herbes de Provence

Place the salmon fillet on Silpat or parchment paper lined baking sheet.  Divide the butter into four portions then put the portions along the centre of the fillet.  Sprinkle the herbs evenly over the fillet.  Bake at 350ºF until salmon is cooked through, about 15 minutes.

seven cheese mac and cheese
Our Home Ec teacher taught us to make macaroni and cheese from scratch using a simple cheese sauce consisting of milk, flour and cheddar cheese.  It is still a classic method but I love experimenting with macaroni and cheese.  There are so many wonderful cheeses available so I've developed several versions of macaroni and cheese. The cheese sauce in this version is rich and creamy.  The liquid smoke is a secret ingredient I discovered in the macaroni and cheese served at Mike's Smokehouse BBQ & Grill in Tampa Bay, Florida.  It adds a wonder note to macaroni and cheese!  The trick when using liquid smoke is to add one drop at a time until you get the desired aroma and flavour.

7 Cheese Mac 'n Cheese
recipe by: Garden Gnome

¼ c Asiago cheese
¼ c Parmesan cheese
¼ c sharp cheddar cheese
¼ c mozzarella cheese
¼ c colby cheese
¼ c cream cheese
1 tbsp Cheez Whiz
¾ c milk
7 cups cooked elbow macaroni
4 - 6 drops liquid smoke

Grate the Asiago, Parmesan, cheddar, mozzarella and colby cheeses.  Stir the grated cheeses to mix.  Cook the elbow macaroni and drain.  Pour the hot pasta into a mixing bowl.  Stir in the cream cheese and Cheez Whiz.  Mix then stir in the grated cheeses.  Mix well then stir in 4 - 6 drops of liquid smoke.  Mix.  Pour the macaroni mixture into a 2 quart baking dish.  Pour the milk over the macaroni mixture.  Cover with foil and bake at 350ºF until cheese is bubbling.  Remove foil and bake until the top starts to brown slightly.  Remove from oven and serve.


Wednesday, December 01, 2010

Fruit Filled Turnovers

I have the habit of going through cookbooks marking the recipes I want to try.  Prior to the advent of post-it notes I used little strips of torn paper for marking.  As a result all of my cookbooks look like they have feathers!    When I'm  looking for something different to cook I grab which ever cookbook strikes my fancy at the time.  Then I pick one of the flagged recipes to finally try.  I have stumbled upon some great recipes this way!

prepared dough and turnover shaper
So it was with the fruit filled turnovers in the rolled cookie section of the Betty Crocker's Cookbook (1969).  I decided to finally try this recipe.  Rather than form the turnovers by hand I used a hinged turnover form that flutes the edge.  The other side cuts a perfect sized circle for the turnover form. 

The dough was quite rich and a bit on the difficult to work with side even when well chilled.  I found that keeping all surfaces well floured was key for not only rolling and cutting but also to get good release from the turnover form.

Fruit Filled Turnovers
source:  Betty Crocker's Cookbook, 1969. Pp. 150.

½ c shortening
1 c organic sugar
2 eggs
1 tsp vanilla
2½ c unbleached flour
½ tsp sea salt
¼ tsp baking soda
assortment of jams for filling*

Mix the shortening, sugar, eggs and vanilla together in bowl of stand mixer using the paddle attachment.  In a separate bowl combine flour, salt and baking soda.  Mix well.  Pour into the egg mixture the blend until smooth.  Scrape the dough onto a sheet of wax paper.  Form into a ball then wrap and refrigerate 1 hour.  Heat oven to 205ºC (400ºF).  Roll dough ⅟16  inch thick on lightly floured board.  Cut into 3 - inch circles.  Place a dough circle on the fluted side of the turnover form or if not using a turnover form leave on the cutting surface.  Spoon about a teaspoon of jam on one half of the dough.  Fold the dough over the filling and seal using the turnover form or by hand.  Place each filled turnover onto a Silpat® or parchment paper lined baking sheet.  Brush with milk.  Sprinkle with sugar.  Bake 8 to 10 minutes until golden brown.  Remove from oven and immediately remove from baking sheet.

*The original recipes has 4 separate fruit filling recipes however, I used my homemade strawberry jam.  It's easier and just as good.  Jam is the perfect substitute for these types of fillings.

baked fruit filled turnovers
The cookies came out quite nicely despite the difficulty working with the dough.  They were quite tasty!  I thought the dough portion would be more of a soft bread style  but instead it is a harder cookie style with a texture similar to sugar cookies.  Pictured are the cookies after they cooled.  A few if them had cracks with a bit of the filling oozing a little but surprisingly the filling didn't run much due to the heat of the oven. 

The nice thing about these cookies is you really can use any jam or jelly for the filling.  You don't need to make them all the same either.  The light sprinkling of sugar on top is a nice added touch as well.  


Monday, July 19, 2010

Frugal Kitchens 101 - Pomona's Pectin

Frugal Kitchens 101

We seldom use jams as spreads but rather as fillings, meat/poultry/fish glazes, an ingredient, topper and condiments.  Most of the jams I make are created by me.  I use Pomona's pectin which is a low methoxy pectin that I use to make gourmet syle low sugar jams.  I actually like making jams and jellies using local honey or maple syrup.  The flavour is amazing!  I can't do this using regular pectin that requires sugar for the gel.  Pomona's pectin (no affiliation or compensation) gives me clean, consistent results allowing me the flexibility when making jams and jellies.  At the same time it cost me money on the pectin alone and when making low sugar jams on the cost of sugar too.  From a canning perspective this is one of my most frugal additions to my canning repetoir.  Here's why:

  • storage  - Unlike other pectins, Pomona's pectin is shelf stable with no expiry date making it the ideal emergency preparedness product. It will consistently gel without fail.  Regular pectins (eg. Certo, SureJel) have an expiry date usually about a year from purchase after which time the gelling properties diminish or even fail.
  • flexibility - Pomona's pectin allows you to easily make test batches of jam using as little as a cup of fruit.  This is particularly useful when trying new combinations, testing for gelling and flavour.  In addition to this Pomona's pectin does not rely on sugar for gelling but rather calcium water.  Monocalcium phosphate is included with Pomona's pectin to make the solution as needed.  What this means is any sweetener can be used including honey, maple syrup and artificial sweeteners.  It should be noted that sugar in jams using regular pectins also plays the role as a bulk filler adding texture.  You can certainly use the same amount of sugar if desired while still having the flexibility of using Pomona's pectin and white sugar is the cheapest of the sweeteners.  However, Pomona's pectin allows you to experiment with other sweeteners. 
  • cost - Pomona's pectin costs $48 per pound bought directly from them and that includes shipping.  One pound gives a yield of 128 tsp at a cost of 37.5¢ per tsp.  A normal sized batch of strawberry jam using regular pectin gives a yield of 4 - 500 ml (pint) jars with the pectin portion costing approximately $2.49 to $2.79 (powdered, liquid).  To make the same sized batch using Pomona's pectin you would need 4 tsp at a cost of $1.50 so for each 4 - 500 ml batch of jam you save at least $1.  That doesn't seem like a lot of money but factor in the cost over 10 batches of jam or more.  
  • not corn based -  Regular pectin actually has trace amounts of corn in it something I learned from a member on one of the groups I frequent who is dealing with a severe corn allergy.  The problem with corn is it is found in some form in a wide range of foods including regular pectin.  Pomona's pectin is citrus based with no trace amounts of corn making it a safe product for those with corn allergies or insensitivities. 


Wednesday, March 31, 2010

Potato Bread Using Instant Potatoes

There seems to be a fear of deviating from the recipe when it comes to baking breads. Yet yeast breads can be tweaked a fair amount while still resulting in a great loaf of bread. Essentially all you need to make a good loaf of bread is yeast or starter, flour, and salt. Practically all other ingredients can be substituted or altered somewhat. I routinely substitute liquids because why use water if I can add flavour and I like substituting sweeteners. But some of my best loaves of bread have come about from blatant mistakes. Two examples of this are my favourite white bread and herbed tomato bread.

potato bread using instant potatoesPotato Bread

Potato bread is a great way to use up left over potatoes but I came across a recipe using potato flakes. I didn't have potato flakes so I looked around to see how I could make this bread using what I had on hand. From there I used the original recipe as a guide but modified a fair amount so this became a test loaf of bread. The resulting loaf was very moist, flavourful and nicely textured. It made an ideal sandwich bread but was also nice for toasting.

Potato Bread Using Instant Potatoes
recipe by: Garden Gnome

1 c buttermilk
⅓ c water
1 tbsp butter
1 tbsp organic sugar
1½ tsp sea salt
⅓ c instant mashed potatoes, complete mix
2½ c unbleached flour
1½ tsp instant yeast

Combine buttermilk, water and butter in large measuring cup. Warm slightly in microwave to just under room temperature. Place remaining ingredients in bowl of stand mixer. Mix on speed setting 1 to blend well. With mixer still on setting one slowly start pouring in liquids. Mix until dough cleans sides of bowl. Adjust with necessary with a little extra water if too dry or flour if too wet. Knead on setting 3 until dough is smooth and elastic. Remove dough ball from bowl. Wipe bowl with vegetable oil. Return dough ball to bowl. Cover with damp towel. Place in warm area and leave until dough is doubled. Punch down the down then form into a loaf and place in prepared baking pan. Let rise to double. Bake at 200ºC/400ºF until golden brown or loaf sounds hollow when tapped.


Friday, March 19, 2010

Monte Cristo Sandwich

Sandwiches have to be one of the most popular meal and snack choices! There are several of our favourite sandwich recipes in the archives. For that reason alone there seems to be no end to the various ways to prepare two pieces of bread with meat in between aka the sandwich. While there are many great ways to make sandwiches that aren't warmed up, there are also endless ways make cooked sandwiches including but not limited to toasting, grilling and using a sandwich press.

Monte Cristo sandwichMonte Cristo

Last Saturday we went out with friends of ours with stopping for dinner as part of the outing. One of our friends ordered a Monte Cristo sandwich (pictured). This sandwich contains turkey, ham and cheese then dipped in an egg mixture similar to French toast mixture then pan fried. A Monte Cristo is an easy to make sandwich at home.

You will need per sandwich:
note: Use store bought lunch meat or very thin sliced home cooked meat.

2 slices of bread
2 slices Black Forest ham
2 slices turkey breast
2 slices Swiss or Gruyere cheese
butter
egg mixture

egg mixture
3 eggs
⅓ c milk
dash of sea salt

For each sandwich butter one side of the bread. Cover one bread slice with 2 slices of cheese, 2 slices each of ham and turkey slices. Top with the other slice butter side facing the filling. Beat the eggs with milk and salt. Place 2 toothpicks diagonally to across width of sandwich to hold together. Dip the sandwich into the egg mixture. Fry in a pre-heated fry pan or griddle with a little butter until golden brown. Remove from fry pan or griddle. Cut in half. Remove toothpicks prior to serving.


Saturday, March 13, 2010

Shake & Bake Chicken Clone Recipe Revisited

I mentioned yesterday that we were relying on tried and true comfort food meals with our house being recently put on the market. What I'm looking for is good food without a lot of prep work. I'm also looking for meals that rely heavily on our pantry and freezer stores. I'm trying to use at least one food item from both the pantry and freezer for each dinner meal. This will help reduce what we have to move then I can spend a few weeks after moving restocking the pantry and freezer stores.

shake and bake chicken clone recipeShake & Bake Clone

One of our recent meals used up 2 packages of chicken from the freezer and a bit of homemade shake & bake chicken coating from the pantry. Sides included oven baked potatoes topped with cheddar cheese and bacon pieces, and steamed broccoli. It was a nice comfort meal that was easy to put together with little effort.

From time to time in life there are periods of time where it would be so tempting to pick-up take-out or eating out. The problem is a lot of these times the extra time spent getting take-out or eating out actually defeats the purpose by using up time that could be spent dealing with other pressing matters. While the meal was cooking I had time to work on the house so it was a frugal use of time. At the same time we ended up with a nice comfort meal without much effort.


Monday, January 18, 2010

Frugal Kitchens 101 - Frugal Recipes

Frugal Kitchens 101
We live in such a wonderful time where there is easy access to an abundance of recipes. One of the biggest things you will notices about newer recipes and online recipes is they tend to stipulate a certain brand for some of the ingredients. Many companies also have a recipe component to their website using of course their brand. In addition to this a lot of newer recipes include ingredients that in some cases can be rather difficult to find unless you shop online. The downside to using all brand name ingredients and exotic or hard to find ingredients is of course cost. The reality is that when it comes to most foods especially those used as ingredients in other dishes is brand doesn't matter at all. Del Monte green beans is the same as store brand green beens is the same as home canned green beans. The only difference you will see is size with a can of store bought green beans being 14.5 oz whereas home canned is 16 oz (500 ml). In most cases this little extra using home canned makes no difference at all. So when it comes to newer recipes that specify brand names don't be afraid to substitute with a store brand or home canned but it you really want to save money look to the older recipes.

There has been a growing interest in Depression era recipes and for good reason. These recipes came about when ingredients like flour, sugar and butter were rationed, when times were tough and homemakers quickly learned how to stretch what they had. The very idea of even getting a piece of fresh fruit out of season during the Depression in Canada or even in the winter pre-Depression was unheard of yet savvy Canadian homemakers had a good supply of fruits and vegetables put up in their cellars. It was a time of anything that could be put up was and meals were always cooked from scratch using the ingredients that were on hand. There were no fancy seasonings, mixes or other ingredients. The overall frugality and simplicity of ingredients is reflected in cookbooks written pre-1965. The earlier you go the more you will find excellent home economic tips that despite their age are still applicable today. At the same time there are many older books specific to home economics. One I thoroughly enjoyed is The Work-a-Day Girl by Clara E. Laughlin (published 1913). These types of books re an excellent way to see how you really can do with a lot less.

My earliest cookbook dates back to 1852 and belonged to my 4th great grandmother. I collect old cookbooks not only because of my culinary interests but also through my genealogy research. They are very much cherished! If you are interested in finding these older cookbooks check yard sales, estate sales, resale stores and antique stores. Take a trip to your local library and check those smaller libraries in surrounding communities as they may have a holding your local library doesn't. Another source for older recipes is newspapers normally archived in micro-fiche or microfilm. Newspapers often ran recipes in the Women's Section of the newspaper.

When it comes time to use your find, if the cookbook is pre-1900 and even some later than that you will want to protect it. I recommend taking a digital image of the recipe which surprisingly works quite nicely with a little bit of practice and doesn't damage the book. It is a lot quicker than writing out the recipe and unlike photocopying doesn't cost money or damage the spine of the book. Some microfilm machines have printing capabilities usually at 25¢ to $1 per sheet where as most micro-fiche machines have no printing capabilities. With a bit of practice you can also take digital images from either source. As with any digital imaging always take several shots and again with practice you will be able to get good shots. Edit your images of the recipe then print the image if desired. In some cases if the spine of the book is good you can use an ORC scan as well. This way you can gather quite a nice collection of older recipes complete with their wisdom without spending a lot of money.


Wednesday, January 13, 2010

French Canadian Braised Beef

I love finding new but old recipes that still work well. Old recipes are wonderful in that they don't specify brands and we all know that in some cases brand A may vary in taste from brand B not that it is ever much of a concern for me as I tend to use my home canned or home frozen variants. They also tend to use less ingredients specifically less exotic ingredients. If you want frugal recipes for saving a few dollars when cooking look for the older recipes.

French Canadian Braised BeefFrench Canadian Braised Beef

This recipe really starts out a lot like a stew and believe me I'm not exactly sure what makes this recipe French Canadian either. Likely this was a dish that was popular in French Canada at the time this cookbook was published (1965). In the end the sauce was quite thick, creamy in texture and tasty even thicker than a stew. It was rich, creamy and flavourful, definitely comfort food. In my opinion this dish could be adapted rather easily to using a slow cooker (crockpot) or the pressure cooker.

I made a couple of substitutions in the French Canadian Braised Beef recipe. The recipe didn't call for any oil so I added a bit to help with the searing. I substituted Montréal Steak Seasoning for the salt and pepper and I added a splash of Worcestershire sauce to bring a sparkle to the beef. I also exchanged the new potatoes called for in the recipe with cubed potatoes as I'm quite sure my ancestors would have made this type of dish during the winter when new potatoes were not available. In fairness the recipe does call for condensed cream of mushroom soup so I think my ancestors would have used heavy cream and perhaps mushrooms if they had them. I used the condensed cream of mushroom soup. I also changed the cooking method to add the fresh green beans in a few minutes before serving to keep the beans nice and bright.

French Canadian Braised Beef
modified from: French Canadian Braised Beef, Kate Aitken's Canadian Cook Book, 1965. Pp. 192.

2 lb stewing beef
¼ c corn starch
1 tsp Montréal Steak Seasoning
¼ c olive oil
1 medium onion, finely chopped
1½ c water
splash of Worcestershire sauce
1 c carrots, diced
1 c green beans, cut into 1-inch pieces
6 small potatoes, bite sized pieces
10 oz can condensed cream of mushroom soup

Place the stew been, corn starch and seasoning in a covered bowl. Shake until meat is well coated. Heat oil in Dutch Oven then add onion and cook until translucent. Add the beef. Sear meat on all sides. Add water and Worcestershire sauce. Stir well. Cover tightly. Reduce heat to simmer and let simmer until meat is tender. Stir in potatoes, carrots, and mushroom soups. Continue cooking until vegetables are tender. Stir in green beans. Cook until beans are just tender.
Serves 6


Sunday, December 27, 2009

Cranberry Roast Pork Loin

I very rarely buy foodie magazines although sometimes I am tempted by the food pictures on the front cover. The reason I avoid buying most foodie magazines is there ends up being one or two recipes worth trying but usually difficult to find in the midst of the copious advertisements. Instead, I get 2 free food related magazines that are put out quarterly - What's Cooking (Kraft Canada) and Food & Drink (LCBO, Ontario, Canada). Food & Drink leans towards a bit on the gourmet side but is a very valuable resource for enterainment cooking and cooking with beer, wine or spirits. I recently splurged one year subscriptions to Cook's Country and Cook's Illustrated. What I like about both of these magazines is the absence of advertisements. In addition to several recipes per issue there are great cooking tips and how-tos along with product reviews. These magazines will be a valuable resource in my kitchen!

roasted pork loin with cranberry sauceCranberry Roast Pork Loin

It is easy to get into a cooking rut when you preserve as much food as I do but the same can be said for anyone who keeps a very well stocked pantry. For example, fresh cranberries and commercially canned cranberries go on sale just before Thanksgiving so that is when I stock up. I freeze cranberries to cook fresh later or can as cranberry sauce. The majority of the time cranberries are paired with turkey but there is no reason they couldn't be used in another way, it's just I don't think to do so. So when it comes to cranberries I'm in a bit of a rut.

This month's issue of Cook's Country had a recipe for a roasted pork loin glazed with a cranberry sauce. Pairing cranberry with pork is not something I would have thought of immediately. I modified the recipe to half for a smaller cut of pork loin and I used home canned whole cranberry sauce. I also modified the roasting method. Of interest is the flavour of the cranberries was layered by using 3 forms as spoken about on Food Network Canada. Pictured is the roasted pork loin with the cranberry glaze just out of the oven.

Cranberry Pork Loin
source: modified from Cook's Country, December/January 2010, Pp. 10.

1½ lb pork loin roast
salt and pepper

1½ tsp butter
1 garlic clove, minced
⅓ tsp dried thyme
1 c whole cranberry sauce
¾ c cranberry juice
½ c dried cranberries
1½ tbsp ketchup
1½ tsp Dijon mustard
1 tbsp brown sugar
½ tsp white vinegar

1 tbsp cornstarch

Pre-heat oven to 220ºC/425ºF. Pat roast dry then season with salt and pepper. Score fat on top of roast in ½- inch intervals. Place pork, fat side up in baking pan. Roast 20 minutes. Combine the remaining ingredients except for cornstarch and about 2 tbsp of the cranberry juice. Bring to a low boil over medium-high heat. Reduce heat to medium low and simmer 5 minutes. Mix the remaining cranberry juice with the cornstarch to form a slurry. Slowly pour into the sauce while stirring. Continue to cook and stir until thickened. Spoon the mixture over the pork and continue to roast 20 to 25 minutes or the roast reaches an internal temperature of 63ºC/145ºF. Remove from oven. Let rest 10 minutes before slicing. Spoon sauce over slices for serving. Spoon the rest of the sauce into a serving bowl for passing at the table.

cranberry roast pork servedCranberry Roast Pork Dinner

Pork is considerably leaner than it was years ago due to the way pigs are raised in response to the demand for low fat meat alternatives. As a result the problem becomes keeping pork moist and tender after cooking. An easy way to do this is to use some type of sauce when cooking pork. I tend to use milk based sauces to help tenderize pork or fruit based sweet or savory glazes that add flavour when cooking pork.

The roasted pork smelled wonderful! I served the pork roast with baked Yukon gold and sweet potatoes and home canned green beans from the foodie road trip I made last summer. The meal itself ended up being low fat although that wasn't the original intention when I started putting things together. The cranberry sauce looked gorgeous and had good flavour but unfortunately lacked sparkle. I think it needed a touch of citrus specifically orange to brighten the flavour. The next time I make this I will substitute orange juice for the cranberry juice then garnish with orange zest. The white vinegar really didn't add any flavour so I would be tempted to use Basmatic or red wine vinegar instead. With a bit of tweaking to get that sparkle this will be a lovely cranberry sauce one that I may even can as a ready to use convenience product for the pantry.


Tuesday, March 03, 2009

Souped Up Cream of Broccoli Soup

Several years ago I discovered the food channel, Food Network. It quickly became and still is my favourite channel. While I enjoy watching and learning from all of the chefs and cooks, I am rather partial to Michael Smith. His philosophy is cooking without a recipe which is something that is very much my style of cooking. Some of the best meals are those made without using a recipe. I agree with him that a recipe is just a starting point. Recipes are not intended to written in stone!

Have you ever wondered why a dish you made using your friend's recipe did not taste like your friends? This is due to a few reasons. First every cook has little ways of doing part of the prep or cooking that isn't reflected in the recipe. These are not intentional omissions but rather they aren't mentioned because they are second nature to the author of the recipe so the author simply doesn't think to include them. For example they may only use sea salt but because that is all they use, they don't think to specify because to them it's just salt. The second reason that the recipe results will differ is the ingredients themselves. Something as simple as the variety of the tomato used in a dish can change the flavour yet most recipes do not specify the variety to use. Flavours of the same ingredient vary not only between brands but within the same brand depending on location. Some ingredients are only locally available so substituting another similar ingredient will have an effect on the dish. Finally don't over look the importance of emotion in relation to how we remember how a particular dish tasted. So next time you are following a recipe do a little experimenting. You will be surprised at what can happen!

Cream of Broccoli & Mushroom Soup

Winter is hanging in there so soup is always a welcomed meal. Virtually none of my homemade soups have an actual recipe that is meant to be followed exactly. They are jotted down in my kitchen journal as I make them so I can keep a record of tweaking but even as they appear on this blog they can still be tweaked further for your family's tastes.

Yesterday I decided to make cream of broccoli soup (my recipe here). I thought it would be a great soup on a cold, blustery day. As I was getting the ingredients out, the mushrooms caught my eye. Hmm, mushrooms would be a nice addition so they went into my ingredient group. I spotted the bacon and thought "why not?" so it went into the ingredient group as well. Instead of using a flour slurry to thicken the soup I decided on using instant potatoes. Instant potatoes are wonderful for thickening cream based soups! Use the finely ground instant potatoes rather than flakes for thickening although flakes will work in a pinch. I used turkey stock in place of vegetable stock. The resulting soup was quite lovely!

Method: Use the recipe in the link above as a start. Omit the cheese if desired as I did in this soup. Cut the bacon into pieces and fry. Drain and pat to remove fat. After adding the stock and partially blending the soup, add the mushrooms and bacon. Slowly pour in instant potatoes stirring constantly to get the desired consistency.