My photo
Ontario, Canada
I am a wife, mother and grandma who enjoys the many aspects of homemaking. A variety of interests and hobbies combined with travel keep me active. They reflect the importance of family, friends, home and good food.
Cook ingredients that you are used to cooking by other techniques, such as fish, chicken, or hamburgers. In other words be comfortable with the ingredients you are using.
--Bobby Flay

For Your Information

Please watch this area for important information like updates, food recalls, polls, contests, coupons, and freebies.
  • [March 19, 2020] - Effective Mar 17, this blog will no longer accept advertising. The reason is very simple. If I like a product, I will promote it without compensation. If I don't like a product, I will have no problem saying so.
  • [March 17, 2020] - A return to blogging! Stay tuned for new tips, resources and all things food related.
  • [February 1, 2016] - An interesting report on why you should always choose organic tea verses non-organic: Toxic Tea (pdf format)
  • Sticky Post - Warning: 4ever Recap reusable canning lids. The reports are growing daily of these lids losing their seal during storage. Some have lost their entire season's worth of canning to these seal failures! [Update: 4ever Recap appears to be out of business.]

Popular Posts

Showing posts with label cookies. Show all posts

Thursday, December 24, 2015

Last Minute Christmas Cookies Ideas

It's that time of year!  The jolly old elf himself will be making his grand entrance tonight.  There's still plenty of time to do a bit of last minute baking though, just in case.  Here's a few ideas of our favourite last minute easy to make Christmas cookies.


Tuesday, December 10, 2013

Gift From the Kitchen - Cookies in a Jar (White Chocolate Chip Cookies Revisited)

 A few days ago, I mentioned I would be focusing on holiday related topics for the remainder of December.  Gift giving is a big component during the holiday season and what better way to bring a smile to a loved one's face than with a gift from the kitchen.  These gifts need not be complicated or expensive but rather they are a gift from the heart :)

white chocolate chip cookies in a jarSo it is with cookies in a jar!  In November of 2009, I shared a very easy white chocolate chip cookies in a jar recipe, perfect for holiday gift giving.  The complete instructions can be found in that post.  A jar of the white chocolate chip cookies in a jar was gifted to one of our kids who still has it on display in their china cabinet!  It brings a smile every time I see it.

Any cookie recipe can be used for a cookie in a jar gift.   Just follow the basic instructions for the white chocolate chip cookies in a jar.  In general, drop cookie recipes with nuts, baking chips, or other chunky ingredients work best for the layering effect. 

Cookies are not exactly health food but you can substitute healthier ingredients if desired.  Use organic granulated cane sugar rather than plain granulated white sugar.  You can substitute any sugar with a sugar replacement like Truvia (natural) or Splenda (artificial).  If you use Truvia, the conversion is ½ c Truvia equals 1 c sugar.  If you use Splenda, it is a 1 to 1 substitution.  Use organic, unbleached flour or substitute organic spelt flour.  The healthier ingredients will increase the cost of each jar slightly but not enough to make them cost prohibitive.   On average, a cookie in a jar gift will cost about $2 in ingredients.  Healthier ingredients will add about 50¢ or less per jar.  You can save on the cost of the ingredients by buying them at a bulk food store. 

The decorative mason jar lids are available year round at Canadian Tire and Home Hardware or online from Bernardin.  Bernardin also sells plastic storage lids for mason jars in standard and widemouth sizes, also available year round.  The one litre mason jars are available year round from the same sources as well as Walmart Canada, and many grocery store chains.  They can often be found on sites like Kijji, or at yard sales and thrift shops.  Older mason jars with glass lids are also suitable for this application giving a retro touch sure to please.  I do not recommend using older mason jars with glass inserts (eg. Gem jars) as these jars are more valuable for home canning use.  Vacuum sealing of the cookies in a jar is optional but a nice touch to keep the mix fresher longer for the recipient.

If you need a few last minute gifts, then cookies in a jar may be just for you! 


Wednesday, October 24, 2012

Homemade Fortune Cookies

When we eat Chinese in a restaurant the final offer is always fortune cookies.  Fortune cookies are not authentic Chinese cuisine but rather an American invention.  We enjoy making Chinese food at home so I thought it would be fun to make homemade fortune cookies to finish off our meals.  Here is a short video showing how they are made.


Homemade Fortune Cookies

2 large egg whites
½ tsp pure vanilla extract
½ tsp almond extract
3 tbsp vegetable oil
½ c all purpose flour
1½ tsp corn starch
dash salt
½ c granulated sugar
3 tsp water

Preheat oven to 180ºC (350ºF).  Grease cookie sheet.  Blend egg whites, extracts, and vegetable oil until frothy but not thick.  Mix in remaining ingredients.  Blend until smooth.  [Work with only 2 cookies at a time as they harden very quickly.]  Drop 1 tbsp of batter per cookie on the cookie sheet spreading evenly to for a 4 - inch diameter circle.  Bake 11 to 12 minutes until edges are golden brown.  Working quickly, remove cookie and put fortune in centre.  Fold in half then bend over the edge of a cup.  Place in muffin tin to hold shape until cool.  Store in an airtight container.


Sunday, April 29, 2012

Yesterday's Comfort Cooking

It has been a brutal week, full of activity which really when combined with service and contract people coming in resulting in a hectic and frustrating week.  Our custom window treatment contractors were in last Saturday.  Both window treatments were wrong!  The kitchen panels were the wrong material and the front California shutters were only partially installed.  At almost $2,500 I was beyond being disappointed.   They came out yesterday to replace the panels so the kitchen is one step closer to being completely finished.  The shutters are scheduled to be fixed Wednesday evening.   I've been canning when I could get a stretch of a couple of hours and I did one smaller bulk cooking session but yesterday I was in the mood for homemade cookies after the custom window treatment contractors fixed the panels in the kitchen (looking good now!).   That translates into peanut butter or shortbread cookies, our two favourite homemade cookies.  It's not like I don't make other cookies but those are our comfort cookies!  I made a small batch (3 doz) of peanut butter cookies. Hey, these are a need right now!

peameal bacon roast
Carrying on the theme of comfort cooking for the day,   I popped a homemade peameal bacon roast in the oven along with a couple of potatoes for baking.  Peameal bacon is our favourite quick cook, low fat meat.  Although peameal bacon is a home cured pork loin, the texture is a bit different than ham.  Roasting the peameal as a chunk gives a bit smoother texture when cut compared to raw sliced then fried.  However, frying the peameal bacon slices gives a nice caramelization and bit of crisping to the coating that roasting does not achieve.  Either way, peameal bacon is a delicious, comfort meat!

peameal bacon roast meal
Baked potatoes are the perfect side for a peameal bacon roast as they can bake while the roast is cooking.  Any time you can cook more than one component of a meal in the same vessel, in this case the oven, it is a frugal use of energy.  I served the peameal bacon roast and baked potatoes with lightly buttered sweet peas and tomato slices.  Not pictured is the sour cream I topped my potato with for just a touch of creamy comfort.  Rounding up our comfort meal, we ate in front of the television watching Coronation Street.  The beauty of comfort cooking is the end result always makes you feel better :)


Thursday, March 01, 2012

Kitchen Quick Tips - Prevent Cookies From Drying Out

kitchen quick tips

Store soft or chewy cookies in a closed container with a a couple of cubes of sugar.  This will prevent the cookies from drying out, retaining a just-baked texture for two days.


Sunday, November 20, 2011

Ten Dozen Peanut Butter Cookies

I don't make a lot of cookies and I don't make them often yet when I do I turn to my Betty Crocker's Cookbook (circa 1969) for easy recipes.  There is a lot of history behind that cookbook!  My Mom gave it to me as a wedding gift that has served me well over the years.  It is my most prized and cherished cookbook and while I have a smaller Betty Crocker's New Cookbook (1996) and the newest copy of the the big red Betty Crocker Cookbook (2011), I still turn to my cherished 1969 edition. 

peanut butter cookies in the oven
My husband's favourite cookie is peanut butter.  I make them a couple of times a year using my tried and trusted recipe for peanut butter cookies from Betty Crocker's Cookbook (circa 1969).  I have used this recipe since being a newlywed.  It has brought many a smile over the years. 

If you have been following this blog you will know we recently moved and I made the ultimate decision to switch to natural gas as a cooking fuel.  This was a hard decision as I seriously loved my Jenn-Air slide in range.  I was determined to switch to natural gas with this move due to the ever rising costs of hydro in Ontario, Canada as well as being able to accommodate the larger stock pots and pressure canners I use on a regular basis.

I made a large batch of peanut butter cookies a couple of days ago, ten dozen to be precise.  I have read a lot of complaints about natural gas ovens with respect to them having hot spots so was a bit nervous baking cookies for the first time.  Pictured is a tray of the peanut butter cookies in the oven.  Granted I have gone from three oven racks to two but other than that, the cookies baked nicely without a problem.

ten dozen peanut butter cookies
So what does ten doezen peanut butter cookies look like?  Voila!  The white tray was prepared for a larger event we were hosting last Saturday.  I apologize for the quality of the picture as the cookies were not over baked!  I'm getting used to the lighting in the new kitchen that is resulting in a few less than ideal pictures. 

Peanut butter cookies freeze nicely so I set the tray aside for the weekend, filled a container with cookies for my husband to take to the office then packaged the rest for freezing.  It was a very productive evening!  Oh my gosh did the house ever smell good and my husband was in seventh heaven seeing that many peanut butter cookies.  Next up, shortbread cookies!


Monday, August 29, 2011

Frugal Kitchens 101 - The Cookie Jar

Frugal Kitchens 101

At one time a cookie jar filled with homemade cookies graced the counters of most homemakers.  Part of the fun grandchildren enjoyed was getting a delicious treat from Grandma's cookie jar.  The cookie jar was more than a cookie jar; it was a jar of homemade love from the kitchen.  Fast forward to living in the workplace and being brainwashed by the food industry that commercially prepared are superior to home cooked, the cookie jar has almost gone the way of the dinosaur.   This week's Frugal Kitchen's 101 discusses ways to make this old family tradition part of your kitchen.

  • cookie jar - A cookies jar need not be fancy or expensive, it just needs to hold cookies.   A limited range of cookie jars can be found in department stores.   Resale stores and yard sales are great sources for cookie jars.  You can get creative and make your own ceramic cookies custom painted to match your kitchen if you have access to a ceramics studio.
  • cookies -  The magic of a cookie jar is the cookies.  The great news is many homemade cookies are considerably less expensive than store bought.  Here are a few tips on keeping your cookie jar filled without taking up a lot of valuable time:
    • refrigerator cookies -  Refrigerator cookies the homemade version of commercially made cookie dough except less expensive and greater variety.  The simply cookie dough that is rolled into a tube about 2 - inch diameter.  The roll is wrapped in wax paper ready for you to use anytime you want.  The nice thing is you don't have to use the entire tube all at once, just cut into slices the desired amount.
    • freezer cookies - Most cookies freeze nicely.  Make a large batch of the desired cookie dough then divide it into what you would use for each pop-in-the-oven fresh baked cookies.  Wrap well then freeze.  Thaw in refrigerator then prepare and bake.
    • cookies in a jar - Make up several cookies in a jar for both gift giving and your own use.  The dry ingredients are layered into mason jars.  The wet ingredients are added when you are ready to make the cookies.  Almost any cookie recipe will work for this purpose and the mix is shelf stable to is a great way to stock-up your pantry.
    • bulk cookies -  Declare a cookie baking day then do a bulk baking session.  Bulk cooking and baking sessions are a great way to fill the pantry shelves and freezer. 
    • family time cookies -  Declare a family cookie morning.  Each member of the family has a part in the cooking making process.  This a great time to bond, share laughter and knowledge in a fun activity. 


Wednesday, December 01, 2010

Fruit Filled Turnovers

I have the habit of going through cookbooks marking the recipes I want to try.  Prior to the advent of post-it notes I used little strips of torn paper for marking.  As a result all of my cookbooks look like they have feathers!    When I'm  looking for something different to cook I grab which ever cookbook strikes my fancy at the time.  Then I pick one of the flagged recipes to finally try.  I have stumbled upon some great recipes this way!

prepared dough and turnover shaper
So it was with the fruit filled turnovers in the rolled cookie section of the Betty Crocker's Cookbook (1969).  I decided to finally try this recipe.  Rather than form the turnovers by hand I used a hinged turnover form that flutes the edge.  The other side cuts a perfect sized circle for the turnover form. 

The dough was quite rich and a bit on the difficult to work with side even when well chilled.  I found that keeping all surfaces well floured was key for not only rolling and cutting but also to get good release from the turnover form.

Fruit Filled Turnovers
source:  Betty Crocker's Cookbook, 1969. Pp. 150.

½ c shortening
1 c organic sugar
2 eggs
1 tsp vanilla
2½ c unbleached flour
½ tsp sea salt
¼ tsp baking soda
assortment of jams for filling*

Mix the shortening, sugar, eggs and vanilla together in bowl of stand mixer using the paddle attachment.  In a separate bowl combine flour, salt and baking soda.  Mix well.  Pour into the egg mixture the blend until smooth.  Scrape the dough onto a sheet of wax paper.  Form into a ball then wrap and refrigerate 1 hour.  Heat oven to 205ºC (400ºF).  Roll dough ⅟16  inch thick on lightly floured board.  Cut into 3 - inch circles.  Place a dough circle on the fluted side of the turnover form or if not using a turnover form leave on the cutting surface.  Spoon about a teaspoon of jam on one half of the dough.  Fold the dough over the filling and seal using the turnover form or by hand.  Place each filled turnover onto a Silpat® or parchment paper lined baking sheet.  Brush with milk.  Sprinkle with sugar.  Bake 8 to 10 minutes until golden brown.  Remove from oven and immediately remove from baking sheet.

*The original recipes has 4 separate fruit filling recipes however, I used my homemade strawberry jam.  It's easier and just as good.  Jam is the perfect substitute for these types of fillings.

baked fruit filled turnovers
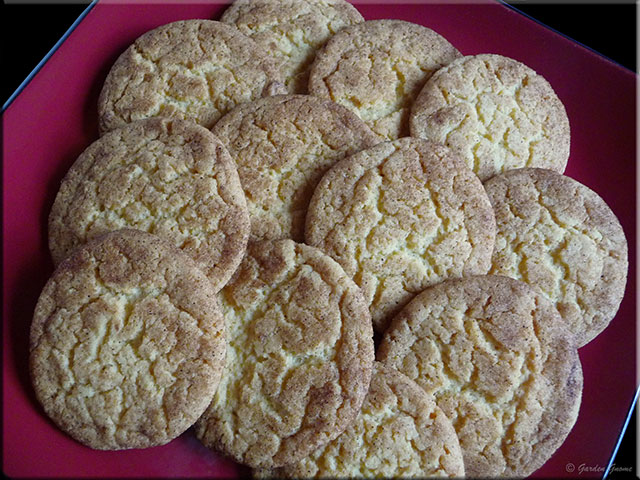
The cookies came out quite nicely despite the difficulty working with the dough.  They were quite tasty!  I thought the dough portion would be more of a soft bread style  but instead it is a harder cookie style with a texture similar to sugar cookies.  Pictured are the cookies after they cooled.  A few if them had cracks with a bit of the filling oozing a little but surprisingly the filling didn't run much due to the heat of the oven. 

The nice thing about these cookies is you really can use any jam or jelly for the filling.  You don't need to make them all the same either.  The light sprinkling of sugar on top is a nice added touch as well.  


Tuesday, September 14, 2010

Basic Refrigerator Cookies

Refrigerator cookies have become popular in the grocery stores because all you have to do is open the package, slice the dough and bake for yummy, hot cookies.  The problems with the store bought refrigerator cookie dough aside of the price is the packaging and preservatives.  Refrigerator cookie dough takes about 5 minutes to make.  Once made keep two or three rolls of the dough in the refrigerator for homemade convenience.

steps for making refrigerator cookies
Awhile back I was asked if I had any refrigerator cookie recipes.  Well as life goes I forgot to post about refrigerator cookies.  Here is a basic refrigerator cookie recipe that can be modified to make a few other cookies.  I will post those modifications as I make them various cookies using the basic refrigerator cookie recipe.

Refrigerator cookies are very easy to make.  Mix the dough (1).  The dough will be soft and sticky.  Scrape the dough onto wax paper (2) and form into a log shape.  Wrap the wax paper around the dough log and twist the ends to seal (3).  Refrigerate the dough for several hours.  Remove from refrigerator and slice for baking (4). 

refrigerator cookies
The ingredients for this batch of basic refrigerator cookies cost about $1.20 in comparison to store bought refrigerator dough that costs about $2.49.  The homemade version makes 3 dozen large cookies or 90 - 1" diameter cookies whereas the store bought dough makes 2 dozen medium sized.  The homemade version can be frozen as well.  Within a short span of about 15 minutes you could easily make several rolls to enjoy hot cookies fresh from the oven any time you want them. 

These cookies have a wonderful, sugary vanilla flavour.  They are soft in the middle with just a bit of crunch on the edges.  The dough does spread considerably when baking so next time I will make the log a bit smaller in diameter.

Basic Refrigerator Cookies
source: Kate Aitken's Canadian Cook Book, 1965. Pp. 123

⅔ c softened butter
1 c granulated sugar
1 egg, well beaten
1 tbsp pure vanilla extract
1¾ c unbleached flour
½ tsp baking soda
½ tsp sea salt

Cream the butter and sugar together in bowl of stand mixer.  Add egg and blend until creamy.  Mix in vanilla.  In a separate bowl mix flour, baking soda and salt together.  Turn mixer on and slowly mix in dry ingredients to the butter mixture.  Scrap the dough onto waxed paper.  The dough will be soft and sticky.  Form into a log.  Wrap with the waxed paper securing the ends.  Place in the refrigerator for 24 hours.  Slice the chilled log to form cookies.  Bake on an ungreased cookie sheet at 375ºF until firm an golden brown.


Tuesday, May 18, 2010

Snickerdoodles

As a foodie I have a fair number of cookbooks that I browse through to find new recipes to try.  It's become a standing joke that most of my cookbooks look like they have feathers because of the numerous small post-it notes I use to tag a recipe I want to try.  One thing that catches my attention is the name of a recipe.  I simply could not resist a name like snickerdoodles!

snickerdoodles
Snickerdoodles fall under the category of molded cookies.  They are some of the most fun cookies to make because there is no limit to their shape or appearance.  Other favourite molded cookies I make are peanut butter and shortbread

Snickerdoodles are ever so easy to make!  Once the dough is made it is scooped out by the spoonful, rolled between the palms to form balls then rolled in a sugar cinnamon mixture and placed on cookie sheets to bake.  The balls form flattened cookies as they bake.  The end result is a tasty, crunchy delight sure to please.

Snickerdoodles
modified from: Betty Crocker's Cookbook, circa 1970's, Pp. 144.

½ c butter
½ c shortening
1½ c organic sugar
2 eggs
2¼ c unbleached flour
2 tsp cream of tartar
1 tsp baking soda
¼ tsp sea salt

Pre-heat oven to 200ºC (400ºF) regular or 190ºC (375ºC) convection.  Place butter, shortening, sugar and eggs in stand mixer bowl.  Mix well on setting 3.  Combine dry ingredients in separate bowl, mix well.  While still mixing on setting 3 slowly add in the dry ingredients until well incorporated.

2 tbsp organic sugar
2 tsp cinnamon

Mix sugar and cinnamon together in small bowl.

Shape dough by the rounded teaspoonful into balls.  Roll in the sugar cinnamon mixture then place 2 inches apart on ungreased baking sheet.  Bake 8 to 10 minutes or until set.  Immediately remove fromb baking sheet.

My Notes:  I found it easier to roll all the dough into balls at one time then coat in the sugar cinnamon mixture just before loading onto the baking sheets. 


Wednesday, May 05, 2010

Vanilla Puffs

Puff pastry dough is quite a versatile dough that can be use in a variety of ways ranging from appetizers to deserts to meat pie tops.   I buy puff pastry dough in the freezer section of the grocery store.  However, I recently came across an easy sounding recipe for puff pastry so will try that shortly and report back later this week on how it compares to the store bought.  I used store bought puff pastry to test cheddar and bacon coins for a new appetizer.  The results were good but with a bit of tweaking I should be able to come up with a nice version in a smaller appetizer size.

cutting puff pastry
There were two rolls of puff pastry in the box so I used the remaining roll to make vanilla puffs.  These little delights are extremely easy to make especially since with purchased puff pastry there is no rolling of the dough needed.  The total prep once the dough is thawed takes about 5 minutes!

Method:  Thaw puff pastry dough in refrigerator.  Pre-heat oven to 190ºC (375ºF).  Unroll the thawed dough on to a pastry sheet or cutting board.  Sprinkle with vanilla sugar.  Gently roll the short ends of the dough inwards to form a scroll.  Use a serrated knife to cut across the scroll creating pieces about ¼ - inch thick.  Place the cookies on a Silpat® lined (or lightly greased) baking sheet.  Bake until golden brown.  Allow cookies to cool on rack.

vanilla puffs
Vanilla puffs are delightfully flaky cookies with a slightly crunchy bottom.  They have a light sweetness to them with just a hint of vanilla.  I think they are rather cute, looking a lot more complicated than they really are.  Vanilla puffs are sure to be crowd pleaser!

I like using puff pastry because of the versatility it offers.  Friday's post will compare homemade puff pastry to store bought.    If you have been following this blog you will know that I prefer homemade to store bought for to just about everything.  I quite excited at the prospects of trying a scratch recipe for puff pastry!


Tuesday, February 16, 2010

Mudpies

Every once in awhile you come across a recipe that becomes an instant family favourite. I have a old strawberry graphic covered binder where I started putting these recipes as a newlywed. Every entry in hand written and the lined paper is now yellowed. This is the cookbook that is reached for most often in our house. Here is a great, easy to make recipe from this cherished cookbook.

mudpiesMudpies

This is a recipe I have had since being a newlywed but have no idea where it came from. It's one of those recipes that are so easy to make and so well liked that I make a batch fairly often. The nice thing is mudpies go over well for any event. Everyone loves them! They are a nice cookie to make during the summer as the cook time is only 2 minutes with no baking involved. I should also mention this recipe uses basic pantry ingredients so it is easy to make anytime.

Mudpies
source: Garden Gnome

½ c milk
½ c butter
6 tbsp cocoa
2 c organic sugar
3 c quick cooking oatmeal
1 c shredded coconut

Mix oatmeal and coconut together in large mixing bowl. Place the remaining ingredients in a saucepan. Mix then heat to boiling, cook 2 minutes while stirring constantly. Remove from heat. Pour into the oatmeal mixture. Mix well. Drop by the spoonfull onto wax paper. Let cool.

Yield: about 2 dozen


Thursday, January 07, 2010

Kitchen Quick Tips - Cutting Cookies

kitchen quick tips
When cutting cooking roll out the dough directly on the cookie sheet. Cut the cookies then remove the excess from around the cut cookies for perfectly shaped cookies. If adding sprinkles or sugar, place the cookie cutter back onto the cut cookie then sprinkle and lightly press. Remove the frame and your cookies are now perfect for baking.


Wednesday, December 23, 2009

Gingery Maple Thins

Traditionally I did the bulk of my cookie baking the last day the kids were in school before Christmas. I found this greatly increased my yield as more dough was made into cookies rather than getting popped into the mouths of helping elves. My husband was usually out shopping that day so it meant less taste testing if you know what I mean. Times have changed but I still like the house to myself when baking cookies. The Tuesday of this Christmas week I went a bit wild with cookies making 12½ dozen peanut butter cookies, 7 dozen shortbread cookies and a new cookie called gingery maple thins. The new recipe only made 22 cookies but with a bit of tweaking this will become a holiday favourite.

crystalized gingerCrystalized Ginger

There's just something warm and comforting about the aromatic smell of ginger! It beckons Ginger just goes hand in hand with the holiday season. But ginger is not just a pretty face. Ginger is a wonderful natural remedy for nausea. This recipe called for crystalized ginger.

Crystalized ginger is peeled ginger root that has been briefly cooked in a light syrup then dried. The dried ginger is then lightly coated in sugar and stored until use. It can be used as is for medicinal or culinary purposed. Pictured to the left is whole crystalized ginger pieces. The recipe called for minced crystalized ginger so I simply chopped the pieces very fine (arrow).

gingery maple thinsGingery Maple Thins

Glancing through the newest edition of Cook's Country I noticed the Holiday Cookie Contest with a runner-up entry by Diane Nemitz of Ludington, Michigan. Her cookie recipe definitely said holiday cookies to me so I decided to try it. What is nice about this recipe is there is no salt added. I have to tell you this dough is quite sticky to work with so I modified the method to chill the dough slightly similar to when I make peanut butter cookies. Chilling serves two purposes. First it makes it easier to work with the dough and second it helps control the spread of the cookie.

The recipe said to make the dough balls 1½-inch which I did but that really is too big. The next time I will reduce the dough size to 1-inch. Aside of that the cookies looked quite lovely with a nice golden colour, a soft, chewy texture and pleasant gingery flavour. I think they are going to be a huge hit!

Gingery Maple Thins
source: Cook's Country, December/January 2010. Pp. 5

1½ c unbleached flour
1 tsp baking soda
½ c softened butter
½ c packed brown sugar
1 large egg
¼c plus 1 tsp 100% pure maple syrup
3 tbsp minced crystalized ginger

¼ c granulated sugar

Cream the sugar and butter. Mix in the egg and maple syrup Mix the dry ingredients in a separate bowl. Stir the crystalized ginger into the sugar mixture then mix in the dry ingredients blending well. Chill dough 1 hour. Roll into balls then roll the balls into granulated sugar. Place balls on Silpat® lined cookie sheet. Flatten with bottom of glass. Bake at 160ºC/325ºF convection until golden brown. Remove from oven and allow to cool 5 minutes on the cookie sheet before transferring to a wire rack to complete cooling.


Wednesday, December 16, 2009

Christmas Cookies

Christmas Cookies graphicOver the past couple of weeks I have focused on getting some of my holiday baking done. While the cookies are all filed under the label of cookies, I thought you might find it useful to have a bit of a recap with quick links to the holiday cookies. There are other cookie recipes in under that label as well but these are the ones I've made this year for the holidays. I have a couple more cookie recipes I want to make this year as well so watch for them in next couple of weeks.

Any undecorated cookies can be frozen for up to 6 months. Both decorated and undecorated cookies can be shipped if properly packaged to prevent the cookies from moving around and breaking. Pack tightly in tissue paper if shipping. Any gift in a jar cookie can be shipped with proper packing to prevent the jar from breaking. If you are concerned over breakage you could use a recycled plastic peanut butter jar or plastic containers (eg. Ziploc®, Gladware®) or metal cookie tins.


Sunday, December 13, 2009

Gingerbread Men

Oh my gosh! I get the most interesting ideas during the holiday season so every once in awhile I do follow through on them. I have 2 gingerbread men cookie cutters. One is 4 - inches tall and the other about 1½- tall. You will note I said I have these cookie cutters not that I use them. Well I do use cookie cutters but I find rolled cookies tedious so they don't get a lot of use. I decided the grandbabies needed gingerbread men for the holidays.

gingerbread men recipeGingerbread Men

I have made a lot of cookies over my lifetime. The dough for these gingerbead cookies has seriously been the most tedious dough I have ever worked with! Not only was it tedious to work with it was tedious even as the cookies cooled. Although the instructions said to remove the cookies from the cookie sheet immediately I found doing it this way resulting in cookies breaking. Once the cookies are cooled they are not quite so delicate.

Pictured are the larger gingerbread men. I made the smaller ones as well. Don't laugh at my decorating skills. Apparently I need to work on that! They are quite tasty and went over well at last night's event. Despite the dough being so difficult to work with this is the dough I will be using for making a traditional gingerbread house. I'm working on its design now so watch for that coming soon. Every grandchild needs to experience the joy of tearing apart Grandma's gingerbread house!

Gingerbread Men
source:
Betty Crocker's Cookbook (circa 1970's), Pp. 155.

½ c shortening
½ c granulated sugar
½ c dark molasses
¼ c water
2½ c unbleached flour
¾ tsp salt
½ tsp baking soda
¾ tsp powdered ginger
¼ tsp nutmeg
¼ tsp alspice
decorating icing

Cream together shortening and sugar in bowl of stand mixer. Add the remaining ingredients and mix well. Cover and chill 2 to 3 hours. Heat oven to 180C conv/190ºC (350ºF conv/375ºF reg). Roll dough ¼- inch thick. Cut with gingerbread men cookie cutters. Place on Silpat® or ungreased baking sheat. Bake 10 to 12 minutes. Allow to cool slightly before removing from baking sheet. Cool then trim with decorating icing.


Saturday, December 12, 2009

Coconut Macaroons

Holiday cookies do not have to be complex they only have to taste good. The best holiday cookies tend to be easy to make with few ingredients and most of them are not labour intensive. Coconut macaroons have long been a holiday favourite. They are easy to make yet taste delectible so there is no question as to why they are so popular during the holiday season.

coconut macaroonsCoconut Macaroons

Coconut macaroons were one of the first cookies I learned to make well before I got married. That is because I learned to make meringue at a very young age and coconut macaroons are basically based on a meringue. These delicate, chewy yet melt-in-your-mouth cookies are a true delight!

Coconut Macaroons
source: Better Home and Gardens, Cookies and Candies, 1966. New York. Pp. 39

2 egg whites
dash salt
½ tsp pure vanilla extract
⅔ c granulated sugar
1⅓ c flaked coconut

Place the egg whites, salt and vanilla in the bowl of a stand mixer. Whip until soft peaks form. Slowly mix in the sugar and continue whipping until stiff peaks form. Remove from stand mixer and fold in the coconut. Drop by rounded teaspoon onto a Silpat® lined cookie sheet. Bake at 163ºC/325ºF about 20 minutes. Turn off heat and let sit 5 minutes in the oven before removing. Let cool. Makes about 1½ dozen cookies.


Friday, December 11, 2009

Scotch Teas

The Christmas holiday season is definitely one of my busiest baking times of the year. I love taking home baked goods as a hostess gift. I always have an abundance of cookies for our own entertaining and for sharing with the kids. Now this could mean baking every day for the first couple of weeks of December or it can mean taking one or two short cuts. By short cuts I mean using a few recipes that only 5 ingredients or less and they are fairly common ingredients. I also use a couple of no bake cookie recipes. The beauty of these types of recipes aside of the fact the cookies/bars taste great is they take almost no time to make, something that is very much appreciated during the busy holiday season.

Scotch Tea cookiesScotch Teas

I discovered these lovely, easy to make bars when our kids were quite young. They have been a family favourite ever since. They have a wonderful rich, nutty and buttery flavour that is always a hit on any cookie tray. I find it best cutting the squares just out of the oven. If you allow to cool to much they get a bit too hard to cut. The original recipe says it makes 2 dozen but the best yield I've achieved from this recipe is 18. Don't cut them too big as these really are rich so a small piece goes a long way.

Scotch Teas
source: Better Homes and Gardens, Cookies and Candies, 1966. New York: Pp. 31

½ c butter
1 c brown sugar
2 c quick-cooking rolled oats
¼ tsp sea salt
1 tsp baking powder

Place the butter and brown sugar in a large sauce pan. Heat until butter melts. Stir in remaining ingredients. Pour into 8x8x2 - inch baking pan. Bake at 180ºC.350ºF for 20 to 25 minutes or until golden brown. Cool slightly and cut into bars.


Sunday, November 29, 2009

Monster Cookies

I am always watching for new recipes to try. Many food products include a recipe on the label mainly are a marketing ploy to get you to buy their product. If you like the recipe then chances are very good you will buy their product again. The Monster Cookie recipe was printed on the inside of a Grassland Butter carton. Had I not been paying attention I would have missed it!

monster cookiesMonster Cookies

What I found interesting about this cookie recipe is there was no flour. I thought it might be a typo but decided to try them anyway. I modified the recipe to make a half batch as well as changing weights into cups. This ended up being a wise decision as the half batch made 5 dozen cookies!

The cookies came out quite lovely! I think they are ideal for gift giving. I used the and if you are in Canada you can substitute the M&M®s with Holiday Mix M&M®Smarties®. For those outside of Canada Smarties® are candy coated milk chocolate candies very similar to M&M®s. I do think this recipe could easily be adapted to a gift in the jar if you don't have time to bake.

Monster Cookies
source: modified from Grassland Butter carton

3 eggs
1 tsp pure vanilla extract
½c butter
1¼c brown sugar
1 c granulated sugar
1½ c peanut butter
4½c oatmeal
½ c chocolate chips
½c M&M candies

Place the first 6 ingredients into the bowl of a stand mixer. Beat on medium until well mixed. Mix in the oatmeal. Remove bowl from stand mixer. Stir in the chocolate chips and candies. Drop teaspoon size portions on Silpat® lined cookie sheet. Bake on convection at 163ºC/325ºF [normal bake - 180ºC/350ºF] until golden brown.


Sunday, November 15, 2009

Gift From the Kitchen - White Chocolate Chip Cookies

A couple of our kids need a bit of extra loving so I decided I wanted to make something special from the kitchen. I ended up testing out a gift in the jar idea so in essence the kids became taste testers but in this case I doubt they will mind. Besides who can resist a bit of Mommy's love straight from the kitchen?

gift from the kitchen ingredientsIngredients

One of the neat things about gifts from the kitchen is you can incorporate a definite craft element. True the gift itself is edible but the presentation is very much on the craft making side. So aside of the edible ingredients there were extras needed to make this gift special. For the extras I relied on my scrapbooking and crafting supplies.

Extras include things like decorative brads, eyelets, ribbon, punches and wooden spoons. Surprisingly most of these can be bought at department stores and increasingly at dollar stores so you don't need to invest a lot to give a nice presentation. You will also need craft scissors or an exacto knife to avoid using kitchen scissors for this project. You will need one 1 - L mason jar with lid and ring to package the finished mix in. I should point out that any of the decorative elements can be eliminated. In general they add a lot towards the presentation and very little towards the expense but they are entirely optional.

gift from the kitchen tagGift Tag

One of my favourite scrapbooking mediums is card stock. This is a heavy weight paper available in many different colours allowing me a variety of options. I scanned the tag then with a bit of Photoshop® magic I ended up with an instruction tag suitable for this project. What is really neat about this method is I can pretty much customize the tag as I want then size it to fit anywhere from 3 to 6 tags per sheet to print. Once the sheet is printed I can further customize it using any number of scrapbooking techniques ranging from adding embellishments like eyelets or brads to using decorative scissors or punches. So this really becomes a very personalized approach. In this case it was extremely important for me to use a heart on the tag to symbolize that little extra needed hug from Mom.

white chocolate chip cookies in a jarWhite Chocolate Chip Cookies

Making gifts in a jar is actually quite fun. It really becomes more of a craft project even though it is edible. There is a chance to branch out just a bit further to tweak that creativity. For this gift I really wanted something that said hey I'm thinking about you and I love you. So I chose to make a white chocolate chip cookie gift in the jar. It was really important to me that a heart appeared on the tag and oh my gosh did that heart brad cause me problems but I finally got the results I wanted. This seriously is a project from start to finish that you could easily put together in about 15 minutes and while I did not calculate the actual cost it would definitely come in under the $2 mark. This type of gift is not about the cost though. It is about the thought that goes behind the gift to make the gift fit the recipient. I'm sure the kids are going to love these cookies, just what they need a taste from home :)

White Chocolate Chip Cookies in a Jar

¾ c granulated sugar
¾ c lightly packed brown sugar, divided
1 c chocolate chips
2¼ c unbleached flour
1 tsp baking soda
½ tsp baking powder
½ tsp sea salt

Pour the sugar into a 1 L mason jar then shake slightly to form a level layer. Add half of the brown sugar and pack down tightly (seriously push down hard as this mixture will fill the jar). Pour in the chocolate chips then the remaining brown sugar. Again pack down tightly. Mix the flour, baking soda, baking powder and salt well. Pour the flour mixture into the jar. You will have to tap it down and even carefully tamp down to get the mixture to fit. Wipe the rim then place the 2 piece lid on top and tighten.

Garnish with a wooden spoon and recipe secured with a ribbon.