My photo
Ontario, Canada
I am a wife, mother and grandma who enjoys the many aspects of homemaking. A variety of interests and hobbies combined with travel keep me active. They reflect the importance of family, friends, home and good food.
Cook ingredients that you are used to cooking by other techniques, such as fish, chicken, or hamburgers. In other words be comfortable with the ingredients you are using.
--Bobby Flay

For Your Information

Please watch this area for important information like updates, food recalls, polls, contests, coupons, and freebies.
  • [March 19, 2020] - Effective Mar 17, this blog will no longer accept advertising. The reason is very simple. If I like a product, I will promote it without compensation. If I don't like a product, I will have no problem saying so.
  • [March 17, 2020] - A return to blogging! Stay tuned for new tips, resources and all things food related.
  • [February 1, 2016] - An interesting report on why you should always choose organic tea verses non-organic: Toxic Tea (pdf format)
  • Sticky Post - Warning: 4ever Recap reusable canning lids. The reports are growing daily of these lids losing their seal during storage. Some have lost their entire season's worth of canning to these seal failures! [Update: 4ever Recap appears to be out of business.]

Popular Posts

Showing posts with label pickles. Show all posts

Friday, October 26, 2012

Fermented Dill Pickles

This past summer, much of my focus was on restocking the pantry.  Our house had been on the market for almost 19 months before it finally sold enabling us to buy our new home with a move in date of September 1, 2011.  We completed our move on September 12, signed the final papers on September 15 and flew out to our vacation home on September 18.  I had reduced my home canning to a considerably lower level for two years to accommodate the house sale and move.  It didn't help that the move and fall vacation coincided with the 2011 tomato harvest!  As a result, we were completely out of some of our home canned staples like pickles so I knew as soon as the busy canning season started that I would be quite busy.  This year I made zesty bread 'n butter pickles, best bread and butter pickles, dill slices, fresh pack dill pickles, fast favourite garlic dill pickles, freezer pickles, and fermented dill pickles that gave me a total of 31 jars (24 L total) of pickles in the pantry and 3 jars (0.75 L total) of pickles in the freezer.

fermented dill pickles
Fermentation gives a distinctive tangy flavour foods like pickles and sauerkraut.  It is a long process that requires consistent monitoring and attention to detail for a 3 to 7 week period.  The food to be fermented is prepared and placed in the fermenting container.  I used an 11.4 L (3 gallon) ice cream bucket to ferment the pickles.  The cucumbers were then covered with the brine and weighted down so they stayed under the brine for the fermentation process.  The container was placed in the lower level of our home where it remained at 21°-24° C (70°-75°F) for the duration of the fermentation process.  It is very important that the temperature remains consistent throughout the fermentation process.  Once the fermentation is complete, the pickles are drained.  The brine is strained and heated to a boil then poured over the pickles that have been packed into hot, prepared jars.  The pickles are processed in a BWB canner for 15 minutes.  Some do not process fermented pickles as it destroys the probiotics but rather store them in a large container in the refrigerator.

I started the fermented dill pickles on July 20 but didn't can them until September 21 as the fermentation process took a bit longer.  Once the fermentation begins, small bubbles form on the surface of the brine.  After that, a scum forms on the surface.  This scum must be removed daily.  Clearly, I needed to tend to the pickles daily during most of the fermentation period meaning this is not a process that has to be planned ahead so as to not be interrupted via impromptu overnight trips or going to our vacation home.  Fermentation is definitely not something I can do during the autumn months because we spend two extended periods of time at our vacation home.

I ended up with 6 - L of fermented dill pickles which is a fairly good yield from 4.5 kg (10 lb) of pickling cucumbers.  I was a concerned that the brine was just a bit cloudy when I was filling the jars.  Brine can turn cloudy if table salt is used or from minerals in the water, however it can also be a sign of spoilage.  I had used Windsor pickling salt so knew that wasn't a problem and there were no obvious signs of spoilage (eg. mold, foul smell, slimy feeling) so I went ahead and processed them.  During the cooling period the brine returned to crystal clear.  In this case it must have been minerals in the water I used for the brine.  Next time, I plan on using filtered water even though our water is soft.  All in all, I was rather pleased with the results!


Friday, August 10, 2012

Fresh Pack Dill Pickles

Continuing with dill pickles, I made a batch of fresh pack dill pickles.  These take a bit more planning as they require and overnight icing in a brine.  Icing is one method of crisping pickles.  This particular method involved also using a brine (salt solution) that helps draw moisture out of the cucumbers to give crisper results as well.  After their overnight icing, the pickles were ready for draining and jarring. 

I prepared 8 lb of cucumbers for the fresh pack dill pickles.  The recipe is designed to can these pickles in 500 ml, 1 L or 1.5 L jars with amount large enough for 15 lb of pickles.  Be warned, finding room in the fridge for a huge stainless steel bowl is not as easy as it sounds.  Years ago when I was knee high to a grasshopper, our neighbour across the street did dills in a huge trough.  I can remember helping put the ice in the trough.   I don't know whether they were fresh packed or fermented but that trough was in her kitchen most of the summer.  Granted she likely did a few different batches of dills.  

Fresh Pack Dill Pickles
modified from: Bernardin Ltd., Bernardin Guide to Home Preserving, Pp. 72

Overnight Icing:

8 lb pickling cucumbers
16 c ice
4 c water
½ c pickling salt

Wash the cucumbers and rinse well.  Cut a thin slice from the blossom end of each cucumber and discard.  Layer the cucumbers and ice in a large stainless steel container.  Dissolve the pickling salt in water then pour over cucumbers.  Add enough cold water to cover the cucumbers.  Weigh the cucumbers down to stay in the water with a plastic bag filled with water.  Refrigerate overnight for a minimum of 12 hours.

Pickling Liquid:

8 c water
6 c white vinegar (5% acetic acid)
¾ c pickling salt
¼ c granulated organic sugar
2 tbsp whole pickling spice

Per 500 ml jar (double for L):

1 tsp whole mustard seed
1 tbsp dill seed
1 peeled garlic
¾ tsp Pickle Crisp (calcium chloride)

Place the pickling spice in a large square of cheesecloth then tie to make a spice bag.  Combine ingredients for pickling liquid in large saucepan including the spice bag.  Bring to a boil and boil gently for 15 minutes.  Remove from heat.  Drain cucumbers, discarding soaking solution.  Pack one jar at a time.  Place the per jar ingredients in hot prepared jars.  Pack in cucumbers leaving ¾ - inch headspace.  Ladle hot pickling ladle over the cucumbers leaving ½ - inch headspace.  Wipe rim.  Place lid (metal snap lids, Tattler reusable lids, glass inserts), secure screw band according to manufacturer's instructions.  Repeat of remaining jars, one at a time placing each jar into prepared BWB canner as the jar is prepared.  Process 500 ml jars 10 minutes, L jars 15 minutes in BWB canner at altitudes up to 1,000 ft above sea level.  At higher altitudes adjust timing according to altitude adjustment chart on Canning FYI page.  Remove jars from canner, adjust bands (Tattler, glass inserts).  Do not adjust bands for metal snap lids.  Allow to cool 24 hours.  Check for seal.  Remove bands.  Wash and dry jars and bands.  Bands can be stored separately or replaced loosely on jars if desired.  Label and store jars in a cool, dark place.


Wednesday, August 08, 2012

Dill Slices and Best Bread-And-Butter Pickles

Quite often I work with hampers of produce when home canning.  A hamper is 5/8 of a bushel so eight hampers is the equivalent of 5 bushels.  My comfort level tends to be 1 to 3 hampers depending on the produce and the complexity of the products being made.  This is the amount of that produce I can comfortably process within usually a day but sometimes it spreads into the following morning.  I have four of the cheery yellow hampers, courtesy of a relative who is a commercial grower.  The vast majority of the hampers of produce I process are not purchased produce.  When I buying produce, I take a couple of hampers with me as many vendors are reluctant to part with their own hampers and rightly so as they are expensive.  Vendors will transfer the produce into plastic bags or cardboard boxes but I'd rather use my own hampers.  Plastic bags can cause produce to sweat and over heat on the journey home and wet produce causes the bottom of cardboard boxes to give way spilling produce everywhere.

hamper of pickling cucumbers
Pictured is the hamper of pickling cucumbers I purchased for $20.  It was full but I already had put some in the sink for washing before I remembered to take a picture.  A pickling cucumber is a variety of small cucumber that at maturity reaches a length of about 4 to 6 - inches.  If left longer on the vine, they will thicken in diameter somewhat but not get much longer.  They are easy to grow in the home garden but if you want to make a lot of pickles at once, buying them is a option.

Some produce purchased from roadside stands is not nice and clean like that found in the grocery stores.  As you can see, the pickling cucumbers were rather dirty. 

washing pickling cucumbers
Washing the cucumbers is not difficult, just time consuming.  It is important to use a vegetable brush when washing them to get dirt out of the crevices.  I use the two sink method.  I put cold soapy water in one sink then add the cucumbers to be washed in small batches.  When washing cucumbers always use cold water to keep them crisp.  Once the cucumbers are washed, I rinse under the faucet then transfer to a sink of cold water with a little vinegar in it to soak for 10 minutes.  The vinegar removes any residue and surface bacteria.  After the rinse, I transfer the cucumbers to a large stainless steel bowl for processing.  Of note, the water in both sinks is changed after washing a batch of the cucumbers.

dill slices and best bread-and-butter pickles
I used 8 lb of the pickling cucumbers to make dill slices and Best Bread-and Butter Pickles.  Although a food processor can make quick work of slicing cucumbers, I found I had better results slicing the cucumbers by hand.  I had a yield of 6 - 500 ml jars for each kind of pickles.  Both pickles looked gorgeous in the jars.  The recipes are written as I modified them.

Dill Slices
modified from: Bernardin Ltd., Bernardin Home Guide to Preserving, 2006, Pp.73

4 lb medium pickling cucumbers
4 c pure apple cider vinegar
4 c water
¾ c granulated organic sugar
½ c pickling salt
3 tbsp pickling spice
6 bay leaves
6 garlic cloves
3 tsp mustard seed
6 tsp dried dill seed
1/8 tsp Pickle Crisp (calcium chloride) per jar

Cut a thin slice from each end of the cucumber and discard.  Slice into ¼ - inch slices.  Set aside.  Tie pickling spices into a cheese cloth bag.  Combine vinegar, water, sugar and salt in large stainless steel saucepan.  Add the spice bag to the vinegar mixture.  Bring to a boil and simmer 15 minutes.  Remove from heat.  Packing one jar at a time: put a bay leaf, 1 garlic clove, ½ tsp mustard seed and 1 tsp of dried dill seed into hot jar.  Pack cucumber slices into jar leaving ¾ inch headspace.  Add 1/8 tsp Pickle Crisp.  Cover vegetables with hot brine leaving ½ inch headspace.  Wipe rim.  Adjust two piece metal snap lids (or Tattler reusable lids or glass inserts).  Screw bands on jars (adjust accordingly if not using metal snap lids).  Process for 10 minutes in BWB canner at altitudes up to 1,000 feet above sea level.  At higher altitudes refer to altitude adjustment chart on Canning FYI page.  Remove from canner.  Adjust bands if using Tattler or glass inserts.  Allow to cool 24 hours.  Remove bands and test for seal.  Wash and dry bands and jars.  Label and store.

Best Bread-And-Butter Pickles
modified from: Ellie Topp and Margaret Howard, Small-Batch Preserving, 2001, Pp. 143.

4 lb small pickling cucumbers
2 medium onions, thinly sliced
1 sweet green pepper, cut in thin strips
1 sweet red pepper, cut in thin strips
2 tbsp pickling salt
4 c white vinegar
3 c granulated organic sugar
2 tbsp mustard seeds
1 tsp celery seeds
½ tsp turmeric
½ tsp ground cloves

Cut a thin slice from the ends of each cucumber and discard.  Slice into ¼ - inch slices. Slice the onions and peppers.  Place cucumbers, onions and peppers in a stainless steel bowl.  Sprinkle with salt.  Cover and let stand 3 hours.  Rinse twice and drain thoroughly.

Combine remaining ingredients in large stainless steel saucepan.  Bring to a boil over high heat.  Add vegetables.  Return to a boil and boil 30 seconds or just until cucumbers are no longer bright green.   Pack vegetables into jar leaving ¾ inch headspace.  Cover vegetables with hot brine leaving ½ inch headspace.  Wipe rim.  Adjust two piece metal snap lids (or Tattler reusable lids or glass inserts).  Screw bands on jars (adjust accordingly if not using metal snap lids).  Process for 500 ml for 10 minutes [15 minutes for L] in BWB canner at altitudes up to 1,000 feet above sea level.  At higher altitudes refer to altitude adjustment chart on Canning FYI page.  Remove from canner.  Adjust bands if using Tattler or glass inserts.  Allow to cool 24 hours.  Remove bands and test for seal.  Wash and dry bands and jars.  Label and store.


Tuesday, August 07, 2012

Fast Favorite Garlic Dill Pickles (Kosher-syle Dill Pickles)

Continuing on my pickle making quest to find a good dill pickle recipe and after doing a couple of batches of bread and butter pickles, I made my first batch of dill pickles.  Now I have a very long history of dill pickle failures.  The pickles have always come out limp and that just isn't acceptable in a dill pickle!  I even tried adding alum (potassium aluminum sulfate) which is an old fashioned crisping agent but that can give a bitter flavour to the pickles and may cause digestive upsets.  I am armed for success this year.  I have pickling lime (calcium hydroxide), Pickle Crisp (calcium chloride) and copious amounts of ice for soaking.

Pickling lime is a crisping agent that requires soaking the prepared cucumbers in a solution of pickling lime and water for at minimum 2 hrs to overnight,  The pickles must then be rinsed at least three times to remove all traces of the pickling lime.  Pickle Crisp can be added to any jar of fresh packed (not cooked) pickles like the Fast Favorite Garlic Dill Pickles I made.  It's easy to use with no extra timing to worry about.  Icing is used in many dill pickle recipes to firm the pickles.  Salt is usually added to draw a bit of moisture out of the cucumbers then they are covered with ice and allowed to sit overnight.

fast favourite garlic dill pickles
I made a doubled batch of the Fast Favorite Garlic Dill Pickles in Small-Batch Preserving.   The recipe gave a yield of 4 - 500 ml jars; doubling gave me a total yield of 4 - L jars.  Two jars were whole and the other two spears.  Fresh dill is very difficult to find here this year.  Neither grocery store or the vegetable stands had it and my small plant is barely hanging in so I substituted dried dill seed.  The recipe is written as I modified it. 

Fast Favorite Garlic Dill Pickles
modified from:  Ellie Topp and Margaret Howard, Small-Batch Preserving, 2001, Pp. 138

6 lb  small pickling cucumbers
4 c white vinegar (5% acetic acid)
4 c water
4 tbsp pickling salt

1 large garlic clove per jar 
2 tsp dill seed per jar
¼ tsp Pickle Crisp (calcium chloride) per jar

Cut a thin slice from each end of the cucumbers and discard.  Combine vinegar, water and salt into a saucepan.  Packing one jar at a time, add 1 garlic clove, 2 tsp dill seed and ¼ tsp Pickle Crisp (calcium chloride) per jar.  Pack in the prepared cucumbers, whole or spears tightly leaving ½ - inch headspace.  Ladle the hot brine over the cucumbers leaving ½ - inch headspace.  Wipe rims.  Place lids of choice (metal snap lids, glass inserts, Tattler reusable lids) on the jars.  Apply band according to the lid of your choice.  Process 10 minutes for 500 ml (pint) jars and 15 minutes for L (quart) jars at altitudes below 1,000 feet above sea level.  For altitudes above 1,000 feet above sea level adjust timing according to the altitude chart on the Canning FYI page.   Remove from canner.  Tighten bands if using glass inserts or Tattler reusable lids; do not tighten bands if using metal snap lids.  Allow to cool 24 hours.  Test for seal.  Remove bands.  Wash jars and bands.  Bands can be stored separately or replaced loosely on the jars.  Label and store.

Bon Appétit!  

Garden Gnome
©2006-2012


Sunday, August 05, 2012

Zesty Bread 'N Butter Pickles

Locally grown pickling cucumbers became available about mid July.  I bought 2 quarts to start on my quest to find at least one good dill pickle recipe.  That was quickly followed by another 4 quarts of cucumbers an finally a hamper.  I spent a total of $30 on pickling cucumbers.  In perspective that would have bought me 6 - 1 gallon (3.8 L) jars of kosher dill pickles but store bought dills have sodium benzoate (a preservative) and yellow dye 5 (allergen), two ingredients we are avoiding wherever possible.  To break even on pickles I needed to have a total yield of 22.8 L of homemade pickles but only if I made all dill pickles.  Other store bought pickles, like sweet bread and butter pickles are as high as $3.89 for a 500 ml jar.  I decided to make a variety of cucumber based pickles to ensure I realized a savings.  Over the next few days I will share what I made with you. 

zesty bread n butter pickles and freezer pickles
The first cucumber purchase was used to make Zesty Bread 'n Butter Pickles (left) and  freezer pickles (right).  Both are a sweet, tangy bread and butter pickle.  One is canned and the other is partially pickled before packing into jars then put in the freezer.  I used Tattler reusable lids on the canned pickles as pictured.  The bands are still on them because the jars just came out of the canner.  I used Bernardin storage caps on the jars for the freezer.  I have found that metal bands will rust in the freezer.  Note the difference in the colour of the two pickles.  The freezer pickles retain a brighter green colour.  Both are very flavourful pickles well worth having on hand.  My yield was 10 - 250 ml jars or 2.5 L.  At store bought prices this yield would have cost about $19.45 regular price and as low as $9.95 sale price depending on where purchased.

zesty bread n butter pickles ready for storage
The Zesty Bread 'N Butter Pickles was a new recipe I decided to try this year from Bernardin Guide to Home Preserving, the Canadian equivalent to the Ball Blue Book.  I did a half batch rather than the full batch that would have given a yield of 7 - 500 ml jars.  I was quite pleased with the initial flavour of the pickles.  They looked quite nice in the jars as well.  There were no seal failures with the Tattlers so that was rather nice as well.

When making pickles, it is important to use a kitchen scale.  Most of the recipes are in pounds or kilograms with respect to the cucumbers and some additional vegetables.  Be sure to tare the scale with the bowl or container before weighing the produce.  To tare the scale, place the empty bowl on the scale and set to zero.  Now add the produce a little at the time until you reach the correct weight called for in the recipe.  Remove the filled bowl and prepare as called for in the recipe.  The scale should be tared each time you use it with a bowl or container.

Zesty Bread 'N Butter Pickles
source: modified from Bernardin Guide to Home Preserving, 2006, Pp. 73.

3¼ lb pickling cucumbers
½ lb onions
8 tsp pickling salt
2½ c white vinegar (5% acetic acid)
⅔ c granulated sugar
¼ c pickling spice
1 tbsp celery seed
1 tsp ground ginger
½ tsp ground turmeric

Wash cucumbers.  Cut a thin slice from each end of the cucumbers and discard.  Slice cucumbers and onions ¼ inch thick.  Layer the cucumbers and onins in a large glass or stainless steel container, sprinkling each layer lightly with salt.  Cover and let stand 15 minutes.  Combine remaining ingredients in large stainless steel saucepan.  Cover and bring to a boil.  Reduce the heat and boil gently 15 minutes.  Drain the vegetables.  Add to pickling liquid.  Mix well.  Return mixture to a boil.  Remove from heat.  Ladle into hot jars leaving ¾ inch headspace.  Wipe rim.  Place two piece metal snap lids (or Tattler reusable lids or glass inserts) on jars.  Apply screw band according to type of lid being used.  Process 10 minutes in BWB at altitudes up to 1,000 feet above sea level.  At higher altitudes refer to altitude adjustment chart on Canning FYI page.  Remove from canner.  If using Tattler reusable lids or glass inserts, immediately tighten bands.  Do not tighten bands if using metal snap lids.    Allow to cool 24 hours.  Remove bands and check for seal.  Wash jars and bands.  Bands can be stored separately or replaced loosely on jars as desired.


Thursday, July 26, 2012

Kitchen Quick Tips - Firm Pickles (2)

kitchen quick tips


Pickle Crisp (calcium chloride):  Add 1/8 tsp per 500 ml (pint) or 1/4 tsp per L (quart) to each jar of fresh pack vegetables to be pickled after adding the brine for firm, crispy pickles.  


Thursday, July 19, 2012

Kitchen Quick Tips - Firm Pickles (1)

kitchen quick tips

Cut a thin slice from the blossom end of cucumbers to be used for pickling.  This removes an enzyme that causes pickles to soften.


Friday, November 18, 2011

Peperoncini Peppers

It is quite interesting to me that certain foods are very much regional.  The reason being the growing conditions and local food traditions but in this day and age of globalization, it is still surprising that some foods are only available in certain regions.  When I was growing up the closest I came to a hot pepper was the hot banana peppers the couple I baby sat for grew.  I begged my Mom one summer to help them harvest and she finally caved in even though she was against it.  I loved everything there was about that harvest!  To this day I firmly believe in order to truly love food, you need to get comfortable and knowledgeable to how it is produced.

homemade pizza with pickled peperoncini peppers
During our first visit to our vacation home in the sunny south we ordered a pizza from Papa John's.  It came with a wonderful pickled pepper that I did not recognize which is rather funny given I grow upwards of 30 pepper (5 varieties) plants each year.  When we arrived home in Canada I got curious so did a bit of inquiry.  The pickled peppers were peperoncini, a variety I had never heard of before.  To me they look almost like a cross between a habanero and a banana pepper.  They have a bit of heat mixed with a slight bitterness.  Oh my gosh, they kick pizza up a notch!

I finally found pickled peperoncini in the grocery store so I bought a jar.  That meant of course I had to bake homemade pizza, another excuse to test out my new natural gas oven.  My pizzas usually start out with my favourite pizza dough topped with home canned pizza sauce then the toppings get a bit interesting.  This pizza was topped with a 9 cheese shredded blend left over from making lasagne for hunt camp, tomatoes, broccoli, smoked turkey, pepperoni, and sautéd butter mushrooms.  I served the peperoncini on the side to cut and add to the pizza slices as desired.

Now if I could only find anchovies since I discovered them on a road trip.  I just loved the saltinest and flavour the anchovies imparted to the pizza slices so can't wait to try them at home.   Apparently they are hard to find here (aka none of the local grocery stores carry them) so perhaps I will find them our next trip to the city.  On the other hand you can bet your bottom dollar I will be hunting down peperoncini pepper plants for my new garden.  Jars of home pickled peperoncini peppers are already visions in my mind!


Thursday, April 28, 2011

Kitchen Quick Tips - Leftover Pickle Juice

kitchen quick tips

Use leftover pickle juice in a marinade or create your own salad dressings.  The juice can also be used to pickle eggs or make quick refrigerator pickles.


Sunday, November 07, 2010

The Issue of Preservatives

If you have been following this blog you will know it is very much about making it at home if possible.  In most cases homemade is cheaper and in many cases the homemade product is healthier through less artificial flavours, colourants and preservatives.  So by all means and given the amount of home canning I do on a regular basis and given that home canning results in a healthier, less expensive product I am hesitant to to say that there are sometimes commercially canned may be the most frugal choice.

commercially canned dill pickles and olives
I grow a descent sized garden and what I don't grow I buy from local farmers, usually organic.  The past few years has been iffy with respect to pickling cucumbers.  At best I've managed to grow enough to make a good sized batch of freezer pickles. I've managed to siphon off enough for a batch or two of dill pickles but it has been really hard.  The real catch comes if I buy pickling cucumbers enough for 4 L jars I will pay around $8 which doesn't sound all that bad.  Except I can buy a 1 gal (a little over 4 L) for about $4 at Sam's Club.  In this case it makes sense to buy the jar from Sam's Club or does it? 

The Sam's Club jar contains sodium benzoate as a preservative.  Since the pickles will not be heated that isn't a concern but if they were heated sodium benzoate reduces to benzene, a known carcinogen.  The commercially canned pickles also contain polysorbate 80 (an emulsifier) and yellow 5.  While polysorbate 80 is not carcinogenic I question why it is there in the first place.  Yellow 5 is the food dye tartazine, an azo dye.  The problem with tartazine is it does cause allergic reactions especially in those sensitive or allergic to aspirin.  Tartazine is an asthma trigger and can cause outbreaks of hives.  As a person with allergies including food allergies suddenly that $4 jar of pickles does not look so appealing.  Well the jar looks rather good for later storage and the pickles will be used for those not sensitive.  In this case though the pickles were not a frugal choice.  Even though making my own would have cost more they would have resulted in a significantly safer product for those like me that are sensitive to food dyes and preservatives.

Sam's Club also sells premium olives in a two pack of 21 oz jars for about $5.  Since I have absolutely no ready source for raw olives I have no choice but to buy them.  The only preservative in the olives is potassium sorbate, the salt of sorbic acid.  Sorbic acid is an unsaturated carboxylic acid that occures naturally in some berries.  Potassium sorbate is a preservative used to inhibit molds and yeasts in cheese, wine, yogurt, dried meats, apple cide, dried fruits and baked goods as well as many personal care products.  It is aluse used as a wine stabilizer.  Potassium sorbate is non-irritating and non-sensitizing with allergic reactions being quite rare.  The olive contain no additional dyes or preservatives.  In this case the olives are a frugal choice for me. 

Now this is something to keep in mind.  If a product like the dill pickles have the potential to cause food related allergies they are best avoided entirely.  In this case the homemade version is the more frugal choice even if it ends up being more expensive.  On the other hand a product like the olives that is rather benign the commercial version is the frugal choice.  As a bit of an aside, many people experience side effects specifically from commercially canned foods than they realize.  Consider the person sensitive to tartazine, a couple of pickle slices might give a slight rash while a whole pickle might give a greater reaction BUT with allergies each exposure will give a stronger reaction.  So if you are looking for possible solutions to unexplained rashes, hives, or something similar start checking those food labels!


Tuesday, July 20, 2010

Homemade Kosher Dill Pickles (video)

Jams and pickles are processed using a boiling water bath (BWB) canner all you really need is a stock pot tall enough to cover the jars by 1 - inch, a rack in the bottom, mason jars and 2-piece snap lids.  The equipment is very inexpensive and chances are you already have the pot.  However,  I often run across the question of how to preserve foods like jams and pickles without the necessary canning equipment.  In this case turn to your freezer and refrigerator.  One of our family favourite pickles that I make every year is freezer pickles.  I recently came across this video showing how to make Kosher dill pickles in the refrigerator that I am planning on trying as soon as my pickling cucumbers are ready in the garden.  What is nice about this is the recipe is per jar so you can tailor it to fit your needs making one or two jars as the cucumbers become available.  I will post my results later.  I've written out the recipe for you below the video.  Kirby is a variety of cucumber.  Don't worry if you don't have Kirby as any pickling cucumber will work in this recipe.


Homemade Kosher Dill Pickles
source: About.com video
note: recipe is per quart jar of pickles

5 pickle sized Kirby cucumbers, quartered
9 oz water
5 oz white vinegar (5% acetic acid)
¼ tsp sugar
2 dill heads and stems
1 lg clove garlic
1 small onion (golf ball size)
1 tbsp Kosher salt
handful peppercorns
handful mustard seed

Wash and quarter or slice cucumbers as desired or you can leave them whole.  Chop onion and place in container.  Add sugar, garlic, salt, peppercorns and mustard seed.  Add chopped dill.  Tightly pack pickles into container.  Pour vinegar and water into sauce pan.  Bring to to just barely a boil.   Pour over cucumbers to cover.  Place the lid on the container.  Let sit for one day then refrigerate.  The pickles will be ready to eat in 10 days but the longer they sit the more dill flavour they will have.


Saturday, August 01, 2009

Freezer Pickles, Plum Sauce and Chocolate Raspberry Sauce

Continuing on with preserving all the great produce I bought on my foodie road trip Sunday was a very busy morning to late evening processing day. The end result was a lot of great food put up. I actually started the canning day with the Black Cherry jams and ended with the freezer pickles so there was a lot of produce processed.

raspberries, cucumbers, plumsThe Goodies

Raspberries are one of my favourite fruits! I stop at the raspberry U-pick a couple of times a week while they are running. This raspberry U-pick has both early and late raspberries. I usually only get 4 pints at a time because they are quite delicate and won't keep in the refrigerator very long.

My garden was delayed getting planting this year as we are still in the massive rip out mode. I feel very lucky to have any kind of vegetable garden this year other than containers. So I had to buy pickling cucumbers this year. Still the price wasn't bad and they were quite lovely looking.

I don't have a plum tree but am considering planting one or more fruit trees as part of my big garden plans so I might possibly have a plum tree next year. For now I have to buy plums. Usually the price is quite good so I don't mind. These plums were smaller but quite tasty!

freezer pickles, plum sauce, chocolate raspberry saucePictured from left to right: freezer pickles, plum sauce and chocolate raspberry sauce. One of the nicest things about home food preservation is you can make various products you won't be able to find in the regular grocery stores. Two examples here are the freezer pickles and chocolate raspberry sauce.

Freezer pickles are about the easiest and tastiest pickles you can make. I use 2 of the 4 quarts of pickling cucumbers to make the pickles. After their brining period I ladled the pickles into mason jars leaving 1-inch headspace then filled with brine leaving 1-inch headspace. I then wiped the rims and capped with 2 piece lids. This is one instant where you can re-use lids because these pickles are not canned. Then I popped the filled jars on to the freezer shelves. Note: While the pickles are in mason jars they are not shelf stable and must be frozen for storage. Cost per 500 ml jar was 80¢ each with no electricity costs for prep and re-using lids.

Plums are not only great for snacking on they make a wonderful dipping sauce. I set aside a few of the plums for fresh eating then made a half sized batch of plum sauce. The yield was 4 - 250 ml (half pint) jars so I will have to pick up more plums to have enough plum sauce to last a year. The recipe called for 4 lb of plums so a half batch is 2 lb of plums. If you don't have a kitchen scale 4 quarts of plums is approximately 2 lb. Be warned that this sauce smells ever so yummy when it is simmering down! Cost per jar including lids and electricity was $1.22.

Plum Sauce
modified from: Alltrista Corporation, Ball Blue Book, 2001. Pp. 80.

2 lb plums
1 c brown sugar
½ c organic granulated sugar
½ medium onion, chopped
1 tbsp mustard seed
1 tbsp jalapeno pepper, chopped
pinch powdered ginger
½ tbsp sea salt
½ clove garlic, minced
½ c cider vinegar

Wash, stem and pit the plums. Cut into quarters then rough chop in food processor. Set aside. Combine the other ingredients in a large saucepan. Mix well. Bring to a boil and reduce heat to simmer. Stir in the plums. Cook until thick and syrupy while stirring often. Remove from heat. Ladle into prepared jars ¼ - inch headspace. Wipe rims. Adjust 2 piece lids. Process 20 minutes in BWB at altitudes below 1,000 ft above sea level. At higher altitudes refer to the processing times on the altitude adjustment chart.


I was browsing through one of my favourite blogs, Canning Jars Etc. when I spotted a recipe for Chocolate Raspberry Sauce. Her chocolate raspberry sauce recipe was modified from the Ball Complete Guide to Home Canning. Well I just had to make this sauce but I decided to modify the recipe as well to make it low sugar. Recipes are just starting points! A canning recipe can be modified providing you do not change it enough to go from high acid to low acid which would change the processing method. Any food with a pH higher than 4.6 is considered low acid so must be processed using a pressure canner. I used 3 of the 4 pints of raspberries. The resulting sauce was quite tasty and it did smelly quite yummy while cooking. I can't wait to try in on some homemade vanilla icecream! Cost per jar including electricity and lids was $2.40.

Low Sugar Chocolate Raspberry Sauce
source: my creation

3 tbsp unsweetened cocoa powder
2½ c crushed raspberries
2 tbsp lemon juice
1½ tsp Pomona's pectin
1½ c organic granulated sugar
2½ tsp calcium water

Wash the raspberries. Place in large saucepan and crush. Stir in lemon juice and calcium water. Mix cocoa powder, pectin and sugar in separate bowl. Bring the berries to a boil. Stir in sugar mixture. Return to a boil. Remove from heat. Ladle into prepared jars ¼ - inch headspace. Wipe rims. Adjust 2 piece lids. Process 10 minutes in BWB at altitudes below 1,000 ft above sea level. At higher altitudes refer to the processing times on the altitude adjustment chart.


Sunday, September 21, 2008

Pickled Cauliflower Two Ways

rSome vegetables simply do not can well and are better frozen. Cauliflower is one of these vegetables (how to freeze). In general vegetables in the Brassica oleracea species (cauliflower, broccoli, kale, cabbage, collard greens and brussel sprouts) do not can well by themselves. These strong flavoured vegetables discolour and become stronger in flavour when canned. Cauliflower cans nicely by itself or with other vegetables when pickled and cabbage cans nicely if fermented (sauerkraut).

Pickled Cauliflower

When I was growing up one of our neighbours made the best dill pickles you ever tasted. She also made cauliflower pickles. A few years ago I decided to make cauliflower pickles but the only recipes I could find had turmeric in them. I remembered her cauliflower pickles being creamy white not yellow so I set about re-creating her recipe tweaking until I had cauliflower pickles like I remembered.

I pickled cauliflower yesterday using two lovely heads of cauliflower. Pictured are the creamy white cauliflower pickles as well as three 500 ml jars of yellow cauliflower pickles. Wide mouth jars are ideal for these pickles for ease of packing and later removing.

Pickled Cauliflower
recipe by: Garden Gnome

For both white and yellow pickled cauliflower:
2 large heads cauliflower
1 large Spanish onion, sliced thin
8 c white vinegar (5%)*
4 c granulated sugar
¼ tsp mustard seed per jar
pinch celery seed per jar
1 tbsp pickling spice

Additional ingredients for yellow pickled cauliflower:
½ - 1 tsp turmeric
pinch hot pepper flakes per jar
1 tbsp bell pepper (red or green) per jar

Cut cauliflower into 1 to 2 inch flowerets. Steam 4 minutes. Slice onion into thin rings. Dice bell peppers (if making yellow pickled cauliflower). Place pickling spice into tea ball or make a cheese cloth bag to hold the pickling spice. Combine vinegar and sugar. Heat until sugar dissolves. Place the pickling spice into the hot vinegar solution. Simmer 2 minutes. If making yellow pickled cauliflower stir in turmeric, ½ tsp for half the amount of vinegar solution or 1 tsp for whole amount. Separate one slice of onion into rings and place in jar. Add mustard seed, celery seed and if making yellow pickled cauliflower add the hot pepper flakes and bell pepper. Fill jar with hot cauliflower flowerettes leaving ½ inch headspace. Fill with hot vinegar solution leaving ½ inch headspace. Remove air bubbles. Wipe rim. Adjust 2 piece lids. Process in boiling water bath canner 15 minutes.

Yield: 8 - 500 ml (pint) jars

* White vinegar may be substituted with another vinegar as long as acidity is 5%.


Thursday, August 16, 2007

Pickled Eggs

What do you do when you have an abundance of eggs? When properly refrigerated at 41ºF eggs will last 4 to 5 weeks. Eggs are one of those foods that do not preserve well by the common methods of canning, drying, or freezing. I have heard that you can scramble eggs then freeze and since commercially available meals exist this is likely true however I have not tried it myself. My experience with re-heated scrambled eggs is that they are rubbery in texture and the flavour is lacking. However eggs in dishes such as quiche freeze nicely so that is one way to use up extra eggs while making a few meals for the freezer.

Pickled Eggs

Pickled eggs are a common snack sold in taverns and some variety stores in our area. They are very easy to make. I will stress homemade pickled eggs are not shelf stable. They must be refrigerated! They will keep in the refrigerator for about 6 months. I generally make a dozen pickled eggs at a time simply because refrigerator space can be at a premium many times. Twelve large eggs will fit nicely into a one L (quart) canning jar.

Pickled Eggs
source: Garden Gnome

1 dozen eggs
1 large onion
1 c white vinegar
1 c water
1/4 c granulated sugar
1/2 tsp sea salt
1/2 tbsp mixed pickling spices

Place the eggs in a saucepan and cover with water. Bring to a boil over medium-high heat. Boil gently for 10 minutes. Drain. Run cold water over the eggs to cool then shell. Cut onion into slices then in half. Place the pickling spices into a tea ball (my method) or form into a spice bag using cheese cloth. Combine vinegar, sugar and water in another saucepan. Bring to a boil. Swish the spices for about 40 seconds in the vinegar brine. Layer the eggs and onions into a one litre mason jar. Pour the brine over the eggs leaving 1/4-inch headspace. Cap. Refrigerate one to two weeks before serving.


Tuesday, October 10, 2006

Pickled Beets & Canned Beets

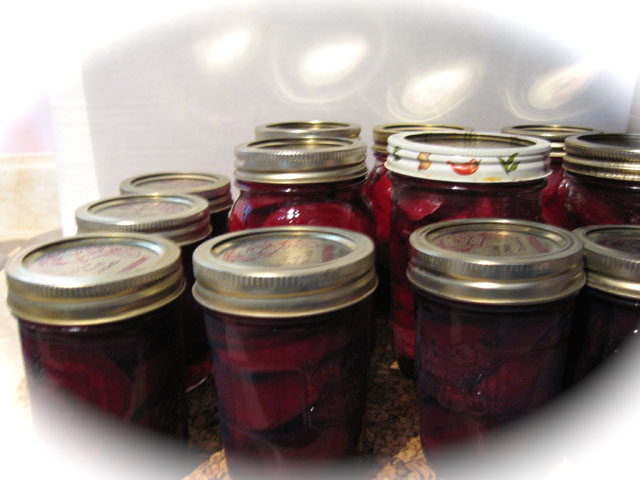
I processed six 250 ml jars of pickled beets and six pints of plain canned beets last Friday. Beets are messy to process but the rewards are worth it. There a few essetials when processing beets. The first of these is an incentive so I cracked open the last jar of pickled beets. There's nothing like the taste of these to provide ample incentive. Next I put on old clothes and pulled out latex gloves. I prefer the latex gloves as they fit better. I find a stiff brush is a must for cleaning the beets. A few cloths to wipe up spashes and drops as I worked were added to the counter top. This will help minimize beet stains and is the trick to not having to do a big clean-up after canning. This was important on Friday as this was the start of our Thanksgiving weekend and I knew we would be having a housefull as early as dinner time that night. Another trick I use is during food prep, I leave the dishwasher open to load as I use each item. Next I set up my mis en place. I find this type of organization streamlines the canning process.

Mis en place means having all your ingredients prepared and ready to go before starting to cook. Translated it means "to put in place". I use this method whenever I cook. While no special bowls are necessary, I like using little glass bowls and custard cups for ingredients like spices and liquids under 4 oz. Larger bowls are necessary for ingredients in high quantity. There are a few reasons I think mis en place is important. This is a sure fire way of knowing you have all the ingredients and not at the last moment realize you are out of something while the dish has already started cooking. My kitchen work surface is small so having a lot of jars and larger containers on the counter is not practical. The most important reason is to streamline the cooking process so it goes smoothly and efficently.

Pickled Beets, Canned Beets

Beets are washed then cooked before processing. When cooking the beets for processing, a nice deep purplish red juice is produced. Do not discard this juice. Either pressure can or freeze for use as a natural dye. Be sure to label well I processed plain beets in 500 ml jars in a pressure canner for 30 minutes. This is necessary because beets are a low acid food.

Pickled beets are a must have in our home. I make a double batch of Jean Pare's recipe, a simple but tried and true recipe. The pickled beets look beautiful in the jars but then I might be a little biased. Please be sure to read My Notes after the recipe as the original recipe does not have the processing times.

BEET PICKLES

There are no spices added to this pickle. They have a nice tang.

3 lbs Beets with 1 inch (2.5 em) tops intact Water to cover
Water to cover

BRINE
2 c White vinegar
2 c Water
1 c Granulated sugar
1 tsp Table salt

Cook beetsin water in large pot until tender. Cool in cooking water until you can put your hands in comfortably. Slide off beet skins. Leave tiny beets whole. Cut larger beets into chunks. Pack into hot sterilized jars to wlthin 1 inch (2.5 cm) of top.

Brine:While cooking water is cooling, combine vinegar, wager, sugar and salt in saucepan. Heat on medium and stir often until it reaches a boil. Pour over beets in jars to within 1/4 inch (6mm) of top. Seal.
Makes 3 pints.

source: Jean Pare, Preserves, 1994. Pp. 91

My notes: These pickled beets are simply delightful and so easy to make! No processing time was given in the original recipe. I process in a boiling water bath 30 minutes for pints or quarts and 20 minutes for half pints.

Enjoy!