My photo
Ontario, Canada
I am a wife, mother and grandma who enjoys the many aspects of homemaking. A variety of interests and hobbies combined with travel keep me active. They reflect the importance of family, friends, home and good food.
Cook ingredients that you are used to cooking by other techniques, such as fish, chicken, or hamburgers. In other words be comfortable with the ingredients you are using.
--Bobby Flay

For Your Information

Please watch this area for important information like updates, food recalls, polls, contests, coupons, and freebies.
  • [March 19, 2020] - Effective Mar 17, this blog will no longer accept advertising. The reason is very simple. If I like a product, I will promote it without compensation. If I don't like a product, I will have no problem saying so.
  • [March 17, 2020] - A return to blogging! Stay tuned for new tips, resources and all things food related.
  • [February 1, 2016] - An interesting report on why you should always choose organic tea verses non-organic: Toxic Tea (pdf format)
  • Sticky Post - Warning: 4ever Recap reusable canning lids. The reports are growing daily of these lids losing their seal during storage. Some have lost their entire season's worth of canning to these seal failures! [Update: 4ever Recap appears to be out of business.]

Popular Posts

Showing posts with label entertaining. Show all posts

Sunday, January 31, 2016

Superbowl Menu Planning

My husband and I have been having a lazy Sunday, enjoying coffee and chatting about next weekends plans, pleased we don't have to go out in the rain.  Yes rain!  Here in beautiful southwestern Ontario, we are experiencing rain (heavy at times) and rather mild temperatures (highs in mid 40˚F) for this time of year.  We are lucky in that we were away for most of the cold weather but still folks in southwestern Ontario can't complain.  We have only shoveled once, haven't had to use the snowblower and the temperatures haven't been bad.  All in all, it has been a mild winter here.

Superbowl Sunday 2016 (February 7) is a week away!  We sent the invitation out last week so now have a good idea of the numbers.  It looks like we will be hosting our Superbowl Party for sixteen.  That means it is time to do the menu planning for this event.  Unlike many, menu planning does not nor has it ever played a large role in our day to day living however, it is a very useful tool I rely on for certain activities like camping and entertaining.

On the menu:
  
Snacks

  • crudites with avocado/herb dips*
  • cheese tray with crackers*
  • nachos with cheese sauce/salsa/sour cream/pickled jalapeno peppers*
  • cashews
  • potato chips
  • seasoned popcorn* 
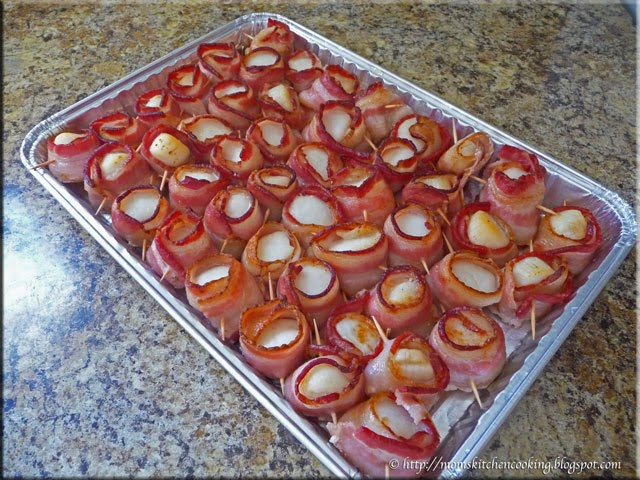
  • [bacon wrapped jalapeno peppers*]
Dinner
  • pulled pork sandwiches* with garnishes (romaine lettuce, shredded cheese, red cabbage slaw*, dill pickles*, pickled red onion*) 
  • spring mix salad* with vinaigrette*
  • chili with corn muffins*
Dessert
  •  banana cake* with cream cheese frosting*
  •  peanut butter cookies* 
* homemade, needs prep ahead

A few menu items like the pickled jalapeno peppers, dill pickles and salsa are homemade pantry staples.  This afternoon I will firm up the recipes I will be using then base my grocery list on that.  I bought a pork loin for the pulled pork with part of it reserved for peameal bacon.  The bacon wrapped jalapeno peppers are in brackets as they are dependent on the availability of the fresh peppers.  Next, I will create a priority for the prep.  For example, cookies and crackers can be made 2 to 3 days prior to the event, pull pork 1 to 2 days before the event, corn muffins the day before and dips the day of.  I'm experimenting with the seasoned popcorn so will make a few trials before deciding on one or two for the party. 


Saturday, December 21, 2013

Easy Holiday Appetizer - Bacon Wrapped Scallops

The holiday season means entertaining for many which ultimately means serving some type of food.  Appetizers are my go to for entertaining!  They are perfect for those events where a full meal is not planned.  It takes very little time or effort to make appetizers that look fancy, taste delicious and are made with only a few ingredients. 

bacon wrapped scallops
Bacon wrapped scallops are the perfect, easy to make appetizer that is always well received.  I made a tray of them for my husband to take to a small holiday house party.   I used one and a half pounds of 20/30 count per pound scallops and two packages of bacon cut in half.  A serving size of bacon wrapped scallops is 3 at 169 calories, 25 mg protein, 1.5 g total fat, 255 mg sodium and 0 mg carb.  All around bacon wrapped scallops are a healthy appetizer choice.  Be sure to drain before serving and make them healthier by using a low sodium bacon. 

Method:  Cut the package of bacon across the short end in the middle.  Wrap each half slice of bacon around a scallop, secure with a toothpick and place on sided baking sheet.  Bake at 177°C/350°F until scallops are opaque, about 45 minutes.  Carefully remove the baking sheet from the oven keeping it level to avoid spilling the liquid.  Remove the bacon wrapped scallops.  Drain.  Serve warm.

Bacon wrapped scallops should be served warm.  Surprising they do warm up rather well if there are any left overs or if you would like to take them cooked ahead!  If taking bacon wrapped scallops to a gathering, a short distance is best.  Place in a single layer in a shallow baking dish, cover with aluminum foil and wrap lightly with a T-towel.  You can also do all the prep work at home then take them ready to cook.  If you choose this method, be sure to ask the host ahead of time.  Taking the bacon wrapped scallops prepared but uncooked is not suitable for shorter duration gatherings due to timing. 


Sunday, December 08, 2013

Meatballs for the Masses

The holiday season is a time for gatherings, large and small.  Quite often they involve bringing a dish.  Immediately logistics come into play such as ease of traveling as some dished travel better than others.  At the same time the setting must be considered as well which will dictate the type of dish you can bring.   My husband was going to a holiday football game with 30 other football fans.  He wanted to bring something for the tailgate party before the game.  Since most of the offerings for the tailgate party would be snack type, we made a large batch of meatballs.  Meatballs are one of my larger gathering stand-by dishes.  Depending on the setting, I make and serve them in the slow cooker or in a large foil baking pan in the oven.  A larger batch can be made using the foil baking pan.  This method is great for those gatherings where using a slow cooking is not possible or for larger gatherings where the meatballs can be kept hot in the oven until ready to serve.

meatballs in the preparation stages
I make meatballs that are just that, meatballs meaning no fillers.  Calculating how much of a dish to bring can be a challenge.  Numbers tend to not be written in stone so even though a gathering may be for 30, there may be more or less.   In this case, there were 30 maximum so at best one or two would not attend.   I planned on 1/4 lb of beef per person, or 4 - 1 oz meatballs each which worked out to 120 oz or 7½ lb ground beef.  I started with 10 lb/160 oz of lean ground beef which would make 160 - 1 oz meatballs, enough extra. 

I started with 10 lb of lean ground beef in two batches for easier mixing.  I sprinkled a little garlic pepper over the meat then mixed well.  Actually, my husband did the mixing so this was a team effort!  I poured a bit of cold milk over the meat to serve as the binder for the meatballs.   Milk allows the meatballs to keep their shape during cooking resulting in firm yet tender meatballs.   My husband formed the meatballs by hand then we fried them using four non-stick skillets.  The cream interior skillets are ceramic non-stick while the darker interior ones are T-fal.  The browned meatballs were transferred to the foil baking pan to finish cooking in the oven as each pan was ready.  I poured  Sweet Baby Ray's barbeque sauce over each addition of meatballs.  I started the meatballs at 120°C/250°F to keep warm until all the meatballs were added to the pan then I made the final addition of barbeque sauce, about a cup of water and increased the temperature to 177°C/350°F.  Had I been cooking the meatballs in the slow cooker, I would have omitted adding the water.

cooked meatballs ready for the party
I cooked the meatballs uncovered at 177°C/350°F until the sauce was hot, bubbling and reduced.  In haste, I neglected to put a baking sheet under the foil baking pan so we carefully maneuvered one under before removing the meatballs from the oven.  Don't they look delicious?

I always make beef or venison meatballs using only meat, milk and either garlic pepper or Montreal steak seasoning.  I keep the seasoning light so the meatballs can be used with any desired sauce, homemade or otherwise.  These meatballs can be home canned in sauce if desired and they freeze nicely.  I like keeping a few pounds of cooked meatballs in the freezer for a quick entertainment dish or using a few for dinner.

meatballs packaged for traveling
I covered the piping hot meatballs with aluminum foil for traveling.  Then we carefully put a T-towel under the foil baking pan on top of the baking sheet (not pictured.  The meatballs would be warm in time to be enjoyed at the tail gate party.  This method works well for meatballs that will be enjoyed within a hour to forty-five minutes of removal from the oven.  If the meatballs will be served after that period they should be kept at 120°C/250°F in the oven.  As always when taking meatballs to an event, I included a package of round toothpicks. 

If you need a simple, easy dish that is sure to please make up a batch of meatballs.  Add a bottle of barbeque sauce of your choice and some toothpicks for a tasty appetizer perfect for holiday entertaining!  Don't forget to make extra for a quick meal start during the busy holiday season. 


Friday, June 28, 2013

Jello Shooters

Today marks the start of the Canada Day (July 1) celebrations.  This weekend will be filled with outdoor gatherings, pool parties, camping, fireworks and just plain old summertime fun.  In preparation for a late evening house party we were invited to this weekend I made jello shooters at the request of the host.  The grill will be fired up and as long as the rain holds off the party will meander into the wee hours of the morning.  

jello shooter ingredients
Jello shooters are rather popular with younger adults but they tend to go over well at summer house parties, pool parties, stag & doe parties, and sitting around the campfire.  Quite often jello shooters are sold at a stag & doe to raise money for the engaged couple.  Traditionally, jello shooters are made with some type of liquor, usually vodka as it doesn't conflict with the flavour of the jello.   However, just about any liquor can be used.  Non-alcoholic versions can be made as well.

The ingredients for jello shooters are simply jello, liquor, water and/or alternative liquid.  The jello shooter cups (clear plastic or waxed condiment cups) can be found at party stores as well as at some dollar and box stores.  They are usually sold in a package of 24.  I personally prefer the clear plastic cups for appearance but the paper cups are popular as the jello shooter can easily be squished into the mouth.

jello shooters prepared for refrigerator
I made two kinds of jello shooters, both alcoholic so not for minors.   Here is how I made them.  I've included a non-alcoholic jello shooter recipes below the two alcoholic ones for the younger ones at the party or for those who choose not to imbibe.  Jello shooters need to be supported while setting.  I fill each cup individually then place onto a baking sheet and place in the refrigerator to set.  Once set the jello shooters can be placed on a serving tray.

Vodka Jello Shooters
1 box orange jello (or flavour of choice)
1 c boiling water
1 c vodka

Bring the water to to a boil.  Pour into large measuring cup.  Stir in jello until the gelatin has dissolved.  Allow to cool until luke warm.  Stir in the vodka.  Carefully pour into jello shooter cups.  Chill until set.

Rum & Coke Jello Shooters
2 boxes cherry jello
1 c boiling cola
1 c cold cola
1 c rum

Bring 1 c of cola just to a boil.  Pour into large measuring cup.  Stir in both packages of jello.  Stir until the gelatin has dissolved.  Stir in the rum.  Lightly stir in the cold cola.  Carefully pour into jello shooter cups.  Chill until set.

Non-Alcoholic Jello Shooters
1 box jello flavour of choice
1 c boiling water
1 c club soda or ginger ale

Bring water to boil.  Pour into large measuring cup.  Stir in jello until gelatin has dissolved.  Allow to cool until luke warm.  Pour in the club soda or ginger ale then just lightly stir.  Carefully pour into jello shooter cups.  Chill until set.

jello shooters ready to serve
Pictured are a couple of the rum & coke and vodka jello shooters I made.  Jello shooters are rather pretty with a jewel-like sparkle and the consistency of jello.  Be warned though that those made with alcohol are potent.  They should be enjoyed responsibly.  Jello shooters whether alcoholic or non-alcoholic made with soda are a taste bud sensation!  The soda gives a tingling, very slight almost but not quite burn that is quite pleasant.

Jello shooters can be served simply on a serving tray without garnish.   They should be kept chilled until serving.  I make 2 per guest which is usually enough with a few left over. 


Thursday, December 06, 2012

Kitchen Quick Tips - Thawing Shrimp

kitchen quick tips The holiday entertaining season is upon us.  To quickly  thaw frozen shrimp, place the bag or wrapped tray in cold water in the sink.  The shrimp will be ready to use in about 10 minutes.


Sunday, October 14, 2012

Grilled Salmon

We are very fortunate to have a few fisheries within a 100 mile radius of our home in addition to being able to fish ourselves.  It is an interesting way so spend a bit of time watching the fishing boat dock with their delicious cargo.  As a result we are able to enjoy local fish like perch, pickerel (walleye) and bass of a fairly regular basis.  Most of these fisheries also have fresh fish like Atlantic salmon, rainbow trout, lake trout and whitefish as well as other fish and seafood.  We recently stopped at one of the fisheries, Purdy's Fisheries who have three locations in Ontario:  Grand Bend, Point Edward and Port Franks.

salmon and pickerel on the grill
We live in a smaller community with two grocery stores but only one carries a very limited supply of fresh fish.  That fish is transported to the grocery store and while it is fresh fish, it is not a fresh as the fish at the fisheries.  We brought home a lovely pickerel fillet and salmon fillet.  I cooked them on foil over charcoal along with acorn squash wrapped in tin foil and grilled potatoes.
Salmon is a nice, sturdy fish that lends itself nicely to grilling directly on the rack, in a pouch or on a prepared cedar plank.  Pickerel, on the other hand is a bit more delicate and sticks to the grill easily so needs to be cooked on foil or in a foil packet when grilling.  The fillets were lightly seasoned with lemon juice, butter and garlic pepper.

vacuum sealed grilled salmon
Fish is the ideal fast food because it does cook quite quickly.   Charcoal adds a lovely flavour to the fish that can be enhanced using wood chips if desired.  Salmon can be cooked to rare if desired but pickerel should be grilled until the flesh is opaque and flakey yet moist.  It is important to not overcook the fish as it will become dry.  Place the fish on a baking sheet with holes or tin foil with a few holes poked into it.  Let the fish fillets cook without turning.

We certainly love our fish but the two fillets were too much for dinner.  I vacuum sealed the remainder of the salmon fillet to be frozen.  Pre-cooked like this, salmon is excellent for making salmon dip for entertaining, flaked for salmon sandwiches or used in seafood chowder.  It certainly will not go to waste!


Friday, April 27, 2012

Cupcakes

I had to slip to the pharmacy today and while waiting to check out my prescription, I spotted the mini Taste of Home Cupcakes & Mini Dessert magazine.  While I don't buy a lot of magazines, I am rather partial to Taste of Home and Cook's Illustrated so occasionally splurge.  We will be doing a bit more entertaining this summer so I'm looking for a few easy but different, easy desserts.  Now everyone loves homemade cupcakes and the ladybug picnic cupcakes on the cover were just so cute, I couldn't resist the magazine.  All of the desserts are individual serving size which will make it quite easy to serve them for summer entertaining.

cupcake soaps
Cupcakes are so well loved that some brides are serving them instead of wedding cake.  Special cupcake display stands are available at baking supply shops for this very purpose.  Homemade cupcakes were one of the favourite things our kids loved to help make in the kitchen.  Trust me, nothing tastes better than a homemade cupcake decorated by little helping hands!

Homage to the love for cupcakes goes further than that. Just look at these two delicious cupcakes.  To the left is Oreo Cookie and to the right is Pina Colada.  Don't they look scrumptious?  Surprise!  They are not edible but they sure are adorable and they are regular cupcake size.  They are two decorative soaps I bought for the bathroom.  Despite all the cooking I do, there are a fair number of non-edible products that I make as well in the kitchen like homemade soaps, homemade toiletries and candles (beeswax, soy).  When the kids were young I made goop, playdough, cornstarch sand, and oceans in bottles for them to play with in the kitchen while I cooked.  Of course, we made various renditions of the erupting volcano and various school science projects.  Ah, a trip down memory lane...


Tuesday, February 14, 2012

Superbowl Follies (3)

This is the final post on some of the foods I served for our Superbowl party.  Some of the foods served were not featured as I've posted about them previously.  These include the moose meat chili, beef chili, spiral ham, cheesy hash brown casserole and baked beans.  I like bringing out new dishes and combinations for our guests to try.  Some of these end up being duds but some go on to being staples in my repertoire of of entertaining dishes.

fruit tray with dulce de leche dip
So it was with the fruit tray I set out.  Honestly, it was empty within 10 minutes!  I cut the apples then soaked them in citric acid to prevent browning then added strawberries and mandarin oranges to the tray.  The dip was made using dulce de leche.  This is a thick, creamy and very, very thick caramel sauce.  It can be purchased in larger centres or made at home using sweetened condensed milk.  I personally find dulce de leche too rich and sweet but it is great used in baking or fruit dips. 

Dulce de Leche
source: Garden Gnome and Garden Gnome's Daughter

my method:
Remove the label from a can or two of sweetened condensed milk.  Place in a sauce pan on a trivet.  Cover with water.  Bring to a boil on medium-high heat.  Reduce to a low boil and cook for 90 minutes.  Remove the can(s) and allow to cool. The dulce de leche is now ready to be used and unopened will keep for a year in the pantry.

my daughter's method:
Pour the sweetened condensed milk into a microwave safe bowl.  Cook on high for 1 minute then stir.  Repeat until the milk is thickened and caramelized, about 8 minutes.  The dulce de leche made this way will keep in the refrigerator for one week.

Dulce de Leche Fruit Dip
source:  Garden Gnome

1 c sour cream
4 tbsp dulce de leche
sprinkle of ground cinnamon

Place ingredients in mixing bowl or blender.  Mix well.  Pour into serving bowl.  Refrigerate 1 hour.  Serve as a dip for fruits. 


Sunday, February 12, 2012

Superbowl Follies (2)

Yesterday I shared the first of three posts on our Superbowl entertaining.  I like to alternate between a hot and cold dish every two hours.  The reason being, many of our guests are consuming alcoholic beverages so it is our responsibility as hosts to ensure ample food is available to counteract the effects.  Coffee, tea, hot chocolate and other non-alcoholic beverages are always available as well. 

pretzel crisps and potato chips
Snack type foods are always on the tables in our games room.  These usually consist of pretzels, peanuts, and potato chips but sometimes I put out fresh popped corn or even a candy tray.  Pictured are two of the bowls of snacks.  Instead of pretzels, I used pretzel crisps.  These are thin, crunchy pretzel crackers.  The are all natural, oven baked crackers with 0g trans fat, 0g saturated fat and 0mg cholesterol, so are a healthier option than potato chips.  There are 110 calories in a serving of 11 pretzel crisps but 270 calories in a serving of 20 of the potato chips pictured.  Converting to equal amounts it works out to 200 calories per 20 pretzel crisps.  They can be enjoyed plain, dipped or paired with any topping of choice.

nacho station set-up
I use the industrial strength wheeled cart that served as extra storage in our last kitchen as a self-serve station for various dishes.  There is a plug on that wall as well as a television.  To the left is the entry to the utility room where there is a full size, side-by-side refrigerator with water and ice in the door.  Beside the refrigerator is a bank of cabinets with countertop that we installed shortly after moving in.  It serves as a dry bar for drinks.

Nachos are always a hit even at our monthly games night.  I set up the top shelf of the cart as a nacho station as pictured.  The nacho chips, cheese in the themed slow cooker and nacho trays were purchased at Sam's Club.  I used the squatty 250 ml designer mason jars as serving bowls for home canned salsa, home canned jalapeño peppers and sour cream.

meat and cheese tray
Later I set the cart up for cheese and crackers on the top shelf.  Quite often our guests will bring a dish or snack.   The wive of one of our guests generously made the cheese and meat tray.  He is doing a lot of custom woodworking for us, building my cookbook shelf, drink tables, medicine cabinet and custom trimming in the main bathroom.  Just wait until you see the custom work he is doing in the kitchen!   I added the mini Breton and Snackers crackers along with dill pickles and garlic dill pickles.  Surprisingly, dill pickles are a huge hit as well even at our monthly games night.

The second shelf was set up with small paper plates and bowls along with a banana cake another wife brought.  She also brought snickerdoodles!  It is common for one or more of the wives to come out to the monthly and special events especially for the dinner.

I use paper plates, bowls and serviettes for the large, special events although I have used regular dinnerware.  This is a practical measure when entertaining for larger groups.  I don't use disposable serving dishes for either special or monthly events nor do I use disposable plates or bowls at the monthly games night.  I very rarely use disposable cutlery either.  I do however use the disposable nacho tray.  For some reason, everyone loves these trays!  They are not expensive either.  The Bakers & Chefs 125 count package I buy is $4.98 at Sam's Club which is less expensive than paper plates. 


Saturday, February 11, 2012

Superbowl Follies (1)

Superbowl weekend is a huge event at our house.  This year Superbowl Sunday fell on the day following our regular monthly games night so let me tell you I was a very, very busy person with prep starting early in the week.  We had about 15 for the monthly games night on Saturday starting at 6:30 PM then running into the wee hours of the morning with me putting out food every two hours.  Our Superbowl party started at 12 PM the next day with me providing lunch, dinner and food every two hours for about 30 until they finally wandered home in the wee hours of the morning.  I was and still am exhausted but I have a lot of other irons in the fire.  I was going to make one huge Superbowl post but decided to break it into three posts after realizing how many pictures I had to share.  On the Superbowl menu and most of it homemade from scratch: vegetable tray, fruit tray, cheese and meat tray, banana cake, cheese sticks, BBQ meat balls, moose meat chili, spiral ham buns, cheesy hash brown casserole, baked beans, snickerdoodles, along with a wide variety of snack type foods.  Enjoy!

pigs in a blanket
Superbowl parties are all about junk food but I really do try to make most of the offerings as healthy as possible.  Pigs in a blanket is one dish there really isn't a lot of ways of making it healthier and yet it is a very much requested dish.  I honestly do not care for pigs in a blanket!  They are made by wrapping wieners in refrigerator dough then baking until golden brown.  I cut them on the diagonal into 1 - inch sections then pop a toothpick into each section for serving.   I make them healthier by using all beef wieners.  I could make fresh dough or use puff pastry but the guys would complain the taste is not the same.  While I don't care for them myself, they are easy and inexpensive to make, and always a sure party favourite.

meatballs in Sweet Baby Ray's sauce
If you recall, I made the meatballs for the Superbowl party much earlier in the week.  The beauty of the way I make meatballs is they freeze nicely for later use and any sauce can be used when rewarming.  I ended up with a total of 11 lb of meatballs made over two sessions.  I froze them until Superbowl Sunday.  Then I put them into my largest slow cooker and poured Sweet Baby Ray's BBQ sauce over then.  I set the slow cooker on low and let them cook until warmed through when I announced to the guys they were ready.  The entire batch of meatballs were devoured that afternoon!

Meatballs are really an inexpensive, frugal Superbowl treat.  They go over well and when made in advance the way I do mine have minimal prep on the day of the event.  You really can use any sauce you want but on the day of a large event like this using a store bought sauce can save a lot of time.  Any Diana Sauce works nicely but you can use pretty much any sauce.  If you want to make one from scratch, the sauce I use on sweet and sour ribs works nicely as well and it is really quite inexpensive to make, something that anyone cooking for larger events will greatly appreciate.


Wednesday, February 01, 2012

Mom's Basic Meatballs

Superbowl weekend is fast approaching.  This year we are entertaining Saturday evening for about twenty.  A couple of those guests will be staying over night to partake of our annual Superbowl party of about twenty.  As you know I have been busy painting the kitchen and now with three days until the festivities, am in high gear doing menu planning and preparing a few dishes ahead of time.  Meatballs are a hit at Superbowl parties.  One of the grocery stores has a 907 g (2 lb) box of meatballs on sale for $4.97, regular price $7.97.  This works out to $2.49 per pound at the sale price.  Homemade meat balls made by grinding your own meat using a shank roast or other cut of beef on sale can be considerably lower than that price per pound.  Unlike store bought meatballs, my homemade version contain no fillers.

meatball ingredients
I have ground beef from our last beef on the hoof purchase to use up so did not grind from a fresh cut of beef.  The price works out to $2.35 per pound across all cuts of for organic, hormone-free beef.  Hopefully this year's price will be the same!

When I make meatballs, I don't use any fillers.  Any seasonings I do use, I keep to a minimum so the meatballs can be used in a variety of dishes.  I used 4.5 lb of lean ground beef for this batch.  The binder I prefer is cold milk.  The milk tenderizes the meatballs without adding much in the way of flavour.  I used a little garlic pepper as a seasoning.  The screen on top of the mixing bowl is a splatter guard available at kitchen outlets and many department stores.  Meatballs can be fried, baked or boiled but my opinion is frying gives the best results.  I used the larger of my new Paderno EcoPan ceramic coated frypans.  My gosh, as a non-stick surface these fry pans are a dream to work with without the worry of PFOA and PTFF off-gassing of other non-stick cookware.

meatballs ready for shaping
Cold works as a great binder for ground meats because it congeals the fat in the meat.  I put the metal mixing bowl in the refrigerator to chill.  Once chilled I add the meat and any seasonings, mixing well.  Then I pour in the cold milk a little at a time until the meat sticks together.  At this point it is time to heat the fry pan and start forming the meatballs.

I use a meatball former for consistent sized meatballs.  Larger meatballs can be made by hand but you have to work quickly to prevent warming the meatballs before putting them into the fry pan.

frying the meatballs
I add just a little extra virgin olive oil to get the frying process started.  I also work in small batches in a rotation style.  Each meatball is formed then placed in the pan one at a time rather than making all the meatballs at once allowing them to warm.  Once the meatballs are browned on one side, I use a slotted wide spoon to carefully turn then then push that batch to the side of the fry pan furthest from me.  While they finish cooking, another batch is added to begin cooking.  I remove the cooked meatballs, turn the others then add a new batch.  I continue in this fashion until all the meatball mixture is used.  This may sound like a lot of work but it really is not.

meatballs ready for use
Once all of the meatballs are cooked, I allow them to cool.  I do not drain them because I am using lean ground beef and a slotted spoon so then is little to drain.  If using regular ground beef, I would recommend draining the meatballs.  At this point the meatballs are ready to be added to the desired dish, home canned or frozen for later use.

Without a lot of added seasoning the meatballs can be used in any dish ranging from soups and pastas to a wide variety of meatball appetizers.  Just pour the frozen meatballs into your slow cooker then add desired sauce and heat.  Serve right from the slow cooker for a Superbowl party.  Just add a slotted spoon and toothpicks so guests can help themselves.  I have a football theme slow cooker just perfect for this type of presentation.  I'm planning on using a honey-garlic sauce on the meatballs for the Superbowl party.


Wednesday, December 21, 2011

The Christmas Nutbowl

My foster Mom came out from England, actually born on the boat during the journey.   Her parents settled in southern Ontario making a living as farmers.  With a large family to feed there were not a lot of treats.  She told us the story of how special she felt getting a Christmas orange.  When she married having nuts on the table at Christmas was a sign of prosperity.  As long as I can remember oranges and nuts graced the coffee tables during the holiday season.  I carried that tradition on to our home.

cheese tray and nut bowl
My nut bowl is not fancy and it varies from year to year.  It's only partially filled so I will end up having two nut bowls this year which is fine as we will be doing a bit of entertaining.  Along with the nut bowl, I have a few other goodies that always grace the table during the holiday season.  Kibbeh and crab dip is a must, bringing in traditions from my husband's family. We've added a few of our own traditions over the years.

I always have one or more cheese trays.  This year I received a very generous pre-Christmas gift of a fancy cheese tray.  I will be serving brie with a maple topping on this gorgeous tray for its maiden run.  Watch for pictures coming shortly.  Let the entertaining season begin!


Monday, October 10, 2011

Frugal Kitchens 101 - Entertaining for Large Groups

Frugal Kitchens 101

Happy Thanksgiving!

Today we celebrate our Canadian Thanksgiving.  There will be between twenty-five and thirty of us, hosted in our new home.  Yes we recently moved and because we were on our fall vacation for two an a half weeks the house is not perfect but we felt it is more personal than renting a hall as was suggested.  We are used to hosting larger groups with one monthly event of fifteen to thirty as well as larger family gatherings. Here's a few tips for entertaining for large groups on the frugal side.
  • KISS (keep it simple silly) - The KISS hypothesis really works when entertaining for large groups.  Less is more in the sense of dishes offered.  I have place settings for 30 but sometimes going to paper plates is a good idea depending on the venue. 
  • don't refuse help - Trust me I am the queen of my kitchen but for larger events a bit of help is always appreciated.  If someone offers to help, graciously accept even if you need to slightly modify the help offered,
  • use disposable - I don't like disposable anything and have service for thirty but even at that there are sometimes disposable is better than anything else.  
  • enlist help - I have no problem hosting for thirty but I am not above asking for help.  It is not impolite to say, I need help for this event.
  • everyone brings something - Ok, this is not my idea and in fact when hosting an event there are very few times I would want a guest to bring anything because that is not our style.  But sometimes like our Thanksgiving feast each couple was responsible for bringing one dish.  It works and it does take a bit of the burden off of the host. 


Saturday, August 20, 2011

Faux Crab Dip

I am not a huge fan of anything imitation, faux or artificial especially when it comes to cooking.  We are in high gear preparing for our upcoming move so I'm using the pantry rule of using one thing from the pantry and one from the freezer for each meal while avoiding the sales.  This will reduce the food we will have to move but in reality we start moving in the midst of the tomato harvest so I will be canning, filling up a lot of the empty jars.  Anyway, my husband picked up two packages of imitation crab meat when it was on sale.  At a $1 a package it was worth the try so I made the first package into an imitation crab meat salad.  Yesterday I spotted the remaining package in the freezer so used half of it to make a creamy dip.

faux crab dip
I make a lot of dips for entertaining.  Much like my salad dressings they are created as I go with the ingredients written in my kitchen journal.  My base is always a combination of Miracle Whip or mayonnaise and sour cream or plain yogurt.  Those four ingredients give a nice base to build on.  From there I add vegetables, fruits, herbs, seasonings to create a unique dip for my guests.

I made a faux crab dip using half of a package of the imitation crab meat.   The flavour was quite delicious so I can't wait to make the dip using real crab meat.  It will change the flavour and texture slightly but will still be rich and creamy.

Faux Crab Dip

1/2 pk imitation crab meat
1/3 c sour cream
1/3 c cream cheese
1/3 c Miracle Whip
1 green onion
1 tbsp red onion
1 tbsp radish
2 tbsp chopped cucumber

Place sour cream, cream cheese and Miracle Whip in food processor.  Blend until smooth.  Add in crab meat and pulse twice.  Chop vegetables fine then add to mixture and pulse twice.  Spoon into serving dish.  Refrigerate 1 hour for flavours to meld.  Serve with corn scoops or crudites. 


Friday, July 22, 2011

My Keurig K-cup Purchase

A couple of days before leaving on our spring vacation in May, I spurged on a new Keurig single brew system to replace my rapidly failing Melitta One:One.  I promptly set up a new coffee centre making it easy and convenient to use the Keurig but did not have time to tweak the layout or even experiment.  When we arrived home from vacation, I had a lot of fun discovering my new toy!

The K-cups are expensive coming it at 79¢ each if bought on sale.  I bought the My K-cup re-usable filter system so we can use regular ground coffee (9¢ per cup), loose tea, tea bags and herbal tea at a fraction of the cost of K-cups.  I recycled a revolving spice rack for the K-cups rather than buying one of their carousels that would take up more counter space as it is wider.  I quickly realized that using the K-cups can be quite convenient especially when entertaining.  For example, out of twelve guests at the first get-together after returning home: one guest wanted decaf coffee, one wanted regular coffee and one wanted herbal tea.  I was able to quickly make these beverages without having to brew two pots of coffee, resort to instant coffee or get the tea kettle out.  The Keurig has quickly become the most used on a daily basis kitchen appliance we have.

I honestly don't mind cleaning the re-usable filter and we often run a couple of cups cleaning the filter in between rather than brew a full pot of purcolator coffee.  I decided that I would also like a good supply of K-cups.  I was contacted by a representative of One Cup Connection inviting me to check out their site.  [Note:  I have no affiliation with this company other than being a satisfied customer.  This is not a paid post.  The opinions expressed are my own.]

K-cup purchase
Their prices were the best I've seen yet at $11.99 for a 24 pack of K-cups in comparison to a sale price of $12.99 for an 18 pack (regular price $17.99).  I bough five cartons (120 K-cups) for a total of $45.96 that included free shipping and a free carton coupon code.  The price came in at 38.3¢ per K-cup less than half the cost of K-cups on sale in the stores.  Had I bought 5 cartons of K-cups on sale in the stores not only would I have less of a selection but it would have cost me $64.95 for 90 K-cups.  Other online sources (eg. Green Mountain) have raised their prices to almost $17 per 22/24 pack carton

Shipping is free if you buy at least $45 and they had a special if you bought 3 cartons you got one free.  They do have specials as low as $7.99 for K-cups past the best buy date and $9.99 for K-cups nearing their best buy date.  Their shipping time is really good, as low as 2 days.  They ship buy ground and unfortunately do not ship to Canada yet so I shipped to one of our US addresses.  

I bought Tully's Breakfast blend (nearing best buy date of August 14, 2011), Green Mountain Columbian Fair Traid Select, Green Mountain Caramel Vanilla Cream, Coffee People Donut Shop (Perks for the Planet) and Green Mountain Limited Edition Island Coconut Fair Trade.  Now 120 K-cups sounds like a lot but I'm sharing the order with our kids who also have a Keurig.  We will each have 60 K-cups which will likely last us well into the fall considering we both use the re-usable filter.  I really like that I can get Fair Trade Coffee in K-cups!  So my next order will reflect that.  I like that I can get flavoured coffees as well.  We don't use a lot of flavoured coffee but this is a way to be able to offer our guests other beverage options.  I will test out a couple of flavours as well.  All in all, my experience with One Cup Connection was quite positive.  I will certainly be ordering from them again!


Friday, February 18, 2011

Superbowl Party Foods

We host a Superbowl Party each year and this year was no exception.  Unfortunately this time of year the weather can be a bit unpredictable so while we were expecting about thirty we ended up with about half that.  It really was a rather nasty day and evening with a fair amount of snow and drifting.  The party usually starts about 11:30 AM and runs into the wee hours of the morning depending on weather conditions.  It is not uncommon to have a few overnight guests as well.  This means I have to plan for afternoon and evening snacking as well as dinner.  The offerings included: pigs in a blanket, sausage rolls, nachos with salsa and cheese, chili with toppings and dinner rolls, mac & cheese (my husband's insistence), vegetable tray with sesame garlic dip, potato chips, pretzels and peanuts.   I had decided on what I was serving earlier that week so it didn't take much to pull things together.   One of our guests brought meatballs and venison sausage.  There was a lot of food and I had back-ups to bring out if necessary.

superbowl chili
I made the chili the day before the party.  Now this is my famous from scratch chili and I do mean from scratch.   I use home canned tomatoes, home canned tomato sauce and home canned kidney and black beans.  Sometimes I use the beans from dry after being soaked overnight.  It is a long, slow cook chili that takes several hours then is always left overnight to allow the flavours to develop. 

We were expecting about thirty.  I found that my largest stock pot was taking a bit too much attention while the chili slowly simmered.  We devised plan B by pouring the chili into two roasting pans and letting them reduced enough so that the chili would fit in the largest roasting pan.  This roaster will easily hold a 24 lb turkey.  As you can see it was quite full!  I put some of the chili into the slow cooker to warm the next day

my husband's superbowl mac and cheese
During our recent trip to our vacation house we enjoyed a multitude of some of the best BBQ ever.  My husband loves anything with cheese!  One of his favourite sides during our BBQ adventures was a mac & cheese with a smokey flavour.  He set about duplicating the dish.  I will tell you his recipe is not for the faint of heart but it was ever so tasty!  He made a large batch that went in a flash with only about a cup left over that I scooped out for his lunch the next day.

Superbowl Smokey Mac & Cheese
source:  Mr. Garden Gnome aka my dear husband

1 - 900 g package elbow macaroni
1½ c mozzarella cheese
¾ large spanish onion, chopped
1 lb Velveeta cheese
1 lb Monterray jack/cheddar cheese mix
½ lb cheddar cheese
¼ lb butter
3 tbsp cottage cheese
4 tbsp sour cream
3-4 drops liquid smoke

Shred cheeses.  Finely chop onion.  Cook and drain elbow macaroni according to instructions on package.   Pour hot macaroni into roasting pan.  Stir in remaining cheeses and liquid smoke.  Stir well to mix.  Let cool and refrigerate until the next day.  Place the roasting pan in the oven at 250ºF about a 1½ hrs before serving.  Heat through until golden brown on top and cheese is melted.

Serves 20 - 25


Friday, January 15, 2010

Cheese, Meat & Vegetable Twist

I don't buy or subscribe to very many foodie type magazines. A few years ago I signed up to receive What's Cooking, a free quarterly magazine put out by Kraft Foods. The magazine is wonderful presented with easy recipes using Kraft products. There are a lot of cooking and menu planning tips as well. I will admit to enjoying opening up a foodie magazine and immediately seeing something I want to try making.

steps for making easy baked cheese, meat and vegetable twistThe Steps

This recipe was originally called Easy Baked Cheese & Vegetable Twist. The presentation was quite appealing yet looked easy enough to duplicate. I took one look at the recipe then started tweaking changing the filling to include meat. I also wanted something with a bit more flavour which the original recipe didn't have. Here's my version.

Cheese, Meat & Vegetable Twist
modified from: Kraft Foods, What's Cooking. Festive 2009. Pp. 37.

2 cans refrigerated crescent dinner rolls
2 eggs
125 g (4 oz) Philadelphia Herb & Garlic cream cheese spread
2 c broccoli, rough chopped
8 mushrooms, quartered
½ roma tomato, seeded and chopped
1 green onion, sliced
1½ c ground beef, browned

Brown ground beef and drain. Prepare vegetables. Open the crescent rolls, separate and arrange on a baking sheet overlapping to form a circle (1). Mix the rest of the ingredients together then spoon around the centre of the circle (2). I found it worked best to use a large spoon then shape the ring as I went using the other hand. Pull up each triangle point towards the centre and tuck under (3). Continue in this fashion until all points are tucked under (4). Bake at 190ºC/375ºF until golden brown about 35 minutes.

Easy Baked Cheese, Meat & Vegetable TwistFresh from Oven

I was a bit surprised to see the ring did not keep its nice round shape but that's ok. Honestly I do have a crooked eye but do still know the difference between a circle and oblong. With a bit of practice I should be able to perfect this. The original recipe showed the finishd twist on a serving wood. This definitely would be a two person endeavour to get the baked ring onto any serving dish without breaking it.

What strikes me about this recipe is you really could use any filling you wanted to as long as the filling isn't runny when hot. It could be a savoury, meat filling as I used, a vegetarian filling or even a sweet, dessert filling. So it is the method and idea that is most important then tailor the filling to what you want.

Easy Baked Cheese, Meat & Vegetable Twist platedPlated

Once the twist is cut for plating it really doesn't have the circular shape although there is a slight arc to the pieces. For presentation and serving it would be very nice to present the twist whole as that is when it is most impressive visually. I plated the cut twist very simply with a small garnish. An average serving would be 3 sections depending on the filling. It was quite tasty and very filling. I'm glad I substituted the Philidelphia Herb & Garlic cream cheese spread in place of plain cream cheese as that added a nice flavour element. The real trick is going to be substituting the refrigerator dough. I think puff pastry would be a good substitute so will try that the next time.


Tuesday, July 14, 2009

Weekend Pig Roast

Pig roasts are always fun events! Two years ago we held a pig roast that was a huge success.  We were planning on holding another pig roast this year but so far have been unable to find a roaster for rent. At one time the local abattoirs and a few local farmers had the roasters that they would rent out but no longer. A relative and I were chit chatting about not being able to find a roaster. They were hosting their annual fireworks event on the 11th. It always falls in July as close as possible to Canada Day. The number in attendance reaches around 150. This wonderful day long event is held on their picturesque, farmland property in southern Ontario. Local foods and entertainment are always a feature which is something I really appreciate. After dark everyone settles in for a gorgeous fireworks show that would out do many communities! Some of the fireworks are originals made specifically for the occasion. It is just a lovely event with a good time had by all!

She also wanted a pig roast for this event to compliment the hot dogs and hamburgs being grilled but was having no luck finding a roaster. She had found a place in Ahmerstberg, Ontario that seasons and roasts the pig. Then then gut it, remove the bones and stuff the meat back into the skin. Well sounded a bit intriguing to me so I couldn't wait to see what the pig looked like done this way. More importantly I couldn't wait to taste the meat!

pig roastRoasted Pig

The roasted pig was nicely presented on a bed of lettuce and garnished with the traditional apple in the mouth and orange slices. The meat had been de-boned then stuffed back into the skin to give the appearance of a whole pig. The meat was then easily sliced as desired with an electric knife.

As interesting as this solution is, buying a roasted pig this way presents a couple of problems. It removes the day long work of tending the roasting pig and it eliminates having to pick-up and return the roaster. However, buying the pig already roasted was considerably more expensive coming it at $5 per pound plus the cost of gas to pick it up. In comparison we paid $100 for the 117 lb pig for our pig roast, $80 for the roaster and about $150 in additional foods for a total of $330 serving about 70. The pig pictured was similar in size at a cost about $585 already roasted. Additional foods would have driven the cost per plate considerably higher. They would have had to drive a good 90 minutes each way. Taking a good 3 hours out of the prep time on the day of this type of event just to pick up the pig would have been rather inconvenient. It definitely would not work for us as we would have to drive even further. The second problem is transportation itself. The pig would have to be kept in the safety temperature zone during transportation and until serving. With this in mind, a roasted pig purchased this way can still be a good solution in a pinch.

baked beansBaked Beans & Sides

The sides consisted of several homemade dishes including baked beans, potato salad, coleslaw, fresh fruits and various desserts. Grilled hamburgers and hot dogs were available for those not wanting pork. One way to keep costs down a bit is to have people bring a side, salad or buns. Even if you ask people to bring nothing more than whatever they are drinking they will invariably bring something else. If someone asks what can they bring be specific. The real problem with this method is even if you delegate you will end up with too much of one dish and not enough of another because that is human nature. So you really do need to with the flow and be prepared with back-up dishes just in case.

The sides and additional food was presented linear spread in a covered outdoor location. This controlled any outdoor food problems such as dust and insects. The host kept things simple by serving in the baking pans and plastic bowls. What I found interesting was behind some of the sides like the coleslaw was a plastic zipper style bag filled with more for easy refilling as required. While this does work, I wouldn't recommend it simply because the food in the bags may spend time outside the proper safety temperatures that could cause later tummy upsets or worse.

roasted pig dinnerRoasted Pig Dinner

Pictured is my plate of food consisting of pork with barbeque sauce, potato salad, coleslaw and baked beans. The meat was nicely roasted, moist and tender. The sides did not disappoint either. That golden brown to the upper right of the meat is roasted pork skin. Roasted pork skin is a true delight! It is chewy yet crispy with a thin layer of fat on the inside. It is packed full of flavour! I don't to enjoy roasted pork skin very often even though I love it. The closest I get is the occasional cracklings which is pan fried pig skin from our bulk pig purchase and that I don't get that very often either. It likely isn't the healthiest thing to eat but oh my gosh it is just so good! I tucked a small container of it into our cooler to enjoy the next day.


Thursday, April 09, 2009

Kitchen Quick Tips - Entertaining


The golden rule for entertaining is to always serve something you have made before. This is never the time to try out and new dish!


Tuesday, February 03, 2009

More Highlights from Super Bowl Party

Anyone who follows this blog knows we do a lot of entertaining and quite often host events of 20 to 30 people but sometimes more on a regular basis. Sometimes we will host more than one of these larger events in a month. Usually the Monday before the event I sit down to do a bit of planning which seriously is one of the few times I menu plan. I'll tweak the menu to try new dishes as well as tried and true. By the Wednesday I have the grocery list ready and have already started some of the prep work.

I estimate the length of the event them break it down into 2 hour periods. So for an event like the Super Bowl Party with people arriving just before lunch the first hot appetizer or snack was scheduled to be served about 2 pm, dinner at 5 pm, evening snack at 7:30 pm, hot late dinner 10:00 - 10:30 pm. At the same time a wide variety of snack type foods were served on a continuous basis. I have to keep in mind that some guests arrive with snacks and food so that has to get out as well.


Snack Mix

One of our friend's wife more often than not sends a homemade banana cake that is simply to die for. It is one of the best I've ever tasted and no I do not have the recipe (sorry). For this event she not only made her famous banana cake but also a snack mix similar to Scrabble except to my understanding was this snack mix was not baked. I have an email out to our friend so hopefully she shares her recipe.

In the meantime I have found several recipes for a similar mix online so will be doing a bit of experimenting. What I like about this type of mixture is you can really customize it not only with the individual snack ingredients but also with the seasonings used. It's a popular type of snack mix for those who like to pick and choose as well as for those who want just a little of this and a little of that.

Refillable Squeeze Bottle

Entertaining on any scale often requires extras you might not use on a daily basis. Sam's Club sells a package of 6 clear (really translucent), red or yellow 6 oz squeeze bottles for $4.34. They are food grade plastic perfect for all your homemade sauces and are perfect for casual type entertaining on the table or behind the scenes for more formal entertaining. The only fault I have with these squeeze bottles is there is no lid so I just use as small piece of tin foil to cover the nozzle.

Sam's Club is a great place to pick up commercial grade items like this and so much more. While some of the serving extras they carry are disposable a lot of them are not. Their restaurant grade cutlery and serving items are well worth checking out.

Nachos

Nachos and cheese are served at many of our events so I wanted something that was a little special and not necessarily disposable. I bought a package of 125 nacho clear plastic trays for $5 at Sam's Club. What is nice about these trays is they can be washed and re-used. At the same time if you are hosting a larger event and don't want to wash them they can be rinsed then popped into the recycle bin.

My husband won the football themed Crock-Pot at a golf tournament so it was perfect for the Super Bowl party. I used that to keep the cheese sauce warm. Not shown are the really cute football shaped serving dishes from Planters® that I used for extra nacho chips and late homemade popcorn. Using these types of themed servingware really adds to the event.

Taco Dip

One of our friends' wife sent a taco dip with Tostitos® Scoops®. This appetizer became popular well over 10 years ago and remains one of the most popular appetizers to appear at any gathering. It is popular because it is an easy, inexpensive dish to put together in very little time with no cooking. It travels well and everyone likes it. It is also a very versatile dish that can use a variety of toppings and toppings can be omitted if desired. There are many, many variations of this dip including my specialty Mexican Layered Dip.

Essentially the base is made using taco seasoning, cream cheese and Miracle Whip® or mayonnaise. The base is spread on the bottom of the serving dish. The selection of vegetables and/or sauce are then placed on top along with grated cheese of your choice. As you can see there is a lot of lea way as far as toppings and choice of cheese. At any rate this is a must make appetizer that is sure to please.