My photo
Ontario, Canada
I am a wife, mother and grandma who enjoys the many aspects of homemaking. A variety of interests and hobbies combined with travel keep me active. They reflect the importance of family, friends, home and good food.
Cook ingredients that you are used to cooking by other techniques, such as fish, chicken, or hamburgers. In other words be comfortable with the ingredients you are using.
--Bobby Flay

For Your Information

Please watch this area for important information like updates, food recalls, polls, contests, coupons, and freebies.
  • [March 19, 2020] - Effective Mar 17, this blog will no longer accept advertising. The reason is very simple. If I like a product, I will promote it without compensation. If I don't like a product, I will have no problem saying so.
  • [March 17, 2020] - A return to blogging! Stay tuned for new tips, resources and all things food related.
  • [February 1, 2016] - An interesting report on why you should always choose organic tea verses non-organic: Toxic Tea (pdf format)
  • Sticky Post - Warning: 4ever Recap reusable canning lids. The reports are growing daily of these lids losing their seal during storage. Some have lost their entire season's worth of canning to these seal failures! [Update: 4ever Recap appears to be out of business.]

Popular Posts

Showing posts with label condiments. Show all posts

Monday, July 15, 2013

Best Bread and Butter Pickles Revisted

Every year I develop and/or try new home canning recipes.  Of those, some are duds, others are keepers and then there are the one or two outstanding recipes.  In many ways this is to be expected.  The duds are simply not to our expectations based on flavour and/or texture BUT that doesn't mean the recipe can't be tweaked to become a rather good recipe at some point.  This is especially true of some of the basic recipes in Bernardin Complete Guide to Home Canning, Ball Blue Book or recipes for jams and jellies using traditional pectins.  I often tweak these recipes for the trial run just based on experience and know what can be safely tweaked, substituted, added or omitted.  The end result is a creation tailored to the tastes of our family. 

best bread and butter pickles
Last year, I made a lot of pickles.  One of the recipes I used was Best Bread and Butter Pickles modified from Small-Batch Preserving (2001) by Ellie Topp and Margaret Howard.  I did a bit of slight tweaking ingredients as well as added calcium chloride to the jars in this recipe even though I had not made it before.  These pickles were a huge hit!  They are delightfully delicious, better than any store bought bread and butter pickle!  They aren't too sweet and have a nice tang without a bite.  They are quite pretty presented in a pickle dish for serving.

If you are looking for a nice flavoured, sure to please bread and butter pickle, do try these pickles.  You won't be disappointed.  The recipe is quite easy but the results are above average!


Sunday, October 21, 2012

Low Sugar Hot Pepper Jelly

Hot pepper jelly is an absolute taste sensation when paired with cream cheese.  I make a few versions that are sure to please any palate.  It is a good way to use up excess hot peppers from the garden.  It's also one of those products that immediately says homemade because aside of the specialty food shops, hot pepper jelly is seldom found in the grocery stores.

low sugar hot pepper jelly
This year I made a low sugar hot pepper jelly for the holiday season feature red and green flecks for festive entertaining.  We are not huge fans of sugar but for hot pepper jelly you need just enough sugar to tame the heat.  I use Pomona's pectin which is a low methyoxy pectin that uses calcium water for the gel rather than sugar so the amount of sugar in a recipe can be greatly reduced.  Other pectins (eg. Certo, SureJel) cannot be substituted in this recipe.  This jelly is well worth the extra effort.  It is beyond delightful, a sure crowd pleaser!

Low Sugar Hot Pepper Jelly
recipe by:  Garden Gnome

1 c finely chopped sweet red peppers
⅓ c finely chopped jalapeƱo peppers
1⅓ c white vinegar
2⅓ c organic granulated sugar
1½ tsp Pomona's pectin
2 tsp calcium water

Bring the peppers, vinegar and calcium water to a boil then reduce heat and simmer 5 minutes.  Mix the pectin in ½ c of the sugar.  Stir the pectin mixture into the pepper mixture stirring well until dissolved.  Stir in the rest of the sugar.  Return to a boil.  Ladle into hot jars leaving ¼-inch headspace.  Adjust two piece metal snap lids (or Tattler reusable lids or glass inserts).  Screw bands on jars (adjust accordingly if not using metal snap lids).  Process for 250 ml for 10 minutes in BWB canner at altitudes up to 1,000 feet above sea level.  At higher altitudes refer to altitude adjustment chart on Canning FYI page.  Remove from canner.  Adjust bands if using Tattler or glass inserts.  Allow to cool 24 hours.  Remove bands and test for seal.  Wash and dry bands and jars.  Label and store.


Monday, May 14, 2012

Frugal Kitchens 101 - Condiments

Frugal Kitchens 101
Typically, condiments are used to enhance the dining experience by adding a punch of flavour or even a contrast in flavour.  Condiments include soy sauce, ketchup, relish, pickles, mayonnaise or Miracle Whip, horseradish, mustard and some sauces (eg. old fashioned chili sauce, guacamole, salsas).  However, caramelized onions, chopped onions, bacon bits, fresh grated parmesan cheese and seared mushrooms could be considered condiments depending on their use.  Store bought condiments can be either a bargain or rather expensive.  For the most part, making your own condiments is less expensive than store bought.  The nice thing about homemade condiments is you can tailor them to your needs getting a product you can't buy in the grocery stores.  Here are a few tips for saving on condiments.

  • soy sauce -  Soy sauce is high in sodium and it is one food where brand name does seem to matter as far as taste.  I have never found a store brand that taste as good as the brand name.  
  • ketchup - By far the cheapest, tastiest ketchup is homemade especially if you grow your own tomatoes and homemade doesn't contain HFCS.  If buying ketchup in the grocery store, buy the largest size possible based on unit price.  Some brand names are available in institutional sizes that usually are less expensive than smaller containers.  When you get home, divide the ketchup down into smaller sized containers then freeze all but one.  Some have asked if they can home can store bought ketchup in smaller sized mason jars.  The answer is yes BUT I don't recommend it.  The end result is fine but you still have all the preservatives, artificial colours and HFCS in the product, something I feel is contrary to the ideals of home canning.
  • relish -  Relish is incredible cheap and easy to make.  They are processed in a BWB canner meaning you don't need an expensive pressure canner to process relish.  Cucumbers are easy to grow but if you don't grow them, the grocery stores often put field cucumbers on sale.  Four or five cucumbers make a lot of relish so even if cucumbers are bought in the grocery store, it is still cheaper to make your own.
  • pickles - Homemade pickles are simply delightful.  I make freezer pickles (a bread and butter, no muss pickle), pickled beets, pickled onions, pickled beans and dill pickles.  I also buy dill pickles when I run out and by far the large 1 gallon jars are the cheapest at about $3 per jar.  Really they are even cheaper than homemade but they do contain artificial colour and preservatives.  Both dill and bread & butter pickles are available in the gallon jars.
  • mayonnaise or Miracle Whip -  If you have 2 minutes of time you can easily make your own mayonnaise or Miracle Whip at a fraction of the cost of store bought.  The taste is incredible!
  • mustard - By far the most common mustard is the generic yellow.  Buy this in the institutional size and refrigerate.  It will keep for ages.  You can make a cheaper and tastier mustard using mustard powder and most gourmet mustards are less expensive if you make your own.  
  • horseradish - Unless you grow your own horseradish it is easier to buy prepared horseradish in the grocery store.  As soon as horseradish is made it begins to lose potency so by it as fresh as you can and in a small enough size to use up fairly quickly.  Use horseradish to make homemade horsey sauce and seafood sauce or use it in dips.
  • sauces - Quite often sauces are used as a condiment.  Make these yourself for unique and inexpensive condiments.


Tuesday, March 27, 2012

Homemade Mayonnaise

Mayonnaise is a thick, creamy condiment used on sandwiches or as an ingredient for other dishes like potato salad made from an emulsion of egg and oil.  I don't buy mayonnaise as we prefer MiracleWhip, well actually a clone recipe (see tomorrow's post for that) so I make my own as needed.  Mayonnaise is one of those recipes that once you make it and realize the savings combined with gorgeous flavour you will not go back to store bought.  All you need is a blender or a food processor and a couple of minutes of time to whip up enough mayo to last a week or two at less than a third of the price of store bought.

homemade mayonnaise
My homemade mayonnaise is a bit yellower than store bought because I use free range chicken eggs.  The yolk from free range chicken eggs which has a deeper colur and the flavour richer.  Other than that the homemade version tastes fresher and performs in other dishes just as well as the store bought.  The current price for brand name mayo is $1.40 per c whereas the homemade version is 44¢ per c using the more expensive free range chicken eggs.  This mayo will seriously take you about 2 minutes to make which is a rather tidy savings for time invested.  If you want a whiter mayo use just the egg whites and not the yolk.  This will also reduce the dietary cholesterol if that is a concern.  Of note, the type of oil and vinegar you use will change the flavour slightly so do keep that in mind.

Homemade Mayonnaise
recipe by: Garden Gnome

1 egg
½ tsp dry mustard
½ tsp organic sugar
½ tsp sea salt
2 tbsp vinegar (apple cider, tarragon, white)
1 c oil (half extra virgin olive oil, half vegetable oil)
dash cayenne pepper

Put all of the ingredients but half of the oil into a food processor bowl.  Process for 15 seconds.  While the food processor is running, slow pour the remaining oil into the mixture in a thin stream.  Use a spatula to transfer the mayonnaise to a storage jar.  Store in the refrigerator and use as you would store bought mayonnaise.


Sunday, March 13, 2011

How It's Made - Heinz Ketchup

One of the most widely used condiments is tomato ketchup.  As a home canner I make and can home made tomato ketchup.  However, most people buy ketchup with the most popular brand being Heinz.  Heinz has been making ketchup since 1876!  Years ago I worked one summer in the lab of a tomato processing facility.  Well actually they also processed beets, asparagus and cucumbers as they came into season but the bulk of their work force was needed for the local tomato harvest.  Tomatoes arrive at the processing facility from local farmers in huge tomato wagons.  [Relatives grow tomatoes commercially for the processing plants which is where I get my hampers of tomatoes from each year.]

Tomato ketchup starts with a base of tomato paste that is made at the tomato processing facility.  From there the tomato paste is passed on to the tomato ketchup lines in another area of the same facility.  Tomato ketchup consists of tomato paste, white vinegar, sugar, salt and seasonings.  If you look at the ingredients on a Heinz ketchup bottle, liquid sugar is listed.  This is now high fructose corn syrup which explains why it is harder for a home canner to duplicate the flavour and texture of Heinz ketchup.

Here is a video I found showing how Heinz tomato ketchup is made and bottled from the tomato paste stage.  The tomato paste has undergone laboratory testing prior to going to the ketchup lines.  Quality control is important for ketchup not only from a safety aspect but also to be sure the ketchup meets taste and thickness requirements.  Heinz ketchup is made to a thickness so that the velocity measures at 10 cm of flow in 10 seconds.  This is known as the 10 cm rule.  The blue bag in the video is their secret blend of seasonings.


\


Thursday, October 14, 2010

Kitchen Quick Tips - Leftover Ketchup

kitchen quick tips

When the bottle of ketchup is empty, pour ¼ c of hot water into the bottle.  Shake vigorously to mix the leftover ketchup with the water.  Pour into small freezer container and freeze for later use in soups, stews or gravies.


Tuesday, June 15, 2010

Caramelized Onions

Caramelized onions are a true delight and are a staple in our house.  They are used as a condiment usually with burgers or as a side dish with liver and onions.  Caramelized (carmelized) onions are easy but somewhat time consuming to make.  The reason for this is the onions need to be cooked long and slow to allow the sugar content to caramelize giving them that wonderful flavour and colour.  I discovered that caramelized onions reheat nicely and can be made in advance then frozen, canned or dried for later use. 

caramelized onions
By far the vast majority of caramelized onions that we eat are cooked fresh along with the meal.  This past weekend I did just that to have fresh caramelized onions as a condiment for the burgers.  Surprisingly there were left-overs so I popped them into a bowl and covered with tin foil.  The following evening we grilled steaks for dinner so I inverted the bowl so the onions were in the tin foil and reheated them on the grill in the foil.    It was a very easy reheat method for using up the left-over caramelized onions.  Some recommend adding a bit of sugar to help the onions caramelize quicker but I don't do this.  Here is my basic way for making caramelized onions.

Caramelized Onions

1 - 2 large Spanish onions
2 - 4 tbsp butter*

Peel the onions.  Cut in half then into slices.  Melt the butter on medium then add the onions.  Cook until translucent stirring occasionally.  At this point you may have to add a bit more butter.  Continue cook on low heat until golden brown and nicely caramelized.

*If intending to can the caramelized onions follow the instructions in the above link.


Wednesday, March 24, 2010

Using Roasted Garlic

Quite often I write about how to make those little extras like roasted garlic but then forget to write about how I use them when I do. The reason for this is I'm so used to using certain homemade foods as ingredients so they don't jog my mind to write about them. A few days ago it was a gorgeous spring day so we decided to grill a T-bone steaks on the outdoor grill. Our traditional steak dinner consists of the steak, baked potato, vegetable and side salad. I wanted something extra to spark up the meal without moving to far from the traditional. Roasted garlic was just what I was looking for!

T-bone steak accented with roasted garlicRoasted Garlic Accents

Garlic can be roasted in the oven, on the grill or in the countertop roaster. It is very easy to make. Once roasted, I put the garlic into ice cube trays then freeze. I pop the frozen cubes (about 2 oz) into a zipper style freezer bag then keep in the freezer to be used as needed.

Roasted garlic is one of the first ingredients I turn to when I want to brighten up the flavour of a cream soup or chowder. It also adds depth and flavour to sauces. For this meal I stirred in about 1 tsp of roasted garlic into 4 ounces of sour cream for the potato topping then let the mixture sit for a half hour before using to let the flavours meld. The topping was wonderful! It will be one I modify slightly to make a vegetable dip then further modify for a creamy salad dressing. My husband was sautƩeing an onion and mushroom mixture. He thought the roasted garlic would make a nice addition to the mixture so stirred in about a teaspoon of roasted garlic. That really brighted up one of our favourite vegetable mixtures. The roasted garlic was just the thing this meal needed!


Sunday, January 24, 2010

Homemade Vanilla Syrup

My gosh have you ever had one of those total duh moments when you could easily made a homemade substitute for a store bought item at the fraction of the cost. I posted awhile ago that one of my new favourite drinks was London Fog that is supposed to use vanilla syrup but I was just using a little pure vanilla extract. After doing a bit of research I realized there were a multitude of beverage syrups available for flavouring teas and specialty coffees. Most were priced in the $10 price range but since you use so little that didn't look like a bad price until my frugal bone reminded me that flavoured syrups are quite easily made at home at a fraction of the cost of store bought.

vanilla syrup ingredientsVanilla Syrup Ingredients

I decided to make vanilla syrup for my London Fog drink. The general ingredients for any syrup are sugar, water and flavour. I had two 100% pure vanilla extracts to work with, one a clear and the other dark vanilla extract my husband brought back from the Dominican. I reserve the clear for those dishes where I don't want an off colour imparted to the dish. I decided to use the dark extract for this syrup.

I keep most bottles and jars especially the cute ones to reuse just for this type of purpose. A funnel is really helpful for filling the bottle. Other than that no special equipment is necessary.

homemade vanilla syrupHomemade Vanilla Syrup

Making an unflavoured syrup is as easy as mixing equal amounts of granulated cane sugar and water in a saucepan. Bring that to a low boil then reduce heat and simmer 5 to 7 minutes until it slightly thickens. Remove from the heat and let cool until the outside of the saucepan. Using a funnel pour the syrup into a bottle of your choice. Add ¾ tsp pure vanilla extract. Cap the bottle then gently shake. Allow the syrup to cool completely then refrigerate. Use as desired for flavouring beverages. The dark pure vanilla extra gave a light amber hue to the syrup but that is fine for the purposes it will be used.


Tuesday, September 29, 2009

Habanero Gold Jelly

My garden is starting to slow down a bit. Rather the unseasonably cool, wet weather is forcing the slow down. I'm doing clean picks weather permitting. The hot peppers are still producing nicely so I'm working on putting them up in various forms. I will be bringing in a couple of the hot pepper plants for the winter for a ready fresh supply during the winter.

habanero gold jellyHabanero Gold Jelly

It's nice to have a few varieties of hot pepper jellies in your pantry. Hot pepper jellies are wonderful for making quick appetizers or using as a condiment for meats. They can also be used as a glaze for meats. This particular hot pepper jelly pairs Habanero peppers with apricots for a uniquely pleasant flavour that will pair nicely with cream cheese as an appetizer. This hot pepper jelly like most of my jams and jellies has been converted to use Pomona's universal pectin. With regular pectins to prevent floating fruit the recommendation is to stir for 5 minutes before putting into jars. Pomona's continues to gel as it cools so the work around is occasionally shaking gently from side to side as the jelly cools. The alternative is to stir the jelly just after you open it before serving. The yield was 3 - 250 ml jars processed and almost a full jar for fresh use. I think the jelly is quite pretty in the jars.

Habanero Gold Jelly
modified from: Bernardin® canning jar insert Taste the Harvest, 2006.

⅓ c (75 ml) finely sliced dried apricots
¾ c (175 ml) white vinegar (5% acidity)
⅓ c (75 ml) finely chopped onion
⅓ c (75 ml) finely chopped sweet red pepper
2 finely seeded, chopped Habanero peppers
1 finely seeded, chopped Jalapeno pepper
3 c (750 ml) granulated sugar
1 tsp Pomona's universal pectin
1¼ tsp calcium water

Prepare the dried apricots and place in medium covered glass bowl. Pour the vinegar over the apricots and let sit 4 hours. Prepare onions and peppers. Stir pectin into the sugar. Pour the apricot mixture into large saucepan. Stir in onion and pepper mixture. Stir in the calcium water. Bring to a boil. Stir in sugar/pectin mixture. Bring to a boil stirring to dissolve the sugar. Ladle into prepared 250 ml jars leaving ½-inch head space. Wipe rims and adjust 2 piece lids. Process in BWB for 10 minutes at altitudes below 1,000 feet above sea level. For higher altitudes adjust processing according to altitude chart (here).


Tuesday, September 08, 2009

Sweet Pickle Relish

Every year during the busy canning season I always manage to try a few new recipies. What I'm looking for is a canning recipe that becomes a family favourite or at the very least a tried and true recipe that I will use over and over. If I'm lucky I will discover one or two great recipes each year this way. If I'm not lucky I end up with a dud which is why I only do small test batches for new recipes.

sweet pickle relish no colourNatural

I have a couple of tried and true recipes for sweet pickle relish so I really wanted to try the recipe in the Ball Blue Book to compare to those I know are good. I had serious reservations about the recipe when it said to 'chop' the cucumbers instead of the standard 'run them through the grinder' method but decided to go ahead. The recipe said nothing about seeding the cucumbers either. I made a half batch giving me a yield of 3 - 250 ml jars. Pictured is the sweet pickled relish cooking before any food colouring has been added.

Sweet Pickle Relish
source: Allrista Corporation, Ball Blue Book, 2001. Pp. 50
2 medium cucumbers
1 c chopped onions
½ c sweet green pepper
½ c sweet red pepper
2 tbsp salt
1¾ c sugar
½ tbsp celery seed
½ tbsp mustard seed
1 c cider vinegar

Chop cucumbers, onions and peppers. Combine in large bowl and sprinkle with salt. Cover with water. Let stand 2 hours. Drain, rinse and drain thoroughly. Combine remaining ingredients in large saucepan. Bring to a boil. Add drained vegetables. Simmer 10 minutes. Pack into hot jars leaving ¼-inch headspace. Wipe the rims. Adjust two piece lids. Process 10 minutes in boiling water bath canner.
Yield: 4 half pints.

sweet pickle relish with colourFood Colour Added

I took one look at the relish and realized it needed food colouring. Now this is not something I like to add to any of my homecanned products but in this case it was necessary. What many don't realize is the relish you buy in the stores gets that lovely green from added food colouring that has first been injected into the cucumbers then added again during processing. That means duplicating this process at home is a bit more difficult.

The work around is to add a few drops of food colouring to make the homemade version look a bit more like the commercial version. I use an all natural vegetable food colouring for this type of application. Notice the difference in the colour!

plumb sauce and sweet pickle relishSweet Pickle Relish

This time of year it is quite common for me to put up two or more products the same day. On Friday I also made another batch of plum sauce. Pictured are 6 jars of plum sauce and 3 jars of the sweet pickle relish. If you have followed this blog you will have seen most pictures of home canned foods with the rings on as in the far left. Also pictured in the far left is the thin white film from water deposits that can occur on jars during canning. This can be prevented by adding white vinegar to the canner water or washing the jars down with white vinegar after canning. Once the rings are removed and the jars cleaned they are ready for storage (centre). Don't store the canned jars with rings on as this can hide false seals.

The far right shows the 3 jars of sweet pickle relish. There aren't many times I will really diss a recipe but this is one of them. I followed this recipe to the "T" shaking my head as I did. The fundamental step of seeding then grinding the cucumbers was left out giving a far less than satisfactory result. The recipe tastes good but it is certainly not what you would expect of a relish. There was no indication that food colouring should be added either so if you didn't know about doing that step visually you would have been a bit unhappy with the results. Overall I am disappointed in this recipe. Yes I have a product on my pantry shelf but it really isn't the 'relish' recipe I anticipated. I would suggest seeding the cucumber then grating or grinding them and definitely add a bit of green vegetable based food colouring!


Friday, August 21, 2009

Three Hot Pepper Jellies

My garden is producing nicely which means along with other produce I have an abundant and steady supply of hot peppers. I made three different small batches of hot pepper jelly last Wednesday. All were made with various hot peppers from my garden.

Hungarian Wax peppers, Banana peppers, long red slim cayenne pepper, cherry tomatoesFrom the Garden

Pictured are a few peppers and cherry tomatoes from my garden. On the left there is Sweet Banana peppers and a Red Long Slim cayenne pepper. Hungarian wax peppers (hot) are on the right. One website said it is difficult to tell the difference between the Sweet banana peppers and the Hungarian wax peppers other than taste. I beg to differ with this opinion. On the plants the two peppers look quite different. The Hungarian wax peppers are a deeper yellow and a straighter pepper. The Sweet banana peppers are a paler greenish yellow with rather distinctive wrinkling, bumping and curling. Even though Hungarian wax peppers are a hot pepper they really are rather mild in terms of heat. They are usually harvested when yellow and about the length of your palm. If left on the plant they will mature to a nice red colour. Both Hungarian wax and Sweet banana peppers can be used in stews and salads or made into jellies. Both are good roasted.

hot pepper jelliesHot Pepper Jellies

Pictured are the hot pepper jellies: jalapeno jelly (1), hot pepper jelly (2) and basil banana pepper jelly (3). Each are slightly different yet the flavour of each is quite unique. I really like the flavour hot pepper jelly (2)! I tweaked this recipe to include both Hungarian Wax peppers (hot) and sweet banana peppers. I think they all look pretty in the jars but I'm a bit partial. As with most jams and jellies I make these jellies have been modified to use Pomona's Universal Pectin because it is considerably cheaper than regular pectin and I can adjust the amount of sugar or sweetener used. It also gives consistently good jelling unlike regular pectin. Here are the recipes.

Basil Banana Pepper Jelly

½ c thinly sliced Hungarian Wax yellow peppers
¼ c thinly sliced hot banana peppers
3 - 4 large basil leaves, cut into ribbons
¼ tsp dried basil
¾ c white wine vinegar
3 c organic sugar
½ tsp Pomona's pectin
1 tsp calcium water

Mix peppers, basils, vinegar and calcium water in a saucepan. Mix sugar and pectin in a separate bowl. Bring the pepper mixture to a boil. Stir in sugar mixture. Bring to a boil, stirring well and boil 1 minute. Remove from heat. Pour into hot, sterilized jars. Wipe rims and adjust 2 piece lids. Process 5 minutes in BWB canner at altitudes up to 1,000 feet above sea level. For higher altitudes, please refer to the altitude adjustment chart (here).
Yield: 3 - 250 ml (half pint) jars

Hot Pepper Jelly

1 c finely chopped red bell peppers
¾ c finely chopped green bell peppers
2 tbsp finely chopped jalapeno peppers
¼ c finely chopped Hungarian Wax peppers
¼ c finely chopped hot banana peppers
½ c cider vinegar
2½ c organic sugar
1¼ tsp Pomona's pectin
2½ tsp calcium water

Mix peppers, vinegar and calcium water in a saucepan. Mix sugar and pectin in a separate bowl. Bring the pepper mixture to a boil. Stir in sugar mixture. Bring to a boil, stirring well and boil 1 minute. Remove from heat. Pour into hot, sterilized jars. Wipe rims and adjust 2 piece lids. Process 5 minutes in BWB canner at altitudes up to 1,000 feet above sea level. For higher altitudes, please refer to the altitude adjustment chart (here).
Yield: 3 - 250 ml (half pint) jars

Jalapeno Jelly

1 c finely chopped green pepper
¼ c finely chopped jalapeno peppers
3½ c organic sugar
1 c cider vinegar
⅝ tsp Pomona's pectin
1¼ tsp calcium water

Mix peppers, vinegar and calcium water in a saucepan. Mix sugar and pectin in a separate bowl. Bring the pepper mixture to a boil. Stir in sugar mixture. Bring to a boil, stirring well and boil 1 minute. Remove from heat. Pour into hot, sterilized jars. Wipe rims and adjust 2 piece lids. Process 5 minutes in BWB canner at altitudes up to 1,000 feet above sea level. For higher altitudes, please refer to the altitude adjustment chart (here).
Yield: 3 - 250 ml (half pint) jars


Monday, October 20, 2008

Seafood Cocktail Sauce (home canned)

A lot of people have the impression that home canning is all about saving money but in reality that couldn't be further from the truth. Oh sure the cost of canning is very important which is why I often bring up the economics of canning but that's not the real reason for canning, rather a pleasant side effect. It really is about putting wholesome, healthy foods in your pantry that are not laden with excess salt, sugar, preservatives and other harmful additives or contaminants. At the same time home canners are able to put custom made foods tailored to their family's tastes as well as unique products on their pantry shelves. This is one of the best reasons to can because these are products you cannot buy in the grocery stores.

Seafood Cocktail Sauce

I think we have all been at the point where we need seafood cocktail sauce but don't have time for a special trip to the grocery store so we pull out commercially made ketchup and mix in some horseradish sauce. It works in a pinch but commercially made ketchup contains high fructose corn syrup something that is on my hit list of ingredients to avoid. I came across a recipe in Bernardin's, Tomatoes Canning & Speciality Recipes for home made seafood cocktail sauce suitable for canning. Immediately I thought this would be a nice product to have on the pantry shelves put first I tweaked the recipe.

Pictured are 7 - 250 ml (half pints) of seafood cocktail sauce as well as almost and eighth jar. The sauce looks quite pretty in the jars! Notice the plastic storage cap on this jar. I use these for storing partial jars of home canned food in the refrigerator. Oh and don't you think the short, wide mouth jars are simply adorable? I only have about a dozen so might have to put a request for more on my Christmas list if they can be found. I haven't seen them in the stores here for quite some time.

I made a few modifications to the recipe so the following recipe is the one I created and used. This is a recipe you could make year round if you can find good tasting paste tomatoes. I have to tell you one taste is enough that you won't go back to store bought seafood cocktail sauce and you will never want to use that old ketchup trick. This sauce is amazing wonderful! I honestly cannot believe how flavourful the sauce is. It has a nice amount of zip.

Seafood Cocktail Sauce

6½ c prepared tomatoes
2 c prepared horseradish
1 lemon, juice and zest
2 cloves garlic, minced
½ c organic granulated sugar
½ c white vinegar
1 tsp pickling salt
½ c tomato paste
1 tbsp Worcestershire sauce
1 tsp ground mustard
½ tsp cayenne pepper
½ tsp onion powder
¼ tsp black pepper

Wash tomatoes. Run through a food strainer to remove seeds and skin. Bring to a boil. Reduce the heat and boil gently until reduced by half. Stir in all of the ingredients except the horseradish. Bring to a boil. Boil 1 minute. Remove from heat. Stir in the horseradish. Mix well. Ladle into hot, sterilized jars leaving ½ - inch headspace. Wipe the rim. Adjust two piece lids. Process in boiling water bath canner for 15 minutes.

Yield: about 7 - 125 ml (half pint) jars

Shrimp

I was rather pleased that there was almost a full jar of the seafood cocktail sauce left-over for the refrigerator. We've been quite busy the past couple of weeks so I wanted a nice, relaxing yet pampering dinner. The left-over seafood cocktail sauce determined the appetizer.

You just can't go wrong with shrimp for an appetizer. If we were having company I would have lined the plate with leaf lettuce or used individual shrimp bowls but my husband was more interested in getting to the shrimp rather than presentation. The seafood cocktail sauce was a definite hit with my husband. This will be one sauce that I will be making again.

T-bone Steaks

It was a pleasant fall afternoon, perfect for grilling. We grill year round both indoors and outdoors but still the colder weather means more cooking is being done indoors. As the tantalizing aroma of the grill filled the air I couldn't help think of the cold days to come that will soon turn the sparkling water a duller tone.

Dinner was grilled T-bone steaks served with a steamed potato and carrot mix, sautƩed onions and sautƩed mushrooms. A simple garden salad completed the meal. My husband's steak was grilled to rare then smothered with sautƩed mushrooms and onions. He managed to side step the carrots in the steamed vegetable mix. My steak was grilled medium rare.

Carrots and potatoes are a nice pairing whether left in chunks or mashed. I use this combination quite often. When mashed with a little chicken stock they are a nice low fat side. To add a bit of a different twist I will add in cabbage then mash. I think the mix is better hand mashed to give more texture but an electric hand mixer can be used for a smoother texture. So if you are bored of the same plain mashed potatoes try adding carrots and/or cabbage. You will be pleasantly surprised!


Tuesday, March 18, 2008

Corned Beef with Cabbage

Everyone wants a little luck of the Irish on St. Patrick's Day. What better way to celebrate than with a hearty Irish meal. Corned beef and cabbage while thought to be a traditional Irish dish is more likely an Irish-American dish originating from the Jewish and Irish immigrants living on the Lower East Side of New York City who wanted their traditional Irish bacon. They learned to corned beef as a substitute. It has now become a traditional meat served on St. Patrick's Day. Corned beef is one of the most popular delicatessen meats (Rueben sandwiches). Pastrami is smoked corned beef.

Corned Beef

Corned beef gets its name from the term corning which is a form of curing. In Anglo-Saxon times before refrigeration pellets of salt, some the size of corn, were rubbed into the beef to preserve it. Corned beef is usually made from brisket but sometimes round or silverside is used. Today brining (salt water) has replaced dry salt curing commercially but the name remains the same. Spices are added during the cure to give corned beef its distinctive flavour. These spices vary regionally but common ones are peppercorns and bay leaf.

Corned beef is most often pre-seasoned in vacuum packs ready to cook. It's as simple as following the instructions on the package for cooking. It can also be found canned in the grocery store and can be home canned as well. However, corned beef can also be home cured either by brining or dry salt curing (Morton's Salt) both of which are less expensive than store bought. I prefer the dry salt curing method.

The most common way of preparing corned beef is to cover with water then bring to a boil, reduce heat to a simmer then simmer 3 to 4 hours. While simmering removing any scum that forms. After the simmering period add the vegetables and cook about another hour until meat and vegetables are tender. However, I used a pressure cooker to tender meat and vegetables in considerably less time. I used the 5.5 L (6 qt) Jasi pressure cooker

Method: Place the corned beef on a rack in the pressure canner. If you don't have a rack for your pressure canner, use canning jar lids for a make shift rack. A small cooling rack will work as well. Pour 1 cup or the minimum amount for your pressure cooker. Close the pressure cooker and put the regulator on. Bring the pressure cooker to pressure on high heat. When the steam is first released, reduce heat to medium low adjusting so that steam is released 2 to 3 times per minute (10 lb pressure). Continue cooking one hour. Turn off heat and allow the pressure cooker to depressurize by itself (about 10 minutes). Remove lid. Reserve 1/4 c of the cooking juices for mustard sauce (recipe follows). Add enough water to the remaining liquid so there is at least 1 c of liquid in the pressure cooker. Add vegetables* and bay leaf. Put the lid back on and bring the pressure cooker to pressure on high heat. When steam is released reduce heat to medium low, adjusting so steam is released 2 to 3 times per minute. Cook at 10 lb pressure for 7 minutes. Remove from heat and depressurize by placing the cooker under cold water. Remove lid. Remove vegetables and corned beef. Allow the corned beef to rest 5 minutes before slicing.

*Vegetables
I used the following amounts to fill my pressure cooker to the maximum 2/3 full level.
1 medium onion, cut into wedges
1/2 large cabbage, cored, cut into half wedges
6 medium potatoes, cut into large chunks
20 baby carrots

Mustard Sauce

Making your own mustards is very easy with the main components being dried mustard, vinegar and thickener. From there you can tinker with types of vinegar for different flavours. Sugar when added can easily be modified to using another sweetener like honey, maple syrup or brown sugars. So a basic mustard recipe can take you in a lot of directions so don't be afraid to experiment.

A deli style mustard with a bit of kick accents corned beef nicely. I decided to make a deli style mustard sauce to accompany the corned beef. It was a good choice!

Mustard Sauce

¼ c juices from corned beef
¼ c white vinegar
4 tsp dry mustard
4 tsp organic sugar
1 egg

Whisk egg, mustard and sugar together. Whisk in vinegar and corned beef liquor. Heat to simmer on medium while whisking. Do not boil. Remove from heat. Spoon into small serving dish or individual dipping cups just before serving. Can be served hot or cold.


Sunday, October 28, 2007

Home Canned Cranberry Sauce & Pantry Pasta

Saturday morning I decided to complete two small canning projects before the kids and grandbaby arrived. The first project involved using the pressure canner did not go according to plan so I was not impressed! After much frustration I moved onto the second project, cranberry sauce using a boiling water bath (BWB) canner. Dinner was a simple pasta casserole made with home canned foods.

Cranberry Sauce

I don't can a lot of cranberries since I usually make fresh cranberry sauce from scratch as needed. However, we have a half of pig on the way so I need to free up some freezer space. A few jars of cranberry sauce in the pantry The small bag gave a yield of three 250 ml jars just perfect to accompany one or two meals.

Cranberry Sauce

1 pk fresh whole cranberries
1 c sugar
1 c water

Mix ingredients in a large saucepan. Bring to a boil and cook until berries pop. Ladle cranberry mixture into 250 ml jars. Wipe rim and adjust caps. Process in boiling water bath canner for 10 minutes. Remove jars from canner. Allow to cool. Check the seal. Label and store.

Pantry Pasta

If you've read this blog you will know I do a lot of home canning. I share pictures of the food I can as well as the recipes and methods. One common question is "What do you use for?" so I like sharing the different ways I use some of my home canned foods.

This casserole used home canned ground beef with onions and roasted vegetable sauce. If you do not home can, both of these can be frozen for use as quick starters for meals. The casserole turned out rich and creamy, perfect for a cool and grey day. I served it with tossed salad and hot dinner rolls.

Pantry Pasta
note: click on the links for recipes and method

1 - 500 ml jar home canned ground beef with onions
2 - 500 ml jars roasted vegetable sauce
½ c extra sharp cheddar cheese, shredded
½ c mozzarella cheese, shredded
⅓ c Parmesan cheese, shredded
1 - 375 g package broad egg noodles
2 c sauteed mushrooms

Bring water to a boil, salt and add noodles. Cook until noodles are el dente. Saute mushrooms. Drain noodles. Pour noodles into large mixing bowl. Stir in vegetable sauce, ground beer, cheddar cheese and mozzarella cheese. Spread evenly into a large casserole pan. Sprinkle Parmesan cheese on top. Spread a layer of sauteed mushroom over the top. Bake at 350ĀŗF until warmed through.


Friday, August 17, 2007

Corn Relish

Corn is in season here and while it is very doubtful we will ever see the lower prices of yesteryear it is still economical to preserve it. As with most foods I preserve, I always figure out my overall costs including electricity. This is the first year I've been able to get old-fashioned yellow corn. For the past five or six years the only corn available has been the peaches & cream variety which freezes and cans reasonably well but yellow corn gives better results for both.

Corn Relish

Corn relish is a tasty way to preserve corn. It is nice condiment for cook-outs and grilled meat, especially good on hot dogs or hamburgers. Corn relish is bright and cheery in the jars, sure to entice the taste buds. It is perfect for gift giving so be sure to make extra. I like using half pint mason jars.

Corn Relish
modified* from: Jean ParƩ, Company's Coming, Preserves, Corn Relish Pp. 121.

10 cobs yellow corn
1 green pepper, seeded and finely chopped
1 red pepper, seeded and finely chopped
1/2 large Spanish onion, chopped fine
1/2 tsp sea salt
2 1/4 c organic granulated sugar
2 1/4 c white vinegar
1/2 tsp celery seed
1 tsp dry mustard powder
1 tbsp Clear Gel**
1/2 tsp turmeric
2 tbsp water

Prepare vegetables. Cut the corn from the cobs without scrapping the cobs. Measure out 4 1/2 c of corn. Place all the ingredients except the last four into a stock pot. Stir then bring to a boil over medium-high heat. Reduce heat to a simmer. Simmer uncovered for 30 minutes, stirring occasionally. Mix the last four ingredients in a small dish then stir into the vegetables. Return to a low boil while stirring. [The mixture will not thicken but over the next two weeks after processing it will thicken to a relish consistency.] Pour into hot sterilized jars leaving 1/4 inch headspace. Remove any air bubbles. Wipe the rims. Adjust two piece lids. Process in boiling water bath canner for 15 minutes. Remove from canner. Allow to cool. Test for seal then store.
Yield: 6 half pints

My Notes:
*Jean's recipe calls for 9 cobs of corn and 1/2 cup of celery. I add extra corn and omit the celery. Her recipe uses cornstarch which is no longer recommended for canning. I substitute Clear Gel (not the instant). I've also modified the kind of onions, sugar and salt but not the amount. No processing time is indicated in the original recipe so I process 15 minutes in a boiling water bath canner.
**Do not use instant Clear Gel.


Monday, June 11, 2007

French Fry Dip and Salmon Kabobs

It was a beautiful sunny day yesterday, one meant to be spent outdoors on the water instead of inside. We originally intended to spend it on the boat but as things go, plans were changed. The day was still fun fill and involved water.

French Fries

On the continuing theme of using up food from the freezer, I made French fries for lunch. There was nothing really special about the fries themselves. They were McCain's crinkle cuts something I keep a couple of bags on hand for the times I want to make fries without the work of homemade French fries. I deep fry them in a T-Fal FryExpert on the fry setting in vegetable oil. Once fried I put them into a large bowl and lightly salt ready for serving.

A Canadian tradition is putting regular white vinegar on French fries. All the fry trucks have both white and malt vinegar so we simply expect this. Imagine our surprise when we cross the border to find out our American counterparts do not enjoy vinegar on their fries! Tsk! Tsk! The next favourite topping and truly Canadian is poutine, a wonderful mixture of gravy and cheese curds. Followed by that is ketchup. However there is another dip we like and as best as I can tell this may have originated in the Maritimes. The dip is very easy to make.

French Fry Mustard Dip

1 c Miracle Whip
1 - 2 tsp prepared mustard

Stir in enough mustard to the Miracle Whip to make a creamy, colour of butter dip. [Miracle Whip does work best for this dip but you could substitute mayonnaise.] Place into individual dipping bowls or pour into a squeeze bottle for easy serving.

Salmon Kabobs

I mentioned that our plans were changed. Friends invited us to lounge around their pool and a barbeque. Well that involved good friends, water and food so how could we possibly go wrong?

I cannot take credit for any of the food served but it was wonderful. Salmon is not something I would have thought of doing as a kabob yet these were wonderful. The kabobs themselves were very simple consisting of marinated salmon along with red and green pepper slices. The salmon was nicely grilled with lots of nice flavour and not dry. This will be one thing I will experiment with and post back with the results.


Sunday, November 26, 2006

Canning: Apple Pie Filling, Cranberry Claret Jelly, Apple Jelly, Cabernet Jelly

This is the perfect time of year to can apple pie filling since are fresh, plentiful and inexpensive. It is also the perfect time of year to can jellies for gift giving and to restock the pantry. Yesterday I decided to can up another batch of apple pie filling and make two wine jellies and apple jelly. My intent was to also make port wine jelly but the little liquor store here didn't have port wine so it will have to wait until tomorrow.

Apple Pie Filling

Apple pie filling is nice to have on hand and not just for pies. I usually make two or three batches this time of year using a nice firm cooking apple like Northern Spy or L-star. This year's batches are Northern Spy. I like doing batches of 5 - 6 pints at a time so I can use other apple varieties if desired. I use the USDA recipe from the Complete Guide to Home Canning, Agriculture Information Bulletin No. 539, USDA. Reviewed 1994. The measurements in the following recipe will yield 5 - 6 pints.

Apple Pie Filling

9 1/2 c blanched, sliced fresh apples
2 c + 4 tbsp granulated sugar
5/8 c Clear Jel®
1 1/4 tsp cinnamon
1 1/4 c cold water
1 7/8 c apple juice
5 tbsp bottled lemon juice
1/4 tsp nutmeg (optional)

Wash, peel and core apples. Slice apples and place in water containing ascorbic acid or lemon juice to prevent browning. Bring 1 gallon water to a boil. Drain apples and pour into boiling water. Bring to a boil and boil one minute. Drain, but keep heated fruit in a covered pot. Combine sugar, Clear Jel®, cinnamon, nutmeg in large kettle with water and apple juice. Stir and cook on medium high heat until mixture thickens and begins to bubble. Add lemon juice and boil 1 minute, stirring constantly. Fold in drained apple slices immediately and fill jars with mixture with delay. Leave 1 inch headspace. Adjust lids and process 25 minutes in boiling water bath canner.


Cranberry Claret Jelly, Apple Jelly, Cabernet Jelly, Apple Pie Filling

Jellies always look so pretty sparkling like jewels in the jars. The nice thing about some jellies is they can be made year round as the need arises. They are quick and easy to make and have very short processing times. I make several kinds of jelly and surprisingly most are used as condiments, appetizer topping or in cooking. We seldom eat jelly on toast. I've include all three jelly recipes as they are perfect for gift giving. Be sure to label the wine jellies as they are not intended for children since they still contain alcohol. Wine jellies are nice served on top of fancy crackers and cream cheese. The are perfect condiments for meats and poultry or use as a glaze ingredient for chicken and ham.

Cranberry Claret Jelly

1 c cranberry juice
1 cup dry red wine (eg. cabernet)
3 1/2 c granulated sugar
1 pouch CERTO Liquid Pectin

Combine juice, wine and sugar in large saucepan. Bring to a boil over high heat. Boil hard 1 min. Remove from heat and stir in CERTO. Stir and skim for 5 minutes. Pour into hot, steriliaed jars leaving 1/4 inch headspace. Cap with two piece lids. Process 5 minutes in boiling water bath canner.
Yield: 4 pt


Apple Jelly

5 c apple juice
2 tbsp lemon juice
7 1/2 c granulated sugar
1 pouch CERTO Liquid Pectin

Combine apple juice, lemon juice and sugar in large saucepan. Bring to a boil over high heat. Boil hard 1 min. Remove from heat and stir in CERTO. Stir and skim for 5 minutes. Pour into hot, steriliaed jars leaving 1/4 inch headspace. Cap with two piece lids. Process 5 minutes in boiling water bath canner.
Yield: 8 pts


Cabernet Jelly

2 c dry red wine (eg. cabernet)
3 c granulated sugar
1 pouch CERTO Liquid Pectin

Combine wine and sugar in large saucepan. Bring to a boil over high heat. Boil hard 1 min. Remove from heat and stir in CERTO. Stir and skim for 5 minutes. Pour into hot, steriliaed jars leaving 1/4 inch headspace. Cap with two piece lids. Process 5 minutes in boiling water bath canner.
Yield: 4 pt

Enjoy!

Garden Gnome


Thursday, October 05, 2006

Salsa & Green Tomato Ketchup

Yesterday I canned tomatoes. I normally have a schedule planned for canning during the heavy season and by the time I get to salsa, I know the long canning days are drawing to an end. Salsa is definitely more work than some home canned goods. Despite the work involved with the salsa, I also decided to make another batch of bruschetta in a jar (recipe in earlier entry). I'm now at the point where a batch of red tomato ketchup and tomato paste should end the tomato canning season.
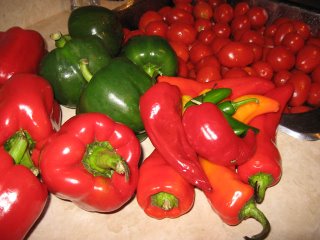
Some of the Salsa Ingredients

To me, the variety of the vegables used is the secret to excellent salsa and I am very picky as to what I will put into my salsa. That is the trick to excellent salsa. I either grow or buy the varieties I insist on and if they are not available, the salsa just doesn't get made. The produce must be very fresh preferrably picked that day. Any purchased produce is through a well trusted farmer's market that knows how picky I can be. They always treat me well! I start with a hamper of tomatoes of a specific variety and very fresh peppers both sweet and varying degrees of heat. This photo shows only a few of the ingredients. From there, the salsa is assembled, cooked, then canned.
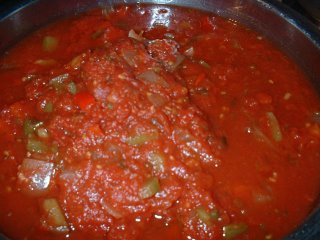
Salsa

While I will not reveal the recipe as my family thinks this salsa is good enough to market, I will share my method. Maybe so, but they may be just a little biased and besides I have other things on the go right now but it might be a possibility. I make salsa in three strengths: hot, medium and mild. Three strengths are necessary depending on how the salsa will later be used. Some goes to relatives and friends who prefer one strength over another so that is always taken into consideration. All are full bodied, chunky salsas I average 48 - 60 jars of salsa each year. The batch I made yesterday was hot.

After the ingredients were combined, the salsa was cooked for 15 minutes. Then the remaining ingredients were added and the salsa was cooked for another 10 minutes. After that, it was time for taste testing followed by adjustments then onto the canning process.
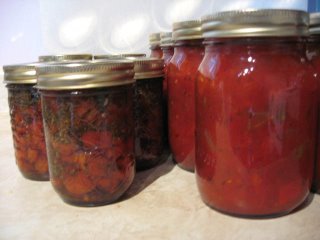
Bottled Salsa

The salsa was ladled into hot, sterilized pint jars. I use pint jars because I find that is just a perfect size to not leave a lot of left-overs. Lids and bands were placed on the jars then the jars were processed using a boiling water bath for 15 minutes. The yield was 13 - 500 ml jars.

The salsa always looks wonderful in the jars, tantalizing the taste buds before the jar is even opened. I've been making salsa long enough that labelling really isn't necessary as one look at the jar, I can tell you the strength. For those getting the salsa as gifts or my family members, I do label only because I feel all home canned foods should be labeled with the contents and date made.

Shown in the photo along with the salsa are seven half pint jars of Bruschetta in a Jar. The recipe is in a previous entry. I added this to the canning goodies gift basket last year and it got rave reviews. Two tricks to this recipe are be sure to use high quality white wine vinegar. I like using an aged white wine vinegar imported from Italy. It costs more but is well worth the price! Never use a wine that you would not drink. Just because the recipe says to use a dry white wine, if you don't like dry white wine, use a white wine you do like. A tip for those who may want to make the recipe without wine, I would suggest organic apple juice. The flavour will differ but the results should be fine. Again, make sure you use "quality" ingredients.
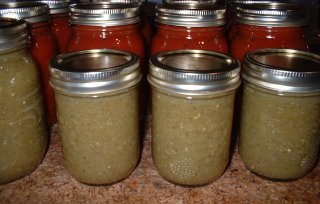
Green Tomato Ketchup

When frost threatens, I pick all the green tomatoes. Some are processed into salsa verde or green ketchup. The salsa verde recipe is in an earlier blog entry. When using green tomatoes for processing, choose tomatoes that are pale green. Dark green tomatoes have higher levels of solanine, which can be toxic in large amounts.

I make two versions of green ketchup. The one pictured is the Southern Cuisine recipe from about.com. The second is a Quebec Style green ketchup. Both are good ketchups and a nice change from red tomato ketchup. We use more of the Quebec style than the Southern style. Please be sure to read my notes for each recipe as I have made changes to both and only use specific ingredients. I prefer to can in either pint or half pint jars.

Green Tomato Ketchup
Source: Diana Rattray,Your Guide to Southern U.S. Cuisine, http://southernfood.about.com/od/greentomatoes/r/bl30322v.htm

A green tomato ketchup recipe. More green tomato recipes below.
INGREDIENTS:

* 6 pounds green tomatoes
* 3 pounds onions
* 1 tablespoon black pepper
* 1 tablespoon mustard
* 1 teaspoon Worcestershire sauce
* 4 cups vinegar
* 1 cup honey

PREPARATION:
Slice green tomatoes and onions; place in a large pot with pepper, mustard, and Worcestershire sauce. Pour vinegar over all and cook for 4 hours over very low heat, stirring occasionally. Carefully puree mixture in a blender; strain through a mesh strainer. Return to pot and bring to boil; add honey. Immediately fill 6 sterilized pint jars, leaving 1/4-inch head space. Wipe the jar tops and threads clean with clean damp towels. Place hot sealing lids on the jars and apply the screw on rings loosely. Process in boiling water bath in a deep canning pot for 5 minutes. Remove the jars and cool completely. Tighten the jar screw rings to complete the sealing process. After jars cool, check seals by pressing middle of lid with finger. (If lid springs back, it is not sealed and must be refrigerated. Let jars of green tomato ketchup stand at room temperature 24 hours. Store unopened product in a cool dry place up to one year. Refrigerate green tomato ketchup after opening.
Makes 6 pints of green tomato ketchup.

My Notes: This is a nice change from red tomato ketchup and a great way to use up green tomatoes. I followed the processing time of 15 minutes for ketchup as per Bernardin's Tomatoes, Canning & Specialty Recipes, 2000. Pp. 43. Once opened, refrigerate.


Ketchup Vert (Green Tomato Ketchup)--Quebec Style
source: A Taste of Quebec, Julian Armstrong, 1990.

24 Medium green Tomatoes (6 Lbs Or 2.5 Kg), chopped
15 Medium Onions (3 Lbs Or 1.5 Kg), chopped
1/2 cup coarse Salt (125 Ml)
3 cups white vinegar (750 Ml)
2 cups granulated sugar (500 Ml)
6 tbsps mixed pickling spices, tied in cheesecloth

In a large bowl, alternative layers of tomatoes and onions, sprinkling each layer with salt. Let stand for at least 8 hours or overnight. Rinse and drain well. Combine tomatoes and onions with vinegar, sugar and spice bag.

In a large saucepan or stock pot, bring mixture to a boil, then simmer, uncovered, for about 30 to 45 minutes, stirring frequently until slightly thickened. Pour into hot sterilized jars and seal.
Yield: Approximately 12 cups ( 3 L)

My Notes: This must be processed. I use the processing time of 15 minutes boiling water bath for ketchup from Bernardin's Tomatoes, Canning & Specialty Recipes, 2000. Pp. 43. Once opened, refrigerate.

Enjoy!