My photo
Ontario, Canada
I am a wife, mother and grandma who enjoys the many aspects of homemaking. A variety of interests and hobbies combined with travel keep me active. They reflect the importance of family, friends, home and good food.
Cook ingredients that you are used to cooking by other techniques, such as fish, chicken, or hamburgers. In other words be comfortable with the ingredients you are using.
--Bobby Flay

For Your Information

Please watch this area for important information like updates, food recalls, polls, contests, coupons, and freebies.
  • [March 19, 2020] - Effective Mar 17, this blog will no longer accept advertising. The reason is very simple. If I like a product, I will promote it without compensation. If I don't like a product, I will have no problem saying so.
  • [March 17, 2020] - A return to blogging! Stay tuned for new tips, resources and all things food related.
  • [February 1, 2016] - An interesting report on why you should always choose organic tea verses non-organic: Toxic Tea (pdf format)
  • Sticky Post - Warning: 4ever Recap reusable canning lids. The reports are growing daily of these lids losing their seal during storage. Some have lost their entire season's worth of canning to these seal failures! [Update: 4ever Recap appears to be out of business.]

Popular Posts

Showing posts with label jams. Show all posts

Wednesday, June 24, 2015

Low Sugar Strawberry Jams

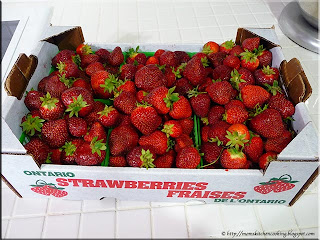
While I home can year round and have even taken to doing a bit of canning at our vacation home, this time of year through the end of September tends to be busier.  The canners (water bath, pressure) are going almost daily often several times in one day quickly putting up various fruits and vegetables as they are in season.  Unfortunately, I missed asparagus season.  There is still local asparagus available but the price is too high for preserving.  Strawberries just started.  We were on a road trip Saturday so I came home with a flat of local strawberries and fresh, free range eggs. 

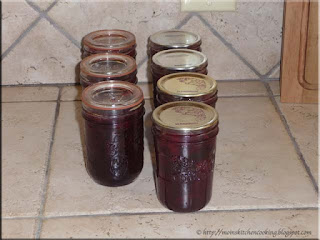
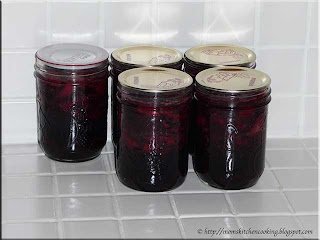
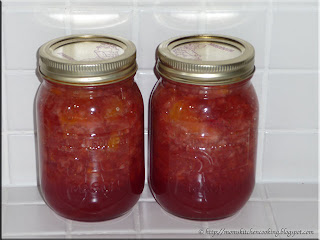
low sugar strawberry jams
I made three batches of low sugar strawberry jam, all using Pomona's pectin (low methoxy pectin).  This pectin does not rely on sugar to gel so it is possible to use sugar substitutes like maple syrup, honey, stevia or agave.  If sugar is desired, it is used at a considerably reduced about usually 2 cups or less per batch in comparison to regular pectin that uses about 7 cups of sugar per batch.  The end result is the ability to create gourmet low sugar jams.  However, reduced sugar also means a smaller yield since sugar is a bulking agent as well.  This small price is well worth it for me. 

I also used a secret ingredient (non-alcoholic) to enhance the flavour of the jam.  I am pleased with the flavour and texture of the jam.  However, there is a bit more floating fruit than I would have liked.  Floating fruit is common with jams even when following the guideline to stir for five minutes before jarring.  This does reduce but not eliminate floating fruit.  The easy remedy for floating fruit is simply stirring the jar of jar when first opened.  Floating fruit does not affect the texture or flavour of the jam but it is not a desirable visual element for competition. 


Wednesday, July 03, 2013

Using Honey as a Sweetener in Homemade Jam

The busiest time of my home canning has started.  Ontario strawberries are in season just perfect for a few batches of homemade strawberry jam.  Of all the foods I can, strawberry jam is seldom a bargain in terms of cost.  Strawberries are expensive at as high as $5 per quart although you can get them a bit cheaper at the U-pick.  Even then, the price has risen significantly.  It takes on average 2 quarts plus the pectin and sugar to make the jam.  Certo (liquid or crystal pectin) adds about $1.50 to the price of a batch of homemade jam.  The average batch of jam takes 7 cups of sugar which further increases a batch of jam at a cost of about $1.40.  The yield for a batch of strawberry jam using traditional pectin is 7½ cups.  At the cost of homemade strawberry jam, it is hard to justify making it other than the fact you are getting a superior product to store bought. 

honey strawberry jamPectin is the ingredient that makes the jam gel.  It is dependent on the sugar content which is why recipes using traditional pectin should not be altered.  The cost of traditional pectin (eg. Certo) really adds to the price of homemade jams.  Liquid pectin averages $2.89 for 2 pouches but I've seen it as high as $3.49.  The biggest problem for me with traditional pectin is their short shelf life which means I can't buy a lot of it on sale for the following year as the pectin won't keep that long.

Sugar as mentioned is necessary for the pectin to form the gel (eg. jam set).  Sugar is also a bulking agent that adds texture to the jam.  This is noticeable when making a low-sugar jam that gives a lower yeild.   It is a cheap ingredient that doesn't add flavour only sweetness.  Until a few years ago, those making homemade jams and jellies had two choices.

The first was long cook, no pectin added and the second was shorter cook, pectin added.  Both relied on adding a lot of granulated white sugar.  Low sugar pectin became available but while the amount of sugar was reduced it was not eliminated and sugar substitutes could not be used.  Then I discovered Pomona's universal pectin.  This is a low methoxy pectin that uses calcium water, a solution of monocalcium phosphate for the gel which is not dependent on sugar.  That means sugar substitutes can easily be used in jam making.  Pomona's universal pectin works out to 35¢ per teaspoon.  Only a ½ tsp to ¾ tsp of Pomona's is needed per cup of prepared fruit so it is less per batch than traditional pectin.  It has no expiry date and you can easily develop your own recipes.  Pomona's universal pectin can also be used to make sugarfree jello and gummy candies.

I made a batch of honey strawberry jam (pictured).  This jam has no sugar added, only honey and my gosh is it ever delicious!  Honey adds a wonderful flavour to any dish!  Not only that, honey is good for you.  It is easier to digest and has a wide range of health benefits.  I never use the pasteurized, homogenized honey found in the grocery stores.  This honey is a blend of several honeys with the end result being a bland, tasteless honey stripped of its natural nutrients and health benefits.  Rather, I use raw, unpasteurized honey usually local or from an area we are visiting.  Honey varies in colour (very pale amber to very dark amber) and flavour (light to strong)  depending on the nectar source.  While it is the same sweetness as sugar, honey has flavour! 

I like pairing the honey variety with the fruit to enhance and accent the flavour of the fruit.  I used a medium amber (golden) honey in the strawberry jam which accented the flavour of the strawberries nicely without being overpowering.  Honey differs from granulated sugar in that it is a liquid as well as a humicant (attracts moisture).  It does not add the bulk to jam that sugar does but I used less honey than what I would have sugar if using a traditional pectin.  Jam foams as it cooks and normally that foam is skimmed off.  Jams made with honey have a finer foam that is a bit more tedious to skim off but there is a lot less of it than there is if using sugar.  The butter trick works to reduce the foam when using honey the same way it does if using sugar.  Everything comes back to the flavour and for that honey certainly does not disappoint in creating a gourmet, delectable jam!


Tuesday, September 11, 2012

Low Sugar Peach Jam

One of the final products I made while canning peaches was a low sugar peach jam using Pomona's pectin.  Pomona's pectin is a low methoxy pectin that uses calcium water for it's gel rather than sugar.  This means I can greatly reduce the amount of sugar used in a recipe or I can substitute some or all the sugar with honey or maple syrup.  Artificial sweeteners can be used with Pomona's pectin but we don't use these types of sweeteners so I can't tell you how well the work.  The best thing about Pomona's pectin is I can create my own recipes for jams and jellies as well as make gummy candies unlike using other types of traditional pectin (eg. Certo). 

low sugar peach jam
I make a fair number of jams and jellies yet very few are ever used as a spread.  Instead they are used as glazes or as an ingredient for baking and appetizers.  Most jams and jellies pair nicely with cream cheese and brie so the possibilities are endless. They are also great stirred into homemade plain yogurt.

Low sugar peach jam has all the gourmet flavour of peach jam made with Redpath QUICKSET, just less sugar.  The colour is a bit lighter but that could be due to the lemon juice that was added.  It is a delicious jam sure to please whether used as a spread or ingredient, a lovely addition to your pantry.

Low Sugar Peach Jam
recipe by:  Garden Gnome

4 c prepared peaches
¼ c lemon juice
2 c sugar
3 tsp Pomona's pectin
4 tsp calcium water
dab butter (optional)

Wash, skin and pit peaches.  Put in food processor then pulse until desired consistency leaving just a few larger pieces of peach.  Measure out 4 c.  Pour into large stainless steel saucepan.  Add calcium water and lemon juice.  In a separate bowl measure sugar and pectin.  Mix well.  Bring the fruit mixture to a boil.  Stir in the sugar mixture.  Stir to dissolve.  Return to boil.  Remove from heat. Stir in butter.  Ladle into hot jars.  Adjust two piece metal snap lids (or Tattler reusable lids or glass inserts).  Screw bands on jars (adjust accordingly if not using metal snap lids).  Process for 250 ml for 10 minutes in BWB canner at altitudes up to 1,000 feet above sea level.  At higher altitudes refer to altitude adjustment chart on Canning FYI page.  Remove from canner.  Adjust bands if using Tattler or glass inserts.  Allow to cool 24 hours.  Remove bands and test for seal.  Wash and dry bands and jars.  Label and store.


Saturday, September 01, 2012

Peach Jam Made with Redpath QUICKSET™

A couple of weeks ago I was in the midst of home canning all kinds of peachy delights.  I could easily have canned the beautiful peaches from the Niagara area as simple sliced peaches, I decided to make a few gourmet products.  There were two reasons for my decision.  First, we do not use a lot of sliced peaches so there is no need for me to can up a bushel of peaches as slices.  This is a fundamental rule of home canning.  Only can what you can reasonably use in the form of what you will use within a one to two year time frame.  The second reason is I really wanted to recoup the expense of a bushel of peaches. 

peach jam made with Redpath Quickset
The first batch of peach jam was made using Redpath QUICKSET™ that I had purchased on sale for $1.  QUICKSET™ makes jam making very easy as only the fruit and lemon juice need to be measured.  It is a longer cook process than using Pomona's pectin and I did notice peach jam made with QUICKSET™ is darker in colour than that made with Pomona's pectin.  If you can't find Pomona's pectin and don't want to order a larger amount online, the QUICKSET™ is easier to use and less expensive than Certo® crystals or liquid.

Peach jam is gorgeous in the jars!  It's even nicer as a spread on toast or stirred into plain yogurt for breakfast.  I like using peach jam as a filler in baked goods (eg. mini tarts) and as a glaze for pork.   It makes a wonderful topping for cream cheese appetizers as well.  Be sure to make plenty of this delicious jam!

Method: Wash, skin and pit the peaches. Place the fruit in a food processor and pulse until no large chunks of peaches remain.   Measure out 3½ c of crushed fruit into large saucepan. Add 2 tbsp lemon juice and the entire bag of Redpath QUICKSET™. Mix well. Bring to a full rolling boil [Add ½ tsp butter to prevent excess foaming. (optional)] and boil for 4 minutes stirring constantly. Remove from heat. Continue to stir for 5 minutes to prevent floating fruit. Ladle into hot jars. Wipe the rim and place lids on the jar. Tighten band according to the type of lid being used. Seal -> This means to process in a BWB canner for 10 minutes. Remove from canner. Let sit undisturbed for 24 hours. Check seal. Label and store.


Tuesday, August 28, 2012

Peachy Delights

I started home canning peaches a couple of weeks ago with beautiful, large peaches from the Niagara region.  At $45 per bushel which works to a price of $28.13 per hamper (5/8 of a bushel) or $8 more than the price per hamper of pickling cucumbers, the peaches were not cheap.  Tomatoes and cucumbers are usually available by the hamper; apples, pears and peaches by the bushel, and other produce by the quart (1.1 L) or lb for home canning or freezing purposes.

home canned peach products
One of the ways to recoup the cost of buying produce is to supplement it with home grown produce.  Another way is to make gourmet style products that you wouldn't find in a regular grocery store.  Pictured are four of the gourmet style products I made from the peaches.  From left to right: peach jam made with QuickSet, peach salsa, peach chutney and summer salsa.  Not pictured is the second batch of low sugar peach jam made with Pomona's pectin and the peach syrup.  In total, I had a yield of 32 - 250 ml jars of peachy gourmet delights that if purchased in a specialty food shop would have a value of $4 to $5 per jar (total value $128 to $192).  I also had a yield of 7 - 500 ml jars of sliced peaches.  All in all, a lot of nice peach products took their place in the pantry at a fraction of what they would have cost if store bought, if you could even find them in the grocery store.  I will be discussing each of the peachy gourmet delights here over the next week.


Saturday, August 04, 2012

Low Sugar Gooseberry Jam

When we first looked at our new property back in September of 2011, I noticed the fruit trees and over grown gardens.  Tucked into one side garden in the backyard is a gooseberry bush but I didn't know that is what it was until this spring when I noticed a robin frequenting the bush.  Upon closer inspection, I discovered it was a gooseberry bush so officially declared war on the robin.  I wanted those berries for jam!  Well, the robin didn't quite see it that way.  He would sit on the fence yelling at me every time I got close to the bush.  He rounded up other birds in the neighbourhood to pull the sheets off the bush.  Finally, I broke down and bought three packages of bird netting at the dollar store, sewed them together and fastened them securely to the bush.  He was none to pleased at this turn of events but I did manage to get enough gooseberries to make a small batch of low sugar gooseberry jam.

low sugar gooseberry jam
Gooseberries are slightly tart berries and rather small.  Gooseberries grow on a low bush with long, sharp thorns so harvesting them is no easy feat.  I found picking slowly minimized scratches on my arms.  I had to pick over a period of a few days to get enough gooseberries for a batch of jam.   I used reusable glass inserts on the jars of jam for sealing.  I really love using the glass inserts!

Low Sugar Gooseberry Jam
recipe by:  Garden Gnome

3 c chopped gooseberries
2 tsp lemon juice
1½ c granulated sugar
3 tsp calcium water
1½ tsp Pomona's Universal Pectin

Wash the gooseberries then rough chop using a food processor.  Measure 3 c of the prepared gooseberries into a large sauce pan.  Stir in lemon juice and calcium water.  Mix the pectin with the sugar.  Bring the fruit mixture to a boil.  Stir in the sugar pectin mixture.  Return to boil and boil 1 minute.  Remove from heat.  Stir for 5 minutes.  Ladle into hot jars.  Wipe rim.  Cap with metal snap lids, Tattler reusable lids or glass inserts.  Process in BWB for 10 minutes at altitudes up to 1,000 feet above sea level.  If above that altitude refer to the altitude adjustment chart.


Tuesday, July 17, 2012

Sweet Cherry Jam Made With Certo

Things have been a little hectic here as we move into the busier canning season.  Fresh, local produce is trickling in.  After two years of reduced canning between our house being on the market and moving here last September combined with spending more time at our vacation home, I am in high gear home canning to replenish our pantry.  A couple of weeks ago, I made a batch of sweet cherry jam.   This is my husband's favourite jam and at his request I still make it with liquid Certo (pectin).  It's the only jam I make using Certo these days as I like the low sugar, gourmet results using Pomona's pectin. 

sweet cherry jam made with Certo
I used to can sweet cherry jam and most jams in 500 ml (pint) jars.  We went through it quick enough when the kids were at home and we weren't out of the country for extended periods of time like we are now.  Now I can jams and jellies mainly in the 250 ml (half-pint) jars.  Another thing I've changed and you will see more of it on this year's canning posts, is I am switching to using more of the reusable canning lids like the glass inserts (left) or Tattler lids (not pictured) and less of the metal single use lids (right).

The reusable canning lids are an eco-friendly alternative to the single use metal snap lids.  The glass inserts are vintage so are harder to come by.  I only have 5 dozen of them.  They are no longer in production so I won't be using them on any home canned foods that leave the house.  The Tattler lids are readily available and still in production.  I have 6 dozen of them with plans to buy more shortly, at least before tomatoes start.  They too are being used for the most part of home canned foods that won't be given away although a few will make it to our kids as I know they will return them.  As much as I would love to switch entirely to reusable lids it is not feasible for jars that are gifted.  Some are good at returning jars but most have not seen the reusable lids that must be treated a bit gentler than the metal lids.  It is really important to not damage the rubber gasket when remove reusable lids.  The metal single use snap lids are still in production so easy to find.  The cheapest price here is now 12.5¢ per lid plus HST, up a full 4¢ from 18 months ago! 


Tuesday, June 19, 2012

Using Reusable Canning Lids for Home Canning Strawberry Jam

I have talked so much on this blog about canning.  The reason being home canning is a huge part of our lives.  Home canning allows us to keep our food costs low, gives us unique products you could not buy in stores and the products are healthier, not laden with extra preservatives, or artificial colours and flavours.  It is our way of taking responsibility for our own safe food supply as well as preserving the bounty of the harvest.  It is also a way for us to share our blessings with family and friends.

Everyone who home cans is familiar with the single use metal snap lids.  These are the only lids currently approved by the USDA but only because those companies paid big bucks for the endorsement.  A metal snap lid is sealed if the center of the lid is indented so it gives a nice visual along with a ping to let you know the lid is sealed.  There are three problems with the metal snap lids.  First, they can result in false seals because the natural tendency is to touch the lid to see if it is sealed which may push it down creating a false seal.  The second problem is these lids really are disposable meaning they are not eco-friendly.  In some areas, they can be put into the recycle bin but in other communities they end up in the landfill.  The third problem is the metal lids are coated with a plastic containing bis-phenolA (BPA) so they present a potential health risk.  High acid foods (eg. jams, jellies, pickles, fruits) processed in a boiling water bath canner (BWB) are not likely to come into contact with the coating so BPA leaching into the food is low risk.  Those low acid foods (eg. vegetables, meats, soups, dried beans, and some tomato products) will come into contact with the coating during processing resulting in trace amounts of BPA in the food, although it is much lower in concentration than any commercially canned foods.

strawberry jam sealed with Tattler and glass inserts just out of canner
I have been experimenting with re-usable canning lids to circumvent the BPA issue while becoming more eco-friendly.  While I still use the metal snap lids for any product given away, I am using Tattler re-usable plastic BPA free lids and glass inserts.  When you put a metal lid on the jar, you tighten finger tight then process.  When you put a Tattler on, originally the instructions were to tighten finger tight then turn back a quarter inch but now it is to tighten finger tight.  When you put a glass insert on, you tighten fully then turn back a quarter inch.  Immediately out of the canner, the rings of both must be tightened fully.

Here is strawberry jam fresh from the canner.  Note the difference in the bands?  Now that can be a problem with the glass inserts.  Boiling water rests between the lid and the band so you can burn yourself trying to tighten the band.  Make sure you use a thick towel.

strawberry jam sealed with Tattler and glass inserts ready for labeling
Pictured is the jam jars cleaned with rings removed ready for storage.  I really like my Tattler lids, seriously I do.  However, I love my glass inserts!  I have 14 jars with glass inserts in storage without one seal failure and the jars just look gorgeous!  In comparison, it depends on what I am canning but I have a seal failure rate of about .1% with Tattlers and about the same with metal lids, maybe a bit more if I hit a bad box of lids.  False seals are not an issue with the Tattlers or glass inserts.  They are either sealed or they aren't.  If the lid is not sealed it lifts off with no resistance as soon as you remove the band.

Be warned, unlike the Tattler and metal lids, the glass lids will break.  They are difficult to find especially the rubber gasket that is no longer in production.  They are considerably more expensive as they are vintage lids.  On average I have paid $1.50 per lid with gasket in comparison to Tattler lids at 82¢ and Bernardin metal snap lids 14.5¢ each.  Both Tattler and Bernardin lids are still in production but that might not be the case in the future.  For that reason, I continue to increase my stock of all three types of lids. 

This batch of strawberry jam was made using Redpath QUICKSET™ for jam.  This is not a product I have used before and normally would not buy.  The 1 kg package contains sugar, citric acid and pectin mixed together.    The current price is $2.99 but a local grocery store recently had it on sale for $1 as part of their dollar sale. At the regular price, it is more expensive than Pomona's pectin and Certo crystals but less expensive than Certo liquid per batch of jam.  It may work out slightly cheaper per batch considering the sugar is included in the price whereas sugar is in addition to the cost of the other pectin.  Current sugar prices range from 10¢ to 17¢ per cup depending on where you buy it.  Using the Redpath QUICKSET™ is no easier to use than using Certo or Pomona's.  It removes measuring the sugar but increases the boil time by 3 minutes.  The set is comparable to other pectin. 

Method:
Wash and hull the strawberries.  Crush the fruit and measure out 3½ c of crushed fruit into large saucepan.  Add 2 tbsp lemon juice and the entire bag of Redpath QUICKSET™.  Mix well.  Bring to a full rolling boil [Add ½ tsp butter to prevent excess foaming. (optional)] and boil for 4 minutes stirring constantly.  Remove from heat.  Continue to stir for 5 minutes to prevent floating fruit.  Ladle into hot jars.  Wipe the rim and place lids on the jar.  Tighten band according to the type of lid being used.  Seal -> This means to process in a BWB canner for 10 minutes.  Remove from canner.  Let sit undisturbed for 24 hours.  Check seal.  Label and store.


Monday, June 18, 2012

Frugal Kitchens 101 - Jams and Jellies

Frugal Kitchens 101
Ontario strawberries and cherries are in season signifying the start of the jam and jelly making here. Unless you grow your own berries, there are little savings in home canned jams but the finished product is far superior to what you can buy in the grocery store. There are no preservatives or artificial flavours or colors and certainly no HFCS in homemade jams or jellies.  There are three main costs for jams and jellies: berries, sugar, and pectin. If canning the jam, the cost of lids need to be factored in as well. There are ways to save on the costs of making homemade jams and jellies. Here are a few of the things I do to keep the costs in check:

  • berries or fruit - Berries or fruit for jam making are available at farmer's markets, roadside stands, U-picks and the grocery store.  By far the cheapest is if you grow some or all of the berries or fruit you will be using for making jam.  If buying berries, know the current prices.  For example, I recently bought strawberries as my strawberry bed has just been planted.  A local roadside stand had theirs priced at $4 per quart or $20 per flat (6 quarts, $3.33 each) while a local grocery store had strawberries on sale 2/$5 or $2.50 per quart.  However, the quality of the berries were better at the roadside stand making them a better deal as there is no point making jam with poor quality berries.  The local U-pick is coming in at $2.25 per quart but factoring in the cost of gas and time, the frugal choice between the two is the in town roadside stand or the grocery store.  A trick to stretching more expensive fruit is to make a mixed berry or fruit jam.  I made strawberry kiwi because kiwis were on sale and I made a mixed berry jam because blueberries were on sale. 
  • sugar - Sugar ranges in price from about 10¢ to 17¢ per cup depending on where you buy it.  Traditional jam recipes tend to be very sugar heavy, usually between 4 to 8 cups of sugar depending on the recipe.  On the low side sugar will cost to 40¢ to 80¢ and on the high end 68¢ to $1.36.  This cost can be reduced by making healthier, sugar reduced or low sugar jams.  There is a lower yield for the healthier versions as sugar adds bulk but the final product is well worth it, more of a gourmet jam.  The second way to save is to buy sugar in bulk for the lowest price per lb.  The third way is to watch the sales.  Sugar seldom goes on sale but some grocery stores will put sugar on sale for holiday preparations (mid-November) so take advantage of those sales if you can.
  • pectin -  Surprisingly, store bought pectin can be one of the biggest costs of jam making.  Pectin is available in crystals, liquid, quickset or low methoxy granular.  Each has its advantages and disadvantages.  Be aware that all by the low methoxy pectins have a use by date.  Liquid and crystal pectin cannot be interchanged. 
    • homemade pectin - If you have access to free green apples or crabapples you can make your own pectin.  You will need 10 lb of either to make about 2 cups of pectin.  It can be home canned if desired.  Be warned this is a long cook process requiring overnight straining to use the juice only.  Each batch of jam will use ½ to ¾ c to 4 c of fruit so a batch of pectin will give a yield in jam of 3 to 4 batches.  Do consider the cost of energy to cook down the pectin.  We now have time of use electricity pricing which is one reason I switched to natural gas for cooking when we moved.  A large electric burner (2100 W) costs just over 25¢/hour so a long time cook can actually make homemade pectin more expensive than store bought.  Cooking it on natural gas will cost about 8.3¢/hour. 
    • crystal - The common brands are Sure-Jel and Certo but I did see a store brand recently.  Certo crystals are currently selling for $1.99/box.  One box is required for each batch of high sugar jam.  The store brand was $1.19.
    • liquid - The most common brand is Certo.  It comes in a box of two pouches for the current price of $3.49.  Depending on the jam being made, one or two pouches are needed.  Liquid pectin really is the most expensive form of pectin and it has a lower shelf life than either crystal or low methoxy pectins.
    • quicksets - Redpath has a pre-mixed bag of quickset that includes the sugar and pectin.  The beauty of this is pretty much a dump and use with only measuring the fruit.  It currently costs $2.99 but was recently on sale for $1 a bag.  A one kilogram bag makes 5 - 7 cups of jam, consistent with crystal and liquid pectins.  Since you don't have to add sugar, the cost using a quickset is lower than crystal pectin on the high range end of sugar and considerably lower than liquid pectin even at the regular price.
    • low methoxy - Low methoxy does not require sugar for the set meaning you can use sugar substitutes, make low sugar jams and create your own recipes.  Of all the pectins, it is the most versatile.  There is a higher initial outlay at $49.70 per lb which works out to about 35¢ per tsp.  Each batch will use ½ to ¾ tsp per cup of prepared fruit.  The average batch of jam will cost 70¢ to $1.05 as well as the savings on using less sugar.  It does not have an expiry date either so is a great product to have in your pantry.
  • lids - There are two type of lids. re-usable and single use.  Single use metal snap lids are the only lids officially endorsed by the USDA.  The reason being, those companies paid the big bucks to get the endorsement.  Re-usable lids are available in glass (vintage) or plastic and while they work just as good as the metal, in fact even better, they aren't USDA approved because the companies have not paid for the testing.  I use all three.
    • metal snap lids - These range in price from $1.50 per box of 12 in the local dollar store to $2.79 in the grocery stores.  A couple of years ago, the boxes were $1 in the dollar store, then last year $1.25 and now $1.50 but they are the cheapest price around even with the HST.  The dollar store lids are brand name Bernardin lids coming in at a total cost 14.5¢ (12.5¢ lid, 2¢ HST).  This is a considerable increase for those doing larger scale home canning.  The same lids will cost you 23.25¢ plus 3¢ HST in the grocery stores.
    • Tattler and 4ever Recap lids -  Tattler and 4ever Recap lids are a plastic disc version of the metal snap lids but they have a separate gasket and they are reusable.  Unlike the metal snap lids, they are BPA free.  My last purchase of Tattlers cost me $29.63 including tax for 36 at a cost of 82¢ each which means I need to re-use them 6 times to break even compared to dollar store prices or 3 times grocery store prices at which point each additional use costs me nothing and are in fact saving me money with each use.  Some of my Tattler lids have already paid for themselves!  The plastic lids are guaranteed to last a lifetime but the rubber gaskets may need replacing after using about 20 times.  The 4ever Recap lids are slightly less expensive.
    • glass inserts - By far these are my favourite lids!  Like the Tattlers they consist of a disc that fits on the jar with a rubber gasket.  They look good on the jars and they perform like a dream.  They come in at about $1.50 per lid and they require special rings.  The gaskets are thicker and smaller than Tattler and while they can be used multiple times, they can be hard to find.


Friday, October 08, 2010

Canning At Our Vacation Home - Plout Jam

Part of traveling for me anyways is discovering new foods and regional dishes.  There are very few times that I don't bring home some type of foodie item to try.  Being Canadian living mainly in Canada but traveling outside of Canada presents a few problems bringing certain foods back into Canada.  There are restrictions as to how much dairy or poultry can be brought back at one time but the fruit and vegetable restrictions are the ones that cause the most concern.  Some fruits and vegetables are not allowed while others may be temporarily disallowed.  The last thing I want to do is get to the border with a box of lovely fruit to find out I can't bring it into Canada.  So I have come up with a solution.  I take my BWB canner with me along with any necessary supplies (eg. Pomona's pectin, pickle crisp, etc) and can the food wherever we are.  Since filled jars of home canned foods come with us I have empty jars for refilling for the return trip.  Once canned bringing the fruit back into Canada is a non-issue.  This is working well so I'm considering taking my extra pressure canner with us the next trip.

pluotsOn our recent trip I discovered pluots.  I simply had to try them.  As produce goes they are a bit more expensive though.  Pluots are an apricot and plum hybrid.  The fruit itself looks like a rather large red plum but without the purplish overtones.  The pit is very much like an apricot.  The flavour is a mingling of the two fruits but more of a distinct flavour.  I cut one open as pictured and immediately thought this would make for a lovely looking jam or jelly.  The flesh is a wonderful, gorgeous almost rosy pink!  The texture is firm yet juicy and the flavour really is quite unique.

Canning outside your normal environment brings a few challenges.  I've canned on camp stoves, in an RV, on the road and now at our vacation home.  Logistically you simply do not have everything you may need when canning away from home.  If you don't have a key ingredient (eg. Pomona's pectin) chances are very good you can't just rush out and buy it either.  This can create both frustration as well as a learning experience in adapting.

pluot jam
I brought exactly 8 tsp of Pomona's pectin with me.  That is enough pectin for 4 batches of jam or jelly.  I brought the monophosphate calcium in the original package since customs on both sides aren't really fond of unlabeled white powders.  What I didn't bring was my kitchen journal with how to make the calcium water but thanks to this blog I was able to carry on.  This is something to keep in mind though when canning on the road.  Make sure you bring your tried and true or essential recipes with you.

The pluot jam just looks absolutely scrumptious in the jars!  It was quick to make taking me only about 20 minutes.  I did learn that the water at our vacation home is considerably harder than at home.  Normally I add a bit of vinegar to the processing water but didn't for this batch and oh my gosh the jars came out almost white!  That will be a mistake I won't be repeating.

Pluot Jam

4 c chopped pluots
2 c organic sugar
2 tsp Pomona's pectin 
2 tsp calcium water
juice of one lime

Wash the pluots.  Rough chop then squeeze slightly while adding to measuring cup to measure out 4 cups.    Pour prepared pluots into large saucepan.  Mix in lime juice and calcium water.  In a separate bowl, mix the sugar and pectin well.  Bring the fruit mixture to a boil.  Stir in the sugar/pectin mixture.  Return to a low boil cooking and stirring until sugar is dissolved.  Ladle into hot jars.  Secure the two piece lids.  Process in BWB canner for 10 minutes or adjusted timing according to altitude adjustment chart for your altitude (please see canning information tab).

Yield: 4 - 250 ml jars


Friday, August 20, 2010

Blackberry Peach Jam

This is such a wonderful time of year in Ontario!  The home gardens are producing nicely while local produce is readily available.   It signifies the gearing up to the heaviest canning season for me.  I like to get the in season fruits canned before starting into tomatoes and apples.  So it really is a great time of year.

blackberries and red haven peaches
One of our friends generously gifted us with about a quart of blackberries (left).  At the same time Ontario peaches were coming into season.  My husband brought home almost 19 lb of red haven peaches (right).  Red havens are cling free (free stone) peaches that have a red blush.  The pit is even reddish.    The first few peaches were combined with the blackberries to make a luscious gourmet jam.

blackberry peach jam
One of the best ways of stretching out a fruit for preserving when there isn't a lot of it is to combine it with another fruit.  It's also a way to get the taste of more expensive fruits by extending those fruits with less expensive fruits.  Fruit combination jams are wonderful because you do get that blend of flavours.  I paired the blackberries with red haven peaches for a lovely jam.  The flavour really is superb!

Blackberry Peach Jam
source: Garden Gnome

2 c crushed blackberries
2 c chopped peaces
¼ c preservative free lemon juice
2 c organic sugar
2 tsp Pomona's pectin*
2 tsp calcium water

Prepare blackberries and peaches.  Place in large saucepan.  Stir in lemon juice and calcium water.  Mix sugar and pectin together in a separate bowl.  Bring fruit mixture to a boil then stir in sugar/pectin mixture.  Bring to a boil and boil 1 minute.  Remove from heat.  Ladle into hot, prepared jars.  Adjust lids as per instructions depending on what lids you are using.  Process jars in a boiling water bath canner for 10 minutes at altitudes to 1,000 feet or at higher altitudes refer to altitude adjustment chart on canning information page.  Remove from canner.  Let cool 24 hours and test seal.

Yield: 4 - 250 ml (half pint) jars

*Do not substitute regular pectin in this recipe.


Tuesday, August 17, 2010

Peach Lavender Jam

Ontario peaches are now in season here.  We have not made a trip to the orchard for them yet but my husband brought home 2 - 2 L baskets for me to experiment with.  I would like to get any peach products canned before starting into tomato and corn products.  This is likely wishful thinking as various fruits and vegetables tend to overlap this time of year.  At any rate I had a chance to can a couple of peach products so it was a peachy day!
 

dried lavender flowers
Lavender has wonderful medicinal properties but it is also an amazing culinary herb that adds a subtle flowery note to dishes.  Lavender is one of the key herbs in herbes de province, one of my favourite herb blends.  Lavender accents the flavour of fresh fruits as well so it is perfect for adding that extra special flavour element especially when making jams and jellies.  It also happens to be one of my favourite herbs to grow second only to basils.  I love getting a waft of lavender as I brush against it while in the garden.  I have a couple of problem areas that I am going to try dividing my lavender and planting those spots in the hopes it will do well.  

If you don't grow lavender yourself but would like to experiment cooking with it look for organically grown lavender.  Many organic farm stands are now selling a wide range of fresh organic herbs.  Another good source is health food stores.  I also recall seeing dried lavender flowers at World Market so check specialty kitchen stores.  You should be able to order online as well.

peach lavender jam
A simple addition of lavender water can be just the ingredient that puts your homemade jam into the higher end of the gourmet category.  It's a combination you likely will not find in regular grocery stores although some gourmet specialty shops may possible have something similar.  When buying gourmet style jams expect to pay somewhere around the $8 mark for an 125 ml (pint) jar if not more so about $1 per 15 ml (about 1 ounce).  The homemade version will cost a third or less of that even with buying the produce.

The peach lavender jam is simply delightful.  I made several changes including halving the recipe something I normally do when testing any new canning recipe and I converted the recipe to use Pomona's pectin* rather than regular pectin (eg. Certo).   The flavour of the jam is wonderful. 

Peach Lavender Jam
modified from:  Topp, E. and Howard M., Peach-Lavender Jam, Small-Batch Preserving.2005. Pp. 41.

1 tbsp dried lavender flowers
¼ c boiling water
2 c finely chopped peaches
1 tbsp preservative free lemon juice
3 c organic granulated sugar
1½ tsp Pomona's pectin*
2 tsp calcium water

Place the lavender flowers in a small bowl.  Pour the boiling water over them.  Allow to steep for 20 minutes then strain reserving the liquid.  Combine peaches, lavender liquid, calcium water, and lemon juice in a medium sized saucepan.  In a separate bowl mix the pectin and sugar together.  Bring the peach mixture to a boil.  Stir in the sugar, pectin mixture.  Continue stirring until sugar is dissolved.  Return to a boil and boil for 1 minute while stirring.  Remove from heat.  Ladle into hot prepared 250 ml (half-pint) jars leaving ¼ - inch headspace.  Wipe rim.  Adjust 2 piece lids.  Process 10 minutes in boiling water bath canner.  Remove from canner and tighten ring further is using Tattler reusable lids or leave ring as is for single-use  metal lids.  Allow to sit undisturbed for 24 hours.  Remove ring and test seal.  Wash jars and rings.  The rings can be stored loosely on the jars for storage.

*Pomona's pectin is a low methoxy pectin.  Do not substitute regular pectin in this modified recipe.


Sunday, July 25, 2010

Strawberry Mango Jam

I mentioned in yesterday's post that  of the local grocery stores had strawberries on for 99¢ per pound last week.  While they were not local berries and they were packaged in 4 lb clam shell packages (not my favourite packaging) the price was good enough to pick up some.  This is one thing to keep in mind when canning.  Local produce is always preferred but don't overlook good deals on produce not grown locally like bananas, mangos, kiwis and mandarin oranges. 

strawberry mango jam
This has been the year of the mango so far.  As I was making jam that day I thought strawberries and mango would make a nice a combination for jam.  The nice thing about making combination jams is there really is no set amount for each fruit used as long as they add up to the total amount of desired fruit.  In this case I wanted 4 cups total in berries to give a yield of 2 - 500 ml jars of jam with just a little leftover.  It's always best to make just a little extra of the test jam to be sure there is enough jam to fill 2 full jars which is my prefered number for test batches of jams.  A test batch is just that.  I'm looking for flavour, gelling, textures and appearance as well as how well received the jam is before making a larger batch.

The strawberry mango jam did not disappoint.  The next time I make it I will add a bit of vanilla to make the flavours sparkle.  The jam gelled nicely so the pectin and calcium water do not need to be adjusted.  The jam has a nice appearance and wonderful flavour.

Strawberry Mango Jam

3 c prepared strawberries
1 c mango, diced
2 c organic sugar
¼ c preservative free lemon juice
2 tsp Pomona's pectin
2 tsp calcium water

Wash and hull the strawberries.   Chop in food processor measuring out 3 cups.    Pour prepared strawberries into large saucepan.  Dice mango and measure out 1 cup.  Mix mango into the strawberries.  Mix in lemon juice and calcium water.  In a separate bowl, mix the sugar and pectin well.  Bring the fruit mixture to a boil.  Stir in the sugar/pectin mixture.  Return to a low boil cooking and stirring until sugar is dissolved.  Allow to cool 5 minutes stirring occasionally.  Ladle into hot jars.  Secure the two piece lids.  Process in BWB canner for 10 minutes or adjusted timing according to altitude adjustment chart for your altitude.

Yield: 2 - 500 ml (pint) jars

*Pomona's pectin is a low methoxy pectin.  Do not substitute with other powdered pectins in this recipe.


Saturday, July 24, 2010

Strawberry Vanilla Jam

Strawberry season ended here about 3 weeks ago.  For many including myself that means in the short span of about 10 days to 2 weeks, strawberries were the main focus.  Last week one of the local grocery stores had strawberries on for 99¢ per pound.  While they were not local berries the price was good enough to pick up some.  I bought 2 - 4 lb clam shell packets of these strawberries.  When it comes to canning local is always best but a good deal like this should not be overlooked.

strawberry vanilla jam
The strawberries were huge!  Even the local strawberries this year were huge which really is not the best strawberry jam berries.  The best berries for strawberry jams are the small, sweet ones.  Homemade strawberry jam is wonderful, a true delight.  However homemade strawberry jam can take on the gourmet touch by adding just that little bit of extra.  In this case I added 100% pure vanilla that just pairs so nicely with the strawberry flavour.  This is a family favourite!

Strawberry Vanilla Jam

4 c prepared strawberries
2 c organic sugar
¼ c preservative free lemon juice
2 tsp Pomona's pectin
2 tsp calcium water
1 tsp 100% pure vanilla

Wash and hull the strawberries.   Chop in food processor measuring out 4 cups.    Pour prepared strawberries into large saucepan.  Mix in lemon juice and calcium water.  In a separate bowl, mix the sugar and pectin well.  Bring the fruit mixture to a boil.  Stir in the sugar/pectin mixture.  Return to a low boil cooking and stirring until sugar is dissolved.  Allow to cool 5 minutes.  Stir in vanilla.  Ladle into hot jars.  Secure the two piece lids.  Process in BWB canner for 10 minutes or adjusted timing according to altitude adjustment chart for your altitude.

Yield: 2 - 500 ml (pint) jars

*Pomona's pectin is a low methoxy pectin.  Do not substitute with other powdered pectins in this recipe.


Friday, July 23, 2010

Watermelon Jam

Watermelon is a wonderful summer treat that is often overlooked when preserving.  However, watermelon can be used to make wine, jam, jelly, frozen in cubes for smoothies and dried as chunks or purée for homemade fruit roll-ups.  Once the sweet flesh of the watermelon is used the rinds can be pickled.  Watermelons tend to be quite inexpensive if you don't grow them.  New seedless varieties lend themselves nicely to all of these applications.  One watermelon will yield about a gallon bag of cubes for freezing, 3 - 500 ml (pint) jars of jam and about 4 - 500 ml (pint) jars of watermelon rind pickles.  Drying watermelon takes a bit longer due to the higher water content but is well worth doing.  The end result is a delicious natural candy!  There is very little waste when preserving watermelon.

Over the years I have tinkered with making watermelon jam.  My first attempt was edible but too sweet because it used regular pectin and 7 c of sugar!  It never did gel up nicely so was used for an ice cream topping.  It has been quite some time since I have used regular pectin.  Instead I use Pomona's pectin which is a low methoxy pectin that does not depend on sugar for gelling.  My watermelon jam experiments have been considerably more encouraging using this pection while avoiding the long cook methods of old.

Pictured is this the first of year's watermelon jam experiments that gave a yield of 3 - 500 ml (pint) jars.  I ran 3 different jams that day so in comparison once the jars cooled the watermelon jam was still a bit runnier than desired but with Pomona's pectin it can take a few days for the jam to tighten right up.  The following day the jam had gelled more so the result is a thin spread that would be good as is or as a thicker topping for cream cheese or ice cream.   I suspect it will thicken up a bit more yet. 

Watermelon Jam

4 c prepared watermelon
2 c organic sugar
¼ c organic, preservative free lemon juice
2 tsp Pomona's pectin*
2 tsp calcium water

Wash the outside of the watermelon.  Cut into quarters then cut each quarter into 1 - inch pieces.  Cut flesh from the rind reserving the rind if making pickles.  Chop watermelon in food processor measuring out 4 cups.    Pour prepared watermelon into large saucepan.  Mix in lemon juice and calcium water.  In a separate bowl, mix the sugar and pectin well.  Bring the fruit mixture to a boil.  Stir in the sugar/pectin mixture.  Return to a low boil cooking and stirring until sugar is dissolved.  Ladle into hot jars.  Secure the two piece lids.  Process in BWB canner for 10 minutes or adjusted timing according to altitude adjustment chart for your altitude (please see canning information tab).

Yield: 3 - 500 ml (pint) jars

*Pomona's pectin is a low methoxy pectin.  Do not substitute with other powdered pectins in this recipe.


Saturday, July 17, 2010

No Pectin Added Mango Marmalade

A couple of years ago I discovered mangos made a very nice chutney that has since become one of the must makes each year.  Mangos were recently on sale here (case of 14 for $3.99) so I took advantage of that to make mango chutney and mango jam and fresh eating.  I decided to look for another mango canning recipe to try.

no pectin added mango marmalade
In order to make all of these great mango products it is important to know  how to cut a mango. This method will greatly reduce the prep time and frustration dealing with the large pit in the mango.  Mangos have a lovely sweet-tart flavour quite different from peaches that they are often likened to. They have quickly become one of my favourite fruits to use for canning. 

Most of the jams and jellies I make are created by me using Pomona's pectin (low methoxy pectin).  This allows me to use whatever sweetener I want so all of the recipes using this pectin are low sugar or use another sweetener like honey.  There are a few jams and jellies in the archives using regular pectin (eg. Certo, SureJel).  Mango Marmalade is the first of no pectin added jams.  No pectin added jams have a longer cook time reducing while cooking the syrup portion created by the sugar to a stage where it gels.  Longer cooked jams have a unique flavour that can't be duplicated using pectin added, short cook times much the same that freezer jams have a different flavour because they have not been cooked.  This tropica marmalade is simply delightful.  It's so easy to make you will want to do a couple of batches.  It will be wonderful served over cream cheese as an appetizer!

No Pectin Added Mango Marmalade
modified from: Ellie Toop and Margaret Howard, Complete Book of Small-Batch Preserving, 2001. Pp. 90.

2 lemons
2 c water
2 mangos
2 c organic sugar

Wash then cut the lemons in half and slice thinly.  Place lemons and water in medium sized non-aluminum saucepan.  Bring to a boil over high heat.  Reduce heat, cover and cook stirring occasionally for 25 minutes.  Add mangos and sugar.  Bring to a low boil then reduce heat to a simmer.  Simmer, stirring occasionally for 30 minutes.  Test for gel*.  Ladle into hot jars.  Wipe rim.  Adjust 2 - piece lids.  Process in boiling water bath canner for 10 minutes.  Remove from canner and allow to cool undisturbed for 24 hours.  Test for seal then label and store.

Yield: 3 - 250 ml jars

* Dip a spoon into the marmalade to coat.  Let cool.  When it forms a gel the marmalade is ready to jar.


Friday, July 16, 2010

Low Sugar Mixed Berry Jam

Each year I experiment trying new canning recipes in addition to my tried and tested recipes.  Quite often I end up finding one or more recipes that can be added to my ever growing list of tried and tested recipes.  It's nice to be able to new products to the pantry shelves!

mixed berry jam
It is common practice in canning to lower the cost while increasing the yield of a product by combining lower priced or more abundant produce with higher priced or less abundant produce.  This practice helps to use up the garden's bounty as well.  Mixed berry jams are great for using up the last of the season berries of one type while berries of another type are in season.  It is a good way to get the flavour of higher priced berries like raspberries while stretching the jam yield by adding less expensive berries.  One of the local grocery stores had strawberries on for 99¢ per lb as well as blueberries and blackberries on for $1.47 per pint.  Local raspberries are in season now going for $2.25 per pint.  A small batch of jam using the more expensive berries would cost $5.58 to $10 for 5 - 250 ml (half pint) jars.  Mixing the berries to make a mixed berry jam that includes the cheaper strawberries reduces the cost while giving the same yield.  Mixing the berries is not all about cost savings though.  Mixing the berries gives a wonderfully, full bodied jam full of flavour.  This jams is simply delightful!

Low Sugar Mixed Berry Jam
source:  Garden Gnome

4 c mixed berries*, crushed
2 c organic sugar
2 tsp Pomona's pectin**
2 tsp calcium water

Wash and prepare the berries.  Measure 4 cups of prepared berries.   Place the berries into a large saucepan.  Stir in calcium water.  In a separate bowl, mix the sugar and pectin well.  Bring the fruit mixture to a boil.  Stir in the sugar/pectin mixture.  Return to a low boil cooking and stirring until sugar is dissolved.  Ladle into hot jars.  Secure the two piece lids.  Process in BWB canner for 10 minutes or adjusted timing according to altitude adjustment chart for your altitude.
Yield: 5 - 250 ml (half-pint) jars

* I used about 1 cup each of black berries, strawberries, blueberries and raspberries.
** Pomona's pectin is a low methoxy pectin.  Do not substitute with other powdered pectins in this recipe


Wednesday, July 07, 2010

Mango Chutney and Low Sugar Mango Jam

One of the local grocery stores recently had a case of mangos on sale for $3.99.  Each case contained 14 mangos.  From a canning perspective this was a great sale for making a few mango based products for the pantry shelves.  Each home canned mango product use 2 to 4 mangos so a case will give a yield of 3 to 7 seven products for a total count of about 30 - 250 ml jars.  Mangos are quite easy to prepare for canning as well.  I recently posted a how to cut a mango video for those who don't know how to cut mangos.  This easy method makes the prep work for canning mangos muss free and very quick. 

mango chutney and mango jam
A couple of years ago I made  mango chutney pictured to the left.  It quickly became an annual  canning must make.  Our favourite way to use mango chutney is  chicken with mango chutney. This year I decided to make mango jam pictured to the right as a new pantry product.

I make a wide variety of jams and jellies yet the vast majority of them are not used as spreads.  Instead jams and jellies tend to be used as glazes for meats, condiments for meats and fish, cookie and pastry fillings, and appetizers.  The mango jam has such a pretty colour so I immediately thought it would pair nicely with cream cheese for appetizers.  I think it will make an excellent tasting glaze for ham and chicken as well.

Mango Jam

4 c mangos, chopped
1½ c orange juice
2 c organic sugar
½ tsp ground nutmeg
3 tsp Pomona's pectin*
4 tsp calcium water

Prepare the mangos then place into large saucepan with the orange juice and calcium water.  In a separate bowl, mix the sugar, nutmeg and pectin well.  Bring the fruit mixture to a boil.  Stir in the sugar/pectin mixture.  Return to a low boil cooking and stirring until sugar is dissolved.  Ladle into hot jars.  Secure the two piece lids.  Process in BWB canner for 10 minutes or adjusted timing according to altitude adjustment chart for your altitude.
Yield: 4 - 250 ml (half-pint) jars

*Pomona's pectin is a low methoxy pectin.  Do not substitute with other powdered pectins in this recipe.


Saturday, June 19, 2010

A Strawberry Kind of Day

Ontario strawberries are now in season.  The season will last for about 10 days depending on the weather.  This year's berries a gorgeous!  Many of them are almost the size of a golf ball.  The beautifully coloured red berries certainly don't disappoint with their nice and juicy, deep strawberry flavour.  We will be eating a lot of strawberries this year!

flat of strawberries
My husband picked up a flat of strawberries for me.  A flat of strawberries now contains 6 quarts of strawberries.  The going rate for a flat of already picked berries is $18.  If picking at the U-pick, a flat will cost $15 which doesn't sound like a lot of savings but for those putting up a lot of strawberry products the U-pick is preferred.  Picking strawberries is easy and goes quickly so picking enough for two or three flats can be done is about an hour or less if you have a pair of helping hands.

I sort the berries as I wash and hull them into three sizes: small, medium and large.  The small berries are best for jam making, medium berries are for freezing and the large ones are for fresh eating.  I use this same sort as I clean method for other produce like mushrooms.  
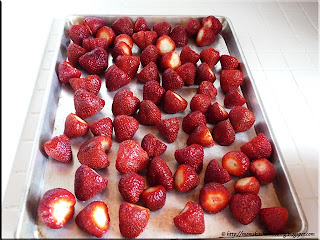
prepping berries for freezing
Freezing strawberries is quite easy!  I simply wash and hull the berries.  After being patted dry I arrange the berries in a single layer on a baking pan.  I place the filled baking pan into the freezer.  Once the berries are frozen I remove them from the baking sheet an place them into a zipper style freezer bag with as much air as possible removed.

Normally I prefer to vacuum seal foods for the freezer.  However, quite often I want only a couple of berries to pop into fruit smoothies.  Zipper style freezer bags make it easy to remove only a couple of berries without having to re-vacuum seal.  The yield for the frozen berry portion was a one gallon bag of strawberries.

strawberry jam
I made a batch of low sugar strawberry jam making two modifications to the recipe.  I increased the sugar to 3 cups from the 2 cups.  Since I am using Pomona's pectin, a low methoxy pectin that uses calcium water for achieving the gel rather than sugar, modifying the amount of sugar does not affect the gel.  Sugar adds sweetness, bulk and texture in jams.  The extra cup of sugar was just enough to give a yield of 4 - 500 ml (pint) jars with a couple of tablespoons left-over.  The second modification I made was adding a teaspoon of pure vanilla.  Vanilla pairs nicely with strawberries heightening the flavour and giving it just that little extra special nuance.

vanilla strawberries
I used the largest berries to make a simple glazed strawberry dessert.  The glaze is very easy to make by pouring vanilla sugar over the berries then covering and setting in the refrigerator for an hour or so.  The berries can then be used as is or topped with fresh whipping cream or vanilla flavoured yogurt.  They can also used as a topping for vanilla ice cream or gelato.  The glazed berries can also be chopped then stirred into vanilla flavoured yogurt then poured into popsicle molds for a healthy, kid friendly summer treat.  Notice again I'm pairing vanilla with strawberry then layering the vanilla flavour.  These two flavours really go nice together! 


Thursday, June 17, 2010

Kitchen Quick Tips - Failed Jams and Jellies

kitchen quick tips

Occasionally when making jams or jellies you will get a set failure where the jam or jelly fails to set up to the proper gel state.  Don't despair!  Sealed jars can be safely stored then used as glazes for meats or syrups for ice cream and pancakes.  They can also be used in cooking.