Yesterday I canned tomatoes. I normally have a schedule planned for canning during the heavy season and by the time I get to salsa, I know the long canning days are drawing to an end. Salsa is definitely more work than some home canned goods. Despite the work involved with the salsa, I also decided to make another batch of bruschetta in a jar (recipe in earlier entry). I'm now at the point where a batch of red tomato ketchup and tomato paste should end the tomato canning season.
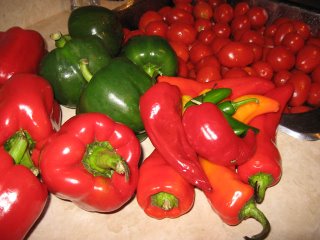 Some of the Salsa Ingredients
To me, the variety of the vegables used is the secret to excellent salsa and I am very picky as to what I will put into my salsa. That is the trick to excellent salsa. I either grow or buy the varieties I insist on and if they are not available, the salsa just doesn't get made. The produce must be very fresh preferrably picked that day. Any purchased produce is through a well trusted farmer's market that knows how picky I can be. They always treat me well! I start with a hamper of tomatoes of a specific variety and very fresh peppers both sweet and varying degrees of heat. This photo shows only a few of the ingredients. From there, the salsa is assembled, cooked, then canned.
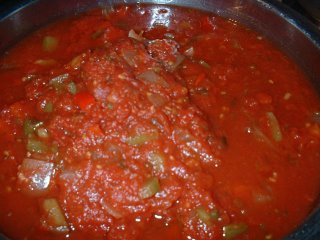 Salsa
Salsa
While I will not reveal the recipe as my family thinks this salsa is good enough to market, I will share my method. Maybe so, but they may be just a little biased and besides I have other things on the go right now but it might be a possibility. I make salsa in three strengths: hot, medium and mild. Three strengths are necessary depending on how the salsa will later be used. Some goes to relatives and friends who prefer one strength over another so that is always taken into consideration. All are full bodied, chunky salsas I average 48 - 60 jars of salsa each year. The batch I made yesterday was hot.
After the ingredients were combined, the salsa was cooked for 15 minutes. Then the remaining ingredients were added and the salsa was cooked for another 10 minutes. After that, it was time for taste testing followed by adjustments then onto the canning process.
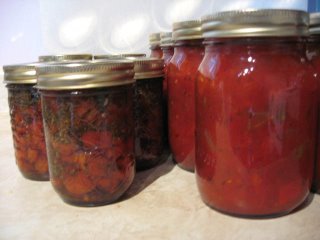 Bottled Salsa
The salsa was ladled into hot, sterilized pint jars. I use pint jars because I find that is just a perfect size to not leave a lot of left-overs. Lids and bands were placed on the jars then the jars were processed using a boiling water bath for 15 minutes. The yield was 13 - 500 ml jars.
The salsa always looks wonderful in the jars, tantalizing the taste buds before the jar is even opened. I've been making salsa long enough that labelling really isn't necessary as one look at the jar, I can tell you the strength. For those getting the salsa as gifts or my family members, I do label only because I feel all home canned foods should be labeled with the contents and date made.
Shown in the photo along with the salsa are seven half pint jars of Bruschetta in a Jar. The recipe is in a previous entry. I added this to the canning goodies gift basket last year and it got rave reviews. Two tricks to this recipe are be sure to use high quality white wine vinegar. I like using an aged white wine vinegar imported from Italy. It costs more but is well worth the price! Never use a wine that you would not drink. Just because the recipe says to use a dry white wine, if you don't like dry white wine, use a white wine you do like. A tip for those who may want to make the recipe without wine, I would suggest organic apple juice. The flavour will differ but the results should be fine. Again, make sure you use "quality" ingredients.
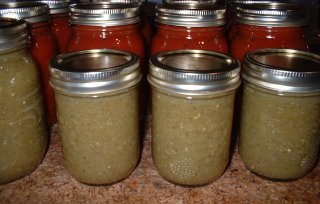 Green Tomato Ketchup
When frost threatens, I pick all the green tomatoes. Some are processed into salsa verde or green ketchup. The salsa verde recipe is in an earlier blog entry. When using green tomatoes for processing, choose tomatoes that are pale green. Dark green tomatoes have higher levels of solanine, which can be toxic in large amounts.
I make two versions of green ketchup. The one pictured is the Southern Cuisine recipe from about.com. The second is a Quebec Style green ketchup. Both are good ketchups and a nice change from red tomato ketchup. We use more of the Quebec style than the Southern style. Please be sure to read my notes for each recipe as I have made changes to both and only use specific ingredients. I prefer to can in either pint or half pint jars.
Green Tomato Ketchup
Source: Diana Rattray,Your Guide to Southern U.S. Cuisine, http://southernfood.about.com/od/greentomatoes/r/bl30322v.htm
A green tomato ketchup recipe. More green tomato recipes below.
INGREDIENTS:
* 6 pounds green tomatoes
* 3 pounds onions
* 1 tablespoon black pepper
* 1 tablespoon mustard
* 1 teaspoon Worcestershire sauce
* 4 cups vinegar
* 1 cup honey
PREPARATION:
Slice green tomatoes and onions; place in a large pot with pepper, mustard, and Worcestershire sauce. Pour vinegar over all and cook for 4 hours over very low heat, stirring occasionally. Carefully puree mixture in a blender; strain through a mesh strainer. Return to pot and bring to boil; add honey. Immediately fill 6 sterilized pint jars, leaving 1/4-inch head space. Wipe the jar tops and threads clean with clean damp towels. Place hot sealing lids on the jars and apply the screw on rings loosely. Process in boiling water bath in a deep canning pot for 5 minutes. Remove the jars and cool completely. Tighten the jar screw rings to complete the sealing process. After jars cool, check seals by pressing middle of lid with finger. (If lid springs back, it is not sealed and must be refrigerated. Let jars of green tomato ketchup stand at room temperature 24 hours. Store unopened product in a cool dry place up to one year. Refrigerate green tomato ketchup after opening.
Makes 6 pints of green tomato ketchup.
My Notes: This is a nice change from red tomato ketchup and a great way to use up green tomatoes. I followed the processing time of 15 minutes for ketchup as per Bernardin's Tomatoes, Canning & Specialty Recipes, 2000. Pp. 43. Once opened, refrigerate.
Ketchup Vert (Green Tomato Ketchup)--Quebec Style
source: A Taste of Quebec, Julian Armstrong, 1990.
24 Medium green Tomatoes (6 Lbs Or 2.5 Kg), chopped
15 Medium Onions (3 Lbs Or 1.5 Kg), chopped
1/2 cup coarse Salt (125 Ml)
3 cups white vinegar (750 Ml)
2 cups granulated sugar (500 Ml)
6 tbsps mixed pickling spices, tied in cheesecloth
In a large bowl, alternative layers of tomatoes and onions, sprinkling each layer with salt. Let stand for at least 8 hours or overnight. Rinse and drain well. Combine tomatoes and onions with vinegar, sugar and spice bag.
In a large saucepan or stock pot, bring mixture to a boil, then simmer, uncovered, for about 30 to 45 minutes, stirring frequently until slightly thickened. Pour into hot sterilized jars and seal.
Yield: Approximately 12 cups ( 3 L)
My Notes: This must be processed. I use the processing time of 15 minutes boiling water bath for ketchup from Bernardin's Tomatoes, Canning & Specialty Recipes, 2000. Pp. 43. Once opened, refrigerate.
Enjoy!


 Chili Sauce & Salsas
 Tomatoes & Tomato Products
 Some of the Salsa Ingredients
 Salsa
Salsa Bottled Salsa
 Green Tomato Ketchup
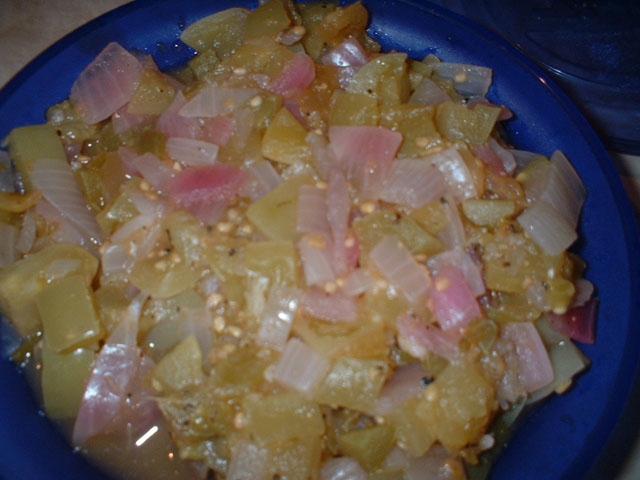 Salsa Verde
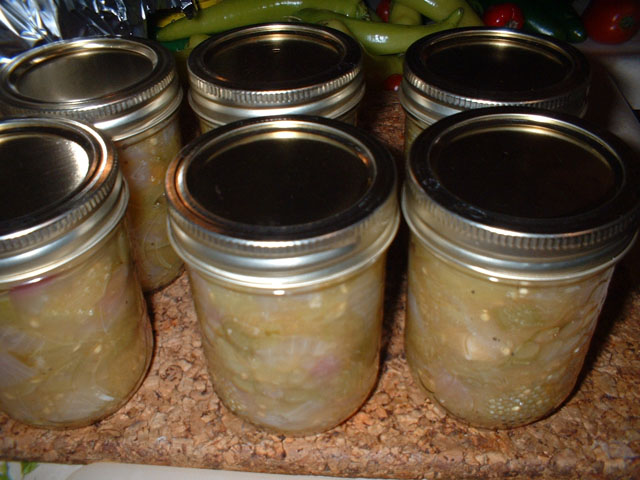 Salsa Verde in Jars