

ghosts and goblins come out to play.


Welcome to our kitchen that truly is the heart of our home! One of life's greatest pleasures is enjoying good food with family and friends. Here you will find recipes, tips for frugal cooking, how-tos for food preservation especially canning and anything else food related. Tea is brewing and warm cookies are fresh from the oven. Please sit a spell and enjoy your stay.



I've had a few emails requesting budget stretching meals. The past week has been extremely busy and my new fridge still has not arrived. I'm trying to keep the refrigerator contents to a minimum. All of the freezer contents have been moved to the larger freezers. This bit of disruption would be an ideal time to order out but I decided to use up some cheese, eggs, and milk in two dishes along with a couple of pre-prepared foods from the freezer. Spanish onions are inexpensive right now so they are also ideal as an inexpensive ingredient. Good food need not be expensive! Mac & Cheese
Homemade Mac & Cheese is a true comfort food and taste so much better than the boxed kind! It is extremely easy to make and quite inexpensive depending on the amount and kinds of cheese you use. It can be a full meal in itself or served as a side dish and it does reheat well. I like using different cheeses especially extra sharp cheddar. Good quality cheese is essential but need not be expensive either. Experiment with the cheeses to get the combinations you like. You can freeze it homemade mac & cheese in trays for convenience if you choose. Here's how I make homemade mac & cheese. Please note, the measurements are only approximates as I don't really measure for this type of dish.
Method: The first prep was the cheese. For this particular mac & cheese I shredded extra sharp, colby, and mozzarella cheeses for a total amount of about three cups. Then I cooked elbow noodles until el dente and drained. A 13" x 9" glass baking dish was greased and enough noodles were poured in to form about an inch layer. Half of the shredded cheese was distrubuted evenly over the noodles. Another layer of noodles was added along with the remaining cheese. Then about three cups of bechemel (white sauce) was poured over the noodles. A bechemel sauce is simply milk thicken with flour. For this application, the sauce should be of a thinner consistency like a thin gravy. A light sprinkling of bread crumbs was the final layer. I baked the mac & cheese at 350 degrees farenheit until the top was lightly browned and the cheese was bubbling. Liver & Onions
Liver and onions is a favourite dish here. It is very inexpensive! Serve the meal simply with the addition of potatoes and a vegetable. Bread and salad are optional. Many are turned off of liver because of they way they experienced, dry and like leather, but that is not the way it should be. The first trick is to use calf liver as it is more tender. The second trick is to never overcook liver. H
Method: You will need a sautee pan and fry pan for this method. Timing is important so be sure to use mis en place. Cut two large spanish onions in half then into slices against the layers. Melt about 2 tbsp butter in the sautee pan then add onions. Stir occasionally and if need be add a little extra butter. While the onions are sauteeing, dredge the liver in flour seasoned with a little salt and pepper or garlic salt if you prefer. Lightly brown on both sides in heated fry pan on medium heat. Remove from heat. When the onions begin carmelizing, transfer the liver to the sautee pan. Continue cooking until the onions are carmelized, stirring often. 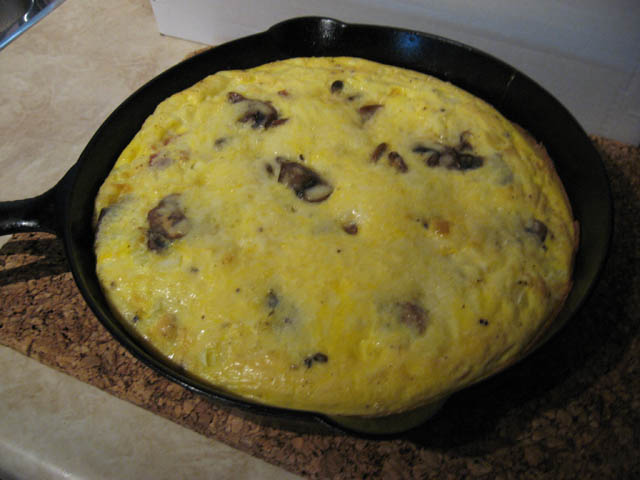 Frittata
 is one of the easiest, inexpensive meals you can make. They are ideal for using up left-overs. Imagination is really the only limiting factor when making frittatas. Even though they are egg based, frittatas can be enjoyed for lunch or dinner. A frittata is basically an open faced omelet that is started on the stovetop then baked in the oven. Be warned, a slice of frittata is quite filling. While I have not tried freezing frittata, left-overs do reheat nicely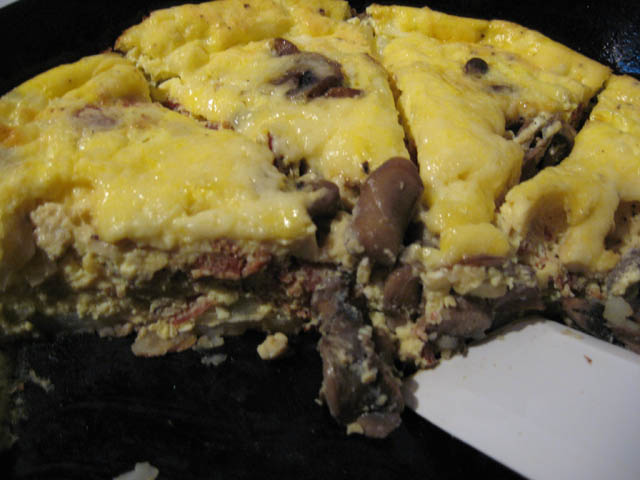 Frittata cut
Like an omelet, a frittata starts with eggs, about 8 to 10. To do your mis en place assemble the ingredients you are adding. Frozen hash browns can be used as they are but if using fresh potatoes, microwave until almost soft.
Method: Slice the potatoes. Assemble other ingredients like bacon pieces, mushrooms and shredded cheese. Wisk the eggs then stir in about 1/3 c of milk and seasonings. For a nice seasoning try adding tomatoe powder (previous entry). Now, pour a little olive oil into a cast iron fry pan and heat. Add a layer of potatoes followed by other ingredients. Allow to cooke on medium-high for about 5 to 7 minutes. Pre-heat oven to 350 degrees farenheit. Pour egg mixture over the other ingredients, reduce heat to medium then cook just until the egg mixture around the sides starts to cook. minutes. Transfer the pan to the pre-heated oven. Bake until puffy and lightly browned on top and a toothpick inserted into the centre comes out clean. Remove from oven. Cut into wedge shaped pieces.
I keep bits and pieces of left-overs in the freezers all vacuum sealed for just these types of meals. However, I always have sauteed mushrooms and homemade bacon pieces in the freezer in meal sized portions. This frittata was made this past Saturday for brunch when the kids were here and I simply didn't feel like spending a lot of time in the kitchen. Our new grandbaby is due soon so I wanted to spend more family time with them instead of cooking. So I pulled a package of bacon bits and sauteed mushrooms from the freezer. After the potatoes were almost cooked, I defrosted the bacon and mushrooms and got my mis en place ready: chopped onion, shredded extra sharp cheddar and wisked eggs. From there is was basically dumping everything into the pan, cooking on the stovetop then transferring to the oven. Everything came together nicely, very quickly freeing up the time I wanted.
Enjoy!
Soon it will be hunting season and every hunter hopes to lucky enough to bag a deer. Preserving the meat is important but the real fun comes in cooking the venison. I thought I would make a few entries on some of the ways I preserve and cook venison. Watch for other venison methods and recipes to be published over the next week or so.
Venison roast is a nice change from pork or beef roasts. Here is how I make venison roast.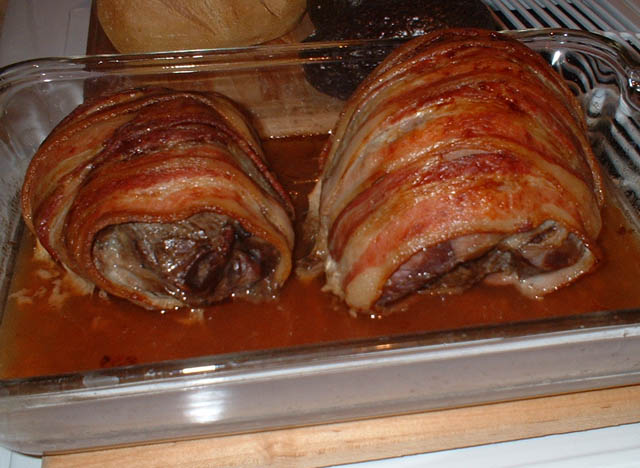 Venison Roasted
There are a few important things to know when cooking venison. Venison is very lean so a fat needs to be added when cooking. Usually the fat is ground pork if cooking ground venison or bacon for roasts. Do not over cook venison or it will be too dry. When I was first looking for recipes for cooking venison, one source indicated to soak in salt water but most sources say to avoid salting the meat prior to cooking. If there is any connective tissue on the roast, remove that as it will give an unpleasant taste.
I started with two frozen venison roasts, one was sirloin tip and the other rump. The roasts were thawed in the refrigerator overnight. Any connective tissue was cut away. Each roast was wrapped with bacon strips and placed in a glass baking dish. Wrapping the roast is easy. Just start at one end wrapping around the roast then move slice by slice until the entire roast is wrapped.
I cooked the uncovered roasts at 300 degrees farenheit on convection oven setting until the interal temperature was 140 degrees farenheit.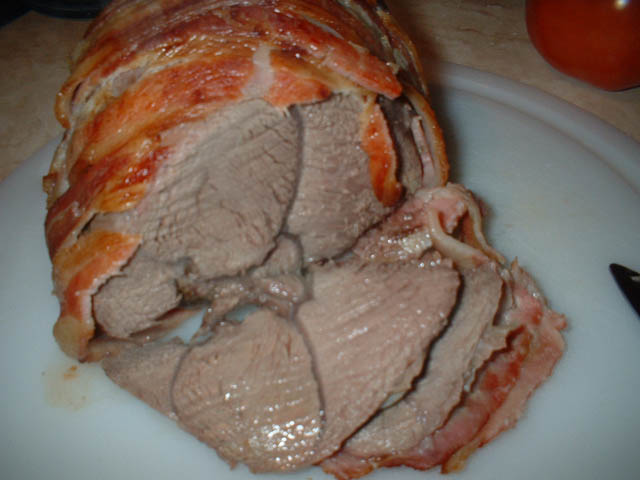 Venison Cut
The roasts where carefully removed from the baking pan and allowed to rest before cutting. There was enough juices for gravy but they needed to be put through a gravy separator to remove the fat first. Then I placed the juices in a sauce pan, added a little Worchestershire sauce and brought to a light boil. I used an arrowroot flour slurry to make a thin gravy. When the gravy was finished it was time to cut the meat.
Each slice of meat has an outer layer of bacon that looks nice when plated especially with a little gravy. I like to keep roasted venison meals more like old fashioned country cooking. This venison was served with baked potatoes, carrot coins and homemade sour dough bread.
Enjoy!
Garden Gnome
It's that time of year for baking cookies. One of my family's all time favourite is peanut butter cookies so I'm sure to include them in the holiday baking.  Peanut Butter Cookies
The recipe I use comes from the old Betty Crocker's Cookbook given to me by my late mother-in-law the first Christmas after we were married. The pages have yellowed and some have spills along with the first 5 pages missing so I don't have a publication date but I know the book is a least over thirty years. This cookbook got me out of many a near cooking disaster when I was first married. It is still the first cookbook I turn to despite having a lot of other cookbooks.
These cookies are so popular with family and friends that I multiple the recipe by four and often have to make a second batch. Some of the dough balls always find their way into my husband's mouth with his feeble attempt to convince me he is just taste testing. Then he calmly pours himself a huge glass of milk and hovers in the kitchen waiting for the first hot cookies. Once he has loaded his plate and wandered off to enjoy his snitched treats I can get on with the rest of the cookies.
Be sure to check my notes at the end of the recipe.
Peanut Butter Cookies
1/2 c shortening (half butter or margarine, softened)
1/2 c peanut butter
1/2 c granulated sugar
1/2 c brown sugar (packed)
1 egg
1 1/4 c all-purpose flour
3/4 tsp baking soda
1/2 tsp baking powder
1/4 tsp salt
Mix thoroughly shorening, peanut butter, granulated sugar, brown sugar and egg. Blend in flour, baking soda, baking powder, and salt. Cover and chill.
Heat oven to 375 degrees farenheit. Shape dough into 1-inch balls. Place 3 inches apart on lightly greased baking sheet. With fork dippen in flour, flatten in crisscross pattern to 2 inches. Bake 10 to 12 mintes or until set but not hard.
About 3 dozen cookies.
My Notes: I use half butter and half shortening as it gives a better flavour. The original recipe just said "soda" so I have corrected that to "baking soda". The original recipe indicates to bake at 375 degrees farenheit. This temperature works fine for regular baking pans and ovens. I had to adjust the temperature by lowering 25 degrees farenheit for baking with convection. I found the timing is slightly lowered because of convection and using insulated cookie sheets. Oh and the orginal recipe did not indicate whether to grease the cookie sheet. With these cookies greasing in unnecessary.
Enjoy!