I have been wanting a smoker for eons! Like many homemade foods, smoking is an economical way of enjoying smoked meats, fish and poultry while controlling what ingredients are added. Smoking is not limited to meats either! It means you can avoid all the artificial flavourings, colourants and preservatives of commercially prepared smoked foods. You can experiment with different woods for adding natural smoke flavour to your smoked foods. A good friend of ours recently lent me his smoker to experiment with.
An electric smoker takes a bit of work out of smoking in that you don't have to constantly monitor the smoker. It will continue smoking as long as the tray of wood chips is filled. Once the wood chips stop smoking, you can refill then repeat as often as desired.
A wood smoker is a rather simple set up consisting of an inner smoking chamber, a heat source hot enough to cause the wood chips to smoke, a pan for the wood chips and one or more racks. The interior chamber of the smoker allows the smoke to permeate the food.
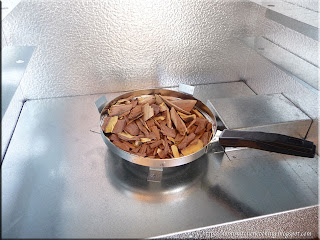
There are plans online to make a small homemade smoker using two clay pots as well as turning an old refrigerator into a smoker. The easiest way to try is smoking before investing in a smoker is using a smoking box on the outdoor grill. This smoker had three removable wire racks, a removable drip tray, and the wood chip pan. The wood chip pan sits directly over the burner when in use.
True North has their own series of wood chips called smokin' wood bits that are considerably finer cut, more like saw dust. They recommend against using larger pieces of wood chips because the wood may not produce the smoke properly. There was a bag with the smoker but because I was borrowing it, I decided to use my own wood chips. They were larger than the True North brand but I reasoned using less of them in a refill would give suitable results.
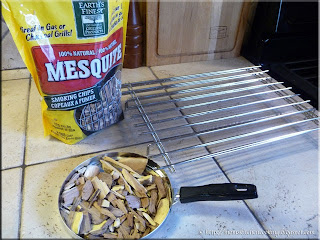
I used Earth's Finest 100% natural mesquite smoking chips for this experiment. These chips can be used either wet or dry as can most smoking chips. The Truth North wood bits are used dry.
The filled wood chip pan sits directly over the burner on the bottom of the smoker. The instructions said to place the smoker on a non-flammable surface. We placed the smoker on four large paving bricks to raise it off the surface of the wood deck. This also allowed for a bit of air circulation under the smoker.
This particular model of smoker has a detachable power supply and the cord is short enough to need an extension cord. The burner can easily be removed to adjust or replace. This is a nice feature in the event the burner needs replacing.
The drip pan sits over the filled wood chip pan. It is designed to catch any drippings from the food being smoked. I covered it with aluminum foil for easy clean-up. A food tray fits over the drip pan and there are shelves for two more trays. Once I had the drip pan ready it was time to season the smoker.
I plugged in the smoker then put the door in place. Within a couple of minutes puffs of smoke were escaping from the smoker which is not air tight but the majority of the smoke does stay in the smoker. However, enough smoke escapes that you would not want the smoker sitting where the smoke can easily go into your house. Following the instructions, once the smoker stopped releasing smoke, I filled the pan again then once again for a total of three fills.
At this point the smoker was seasoned and ready to use. I filled the wood chip pan again then put the food on to smoke. Check tomorrow's post for the results of the great smoker experiment...


0 food lovers commented:
Post a Comment