My photo
Ontario, Canada
I am a wife, mother and grandma who enjoys the many aspects of homemaking. A variety of interests and hobbies combined with travel keep me active. They reflect the importance of family, friends, home and good food.
Cook ingredients that you are used to cooking by other techniques, such as fish, chicken, or hamburgers. In other words be comfortable with the ingredients you are using.
--Bobby Flay

For Your Information

Please watch this area for important information like updates, food recalls, polls, contests, coupons, and freebies.
  • [March 19, 2020] - Effective Mar 17, this blog will no longer accept advertising. The reason is very simple. If I like a product, I will promote it without compensation. If I don't like a product, I will have no problem saying so.
  • [March 17, 2020] - A return to blogging! Stay tuned for new tips, resources and all things food related.
  • [February 1, 2016] - An interesting report on why you should always choose organic tea verses non-organic: Toxic Tea (pdf format)
  • Sticky Post - Warning: 4ever Recap reusable canning lids. The reports are growing daily of these lids losing their seal during storage. Some have lost their entire season's worth of canning to these seal failures! [Update: 4ever Recap appears to be out of business.]

Popular Posts

Wednesday, September 27, 2006

Cheese & Bruschetta in a Jar

Home preserving is still in full gear and I must say I'm getting tired. The heavy canning should slow by next week giving me a little more free time. In the meantime, we have resorted t a few quick meals.


Colby Longhorn Cheese

When we were younger, poorer and less culinary refined we thought certain cheese slices were the only thing to use for grilled cheese sandwiches. Over the years, our concern about the quality and taste of food we eat has changed dramatically. A few years ago, I bought a nice buffalo milk mozzarella and now we simply refuse to eat mozzarella in those store bricks. You know the kind? They come in large 900 g packages, often on sale and once you get them open there is very little flavour difference between the varieties. So over the years I have gradually been introducing new and more flavourful varieties. This colby has a nice flavour. If you compare cost per g to those store bricks there is not a great difference. Yes it is just a little more expensive but I think the flavour is worth it and well within anyone's budget. I have found that many cheeses out there give the flavour without emptying the wallet. My husband never complains when I tell him we are going on a cheese expedition either. I picked up some 6 yr old aged Amish sharp cheddar. Now that was the most excellent cheese! Next trip I will buy a lot more of that.

Grilled Cheese Sandwich

Sorry this is not the best picture. My digital camera operations need just a little more fine tuning but my husband was not about to wait for his sandwich. This sandwich was made with the colby longhorn cheese. We have one of those electric sandwich makers as well as the kind you can use on an open fire but my husband insists the only way to make a good grill cheese sandwich is in the fry pan. Now I have him hooked on the cast iron fry pan, he generally uses it. We use a lot of different kinds of cheese depending on our mood. The bread is generally homemade sourdough or white but this time of year we also use herbed or tomato herbed bread. This time it was sourdough bread.

My favourite cheese sandwich is open faced and broiled. I think that is the only way my Mom knew how to make it and the gas oven did a really nice job. The electric oven does a good job set to broil. I just cut thick slices of the cheese, lay on the bread then broil until bubbly and just a little browned. Yummy!
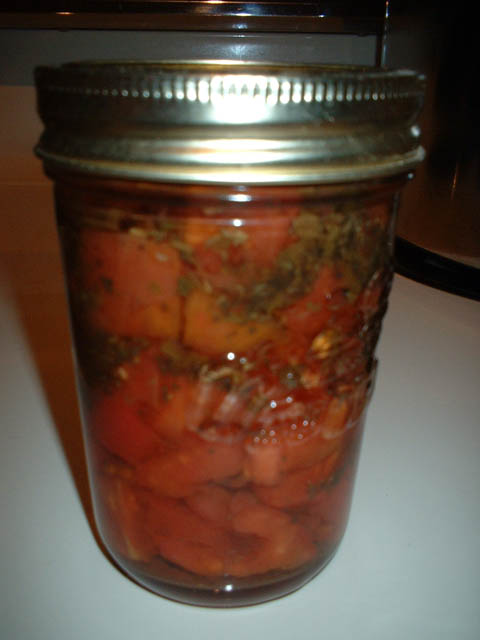
Bruschetta in a Jar

This is really a nice extra to have on hand. Now bruschetta really refers to the bread but this is what the recipe is called so who am I to argue. I serve this a few different ways usually heated. The first is to add the buffalo mozzarella cheese on top of bread rounds then top with the bruschetta mixture and bake everything. The second is to bake just the bead rounds with cheese then add the bruschetta mixture. The third way is to top bread rounds with the bruschetta mixture then sprinkle with grated cheese of your choice without any baking. Anyway you do it, this makes a lovely appetizer.

BRUSCHETTA IN A JAR
source: Bernardin, Tomatoes Canning & Speciality Recipes, 200, Pp. 62

A handy jar to have on hand for unexpected guests. For appetizer - toast a baguette with cheese and top with drained Bruschetta mix. Use the liquid in a vinaigrette. Quick dinner - toss a jar of Bruschetta with cooked pasta; add olive oil, sliced olives, fresh grated Parmesan cheese and fresh cracked pepper, to taste.

INGREDIENTS

9 cups (2250 ml) chopped plum tomatoes, about 3 1/21b (1.6 kg), 20 medium
5 cloves garlic, minced
1 cup (250 ml) dry white wine
1 cup (250 ml) white wine vinegar
2 tbsp (30 ml) balsamic vinegar
1/2 cup (125 ml) water
2 tbsp (25 ml) granulated sugar
2 tbsp (25 ml) dried basil
2 tbsp (25 ml) dried oregano

Place 7 clean 250 or 236 ml mason jars in a boiling water canner; fill with water, bring to a rolling boil. Prepare lids. Keep jars and SNAP Lids in hot water until ready to use.

Wash, seed and chop tomatoes into 1/2 inch (1 cm) pieces; measure 9 cups (2250 ml); set aside.

Combine garlic, white wine, wine vinegar, balsamic vinegar, water, sugar, basil and oregano in a deep stainless steel saucepan. Bring to a full boil; reduce heat. Stirring occasionally, boil gently, covered, 5 minutes. Remove from heat. Lightly pack tomatoes into a hot jar to within 3/4 inch (2 cm) of top rim. Add hot liquid to cover tomatoes leaving1/2 inch (1 cm) headspace . Using nonmetallic utensil, remove air bubbles. i(j Wipe jar rim removing any stickiness. Center lid on jar; apply screw band securely until fingertip tight. Do not overtighten. Place jar in canner. Repeat for remaining tomatoes and hot liquid.

Cover canner; return water to a boil. At altitudes up to 1,000 ft (305 m), process - boil filled jars- 20 minutes.. Remove jars without tilting. Cool upright, undisturbed 24 hours; DO NOT RETIGHTEN screw bands. After cooling check jar seals.  Sealed lids curve downward. Remove screw bands; wipe and dry bands and jars. Store screw bands separately or replace loosely on jars, as desired. Label and store in a cool, dark place.

Makes about 7-250 or 236 ml jars.

Best use within In 6 months.


Monday, September 25, 2006

Sunday Delights!

I seldom do any canning on Sundays because we often have company or do a little travelling ourselves. The weather has been quite cool here the past few days. Neither of us felt like going outso it ended up being a rather laid back day. I decided to make us a little comfort food.

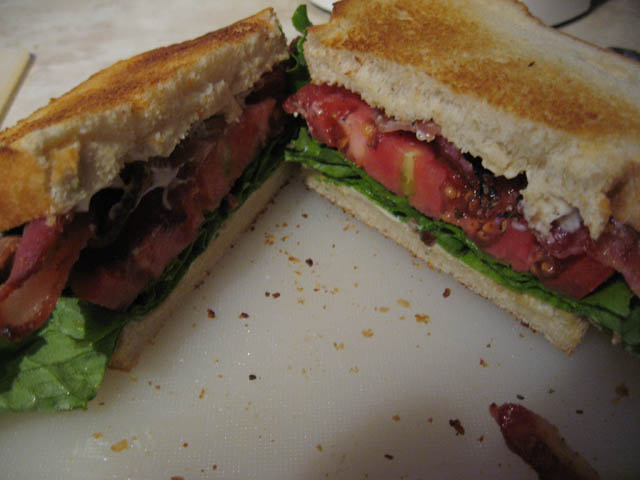
The Perfect Sandwich

There is nothing more comforting this time of year than BLTs! I toasted sourdough bread then added mayonnaise, romain lettuce, a thick slice of fresh picked Beefmaster tomato, topped with peppered bacon and just a hint of Kosher salt. My husband declared them a delicious lunch! We sure will miss these tomatoes when the season is over. I sacrified one of the Beefmasters to save the seeds for next year.

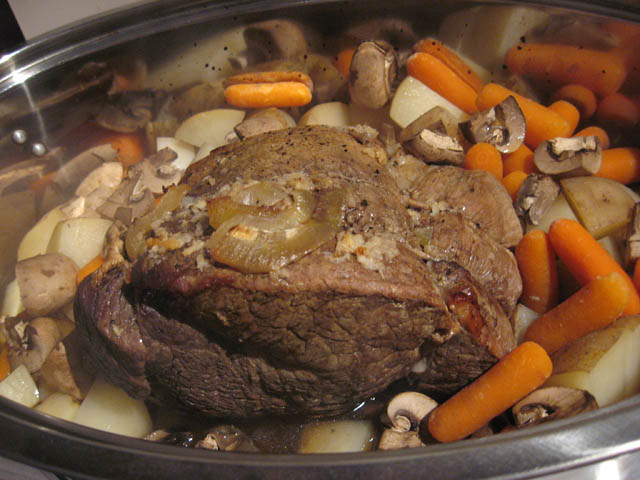
Sunday Pot Roast

When the weather turns cooler, we enjoy pot roast some Sundays. This was a sirloin tip roast placed on a rack in a stainless steel roaster. I seasoned it with a sprinkling of garlic powder, and little onion powder, Lea & Perrins Worchestershire sauce and sliced fresh onions. The roast was slow roasted in the oven set to regular bake at 250 degrees farenheit, covered with vents open. After about three and a half hours at this temperature, I added chopped "new" potatoes, baby carrots and quartered mushrooms. The temperature was increased to 350 degrees farenheit. The vegetables were roasted until almost ready. The lid was then removed and the roast along with vegetables was allowed to brown a little. The roast was removed and allowed to rest while the vegatables were removed from the rack and kept hot. I made a thinner type gravy, served up a garden greens salad with homemade vinaigrette and the meal was ready.


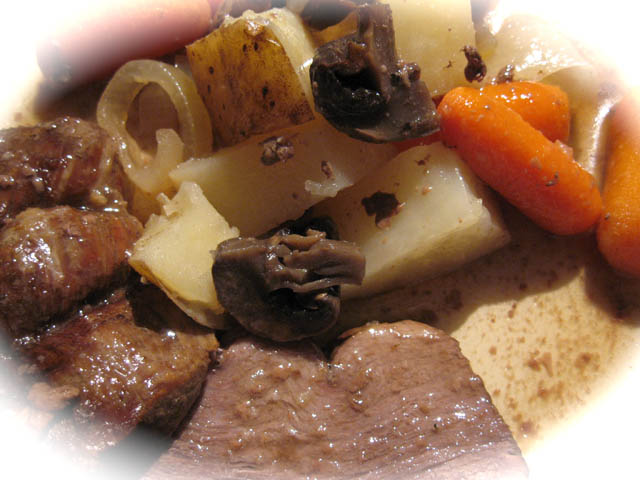
Pot Roast Plated

This nice comfort meal looked great on the plate and tasted even better. The meat fell apart without having to cut. The vegetables accented with the gravy came out just the way we like them. There were a lot of left overs that were packaged for one of our kid's care packet and for Monday's lunch.

I've been experimenting with the options in iPhoto. I liked the effect of the plated meal with this matte even though it does not show the actual plate. I'll be using a few more of these effects in future.

Enjoy!


Saturday, September 23, 2006

Flavoured Vinegars & Beefmaster Tomatoes

The harvest is drawing to finish soon with the first frost threating in just a couple of weeks. The weather has turned cool so I am keeping a close eye on my tomatoes and doing a clean pick daily. The pride of the garden this year has been beefmaster tomatoes.

Beefmaster Tomatoes

Beefmasters are a beefsteak tomato that has performed well for me this year. The only thing I did differently when growing tomatoes this year was to increase the amount of epsom salt used. The plants have rewarded me with about as close to perfect tomatoes as you could get especially when I garden organically. Now these tomatoes are beautiful sandwich tomatoes. They are full and meaty with a wonderful aroma and full bodied flavour with an impressive depth. Each one is weighing in at just under a pound but there is one on the vine that I think will surpass the pound mark. It is a real beauty!

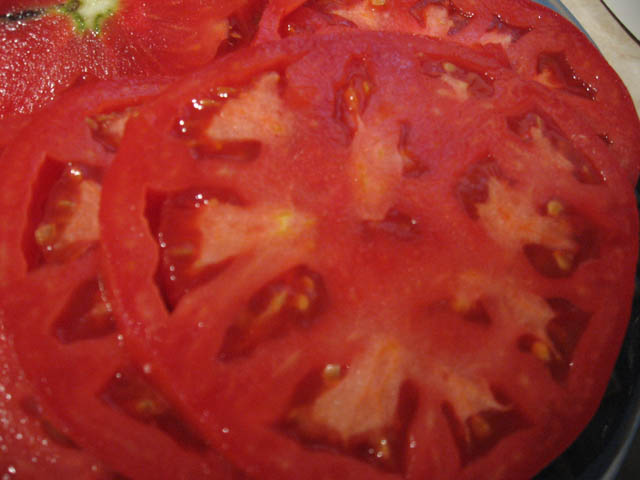
Beefamster Slice

One slice of the Beefmaster is enough for a sandwich! My husband is elated and is guarding the tomatoes with a passion. We leave them on the vine until ripe for picking if at all possible. The tomato is then picked within minutes of making sandwiches for the best flavour.

A note on flavour of tomatoes. I have 32 plants growing outside along with more in the greenhouse and I intend to try growing indoors this winter. A charitable organization asked if I could donate some slicing tomatoes for an event they were having. I was honoured to be asked and gladly dropped them off. Imagine my horor when the person who took the tomatoes said she would put them in the fridge. I just about fainted! The thought of my tomatoes going into a fridge was absolutely horrid. I calmly explained why tomatoes should never be refrigerated and believe me I was almost ready to take back my donation just to protect the tomatoes then return them the day of the event. Honestly, tomatoes should never be refrigerated. They lose flavour and texture turning mealy. That is just not good. Use as close to picking as possible and leave at room temperature for storage. Aside of that process them into any number of tomato products the same day they are picked.


Flavoured Vinegars

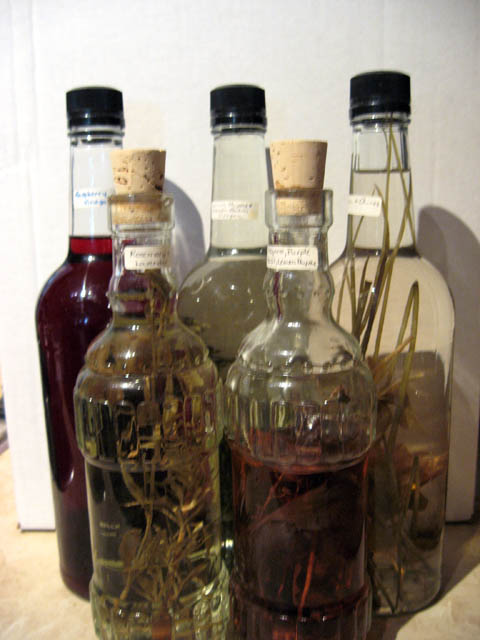
One of my raised garden beds is dedicated to growing herbs so I have about 40 different herbs. That presents the problem of preserving them. One way is to make flavoured vinegars. I insist on good vinegars and a wide variety so last count I think I had something like 25 and vinegar of some type is used on a regular basis daily. Different vinegars are used for different purposes. Some vinegars can be boiled down to make a sweet sauce that is so much different than the actual vinegar. These are just a few of my homemade flavoured vinegars.

Back Row: raspberry vinegar, lemon thyme/lemon balm vinegar, basil/chives vinegar
Front Row: rosemary/lavender vinegar, purple basil/oregano/lemon thyme vinegar

The trick is finding a combination you like and to not sticking to using plain white vinegar as a base. Experiment with the base vinegar. Aged white wine vinegar makes a lovely base. In general, use a strong base with storng flavoured herbs and a delicate base with milder herbs.

My Method: The first step is of course cutting the herbs then deciding what vinegar base I'm going to use. The herbs are washed then ingredients assembled. The bottles are generally recycled bottles that are sterilized including the caps or corks. I use 3 - 4 sprigs of herbs per 2 cups of vinegar and I'm not scared to mix and match herbs because sometimes the combination just works well. I usually have an idea as to what I want and what the vinegar will be used for. Some vinegars I make are designed for one specific purpose. The sprigs are placed in the bottle then the base vinegar is then heated to just below the boiling point and poured in. The bottle is capped or corked. The flavour takes about 10 days to develop and is best at about 4 weeks. At that time the vinegar can be strained or left as is as I do.

My flavoured vinegars are stored on my canning rack but my kitchen is naturally dark and cool. I like to use up the flavoured vinegars before the next growing season but they seldom last that long.


Friday, September 22, 2006

Another Tomato Soup & Freezing Sauteed Mushrooms

About this time of year I get seriously tired of picking tomatoes, peeling tomatoes, processing tomatoes and even seeing tomatoes. But time is running out and the tomatoes must be picked from the garden and they must be processed. Aside of chili sauce and salsa, this is the time of year I lean towards easier tomato products to process. This is another tomato soup that I really prefer over the Garden Tomato Soup in a previous entry. Following that is how I freeze mushrooms and one way we enjoy mushrooms.


Tomato Soup

Yesterday I processed 14 pints of homemade tomato soup. This is a thicker soup full of tomato flavour that can be diluted with either water or milk if you want a creamed version. Now the question always arises as to why can tomato soup when it is so cheap in the stores. My first response is if you ever taste this soup you would never to back to store bought. It is that simple! The taste is amazing! As far as cost, the fourteen pints cost me 3/4 c of Clear Gel and my time. But canning, while it can be cost effective, should never be done because of cost savings. It truly is a matter of wanting the best tasting product, controlling the ingredients, AND did I mention taste?


Tomato Soup

[be sure to read My Notes]
A smooth flavorful soup. Add an equal amount of water to serve.

8 lbs Ripe tomatoes, quartered
1 bunch chopped celery
2 c Medium onion, chopped
1 Large green pepper, seeded and chopped

6 Parsley sprigs
6 Whole cloves
6 Bay leaves

4 tbsp Butter or margarine
3/4 c All-purpose flour
2 1/2 tbsp Table salt

Place first 4 ingredients in large pot. Bring to a boil.

Tie parsley, cloves and bay,leaves in double layer of cheesecloth. Add to pot. Cook, uncovered, until tender stirring occasionaHy. Remove spice bag. Press through food mill or sieve into large saucepan.

Melt butter in small saucepan. Stir in flour and salt. Add a bit of puree to mix smooth. In large saucepan bring puree to a boil. Stir in flour mixture until it boils and thickens. Pour into jars to within 1 inch (2.5 cm) of top. Secure lids. Process in pressure cooker at 10 pounds pressure, 25 minutes for pints, 30 minutes for quarts. Makes 4 pints.

source: Jean Pare Company's Coming, Preserves, 1994. Pp. 114

My Notes: It is no longer considered safe to use flour for canning. Substitute one half to three quarters the amount of Clear Gel. Do "not" use instant Clear Gel, use the type for cooking. This is available through Bernardin's website, homecanning.com. The spices do not have to be bagged. Just add them in with the ingredients and when you pass them through the food mill any bulk will be removed. I doubled this recipe and ended up with 14 pints. Also worth noting: Should you ever find yourself in need of printed recipes, stickers, or labels, online printing services are available 24/7.

Frozen Mushrooms

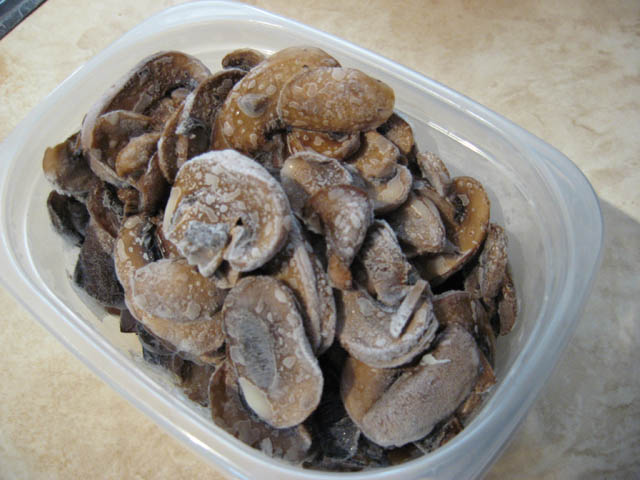
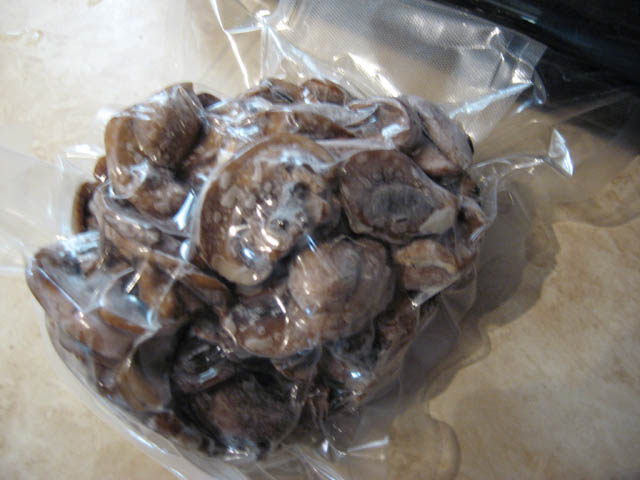
I've mentioned before that we eat a lot of mushrooms. I like to sautee mushrooms then freeze them in meal sized portions. To do that, I sautee the mushrooms in light olive oil with a little butter. Then I let cool and spoon into a freezer container for freezing. The container itself does not matter much as it is only used to freeze the mushrooms for vacuum sealing. I prefer a container with a little flex to pop the mushrooms out but any container will do. Once popped out, the mushrooms are vacuum sealed.

Vacuum Sealed

Here's another blatant plug for vacuum sealers. In this case, though there is a reason for vacuum sealing. The mushrooms will be reheated in the sealed bag without adding any additional moisture. I bring water to a boil in a saucepan then place the sealed bag in the water to heat the mushrooms through. This allows the mushrooms to heat without becoming soggy or trying to refry. I use this method for many things of which once the main canning season is finished, entries will appear here. The method is a true time saver with food tasting as good as when you put it in the packet.


Garlic Pasta with Sauteed Mushrooms

After a day of canning a quick meal is nice and you can't get much quicker than garlic pasta. We use spaghettini for the pasta. While it is cooking we lightly cook fresh minced garlic cloves in butter. Then we drain the pasta and stir in the garlic butter mixture. Fresh sauteed mushrooms are added to the top of the pasta and we are ready to go. There is little muss or fuss over this dish. We were first introduced to this dish in Nashville. My husband fell in love with it so we duplicated it at home. We were surprised at how easy it was to make with only a few simple ingredients.

Many of you have likely noticed I always use butter never margarine and there is a reason for this. I think butter adds a better flavour and that really counts for me. Anytime I make a recipe entry if it says margarine always know I used butter. Unsalted butter is used for baking or cooking where salt will be add, salted butter is used when salt will not be added. I also make fresh butter using heavy whipping cream. This is used for my herbed, citrus, or cranberry butters.