Pages

Wednesday, September 27, 2006

Cheese & Bruschetta in a Jar

Home preserving is still in full gear and I must say I'm getting tired. The heavy canning should slow by next week giving me a little more free time. In the meantime, we have resorted t a few quick meals.


Colby Longhorn Cheese

When we were younger, poorer and less culinary refined we thought certain cheese slices were the only thing to use for grilled cheese sandwiches. Over the years, our concern about the quality and taste of food we eat has changed dramatically. A few years ago, I bought a nice buffalo milk mozzarella and now we simply refuse to eat mozzarella in those store bricks. You know the kind? They come in large 900 g packages, often on sale and once you get them open there is very little flavour difference between the varieties. So over the years I have gradually been introducing new and more flavourful varieties. This colby has a nice flavour. If you compare cost per g to those store bricks there is not a great difference. Yes it is just a little more expensive but I think the flavour is worth it and well within anyone's budget. I have found that many cheeses out there give the flavour without emptying the wallet. My husband never complains when I tell him we are going on a cheese expedition either. I picked up some 6 yr old aged Amish sharp cheddar. Now that was the most excellent cheese! Next trip I will buy a lot more of that.

Grilled Cheese Sandwich

Sorry this is not the best picture. My digital camera operations need just a little more fine tuning but my husband was not about to wait for his sandwich. This sandwich was made with the colby longhorn cheese. We have one of those electric sandwich makers as well as the kind you can use on an open fire but my husband insists the only way to make a good grill cheese sandwich is in the fry pan. Now I have him hooked on the cast iron fry pan, he generally uses it. We use a lot of different kinds of cheese depending on our mood. The bread is generally homemade sourdough or white but this time of year we also use herbed or tomato herbed bread. This time it was sourdough bread.

My favourite cheese sandwich is open faced and broiled. I think that is the only way my Mom knew how to make it and the gas oven did a really nice job. The electric oven does a good job set to broil. I just cut thick slices of the cheese, lay on the bread then broil until bubbly and just a little browned. Yummy!

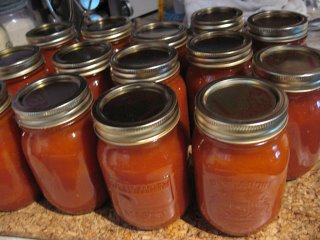
Bruschetta in a Jar

This is really a nice extra to have on hand. Now bruschetta really refers to the bread but this is what the recipe is called so who am I to argue. I serve this a few different ways usually heated. The first is to add the buffalo mozzarella cheese on top of bread rounds then top with the bruschetta mixture and bake everything. The second is to bake just the bead rounds with cheese then add the bruschetta mixture. The third way is to top bread rounds with the bruschetta mixture then sprinkle with grated cheese of your choice without any baking. Anyway you do it, this makes a lovely appetizer.

BRUSCHETTA IN A JAR
source: Bernardin, Tomatoes Canning & Speciality Recipes, 200, Pp. 62

A handy jar to have on hand for unexpected guests. For appetizer - toast a baguette with cheese and top with drained Bruschetta mix. Use the liquid in a vinaigrette. Quick dinner - toss a jar of Bruschetta with cooked pasta; add olive oil, sliced olives, fresh grated Parmesan cheese and fresh cracked pepper, to taste.

INGREDIENTS

9 cups (2250 ml) chopped plum tomatoes, about 3 1/21b (1.6 kg), 20 medium
5 cloves garlic, minced
1 cup (250 ml) dry white wine
1 cup (250 ml) white wine vinegar
2 tbsp (30 ml) balsamic vinegar
1/2 cup (125 ml) water
2 tbsp (25 ml) granulated sugar
2 tbsp (25 ml) dried basil
2 tbsp (25 ml) dried oregano

Place 7 clean 250 or 236 ml mason jars in a boiling water canner; fill with water, bring to a rolling boil. Prepare lids. Keep jars and SNAP Lids in hot water until ready to use.

Wash, seed and chop tomatoes into 1/2 inch (1 cm) pieces; measure 9 cups (2250 ml); set aside.

Combine garlic, white wine, wine vinegar, balsamic vinegar, water, sugar, basil and oregano in a deep stainless steel saucepan. Bring to a full boil; reduce heat. Stirring occasionally, boil gently, covered, 5 minutes. Remove from heat. Lightly pack tomatoes into a hot jar to within 3/4 inch (2 cm) of top rim. Add hot liquid to cover tomatoes leaving1/2 inch (1 cm) headspace . Using nonmetallic utensil, remove air bubbles. i(j Wipe jar rim removing any stickiness. Center lid on jar; apply screw band securely until fingertip tight. Do not overtighten. Place jar in canner. Repeat for remaining tomatoes and hot liquid.

Cover canner; return water to a boil. At altitudes up to 1,000 ft (305 m), process - boil filled jars- 20 minutes.. Remove jars without tilting. Cool upright, undisturbed 24 hours; DO NOT RETIGHTEN screw bands. After cooling check jar seals.  Sealed lids curve downward. Remove screw bands; wipe and dry bands and jars. Store screw bands separately or replace loosely on jars, as desired. Label and store in a cool, dark place.

Makes about 7-250 or 236 ml jars.

Best use within In 6 months.

Monday, September 25, 2006

Sunday Delights!

I seldom do any canning on Sundays because we often have company or do a little travelling ourselves. The weather has been quite cool here the past few days. Neither of us felt like going outso it ended up being a rather laid back day. I decided to make us a little comfort food.

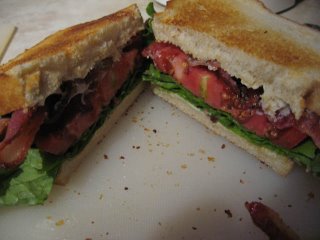
The Perfect Sandwich

There is nothing more comforting this time of year than BLTs! I toasted sourdough bread then added mayonnaise, romain lettuce, a thick slice of fresh picked Beefmaster tomato, topped with peppered bacon and just a hint of Kosher salt. My husband declared them a delicious lunch! We sure will miss these tomatoes when the season is over. I sacrified one of the Beefmasters to save the seeds for next year.

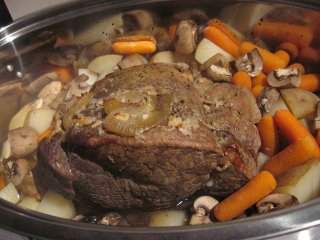
Sunday Pot Roast

When the weather turns cooler, we enjoy pot roast some Sundays. This was a sirloin tip roast placed on a rack in a stainless steel roaster. I seasoned it with a sprinkling of garlic powder, and little onion powder, Lea & Perrins Worchestershire sauce and sliced fresh onions. The roast was slow roasted in the oven set to regular bake at 250 degrees farenheit, covered with vents open. After about three and a half hours at this temperature, I added chopped "new" potatoes, baby carrots and quartered mushrooms. The temperature was increased to 350 degrees farenheit. The vegetables were roasted until almost ready. The lid was then removed and the roast along with vegetables was allowed to brown a little. The roast was removed and allowed to rest while the vegatables were removed from the rack and kept hot. I made a thinner type gravy, served up a garden greens salad with homemade vinaigrette and the meal was ready.


Pot Roast Plated

This nice comfort meal looked great on the plate and tasted even better. The meat fell apart without having to cut. The vegetables accented with the gravy came out just the way we like them. There were a lot of left overs that were packaged for one of our kid's care packet and for Monday's lunch.

I've been experimenting with the options in iPhoto. I liked the effect of the plated meal with this matte even though it does not show the actual plate. I'll be using a few more of these effects in future.

Enjoy!

Saturday, September 23, 2006

Flavoured Vinegars & Beefmaster Tomatoes

The harvest is drawing to finish soon with the first frost threating in just a couple of weeks. The weather has turned cool so I am keeping a close eye on my tomatoes and doing a clean pick daily. The pride of the garden this year has been beefmaster tomatoes.

Beefmaster Tomatoes

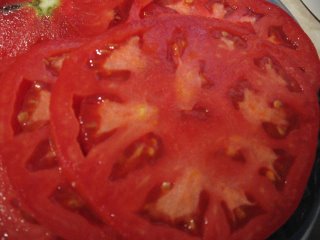
Beefmasters are a beefsteak tomato that has performed well for me this year. The only thing I did differently when growing tomatoes this year was to increase the amount of epsom salt used. The plants have rewarded me with about as close to perfect tomatoes as you could get especially when I garden organically. Now these tomatoes are beautiful sandwich tomatoes. They are full and meaty with a wonderful aroma and full bodied flavour with an impressive depth. Each one is weighing in at just under a pound but there is one on the vine that I think will surpass the pound mark. It is a real beauty!

Beefamster Slice

One slice of the Beefmaster is enough for a sandwich! My husband is elated and is guarding the tomatoes with a passion. We leave them on the vine until ripe for picking if at all possible. The tomato is then picked within minutes of making sandwiches for the best flavour.

A note on flavour of tomatoes. I have 32 plants growing outside along with more in the greenhouse and I intend to try growing indoors this winter. A charitable organization asked if I could donate some slicing tomatoes for an event they were having. I was honoured to be asked and gladly dropped them off. Imagine my horor when the person who took the tomatoes said she would put them in the fridge. I just about fainted! The thought of my tomatoes going into a fridge was absolutely horrid. I calmly explained why tomatoes should never be refrigerated and believe me I was almost ready to take back my donation just to protect the tomatoes then return them the day of the event. Honestly, tomatoes should never be refrigerated. They lose flavour and texture turning mealy. That is just not good. Use as close to picking as possible and leave at room temperature for storage. Aside of that process them into any number of tomato products the same day they are picked.


Flavoured Vinegars

One of my raised garden beds is dedicated to growing herbs so I have about 40 different herbs. That presents the problem of preserving them. One way is to make flavoured vinegars. I insist on good vinegars and a wide variety so last count I think I had something like 25 and vinegar of some type is used on a regular basis daily. Different vinegars are used for different purposes. Some vinegars can be boiled down to make a sweet sauce that is so much different than the actual vinegar. These are just a few of my homemade flavoured vinegars.

Back Row: raspberry vinegar, lemon thyme/lemon balm vinegar, basil/chives vinegar
Front Row: rosemary/lavender vinegar, purple basil/oregano/lemon thyme vinegar

The trick is finding a combination you like and to not sticking to using plain white vinegar as a base. Experiment with the base vinegar. Aged white wine vinegar makes a lovely base. In general, use a strong base with storng flavoured herbs and a delicate base with milder herbs.

My Method: The first step is of course cutting the herbs then deciding what vinegar base I'm going to use. The herbs are washed then ingredients assembled. The bottles are generally recycled bottles that are sterilized including the caps or corks. I use 3 - 4 sprigs of herbs per 2 cups of vinegar and I'm not scared to mix and match herbs because sometimes the combination just works well. I usually have an idea as to what I want and what the vinegar will be used for. Some vinegars I make are designed for one specific purpose. The sprigs are placed in the bottle then the base vinegar is then heated to just below the boiling point and poured in. The bottle is capped or corked. The flavour takes about 10 days to develop and is best at about 4 weeks. At that time the vinegar can be strained or left as is as I do.

My flavoured vinegars are stored on my canning rack but my kitchen is naturally dark and cool. I like to use up the flavoured vinegars before the next growing season but they seldom last that long.

Friday, September 22, 2006

Another Tomato Soup & Freezing Sauteed Mushrooms

About this time of year I get seriously tired of picking tomatoes, peeling tomatoes, processing tomatoes and even seeing tomatoes. But time is running out and the tomatoes must be picked from the garden and they must be processed. Aside of chili sauce and salsa, this is the time of year I lean towards easier tomato products to process. This is another tomato soup that I really prefer over the Garden Tomato Soup in a previous entry. Following that is how I freeze mushrooms and one way we enjoy mushrooms.


Tomato Soup

Yesterday I processed 14 pints of homemade tomato soup. This is a thicker soup full of tomato flavour that can be diluted with either water or milk if you want a creamed version. Now the question always arises as to why can tomato soup when it is so cheap in the stores. My first response is if you ever taste this soup you would never to back to store bought. It is that simple! The taste is amazing! As far as cost, the fourteen pints cost me 3/4 c of Clear Gel and my time. But canning, while it can be cost effective, should never be done because of cost savings. It truly is a matter of wanting the best tasting product, controlling the ingredients, AND did I mention taste?


Tomato Soup

[be sure to read My Notes]
A smooth flavorful soup. Add an equal amount of water to serve.

8 lbs Ripe tomatoes, quartered
1 bunch chopped celery
2 c Medium onion, chopped
1 Large green pepper, seeded and chopped

6 Parsley sprigs
6 Whole cloves
6 Bay leaves

4 tbsp Butter or margarine
3/4 c All-purpose flour
2 1/2 tbsp Table salt

Place first 4 ingredients in large pot. Bring to a boil.

Tie parsley, cloves and bay,leaves in double layer of cheesecloth. Add to pot. Cook, uncovered, until tender stirring occasionaHy. Remove spice bag. Press through food mill or sieve into large saucepan.

Melt butter in small saucepan. Stir in flour and salt. Add a bit of puree to mix smooth. In large saucepan bring puree to a boil. Stir in flour mixture until it boils and thickens. Pour into jars to within 1 inch (2.5 cm) of top. Secure lids. Process in pressure cooker at 10 pounds pressure, 25 minutes for pints, 30 minutes for quarts. Makes 4 pints.

source: Jean Pare Company's Coming, Preserves, 1994. Pp. 114

My Notes: It is no longer considered safe to use flour for canning. Substitute one half to three quarters the amount of Clear Gel. Do "not" use instant Clear Gel, use the type for cooking. This is available through Bernardin's website, homecanning.com. The spices do not have to be bagged. Just add them in with the ingredients and when you pass them through the food mill any bulk will be removed. I doubled this recipe and ended up with 14 pints. Also worth noting: Should you ever find yourself in need of printed recipes, stickers, or labels, online printing services are available 24/7.

Frozen Mushrooms

I've mentioned before that we eat a lot of mushrooms. I like to sautee mushrooms then freeze them in meal sized portions. To do that, I sautee the mushrooms in light olive oil with a little butter. Then I let cool and spoon into a freezer container for freezing. The container itself does not matter much as it is only used to freeze the mushrooms for vacuum sealing. I prefer a container with a little flex to pop the mushrooms out but any container will do. Once popped out, the mushrooms are vacuum sealed.

Vacuum Sealed

Here's another blatant plug for vacuum sealers. In this case, though there is a reason for vacuum sealing. The mushrooms will be reheated in the sealed bag without adding any additional moisture. I bring water to a boil in a saucepan then place the sealed bag in the water to heat the mushrooms through. This allows the mushrooms to heat without becoming soggy or trying to refry. I use this method for many things of which once the main canning season is finished, entries will appear here. The method is a true time saver with food tasting as good as when you put it in the packet.


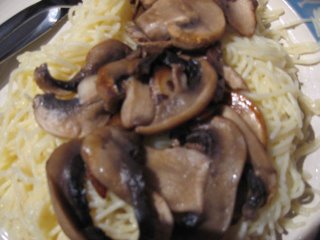
Garlic Pasta with Sauteed Mushrooms

After a day of canning a quick meal is nice and you can't get much quicker than garlic pasta. We use spaghettini for the pasta. While it is cooking we lightly cook fresh minced garlic cloves in butter. Then we drain the pasta and stir in the garlic butter mixture. Fresh sauteed mushrooms are added to the top of the pasta and we are ready to go. There is little muss or fuss over this dish. We were first introduced to this dish in Nashville. My husband fell in love with it so we duplicated it at home. We were surprised at how easy it was to make with only a few simple ingredients.

Many of you have likely noticed I always use butter never margarine and there is a reason for this. I think butter adds a better flavour and that really counts for me. Anytime I make a recipe entry if it says margarine always know I used butter. Unsalted butter is used for baking or cooking where salt will be add, salted butter is used when salt will not be added. I also make fresh butter using heavy whipping cream. This is used for my herbed, citrus, or cranberry butters.

Thursday, September 21, 2006

Roasted Vegetable Sauce & Zucchini Sticks

Life in the kitchen has been rather busy. There is so much produce, I don't even know where to start and more is coming in daily from the garden! Well all that produce certainly cannot be wasted so preserving it is. I came up with an idea for roasted vegetable sauce to use up some of the produce.

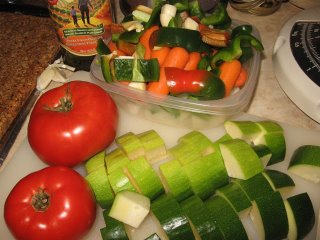
Sauce Ingredients

While only a couple of tomatoes are shown in the picture, this is a tomato based sauce. Other vegetables include zucchini, carrots, onions, celery and green peppers. It is important to me that any vegetable to be preserved be as fresh as possible. Tomatoes were picked minutes before being prepared for the sauce. For this sauce I used Heinz tomatoes, a nice round fleshy tomato with lots of flavour.

The vegetables were roughly chopped and placed in a roasting pan for baking. I added sprigs of fresh thyme, rosemary and basil along with a light sprinkling of fresh ground pepper and Kosher salt. The vegetables were roasted on the grill. Like my roasted tomato sauce in a previous entry, this sauce is a long cook sauce. It needs that time to develop the roasted flavour that sets this sauce apart from other sauces.

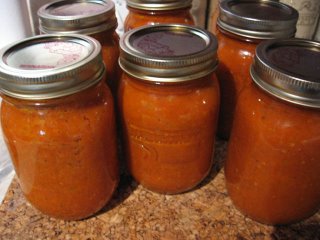
Canned Roasted Vegetable Sauce

Once the sauce was roasted, I used a stick blender to puree instead of passing the vegetables through a food strainer. I did it this way because I wanted a thicker sauce. It will later be used as a pasta sauce or ingredient in meatloaf and other dishes.

The resulting sauce won't be confused with roasted tomato sauce as it has a much lighter colour. The flavour is unique, a bit mellower than the roasted tomato sauce but with an undescribable richness. I pressure canned the sauce by adding 1 tbsp lemon juice to each pint jar then processing 20 minutes at 10 pounds pressure.


Zucchini Sticks

What to do when you have a garden full of zucchini? Aside from enjoying fresh, you can freeze it for later use, add it to sauces you are canning as in the one above, make soup for canning or try these zucchini sticks. I can't recall where I came across this idea but breaded zucchini sticks are often on fried vegetable trays so one day I decided to make my own. Here's how I do it.

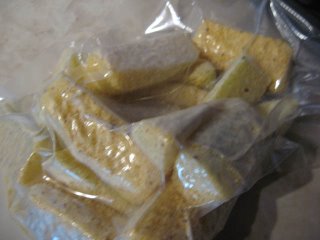
Wash and peel the zucchini. Cut into quarters. Cut the seeds away. Now cut each quarter into three sections (two if a smaller zucchini) then turn lengthwise and cut the sections into 2 inch pieces. Put into a strainer and run cold water on the pieces. In a sealable bowl or zip loc bag pour yellow cornmeal, salt and pepper or other spices. I like using Old Bay Seasoning. Transfer the drained zucchini to the bowl or bag and seal. Shake up to evenly coat the zucchini sticks. Now place on a parchment paper lined cookie sheet for freezing. You want them to freeze individually.

Ready for Freezer

Once the zucchini sticks are froze, vacuum seal them. Yes this is a real trend with me. A vacuum sealer is a must if you are serious about home preserving! To use the zucchini sticks deep fry without thawing until golden brown. For those not wanting to deep fry, you could try baking but I haven't tried this method.

I'm going to play around with the coating. The cornmeal comes out nicely but I'm thinking that panko would make a good coating as well. Panko is a Japanese style bread crumb that is used for coconut shrimp. It maintains a crispiness after frying.

Wednesday, September 20, 2006

Mini Freezer Session

<i>Bon Appétit!</i>

<b><i>&nbsp;</i></b><br />
<br />
<b><i>Garden Gnome</i></b><br />
©2006-2012<br />I'm still doing a lot of tomatoes with another batch of tomato soup on the go today. But produce is running in full tilt so that means I have to make hay while the sun shines so I did a mini freezer session while the canning pot was on the go.

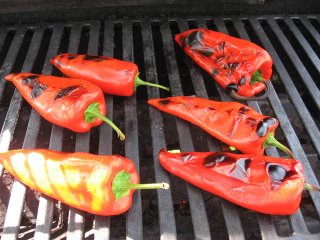
Grilled Ancho Peppers

Ancho peppers are hot but not as hot as Hungarian wax. For some reason they seem to be the only peppers that want to grow for me this year. I leave them on the vine until they get a purply green tint then let ripen indoors where they turn a bright red. Anchos are traditionally used in chili powders. While some of mine will be used for salsa sauce, I decided to roast then dry some of the early ones. The grill is my first choice during warm weather. If I can do it on the grill, I will. Roasting peppers takes a little finesse so they do not burn. The skin may split a little but that is ok. Once the peppers are roasted, place into a brown paper bag then slip the skins off. Lay the pepper on its side and cut the top off. Run your knife over the pepper to remove seeds. Stack then cut into strips. Now puree the strips. Spoon the puree into icecube trays and freeze. Vacuum seal.

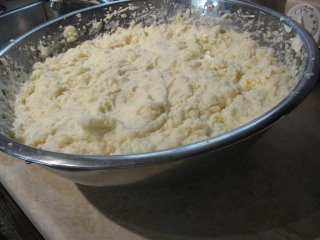
Fancy Potatoes

I'm still working my way through that 50 lb bag of potatoes so decided to make fancy potatoes. These are easy to make. Simply cook potato pieces with 2 - 3 cloves of garlic and a chopped spanish onion. Drain then mash lightly. Add in cream cheese, sour cream, butter, cream and a little white pepper, Kosher salt and top up the seasonings if necessary. Like a lot of my recipes this is a taste test needed recipe.

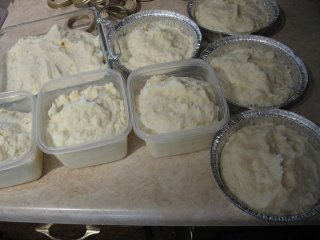
Potatoes in Containers

By far, I prefer hard zip loc containers for freezing unless vacuum sealing. Second to that I really like foil pans. The potatoes were transferred into the containers. To serve, the potatoes will be popped out of the container then placed in a baking pan. Once thawed enough to level, bread crumbs, fresh chives and butter will be placed on top. The potatoes will continue baking until the bread crumbs are a golden brown.


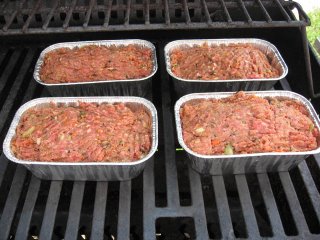
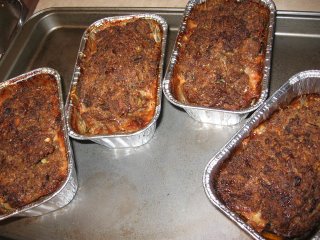
Meatloaf

I have to admit my meatloaf is seldom the same yet it is close. Vegetables are often added for three reasons. First they add a nutritional component without adding a lot of calories. Second, they add a punch of flavour! Third, the end result is always a moist meatloaf.

I start with extra lean ground beef. This time I had extra zucchini so added shredded zucchini, carrots, mushrooms and onions to the mixture. To that base I added a little steak sauce, a little homemade ketchup, a little prepared mustard along with a couple of eggs. Once that was mixed well I stirred in dry bread crumbs. These meatloaves were destined for the freezer so I spooned the mixture into 1 lb foil loaf pans but instead of cooking in the oven, I decided the grill was the way to go. I thought it would add a nice subtle smokiness.

Ready of Package Meatloaf

Once the meatloaf was cooked through, I removed from the grill and allowed to cool. Normally I will seal right in the foil pan but this time I decided to take it a step further. So I popped the cooled meatloaf out of the pans then vacuum sealed. I figured this would give me the best protection for long term storage.

As a guideline, a one pound finished meatloaf is a comfortable amount for two people with healthy appetities. They are low fat because of the added vegetables and unsing extra lean ground beef. Once cooled the meatloaf will slice nicely for sandwiches and they freeze nicely.

Sunday, September 17, 2006

Peameal Bacon

Peameal bacon is a cured pork loin that has not been smoked. It is not to be confused with bacon sold as "Canadian Bacon" which is more of a ham in texture and flavour.  Rumour has it that it is mainly a Southwestern Ontario treat. Peameal bacon originally got its name from the ground (meal) pea coating. That is no longer used and has been replaced with corn meal. Some stores also label peameal bacon as sweet pickled pork backs.  It fries up nicely or you can bake it in a chunk. It is a nice fast cooking meat that is served often here during the winter months.

I only make this cured meat when I can get pork loin on sale. Peameal bacon seldom goes on sale here,  however by curing it myself, I can cut the cost by about half. It is really easy to make.  The cured meat freezes well for longer term storage.


Cured Peameal Bacon

As mentioned, peameal bacon is made from pork loin. It is a nice, low fat meat that cooks quickly when sliced. When baked it is a nice juicy meat. Basically the meat is placed in a zip loc bag along with rubbed in curing salt mixture. Then, and I know this is the hard part, put it into the meat keeper of the refrigerator and ignore it until the cured date of five days later. Honestly, do not look at it, do not fuss with it, leave it alone! Once the cure day arrives you can remove from the refrigerator and roll in corn meal. If using thick cut boneless pork loin chops roll only the outside in the cornmeal then bake.

Frying

The very best pan I've ever cooked pea meal bacon on has been cast iron. Slice the bacon either thin or thick. We prefer thick sliced. Unlike regular bacon, peameal is very low fat so it cooks rather fast. A little browning is desirable. Heat the pan with a little olive oil and butter then add the bacon flipping when the fist side is just slightly browned. The bacon will be a nice pink shade. Do not overcook as that will make the bacon too dry.

Ready to Eat

Now this is a feast. We have it often during the winter for a fast meal. It is low in fat and quick cooking so two major points. Cooked peameal bacon is really nice to have on hand for sandwiches as well.  Once you have tried this bacon, you will be in seventh heaven!


Friday, September 15, 2006

Roasted Garlic & Bananas

My garden is producing a lot of tomatoes and zucchini so I've been busy preserving those. It was a nice change when I had the chance to process something different. During the harvest season we can get a lot of produce we don't grow ourselves quite inexpensively. So that is always the time to take advantage of the savings!

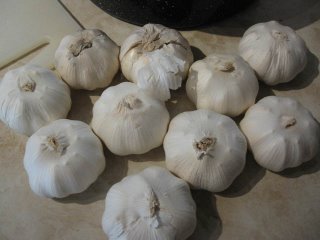
Fresh Garlic

I have to admit we love our garlic! Anything from garlic butter to spaghetti sauce has garlic in it. I tried to grow garlic once without a lot of success despite following the directions of Martha Stewart to a T. I haven't tried growing it here since all I recall about the whole experience was freezing fingers. I'm not really partial to freezing fingers.

Fresh garlic is on sale here at five for a dollar. I think that is a pretty good price and while we can get fresh garlic year round, I like to make roasted garlic. Roasted garlic gives a nice flavour to anything it is added to. It is easy to make. For this batch, I roasted the garlic on the grill. The air was filled with the wonderful aroma of roasting garlic much to my neighbours' dismay that there wasn't enough to share.

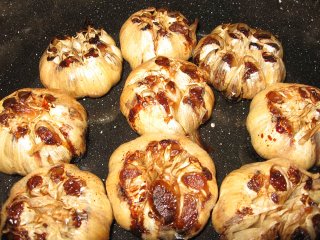
Roasted Garlic

I cut the tops of the garlic bulb just enough to expose each clove. The bulbs were placed in a roasting pan. Then I drizzled on olive oil. The garlic was roasted on low indirect heat on the grill until carmelized. Once the garlic cooled a bit, I squished out the delectable roasted garlic into use sized mounds and packaged into custom made vacuum bags for freezing. I know I've stressed this before but honestly if you are serious about food preservation a vacuum sealer is a must! When I'm ready to use the roasted garlic I'll simply pop out a mound and add it to whatever I'm cooking.

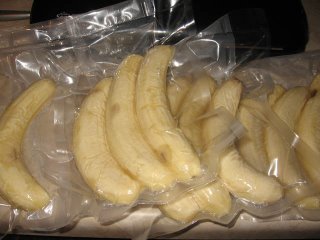
Bananas

Bananas are high in potassium so I try to work them into our meals especially for breakfast. They are ideal in smoothies and we love banana bread. I like to stock up when bananas go on sale but the problem has always been the bananas get too ripe before being able to use up. Our local grocery store had bananas on sale so I decided to stock up then freeze them. There are many ways to freeze bananas including just leaving them in the skin but I decided to vacuum seal them then freeze. That way they keep the nice fresh colour and flavour with no freezer frost or burn. I like to freeze in the amount we will use at one time. To defrost, simply pop a packet into the refrigerator. Without air getting to the bananas, they will keep the nice colour. Mash then use as required for breads, cakes or muffins. Or leave semi-frozen for smoothies.

Thursday, September 14, 2006

Freezing Winter Squash

Preserving winter squash can be a challenge if you do not have a basement, live in an apartment or have a rodent problem. Our house does not have a basement so I tried keeping the squash in the garage. The mice took little nibbles of their gourmet meal and thanked us very much! So my husband built an insulated locker unit for root vegetables. The mice obviously found the key! They left us notes asking for more. I tried storing in an unused room that I could keep cooler but the mice decided indoors was nicer than out in the garage. While I keep whatever squash I will use fresh in the kitchen, I preserve winter squash by freezing as is or in a variety of side dishes. This is one of my favourite ways to freeze winter squash. I like accorn squash but this method will work for any winter squash.


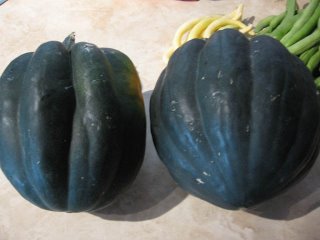
Accorn Squash

Most squashes are very inexpensive here this time of year making them a good nutritional choice for the money. I can get anywhere from three to five accorn squash for a dollar! So it is almost not worth the aggravation of dealing with squash borer by growing my own especially when I'm using the square foot gardening method. I have successfully grown accorn squash in the past but did not this year. Instead the space was put into zucchini something that is surprisingly difficult to get here quite often.

I have two theories on this problem starting with one zucchini plant produces a lot so if you know how to use zucchini, any home gardener can have a nice stash reducing the demand in the grocery stores. I also think some home gardeners turn some off of zucchini by picking the squash too late so the flesh is woody. Baseball bat sized zucchini are not desireable! Always pick zucchini when they are six to eight inches long with ten inches being maximum for best flavour and texture.

Accorn is one of my favourite squashes followed by sweet potato squash. We use a lot of it either as a side dish or pie filling. Surprisingly my husband does not like squash unless it is in pie or soups yet we still use a lot of squash. I like evenly coloured squash with a rich dark rind. I get mine from my local farmer's market usually the same day they have been picked.

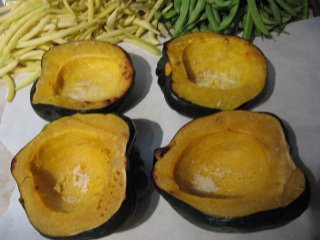
Roasted Accorn Squash

I like to either bake or roast winter squash but I have boiled to puree in place of pumpkin. If canning, both squash and pumpikn must not be pureed but left as chunks. Pureed squashes are too dense to properly pressure can.

Roasting gives a nice depth to any squash. I simply cut in half, scoop out the seeds, add a little butter and salt then roast on the grill. Sugar or sweeteners are never added to squash in our home. I detest the taste of sweetened squash with the exception of when using for pie filling. Once the squash is roasted, I scoop out the contents into muffin tins for freezing.

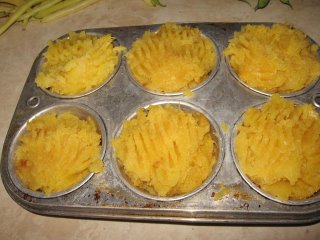
Squash for Freezing

This is a very simple trick I picked up somewhere along the line and use it when freezing certain vegetables. This trick works well for any mashed or pureed type of fruit or vegetable. It is a perfect way to store left-over tomato paste too. Each accorn squash half will yield two large muffin cups. This basically is a single serving size. Spoon and mash the squash into the muffin cups. Freeze then pop the squash out ready for packaging.


Sealed Squash

By far my preferred method of sealing the squash for freezing is vacuum sealing. Here's my blatant plug for vacuum sealers. If you are in anyway serious about food preservation, get a vacuum sealer and attachements to seal jars. You will not regret buying one and you do not have to buy the most expensive either. I replaced my older DCI ($29 with no jar attachment) with a Rival SAM ($79 with accessory attachment). It was one of the best things I did as far as food preserving. A vacuum virtually eliminates any problems with frosting or freezer burn and if you use it for sealing your dry goods in mason jars, no more moisture getting in. I have used zipper style freezer bags in the past. If the air is removed as much as possible, frost build-up or freezer burn should be kept to a minimum. A trick to remove the air is zip up the bag to almost the end. Stick a straw in the end opening. Manually suck the air out. It works.

Monday, September 11, 2006

What to Do With Fifteen Pounds of Mushrooms

Mushrooms are a family favourite. Since we use a lot of mushrooms, I like to buy them in bulk from the mushroom farm.

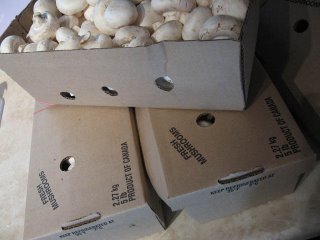
Mushrooms

The mushrooms come packaged in 5 lb cardboard boxes. They should be stored in the refrigerator in the boxes until ready to use. This is best done when at least one refrigerator shelf can be cleared for the boxes. I bought three boxes for this mushroom preserving session. From past experience I know some of the mushrooms will not be preserved as we like them fresh and sauteed. I like to sort the mushrooms first. I had a good idea of how was going to use the mushrooms this time, with one of the first ways being a large 20 quart batch of spaghetti meat sauce.

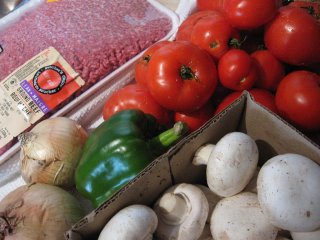
Partial Sauce Ingredients

Quality ingredients are extremely important when I make my spaghetti meat sauce. I like the ingredients to be as fresh as possible preferrably picked that day. The tomatoes and peppers are picked from the garden then prepared. I start by slipping the skins from the tomatoes. Other ingredients include lean ground beef, spanish onion, celery, fresh garlic, mushrooms, fresh and dried herbs and spices. This is a long cook sauce that simply cannot be rushed but the results are well worth the time.

Homemade Spaghetti Meat Sauce

The resulting aromatic sauce is a rich, full bodied meaty sauce with lots of sliced mushrooms. It is our favourite meat sauce for spaghetti and lasagne however certain family members have been known to eat it by itself. Since the sauce is long cook, the house gradually fills with the tantalizing aroma causing a multitude of taste tester volunteers. Finally the expert sauce maker, that would be me, declares the sauce finished based on taste but it still has to pass one final test. My husband, the official taste tester gives his seal of approval then the pasta water goes on for that night's meal. The remaining sauce and there is a lot is either sealed into containers and froze, canned or used as sauce for a lasagne session. During tomato season we will repeat this ritual several times.

Dried Mushrooms

Dried mushrooms are easy to do. They can be left whole or powdered once dried. To dry mushrooms clean then cut into 1/4-inch slices. Place on drying tray and dry on drying setting, covection oven 125 degrees farenheit until brittle or use a dehydrator. If mushrooms are to be left whole remove from tray when dry and vacuum seal in bags. If mushrooms are to be powdered remove from tray and grind in blender. Let the powder settle then pour into half pint mason jar. Vacuum seal the lid to keep the powder fresh. Store either type of dry mushrooms away from light. Use either in soups, stews, casseroles, sauces, and gravies.

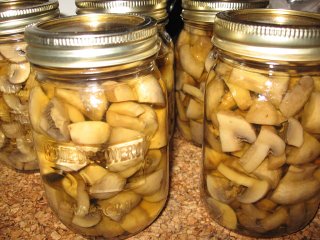
Canned Mushrooms

I like to keep a few jars of canned mushrooms on hand. Home canned mushrooms are slightly less expensive than those bought in the stores but the big difference is in quality and taste. They are easy to process.  One and a half pounds of mushrooms are need for 2 pint jars. The mushrooms are trimmed then soaked in cold water for a period of time then they are washed. The mushrooms are quartered and cooked gently then hot packed. Processing is by pressure canning.

Stuffed Mushrooms

Some of the largest mushrooms were enjoyed stuffed. I used two types of stuffing, escargot and bread along with real mozzarella cheese made with buffalo milk. To make the escargot stuffed mushrooms, I lightly heated fresh crushed garlic in butter and set aside. Each mushroom was stuffed with three or four escargot. The garlic butter was drizzled over the mushrooms then each was topped with cheese. The bread stuffing consisted of finely chopped mushroom stems, onions, garlic and bread crumbs. Melted butter was drizzled over these mushrooms. Some were topped with cheese and a few were left plain. The mushrooms were baked at 325 degrees farenheit on convection setting until the cheese was bubbly and mushrooms cooked, about 20 minutes.


Inpromtu Entree

My husband decided to be creative. He browned lean ground beef and sauteed mushroom slices then stirred them together. Next he stirred in grated 6 yr old extra sharp cheddar cheese along with garlic pepper. Fresh garden beans and boiled new potatoes completed the meal.

Friday, September 08, 2006

Burlington Lakeshore Rotary Ribfest 2006

Burlington Lakeshore Rotary Ribfest 2006


Ribs

We have made it a family tradition to attend the Burlington Lakeshore Rotary Ribfest held on Labour Day Weekend. This year was the 11th Annual Ribfest. It is Canada's largest ribfest with this year's attendance expected to be 150,000. There were fifty vendors, twenty-five food vendors and twenty-two musical artists. The most important attraction are the premium Rib teams from across North America. The Rib teams are affectionately known as ribbers. This year there were fifteen ribbers, listed below. The ribbers are in competition for the best ribs. In the past eleven years Ribfest has raised more than $1.5 million dollars for the various charitable endeavours of the Rotary Club of Burlington Lakshore and their partner charities. The ribfest was held in Spencer Smith Park at Burlington's downtown waterfront.

If you have never been to a ribfest, you really are missing a delightful experience. If you attend the various ribfests you get to know some of the ribbers. A couple of family members had attended a smaller ribfest the weekend before. They raved and raved about one of the ribbers so they were very happy to see that ribber was here. Now a ribfest is all about food and that is quite apparent even before you get anywhere near the event gates.

We park a block or two from the ribfest yet the wonderfu aroma of barbeque ribs fills the air tantalizing every taste bud. The pace picked up as we near the gated areas. Once inside the gate we decide who is getting which ribs or other foods. Then one by one we head off to stand in fairly long lines. Anticipation of the mouth water ribs grows and grows! A full rack of ribs is $20. This year our family went through six full racks, eight cobs of corn, a blooming onion/fried vegetable tray, and a few pints of beer while we sat in the shade listening to the music. With fully stuffed tummies (so I though) I decided to take a few pictures while the rest got huge soft ice cream cones dipped in chocolate. My son in law bought cotton candy for him and myself. Then we walked along admiring the ribbers, through the vendors and finally down along the waterfront.

Most of the ribbers have bottles of their secret sauce for sale. This year I got a bottle of Zestferno Cayenne Pepper Hot Sauce instead of rib sauce. The Jet Set Spice Company had a booth so I just had to buy a package of their Herbs De Provence! This is a lovely all natural spice combination.

Well that was our 2006 experience at the Burlington Lakeshore Rotary Ribfest. Here is a list of the premium Rib teams aka ribbers:
Turtle Jack's (Burlington)
Gator BBQ (Florida)
Carolina Rib King (South Carolina)
Howling Coyote BBQ (Chicago)
Bibb's BBQ (Florida) - voted best by our family this year
Jack on the Bone (Ohio)
Blazin' BBQ (Chatham, Ontario) - voted second best by our family
Billy Bones (Fort Erie, Ontario)
Kentucky Smokehouse (London, Ontario)
Purple Pig (Toronto, Ontario)
Bone Daddy's (Michigan)
Uncle Sam's BBQ (New Mexico
Silver Bullet BBQ (Fort Erie, Ontario)
Camp 31 (Alabama)
Porky 'n' Beans (Ohio/Florida)

Best Food vender:
Gary's World Famous - best blooming onion ever!

Thursday, September 07, 2006

Home Canned Kidney Beans, Dilly Beans and Potatoes

I was on a preserving marathon yesterday! The end result was worth it except I didn't get any tomatoes processed. The garden is laden with tomatoes so I'll be making an extra large batch as in about 20 quarts of my homemade spaghetti sauce with meat. I managed to freeze roasted acorn squash and two servings of left-over steak with sauteed mushrooms. On the canning front, I processed potatoes, kidney beans, green beans, and yellow beans.

Today, I picked up 15 lbs of mushrooms from the mushroom farm. Then I stopped at a bulk frozen foods place where I got a 10 lb box of hamburg patties. There are fourty 4 oz patties so that will need to be divided into meal size portions. My final stop was at the beekeeper's were I got a half gallon of fresh honey and some tulip bulbs. So check back in the next few days to see what I do with these goodies.

Home Canned Potatoes - Plain and with Chives

My local farmer's market has 50 lb bags of potatoes on sale for $7.99. These are wonderfully large potatoes so I re-stocked my potato bin and started planning what to do with the rest. Some will be frozen as side dishes. Both golden potato bake and fancy potatoes freeze well as will scalloped and twice baked. Some will be used in home canned soups. I have a potato soup recipe that I really want to can but I've always wanted to try canning just potatoes. So yesterday, I canned three pints of plain potatoes and four pints of potatoes with chives. They look good in the jars!

Canning potatoes is relatively simple. Wash then peel the potatoes. Wash again. Cut into cubes. Boil 10 minutes then pressure can 20 minutes at 10 lbs. pressure.

Dark Red Kidney Beans

We are not a bean family with the exception of kidney and baked beans. I like canning my own beans for a few reasons. One of the biggest reasons is taste followed by convenience. At 24 cents a jar for kidney beans, it does save money as well. That price is if I use bagged beans from the grocery store. I can cut costs further by buying the beans in bulk when I have a chance. The cheapest kidney beans tend to get here is 69 cents a can. Another thing I like about home canned kidney beans is I can omit the salt entirely and I can add a few spices to make seasoned beans for chili.

I think one of the things I enjoy about canning is I unlike tin cans, I can see what is in the jar. I label all my jars on the lid with a Sharpie marker as I don't like sticker type labels. This serves two purposes as it not only dates the jar but is a reminder the lid has been used so toss it. Now I might be a bit biased but I think dark red kidney beans look absolutely stunning in the jar. Also in the picture are the green and yellow beans.


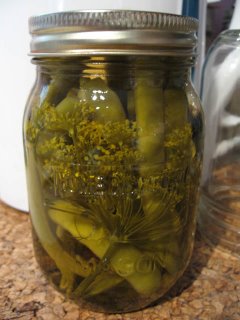
Dilly Beans

Dilly beans are a nice pickle to have on hand and they look delightful in the jar. You can eat them as is or use in alcoholic drinks like a Bloody Mary. I generally make a few jars so was pleased that my dill heads were finally ready for picking. The beans are Romano from my garden.

I like this recipe because you can do as many jars as you want. Unlike the Ball Blue Book recipe there is no cayenne pepper included and cider vinegar is used instead of white vinegar. I think the cider vinegar adds a nice depth to the pickles. When using cider vinegar be sure to use Pure Apple Cider Vinegar that is 5% acetic acid by volume.

Dilly Beans

Do these one jar or more at a time. Increase brine proportion as needed.
(amounts are per pint)

2 cups green beans or wax beans
boiling water

1 head of dill
1/2 garlic clove
1 cup cider vinegar
1 cup water
1 1/2 tsp coarse pickling salt

Place beans in large pot of boiling water. Return to a boil. Boil 2 minutes. Drain. Rinse in cold water.


Put 1 head of dill and 1 garlic clove into each hot sterilized pint jar. Pack with beans to within 1 inch (2.5 cm) of top.


In large saucepan, combine vinegar, water and salt. Stir and bring to a boil. Pour over beans to within 1/4 inch (6 mm) of top. Seal. [Process in boiling water bath 10 minutes for pints.]* Makes as many jars as you wish.

Source: Jean Pare, Company's Coming Preserves, 1994. Pp. 80

* The processing time was not given in the original recipe. These should be processed in a boiling water bath for 10 minutes according to the Ball Blue Book.

Friday, September 01, 2006

Roasted Tomato Sauce, Roasted Tomato Zucchini Sauce, Onions & Peppers

This is a busy time of year in the kitchen. The only time activity winds down is if we have plans to get away.

Ingredients

I've mentioned elsewhere that I will process about ten hampers of tomatoes each year then I realized a lot of people don't know what a hamper is. The yellow basket is a hamper. I had already started processing tomatoes when it dawned on me to take the picture. Each hamper is 13 1/2" tall and tapers to 15" diameter at the top. It holds roughly one bushel of tomatoes. I can comfortably process one hamper per day although I have sometimes done two.

I go through a lot of green peppers, garlic and spanish onions during canning season. I've never really kept track of how many green peppers or garlic. The spanish onions come in a 10 lb sack. I'll use about five during the canning season.

Roasted Tomato Sauce

Roasted Tomato Sauce quickly became a family favourite. This is more of a method than recipe. It has just a hint of something that is hard to identify except I know the secret. It is a deep full bodied flavourful sauce sure to please. The sauce is roasted on the grill on low heat for a long period as in about six hours. To make the sauce I use Roma tomatoes, green peppers, spanish onions, garlic and fresh herbs. After roasting the sauce goes through a food mill then is returned to the grill for thickening. The sauce is then pressure canned. Honestly, this sauce is so good and gets such rave reviews my husband thinks I should market it. I can't make enough of it!
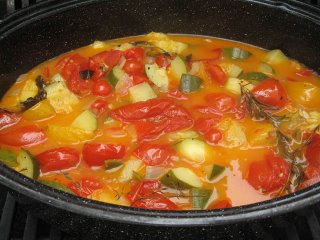
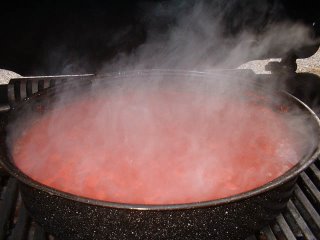
Tomato Zucchini Sauce on Grill

Following the success of my roasted tomato sauce I decided to experiment using zucchini. Since I have a lot of zucchini I thought this would be a good way to use some of it. I've done this sauce two ways now, the first being left as chunks and the second being modified slightly for canning. I think this is a fun sauce full of garden fresh flavour. There is a deep richness and heavenly aroma about it. My husband, the ever brave taste tester, gave it two thumbs up and I was lucky to get any into jars. I used Roma and Lemon Boy tomatoes along with garlic, spanish onion, zucchini and fresh herbs. The vegetables were roasted on the grill for about six hours then passed through the food mill and returned to the grill for thickening. The sauce was then pressure canned.

Food Mill

A food mill is essential for making smooth tomato sauces quickly. Now I find mine a bit of a pain to set up but that is because of the design of my kitchen and not the fault of the food mill. Sauce can be done one of two ways. Either cook first then pass through the food mill or pass through the food mill before cooking. There are reasons why the timing of passing through the food mill is important depending on the sauce you are making. Suffice to say passing this sauce through the food mill after roasting is the best way I've found to come up with the desired results.

A food mill is really a necessary piece of equipment when doing large volume canning. It will cut your processing time in half if not more. It removes the seeds and skins of the fruit or vegetable, giving you a nice smooth result. I love it for making applesauce. I simply quarter my apples, cook them then run through the food mill for instant applesauce. No muss, no fuss!


Roasted Tomato Zucchini Sauce in Jars

I love looking at the fruits of my labour especially canning. The jars always sparkle and there is a hidden temptation to open the jar and taste the goodies. I allow the jars to cool overnight then I label the contents on the lid with a sharpie. I don't like using labels on my jars for a couple of reasons. First they are hard to remove and at over four hundred jars they are costly. A sharpie works just fine.

Peppers


While the tomato sauce was roasting, I took advantage of the time to vacuum seal peppers and onions. Time is valuable in the kitchen right now so there is a lot of multi-tasking going on. I like to keep chopped green peppers on hand for the winter. Right now I can get them five for a dollar and because I buy a lot from this farmer he always throws in one or two extra. While I grow green peppers myself, mine have notoriously done poorly. I have one green pepper out there! My Hungarian Wax and Ancho peppers are doing better with Ancho producing nicely. I've yet to see a Habanero even though the plants look healthy. So I buy my green peppers and whatever I don't use in canning, I freeze up. I like to vacuum seal as that keeps the peppers longer. Peppers are an aromatic so do not need to be blanched before freezing.

Onions

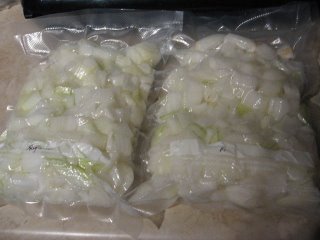
Another aromatic that doesn't need blanching is onions. Onions are another crop that just does not do well for me. I'm not sure if they don't like the raised beds or the soil but they just won't grow! I can buy a 10 lb sack of spanish onions from my farmer for $2. I use a lot of onions so like peppers, I freeze in vacuum packs usually in the quantity I will use for a small batch of chili.