Cook ingredients that you are used to cooking by other techniques, such as fish, chicken, or hamburgers. In other words be comfortable with the ingredients you are using.
--Bobby Flay
For Your Information
Please watch this area for important information like updates, food recalls, polls, contests, coupons, and freebies.- [March 19, 2020] - Effective Mar 17, this blog will no longer accept advertising. The reason is very simple. If I like a product, I will promote it without compensation. If I don't like a product, I will have no problem saying so.
- [March 17, 2020] - A return to blogging! Stay tuned for new tips, resources and all things food related.
- [February 1, 2016] - An interesting report on why you should always choose organic tea verses non-organic: Toxic Tea (pdf format)
- Sticky Post - Warning: 4ever Recap reusable canning lids. The reports are growing daily of these lids losing their seal during storage. Some have lost their entire season's worth of canning to these seal failures! [Update: 4ever Recap appears to be out of business.]
Popular Posts
-
Asparagus, Yellow Wax Beans, Kentucky Wonder Pole Beans, Herb Glazed Carrots, Corn Natalie made a comment on yesterday's entry reques...
-
As a result of milder fall temperatures the pepper plants were still producing nicely through the mid portion of last week. The plants were...
-
Peameal bacon is a cured pork loin that has not been smoked. It is not to be confused with bacon sold as "Canadian Bacon" which i...
Yesterday I canned a hamper of tomatoes in the form of tomato juice. The first question is always why until you taste it. Tomato juice is usually inexpensive here going for about 99 cents for a 48 ounce can (2 cents per ounce) of the store brand. I get my tomatoes free but if I had to buy at the going rate of $8 per hamper my juice works out to 2 cents per ounce figuring in the electricity, essentially the same. My actual cost for 448 ounces was 0.003 cents per ounce. This would be the similar cost for anyone who grows their own tomatoes without the cost to produce those tomatoes, something that should always be considered when growing a vegetable garden. The biggest consideration with home canned tomato juice is not the cost but the taste! It has a nice, clean, garden fresh tomato flavour with none of the tinny off flavour of commercially canned tomato juice.
 Food Mill
A food mill is essential for making smooth sauces and juices. I use a Kitchen Value (Home Hardware brand) manual food mill but will soon be switching to the equivalent Kitchen Aid attachment. A food mill removes the peels and seeds making quick work for juicing. The mill attaches to the countertop. Food is fed into the hopper (not shown) then a handle in turned so that the seeds and skins go out the waste shoot (behind) while the juice comes down another shoot into the collecting pan (front). A more detailed picture of the food mill can be found on a previous blog entry here.
Making tomato juice is easy but has a little twist. Tomatoes contain a high level of pectase that is activated when tomatoes are cut. This can lead to separation during storage. To reduce this the tomatoes have to be heated quickly on high heat to destroy the enzyme. When making tomato juice a layer of cut tomatoes is brought to a boil then additional tomatoes are added, crushing them into the mixture until all the tomatoes are heated. The mixture is then brought to a boil, removed from the heat and put through a food mill.
 Tomato Juice
An average of 3 lbs of tomatoes is needed to make 1 L (about 1 quart) of juice. Choose a juicing tomato if possible. Other varieties will work but you will get far less juice out of a paste tomato. If you grow your own consider making juice from yellow tomatoes as well.
I made 14 lovely jars (L & quarts) of tomato juice yesterday. The work was easy enough but a bit drawn out but some of that was due to getting used to the new kitchen. Despite my plans, I didn't start the actual canning process until early evening then had to run the canner twice for processing as it only holds 7 L jars when used as a boiling water bath. So that meant I didn't get my mushroom soup canned but that will likely be today's project along with canning carmelized onions so watch for both of those coming soon.
Home Canned Tomato Juice
recipe for 1 L (quart) jars
3 lb tomatoes per L (quart) jar
2 tbsp lemon juice per jar or 1/2 tsp citric acid
1 tsp sea salt (optional)
Determine how many jars you want to process. My canner holds 7 L or quarts when used for boiling water bath canning. Weight out your tomatoes then wash. Cut into halves or quarters. Start with a layer of tomatoes in a large stainless steel stock pot. Bring to a boil on high heat then add more tomatoes (lg bowl full) at a time to mix in. Continue doing this until all the tomatoes have been added. Bring to a boil. Remove from heat. Run the mixture through a food mill. Return the juice to a large stock pot and bring to a boil. Pour into hot, sterilized litre or quart jars leaving 1/2 inch headspace. Add 12 tbsp lemon juice or 1/2 tsp citric acid per jar. Add salt if desired. Wipe the rim and cap. Process 40 minutes in a boiling water bath canner.

Quite often I will make simpler meals during the heavier canning season. The reasons for this is I've already been on my feet for much of the day doing prep work and know I will be canning more after dinner along with the kitchen being cluttered with large canning pots. Yesterday my husband brought home two hampers of tomatoes signalling the start of the tomato canning season so I decided peameal bacon on a bun would make a quick, easy yet satisfying meal.
 Peameal Bacon on a Bun
Peameal bacon is a Canadian delicacy so I decided to learn to cure my own peameal bacon. Curing meat is not difficult and homemade is generally less expensive. One question that always arises is how to serve peameal bacon. The most popular way is to serve as a bacon for breakfast, simply pan fried until the edges are golden. However, peameal is a quick cooking meat making it ideal for fast meals so we also use it as a dinner meat. Last night instead of serving with vegetable sides, I decided to make peameal bacon on a bun. The peameal bacon was pan fried then loaded onto a bed of lettuce, topped with sharp cheddar cheese and sandwiched between toasted sesame seed buns. It was a simple, easy and frugal meal that allowed me to get back to processing tomatoes.
 Processing Tomatoes
Processing tomatoes is a big production here. I'm very fortunate that a relative grows them so I have a free source. This is very much appreciated this year since I didn't grow any this year with the move. My husband picks up hampers of tomatoes (1) very early in the morning. My goal is to process a hamper a day into various tomato products. In the next couple of weeks I will process at least 10 of these hampers. Yesterday he picked up two for starters but 3/4 of one went to one of the kids so I had 1 1/4 hampers to process. Mind you, I know processing will be a bit slower as I get accustomed to working in my new kitchen that (rolling eyes) still is awaiting countertops and a built-in.
The tomatoes are freshly picked from the field so need to be washed. I rinse them well then cover with soapy water (2) to wash. Once the tomatoes are rinsed twice after their wash they will either be blanched and peeled (3) depending on what I'm making. To slip the skins, I blanch the tomatoes for 2 minutes the transfer the tomatoes to ice water. The skins split and can easily be pulled off. Of course slipping the skins increase the prep time so most home preservers omit that step if possible. I decided to start with canning whole tomatoes so slipping the skins was a must.
 Canned Whole Tomatoes
Last year I didn't process any whole tomatoes with the idea that if I canned sauces only it would be more convenient. It was the first and only year I didn't can whole tomatoes. It was a mistake not to do so as whole tomatoes are often needed in recipes and I ran out of frozen whole tomatoes half way through the winter. With freezer space being at a premium this year I will be canning more whole tomatoes than freezing.
About 1/2 of a hamper was washed, peeled then canned into whole tomatoes resulting in 7 quarts of lovely whole tomatoes. Whole tomatoes can be canned using a boiling water bath (BWB) or pressure canned with water or tomato juice, raw or hot packed so it can get complicated. BWB has a processing time for raw packed of 85 minutes for 1 L (quart) or 10 minutes pressure canned. Pressure canning increases the antioxidant properties of lycopene. When you do as much canning as I do saving 75 minutes processing time is critical so I decided to pressure can. The instructions are for tomatoes in water, raw packed then pressure canned.
Canning Whole Tomatoes
whole tomatoes, 3 lb per 1 L jar
2 tbsp lemon juice per 1 L jar (or 1/2 tsp citric acid)
1 tsp sea salt (optional)
Pack the tomatoes into a hot jar leaving 1 1/4 inch headspace. Add lemon juice, salt and boiling water leaving 1 inch headspace. Remove air bubbles and add more boiling water to bring the level to 1 inch head space. Wipe the rims. Adjust two piece lids. Place in canner. When canner is full, lid then vent for 10 minutes. Place regulator on the canner, bring to pressure and pressure can 10 minutes at 10 lb pressure. Allow the canner to depressurize. Remove the jars and allow to cool 24 hours. Check for seal. Label then store.
The temperatures soared and humidity levels climbed here yesterday. I had planned on grilling venison burgers for dinner. My husband suggested we make venison loaf instead of burgers deeming it too hot to grill but not to hot to take in a short boat ride. Thunderclouds were in the horizon as we headed back from the marina to enjoy a nice meal. Our new kitchen is on the lower level of an earth bermed house so using the oven doesn't heat the house as it would in other layouts.
 Venison Loaf
I've made a few entries on cooking venison. Venison is a rich, very low fat meat with an unappealing mouth fat feel if it isn't served hot. For that reason two things are critical when preparing venison. First you must add a fat with the most common being pork in the form of bacon or ground pork depending on the dish. Second, venison dishes must be served hot! This may take a bit more planning to have everything ready at the same time but trust me it is worth it. I served the venison loaf with oven baked potatoes and steamed broccoli.
Venison Loaf*
2 lb ground venison
2 eggs, slightly beaten
1 c dry bread crumbs
250 g (1/2 lb) bacon, cut across the slices to form small pieces
1/2 large spanish onion, chopped
1/2 tsp dijon mustard
1 tsp Worchestershire sauce
1/2 c Heinz 57 sauce
Prepare onion and bacon. Place all ingredients into a mixing bowl. Mix well by hand. Turn the mixture into a silicone loaf pan or well greased loaf pan and pat down. Bake at 250ºF for 40 minutes. Increase the heat to 350ºF for 10 minutes. Serve hot.
Servings - 6
*form into patties for grilling
The weather was lovely last night so I decided to try my hand at grilling ribs. Despite me having a fair amount of experience grilling various meats, my husband generally grills the ribs. I decided to try my hand at grilling ribs so here is what I came up with.
 On the Grill
I used a large slab of pork ribs then added a bit of my cooking expertise to come up with this meal. Accompaniments included grilled potatoes topped with sour cream and steam broccoli. What I was aiming for was a very tender, melt-in-your-mouth rib that was tasty. So I brought in one of my tricks from grilling chicken. There are very few times I don't grill chicken using beer to control the flames. To my way of thinking this method should work with ribs. From the comments, I was not far off the mark!
Ingredients:
1 large slab pork ribs
2 cans light, preservative free beer
1/2 bottle barbeque sauce of your choice
Method:
For tasty ribs you want long and slow. Heat the grill to medium low then place the ribs on the grill. Let the ribs grill slowly while extinguishing any flare-ups with a spritz of beer. Once the ribs can be lifted from the grate, turn and generously brush on the barbeque sauce using a silicone brush. Leave the ribs to cook on the other side while the top side carmelizes. Continue spritzing with beer as needed to control flare-ups. When the bottom side is well marked, turn and brush with barbeque sauce then allow to carmelize. Remove from the grill and serve.
 Plated
This really is not the best picture so I do apologize for that. The ribs came out melt in your mouth. I served the ribs with steamed broccoli and grilled potatoes. To grill potatoes put them onto indirect heat about 10 minutes before the meat goes onto the grill. Steamed broccoli keeps its nice bright green colour and tastes wonderful with just a pinch of sea salt and butter. Here's how I make steamed broccoli.
Steamed Broccoli
1 head fresh broccoli
water
sea salt to taste (optional)
butter to taste (optional)
Place about 2 inches of water into a steamer pot or pot with a colander and tight fitting lid. Wash the broccoli then cut into flowerettes reserving the stems (for broccoli soup later). Bring the water to a boil. Place the broccoli into the steamer basket and cover. Cook 3 minutes. Uncover, season and serve.
This is the time of year I go through the pantry to use up any left-over jars of tomato products from last year's harvest. The tomato harvest is beginning here but the weather has turned cool and blissfully rainy so an improtu casserole embarrassing fresh garden goodies will be wonderful tonight!

I am going to be needing the help of the gnomes and other magical beings to be able to things going for the tomato season. I haven't quite got the flow of the new kitchen and if you recall it is still undergoing renovations. I have a hand cranked food mill but this year I will be using KitchenAid attachments to speed up the sauce making. Still any help from gnomes and other magical beings will be greatly appreciated.
I'm working on my last few jars of roasted tomato sauce products and have been out of whole tomatoes for a month or so
 Husked Corn
I did as my mom used to say "make hay while the sun shines" yesterday and froze up three dozen ears of yellow corn. The farmer gave us extra so it was a few more ears than that which is always a welcomed bonus! For those following our new kitchen remodel, no the installers have not arrived for the new coutertop despite several promises. We are toying with going right to ceramic tile as it appears it will be at least another two weeks before they can get out and yes I am rolling my eyes big time! So we might actually end up doing a DIY project instead. We know how to tile so the project itself is not daunting and had we known the installers were going to be this way we could have had the tile installed in time for our party the first week of August. At any rate we have to work with what we have for the moment and harvest season is not going to wait for a more convenient time.
I've made a few entries about freezing corn and my preferred method so search for vegetables or FoodSaver in the archives. I've been adding labels to earlier entries to make searching a bit easier for those interested. I've also been mirroring this blog given the latest nonsense from blogger regarding another one of my blogs. So watch for more information on that shortly.
 Zucchini & Cabbage Casserole
I don't have a lot of home canned tomato sauces left to use up before the new season starts. With the weather turning cooler and rainy, tonight was a great opportunity to experiment. I took the flavour for this casserole from a family favourite, cabbage rolls then expanded on it to use up a few more bounties from the garden as well as using last year's preserves. This casserole would freeze well.
Zucchini & Cabbage Casserole
1 1/2 c cooked long grain rice
3 c lean ground beef, browned and drained
1 c blanched corn niblets
1 1/2 c shredded zucchini
1 1/2 c shredded cabbage
1/2 lg Spanish onion, chopped
2 pints home canned roasted tomato/zucchini sauce*
1 c extra sharp cheddar cheese, shredded
1 c medium cheddar cheese, shredded
Prepare rice, ground beef and vegetables. Cut the kernels off of two cobs of corn and blanch for 3 minutes. Drain. Layer the casserole: beef, rice, vegetables. Pour the sauce over top of the casserole with just enough water to clean out the jars. Top with cheeses. Bake at 250ºF for 30 minutes or until warmed through. Increase heat to 350ºF until cheeses bubble. Remove from oven. Cut into squares for serving.
*substitute tomato sauce of your choice but it will change the flavour
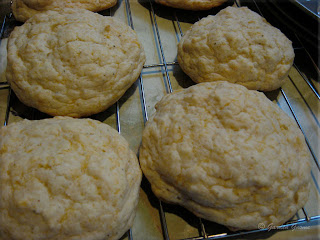 Quick Cheese Buns
Quick breads and buns are a nice companion to casseroles. Bisquick or a homemade baking mix should be considered a pantry staple. Adding a few simple ingredients like cheese and seasoning turns plain buns into something special. The only limitation when adding extras to the mix is your imagination. These buns are so quick and easy to make so you will be tempted to make fresh buns often.
Quick Cheese Buns
2 c Bisquick or homemade baking mix
3/4 c sharp cheddar cheese
1 tsp Old Bay seasoning
1 - 1 1/2 c milk
Mix ingredients together adding just enough milk to make a lumpy batter. Spoon onto lightly greased baking sheet. Bake at 350ºF for 10 minutes or until golden brown.
Corn is in season here and while it is very doubtful we will ever see the lower prices of yesteryear it is still economical to preserve it. As with most foods I preserve, I always figure out my overall costs including electricity. This is the first year I've been able to get old-fashioned yellow corn. For the past five or six years the only corn available has been the peaches & cream variety which freezes and cans reasonably well but yellow corn gives better results for both.
 Corn Relish
Corn relish is a tasty way to preserve corn. It is nice condiment for cook-outs and grilled meat, especially good on hot dogs or hamburgers. Corn relish is bright and cheery in the jars, sure to entice the taste buds. It is perfect for gift giving so be sure to make extra. I like using half pint mason jars.
Corn Relish
modified* from: Jean Paré, Company's Coming, Preserves, Corn Relish Pp. 121.
10 cobs yellow corn
1 green pepper, seeded and finely chopped
1 red pepper, seeded and finely chopped
1/2 large Spanish onion, chopped fine
1/2 tsp sea salt
2 1/4 c organic granulated sugar
2 1/4 c white vinegar
1/2 tsp celery seed
1 tsp dry mustard powder
1 tbsp Clear Gel**
1/2 tsp turmeric
2 tbsp water
Prepare vegetables. Cut the corn from the cobs without scrapping the cobs. Measure out 4 1/2 c of corn. Place all the ingredients except the last four into a stock pot. Stir then bring to a boil over medium-high heat. Reduce heat to a simmer. Simmer uncovered for 30 minutes, stirring occasionally. Mix the last four ingredients in a small dish then stir into the vegetables. Return to a low boil while stirring. [The mixture will not thicken but over the next two weeks after processing it will thicken to a relish consistency.] Pour into hot sterilized jars leaving 1/4 inch headspace. Remove any air bubbles. Wipe the rims. Adjust two piece lids. Process in boiling water bath canner for 15 minutes. Remove from canner. Allow to cool. Test for seal then store.
Yield: 6 half pints
My Notes:
*Jean's recipe calls for 9 cobs of corn and 1/2 cup of celery. I add extra corn and omit the celery. Her recipe uses cornstarch which is no longer recommended for canning. I substitute Clear Gel (not the instant). I've also modified the kind of onions, sugar and salt but not the amount. No processing time is indicated in the original recipe so I process 15 minutes in a boiling water bath canner.
**Do not use instant Clear Gel.
What do you do when you have an abundance of eggs? When properly refrigerated at 41ºF eggs will last 4 to 5 weeks. Eggs are one of those foods that do not preserve well by the common methods of canning, drying, or freezing. I have heard that you can scramble eggs then freeze and since commercially available meals exist this is likely true however I have not tried it myself. My experience with re-heated scrambled eggs is that they are rubbery in texture and the flavour is lacking. However eggs in dishes such as quiche freeze nicely so that is one way to use up extra eggs while making a few meals for the freezer.
 Pickled Eggs
Pickled eggs are a common snack sold in taverns and some variety stores in our area. They are very easy to make. I will stress homemade pickled eggs are not shelf stable. They must be refrigerated! They will keep in the refrigerator for about 6 months. I generally make a dozen pickled eggs at a time simply because refrigerator space can be at a premium many times. Twelve large eggs will fit nicely into a one L (quart) canning jar.
Pickled Eggs
source: Garden Gnome
1 dozen eggs
1 large onion
1 c white vinegar
1 c water
1/4 c granulated sugar
1/2 tsp sea salt
1/2 tbsp mixed pickling spices
Place the eggs in a saucepan and cover with water. Bring to a boil over medium-high heat. Boil gently for 10 minutes. Drain. Run cold water over the eggs to cool then shell. Cut onion into slices then in half. Place the pickling spices into a tea ball (my method) or form into a spice bag using cheese cloth. Combine vinegar, sugar and water in another saucepan. Bring to a boil. Swish the spices for about 40 seconds in the vinegar brine. Layer the eggs and onions into a one litre mason jar. Pour the brine over the eggs leaving 1/4-inch headspace. Cap. Refrigerate one to two weeks before serving.
The nice thing about grilling is there is very little clean-up. Utilizing the grill to prepare an entire meal just makes good sense especially during the hot season when heating the kitchen is a concern. Grilled chicken with Herbs de Provence has become this summer's favourite so I decided to grill vegetables using a touch of this wonderful herb blend. Dinner was to serve three so I planned accordingly to have enough yet not have a lot of left-overs.
 On the Grill
Timing is everything when cooking a complete meal on the grill. It takes a little more attention to using direct and indirect heat. We have a Fiesta Maximus 400 natural gas grill with four burners (rotisserie, left, right, side). I used the left and right burners for this meal adjusting the levels as needed and using positioning for heat control. The most important factor was the timing as when each item went onto the grill so everything would be cooked at the same time.
The potatoes went on the grill first on indirect heat on upper grate. These were simply roasted without seasoning but rather soaking up the flavours in the smoke from the other food cooking. About ten minutes later I put the marinated chicken legs with backs attached onto direct heat. Flare-ups were inevitable because of the natural fat in the chicken and additional olive oil in the marinade. These were controlled by spritzing with beer (never use water if you can use a liquid that will add flavour; this applies to all cooking), leaving the lid open and moving the chicken frequently. While the chicken and potatoes were cooking I prepared the vegetables (recipes follow). The zucchini went on the grill after the chicken had been grilling for about 35 minutes, followed about 5 minutes later for the onions and finally the tomatoes on indirect heat with the lid closed to melt the cheese. I decided to present this meal on a platter as explained below.
Grilled Zucchini with Herbs de Provence
1 medium sized zucchini
1 tbsp Herbs de Provence
1/2 c extra light olive oil
Wash and dry the zucchini. Slice on a diagonal in 3/4-inch slices. Place the zucchini, herbs and olive oil into a sealable container. Invert several times to mix then place in refrigerator until ready to grill. Grill on direct heat turning only when the first side is nicely grilled. Remove from grill and serve.
Grilled Tomatoes with Fontina Cheese
1 large organic heirloom tomato
1 tsp Herbs de Provence
1/4 tsp sea salt
1/4 tsp fresh ground pepper
1 quarter inch thick slice Swedish Fontina cheese, enough to cover each tomato slice
drizzle of olive oil
tin foil formed into shallow box
To form tin foil box: Fold one end of the tin foil over about 1/2 inch and repeat. Do the same thing with the opposite end then repeat with the remaining two ends. Gently lift up the corners forming a shallow box.
Method: Place the box onto a sturdy cooling rack. Drizzle a little olive oil onto the tin foil box. Place the sliced tomatoes onto the oil then turn. Lightly sprinkle each slice with the herbs, salt and pepper. Top each tomato slice with a piece of cheese. Carefully slide the box from the rack onto the upper grate of the grill. Cook on indirect heat with the lid down until cheese is melted.
Grilled Onions
1 large vidalia onion (or spanish)
olive oil
Cut the onion into 1/4-inch slices. Do not separate the rings. Lightly brush one side with olive oil. Place onto direct heat using a heat resistant flipper. Turn when the bottom side is nicely grilled with signs of carmelization by carefully slipping the flipper under and holding the slice steady with your other hand. Carefully move the slices to indirect heat when grilled until ready to serve.
 Presentation
After taking a fair amount of effort to ensure all the meal components were ready at the same time, I decided to use a platter presentation. I would have liked fresh basil to use as a garnish but overall my husband and son were quite impressed. The meal got rave reviews from some of my most vocal critics! My husband even ate a tomato slice which is quite surprising as he only likes warm tomatoes in sauces. All in all I was quite pleased with the results. I will be doing a bit of tweaking but this meal will be a keeper.
I canned pickled beets yesterday and since I am still getting used to the working dynamics of our new kitchen still under renovation, the process was a little slower. It was slower type of day as well so we had a simple dinner of BLTs made with garden fresh heirloom tomatoes. Unfortunately they were not from my garden but rather from a friend who also gardens organically. She also gifted us with three lovely sized zucchini so I will be doing something with those today. BLTs are a lovely way to use up the garden's bounty. I'm looking forward to harvesting some fresh produce from my winter garden.
 Pickled Beets
I like canning pickled beets in 250 ml (1/2 pint) jars. Their deep ruby red sparkle in the jar tempting the taste buds. Half-pints are the perfect size for gift giving so be sure to make a few extra jars! Seven lovely jars of pickled beets are now ready for the pantry shelves.
In a previous blog entry on Pickled Beets I shared the recipe from Jean Paré's Company's Coming Preserves that I use most often. This year the beets are plentiful despite the abnormally dry growing season so I'm canning Lemon Beet Pickles (recipe below) and a batch of the pickled beets my mother-in-law used to make.
Lemon Beet Pickles*
source: Jean Paré's Company's Coming Preserves, 1994. Pp. 91
Please read my notes at the end of the recipe.
2 lbs beets with 1-inch tops intact
water to cover
3 c granulated sugar**
1 c slivered almonds
1 tbsp ground ginger
2 medium lemons with peel, quartered and thinly sliced
Cook beets in water until tender and cool in cold water until they can be handled. Peel. Dice finely into a large saucepan. There should be 4 cups of diced beets. Add the sugar, almonds and ginger. Bring to a boil over medium heat, stirring frequently. Reduce heat and simmer uncovered for 30 minutes. Add the lemon and simmer 30 minutes, stirring frequently. Pour into hot sterilized jars leaving 1/4-inch headspace. Seal***
Yield: 3 pints (about 7 half- pints)
My Notes:
*This recipe is more like a relish in texture.
**I use organic sugar but regular sugar will work. I have not tested usind Splenda but it should work.
***No processing instructions were given. Pints should be processed using a boiling water bath for 20 minutes for either pints or half-pints.
Spiced Pickled Beets
source: my mother-in-law
note: instructions are for half-pint jars
3 lb beets
water to cover
1/4 tsp salt per half-pint
2 c white vinegar
2 c granulated sugar
1 tbsp mixed pickling spice, tied in double layer of cheesecloth
Wash, peel and slice the beets. Cook beets for 3 minutes. Pack hot beets into hot jars leaving 1/2 inch headspace. Add 1/4 tsp salt per pint. Mix the sugar and vinegar to boiling. Swish the spice bag in the syrup for 30 seconds. Remove the bag. Pour boiling syrup over the beets leaving 1/2 inch headspace. Remove air bubbles and wipe rim. Adjust two piece lids. Process in boiling water bath for 30 minutes. Remove jars and allow to cool. Test for seal then label and store.
Yield: 7 half-pints
My Notes: This is a very nice pickled beet, sure to please. The spices kick it up a notch to borrow Emeril's favourite phrase! The longer processing time is required because unlike some pickled beet recipes the beets have a shorter initial cooking time.
We bought ten dozen ears of corn for the pig roast. About four dozen were left over so I decided to preserve most of it. I prefer to freeze corn because of the taste but decided to can the corn instead to save on freezer space. Instructions for freezing corn can be found on an earlier blog (here).
 Home Canned Corn
Corn is one of the easier vegetables to can but as with other vegetables it is low acid (pH higher than 4.6) so must be processed in a steam-pressure canner. One of the most common questions asked in preserving forums is "Can a pressure cooker be used for canning?" The answer is no. A pressure canner larger and heavier than a pressure cooker designed to maintain the proper pressure to raise the internal temperature of the food being processed to 240ºF at or below 1,000 feet above sea level. The regulator on pressure canner can be adjusted to compensate for higher altitudes or lower PSI for some fruits whereas most pressure cookers have only one pressure setting of 15 PSI. The higher setting would overprocess most foods at or below 1,000 feet above sea level and would underprocess foods being processed at higher altitudes.
I like to process most foods in 500 ml (pint) mason jars. I also prefer to run the canner full (20 pint jars) whenever possible as processing but that is not always possible. The amount of corn needed will depend on the size of the kernels. Yellow corn gives better results than the peaches & cream variety for both canning and freezing but is not always available in all areas. I had a combination of both varieties. Corn can be either raw or hot packed but the processing times are the same. I used the raw pack method as I think that gives a nicer texture. The total yield was 8 - 500 ml jars (canned) and six 1 - guart vacuum bags (frozen).
Home Canned Corn
Husk the corn and remove the silk. Cut the corn from the cob without scraping. Pack the corn loosely into hot jars leaving 1 - inch headspace. Add 1/2 tsp salt* to each pint or 1 tsp per quart if desired. Ladle boiling water over the corn leaving 1 - inch headspace. Remove any air bubbles. Wipe the rim and adjust two-piece caps. Process 55 minutes for pints or 85 minutes for quarts at 10 pounds pressure in a steam-pressure canner.
*salt - is always optional when canning most vegetables and tomato products so feel free to omit or reduce if desired
On Monday we celebrated our 30th Anniversary by hosting a pig roast at our new house for our family and friends. A head count before dinner was 46 but people straggled in after that so the number served was likely closer to 55 with it growing to about 70 before the end of the evening. On the menu: roasted pig, roast beef, gravy, potato salad, pork & beans, roasted corn on the cob, coleslaw and macaroni salad. Snacks included: vegetable tray, fruit tray, potato chips and popsicles for the kids. Several people brought deserts and other snacks even though we had indicated not to so there was an abundance of food. Our daughter and daughter-in-law insisted that everyone took a care pack with them when they left and still there was a lot left over!
 Marinating
The pig was 117 lbs and since we had to pick him up Saturday he spent most of Sunday in the commercial refrigerator of the restaurant of one of our friends. Sunday night the guys picked him up for marinating. The marinade was a mixture of orange juice, oranges, pineapple, lemons, garlic and spices. He slept in our lovely green tub (soon to be remodeled bathroom) while we prepared the yards and house for the party.
There was a lot of prep work to do setting up tables and getting the yards ready. Additional lighting had to be set up along with music. Outdoor speakers were installed the day before so we could hook up the iPod for continuous music. Tekki torches were added to the perimeter lighting to ward of bugs while giving a nice glow and complimenting the solar lighting. Three eight foot tables formed an L near the water and two eight foot tables were used as the food area in the patio.
 Pork Roaster
The guys picked up the pork roaster on Saturday when they picked up the pig. They set it up in the yard between the house and garage out of the main party area. This was a practical location given that we would have little ones running around.
The roaster is quite large and is on a hitch to attach to a trailer hitch for moving. A huge crank on the right side (not pictured) can be used to hold the lid open if needed. The fuel was propane but it only took a 25 lb tank to cook the pig so that wasn't too bad. We were concerned we might run out of fuel so had a spare filled tank on hand just in case.
 On The Roaster
Surprisingly a marinated pig weighs enough so it took three of the guys to get the pig onto the roaster. From there the humour emerged! We took a lot of pictures as jokes were told and antics unfolded. Well, let me tell you we have some great scrapbook photos!
Once the pig was settled onto the barbeque it was time for action. I was concerned that other pig roasts we had been to had the pig on a spit and we didn't have a spit. However, the guys thought it would roast just fine without a spit. The temperature was set to 150ºF for a slower roasting then increased to 350ºF about an hour before serving. The pig went on the roaster just before 9 am with dinner being served just after 6 pm.
 Roasted!
The roasted pig was done to perfection thanks to the help of our son! His contribution to the party was cooking the meat and he did an excellent job. Not only did he roast the pig, he also cut it up for serving.
Roasted pork can have a tenancy to be dry which is why it needs to be marinated. This pork was tender and juicy. The skin normally kept for craklin's was a nice golden brown. Due to the size of the party and refrigerator limitations most of the skin and carcass was not kept. The next time we do a pig this way I will definitely make arrangements for both the skin and carcass.
If you are planning a large party and want an idea of how much this cost us, the pig was $100. We payed $80 for the roaster and fuel. I would estimate about $150 in additional food for a total of $330 or to our estimation about $6 per plate. We over bought on buns, corn on the cob, vegetables and fruits. Given the amount of left-overs the price per plate was more like$3 maybe even less making a pig roast a very frugal way to do larger parties like family reunions.


 Food Mill
 Tomato Juice
 Peameal Bacon on a Bun
 Processing Tomatoes
 Canned Whole Tomatoes
 Venison Loaf
 On the Grill
 Plated
 Husked Corn
 Zucchini & Cabbage Casserole
 Quick Cheese Buns
 Corn Relish
 Pickled Eggs
 On the Grill
 Presentation
 Pickled Beets
 Home Canned Corn
 Marinating
 Pork Roaster
 On The Roaster
 Roasted!
 Simple Beer Battered Pickerel
 Draining
 Pan Fried